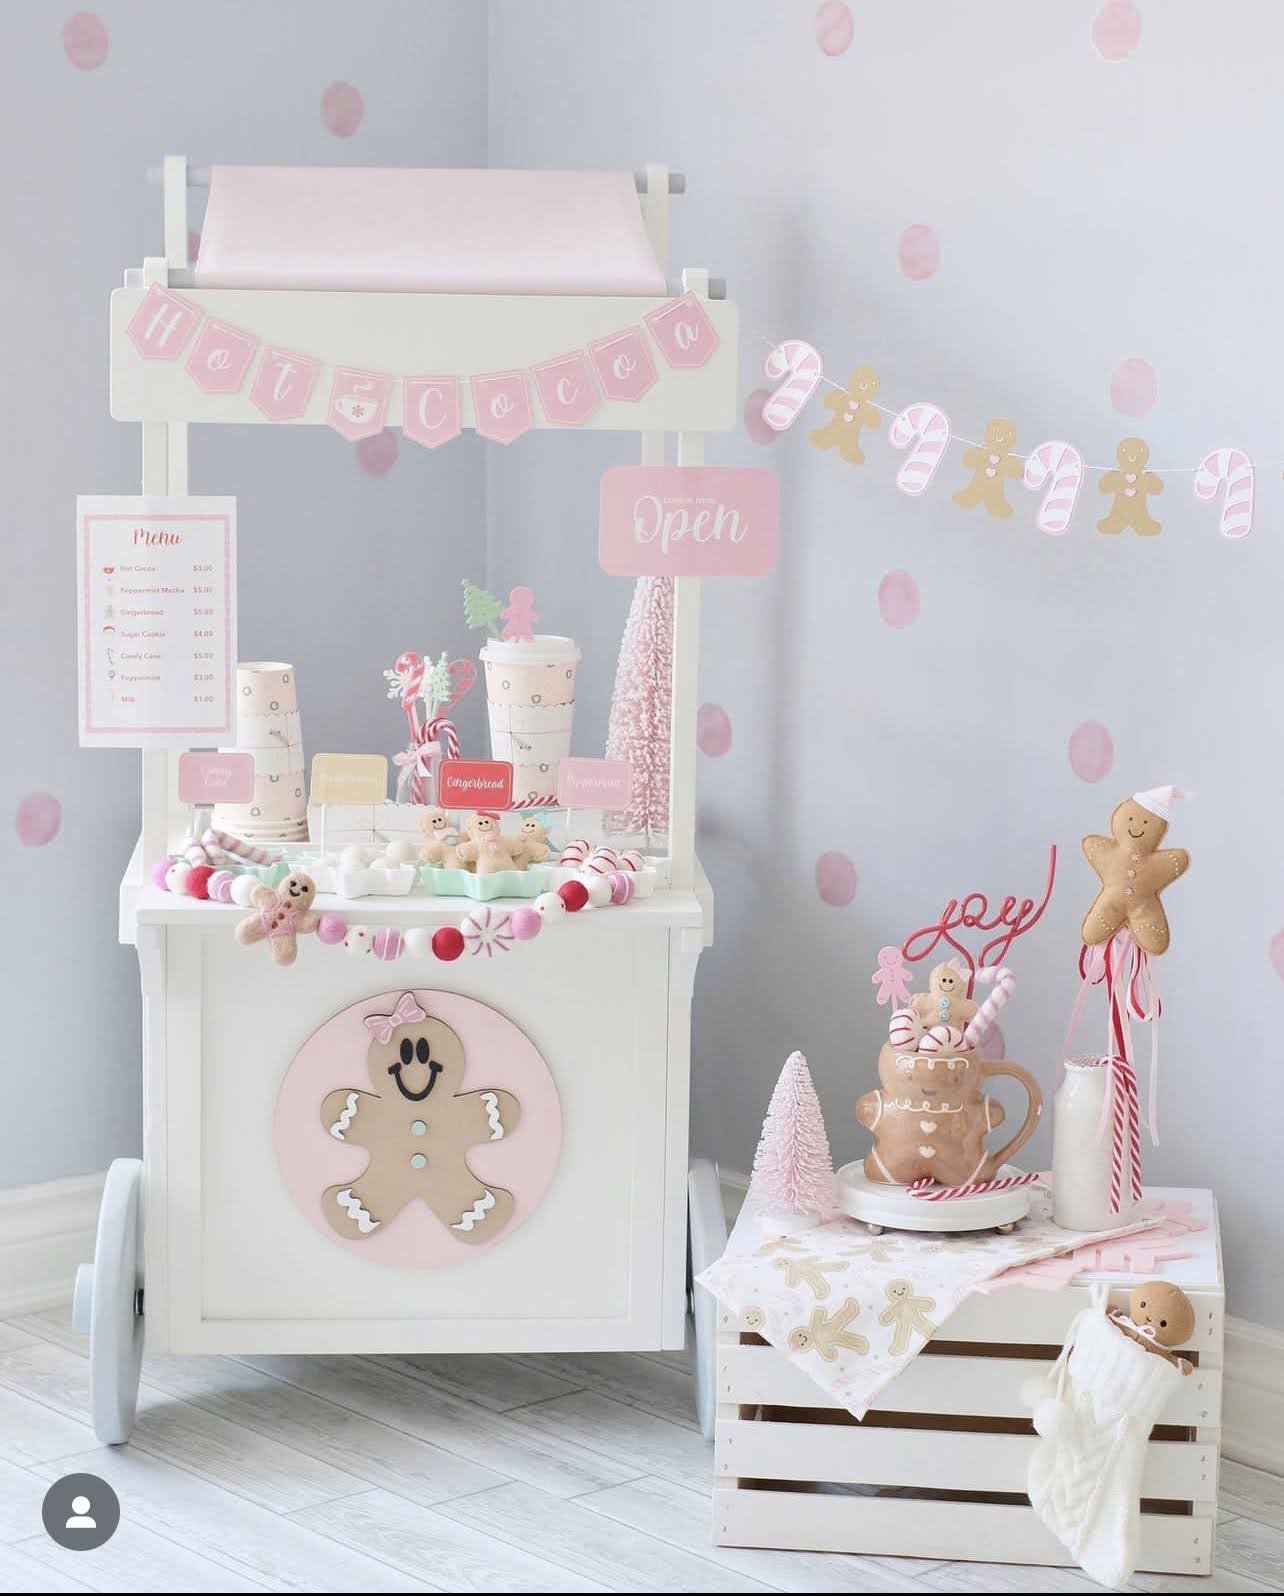
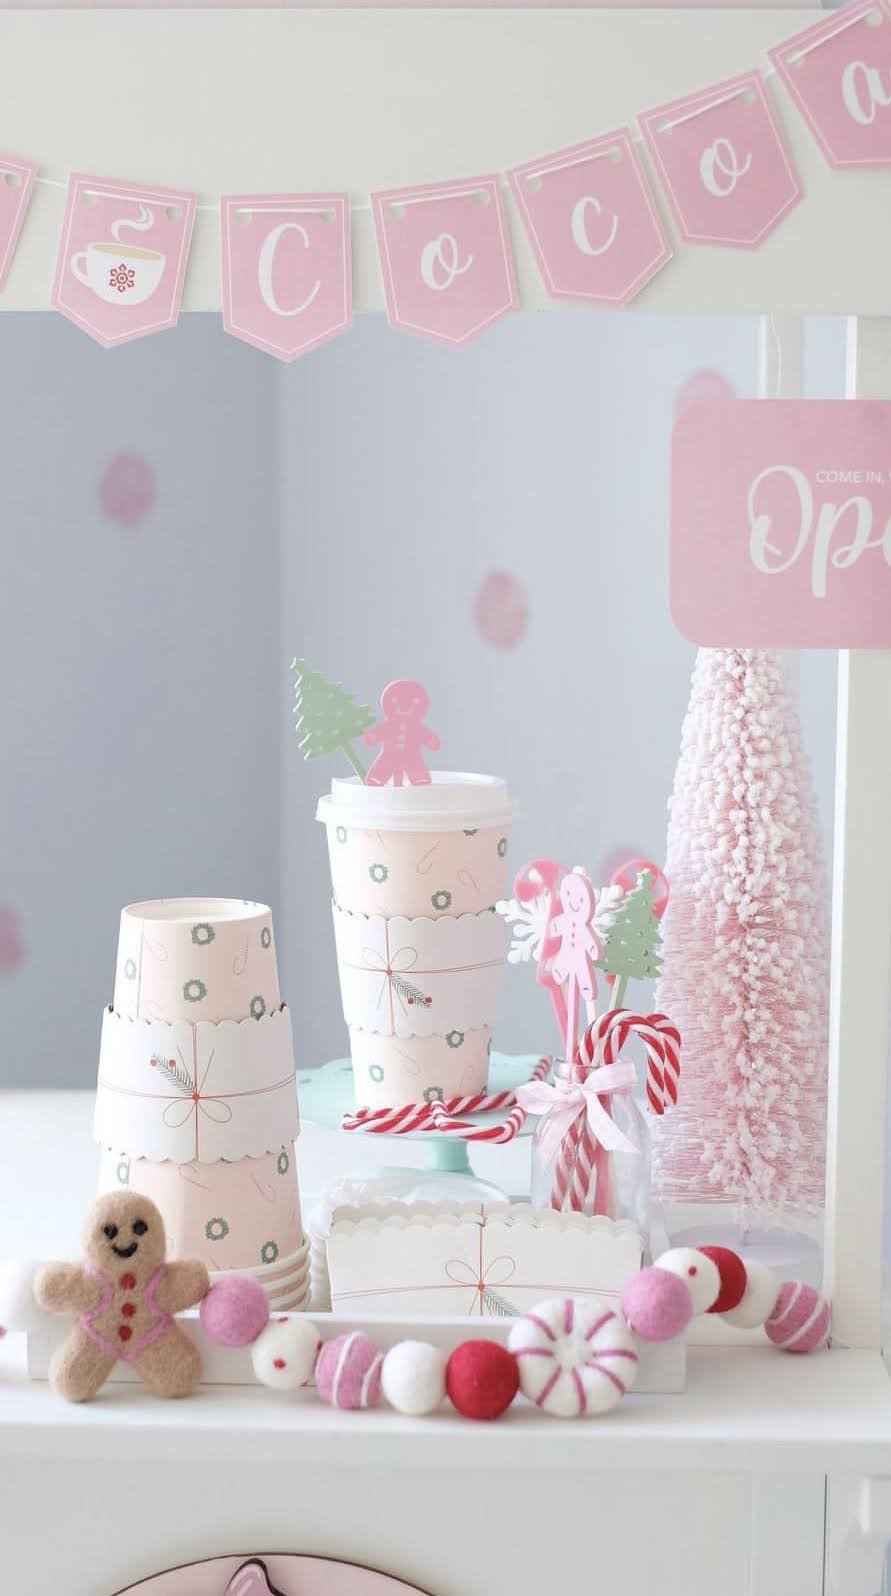
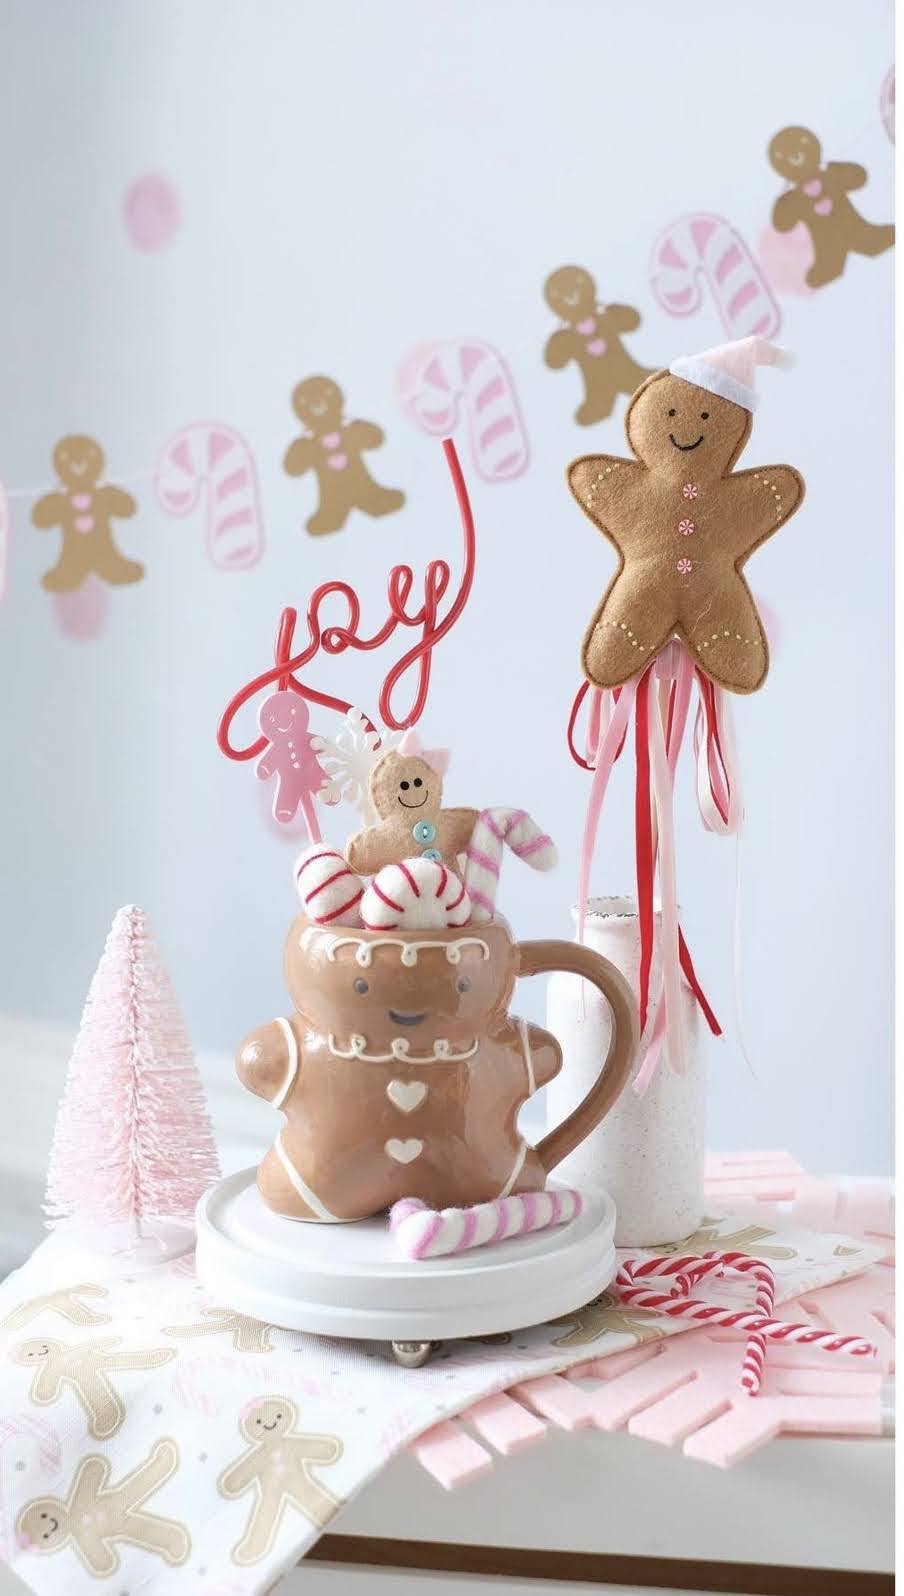
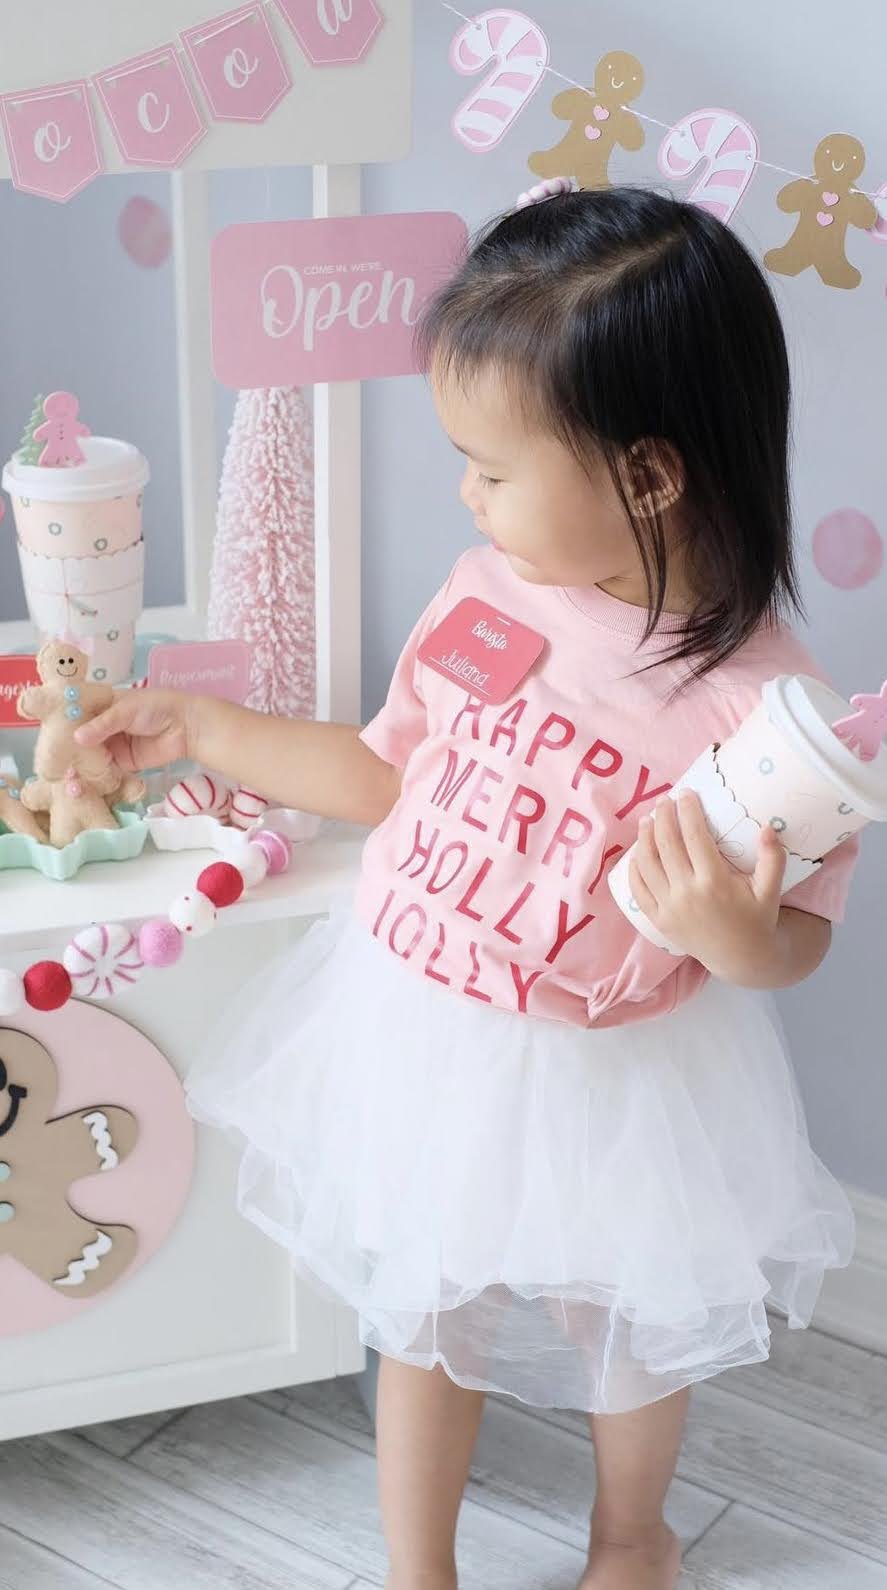
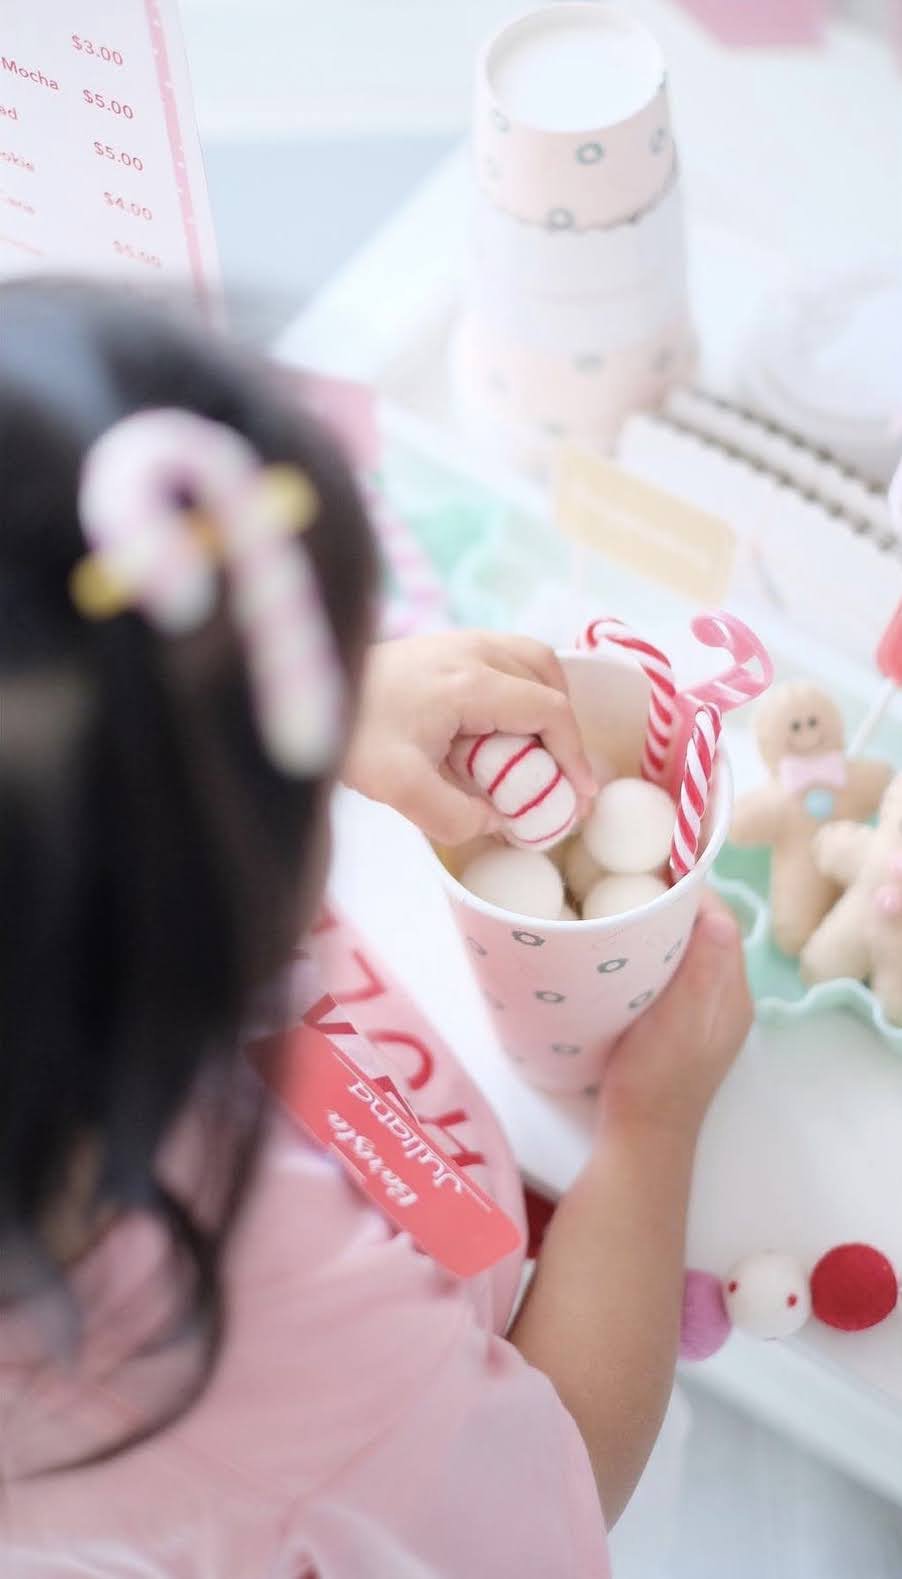
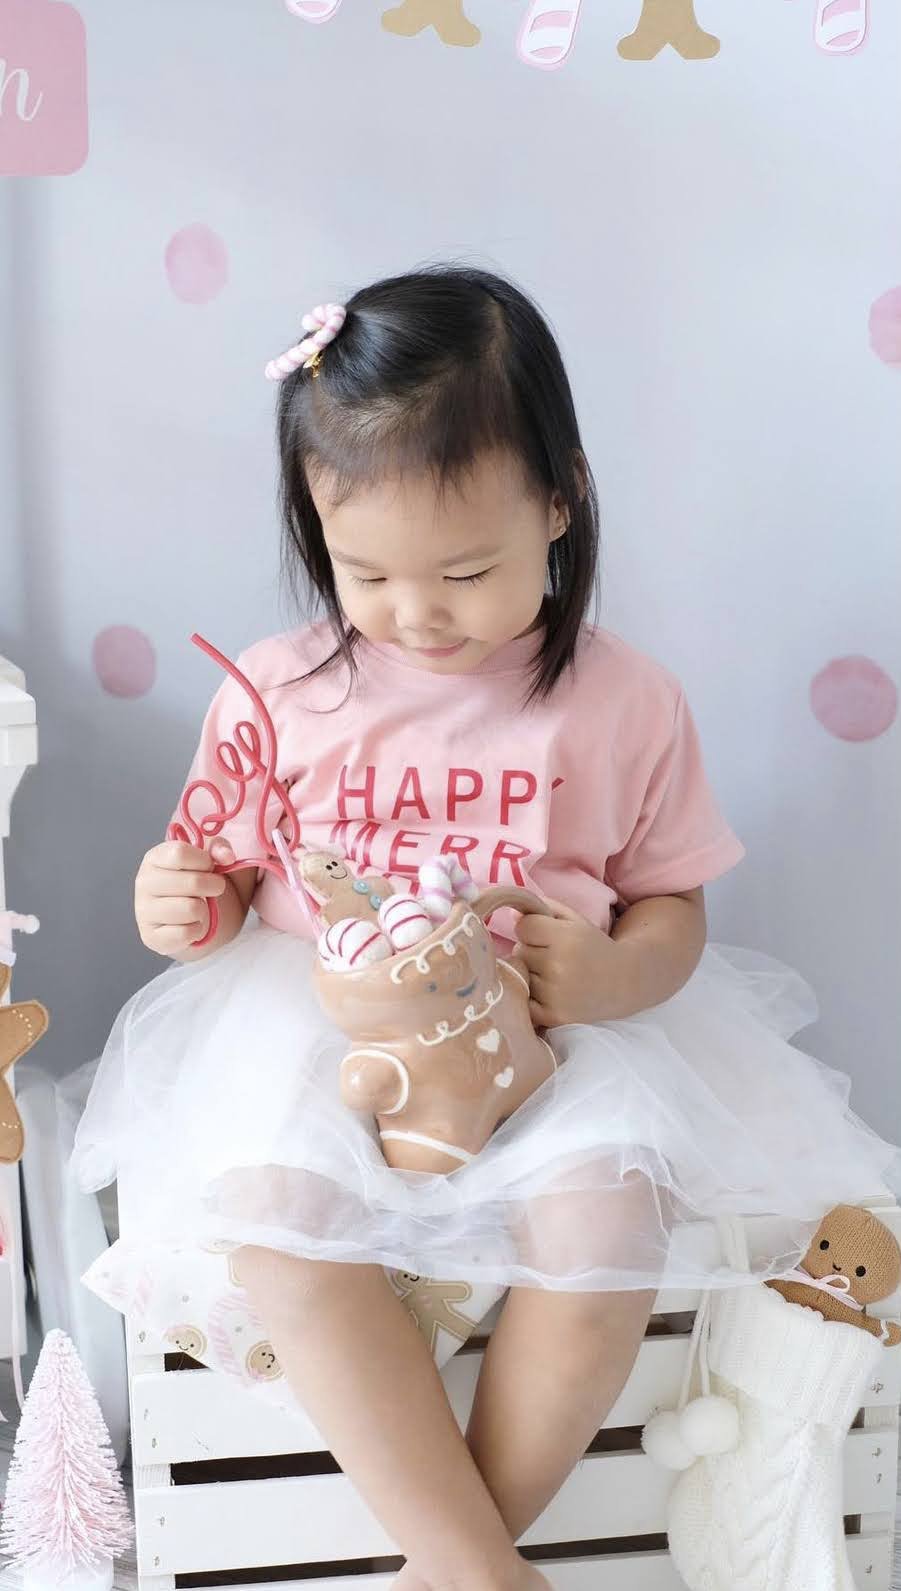
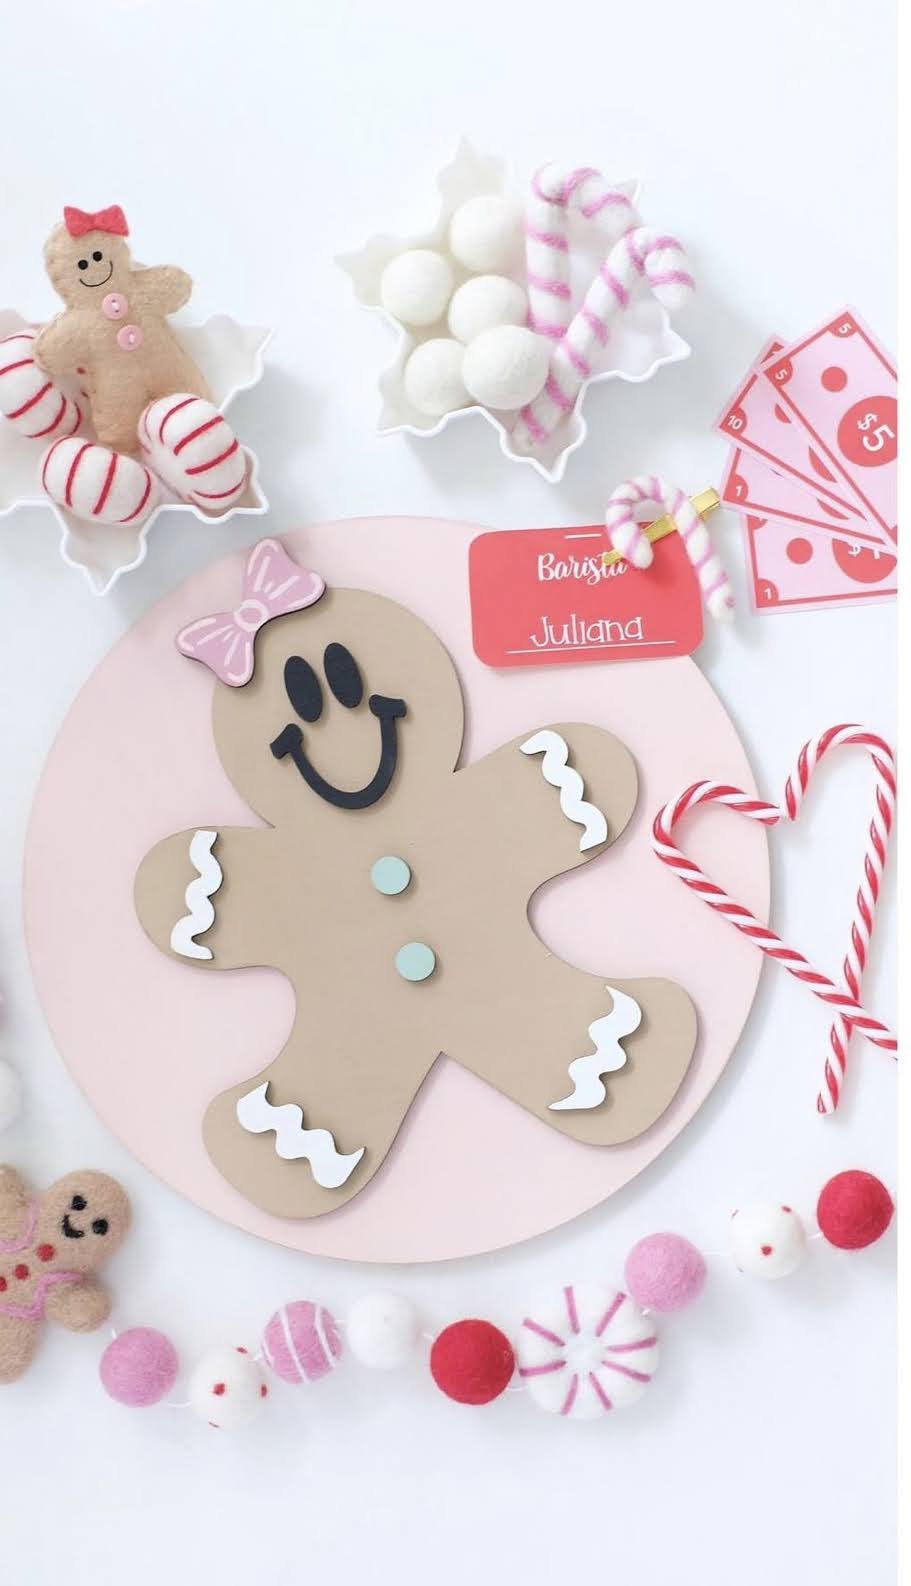
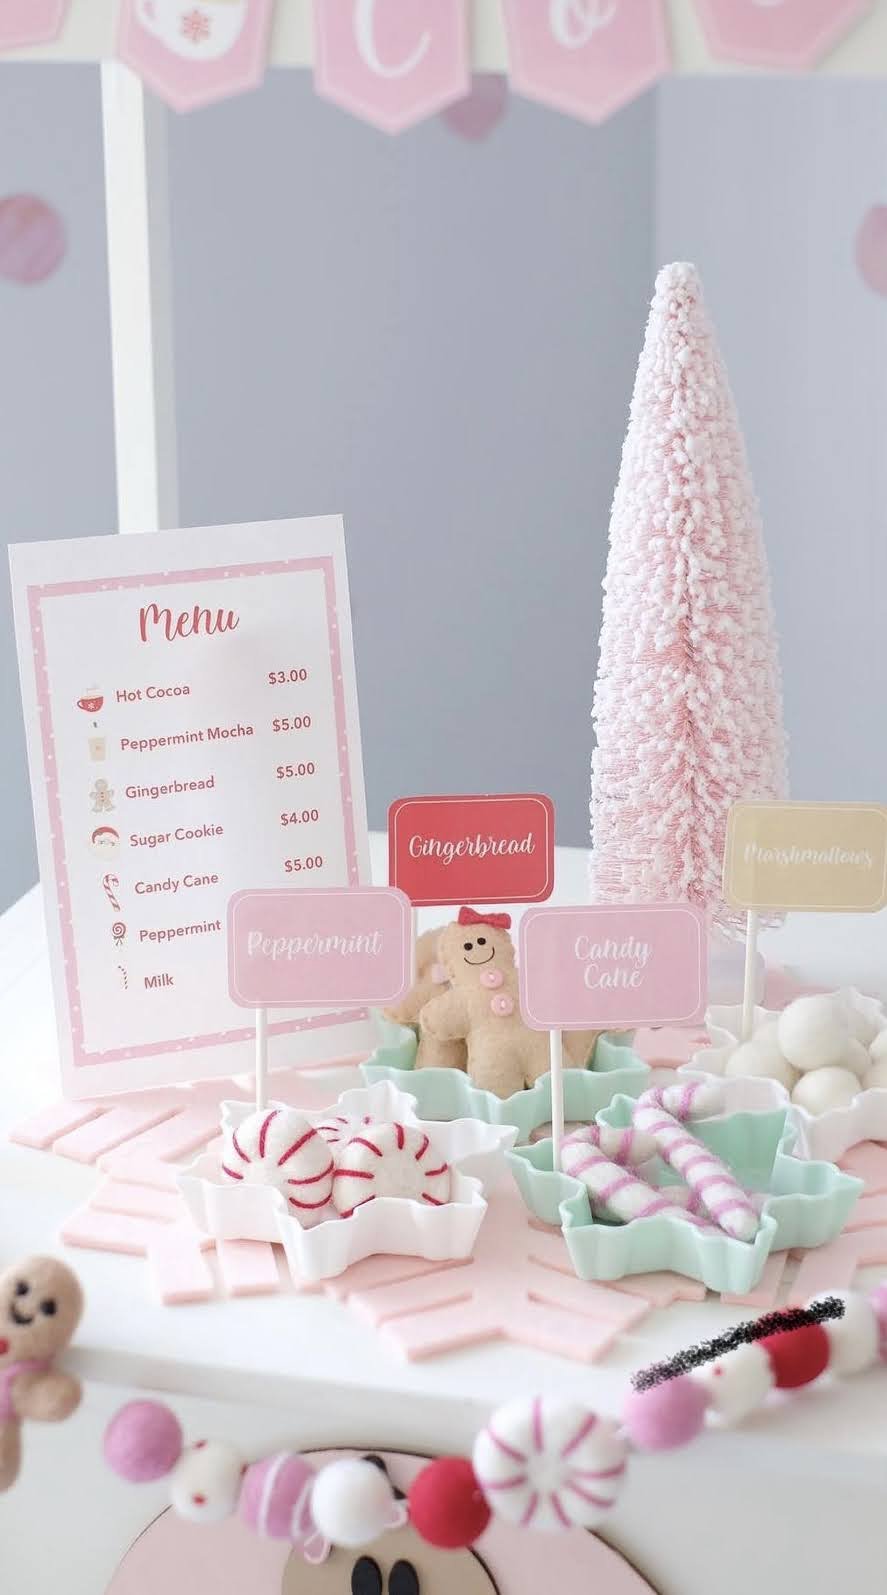
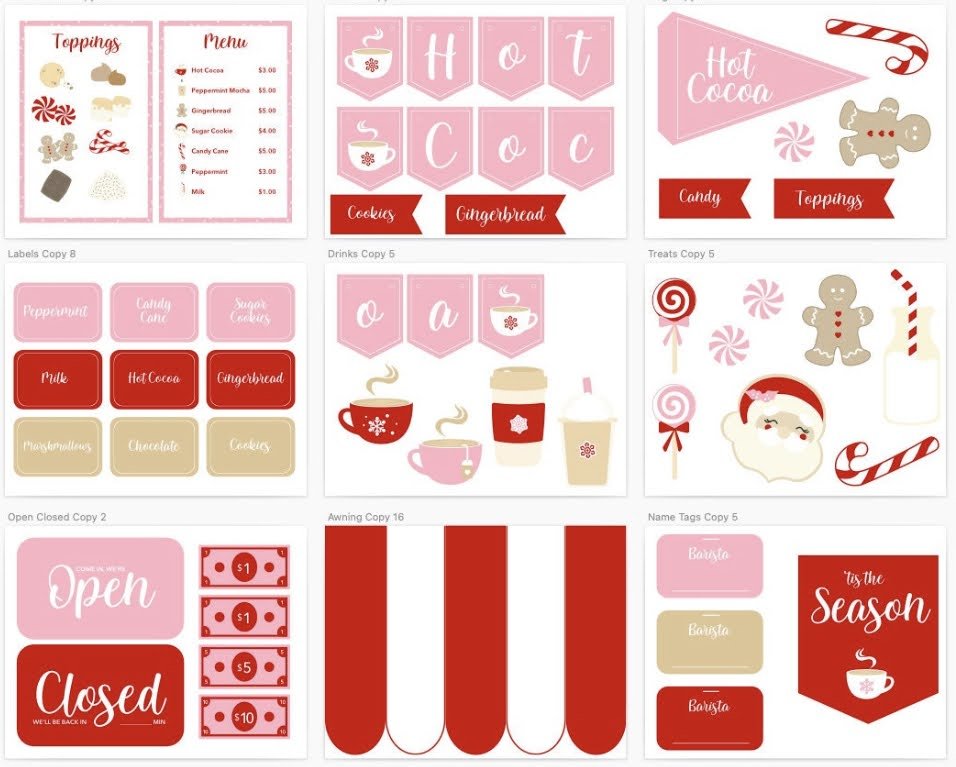
This year, I teamed up with the amazing @pockets.of.sweetness to bring you this adorable Peppermint & Gingerbread Hot Cocoa cart.

Your Custom Text Here

This year, I teamed up with the amazing @pockets.of.sweetness to bring you this adorable Peppermint & Gingerbread Hot Cocoa cart.


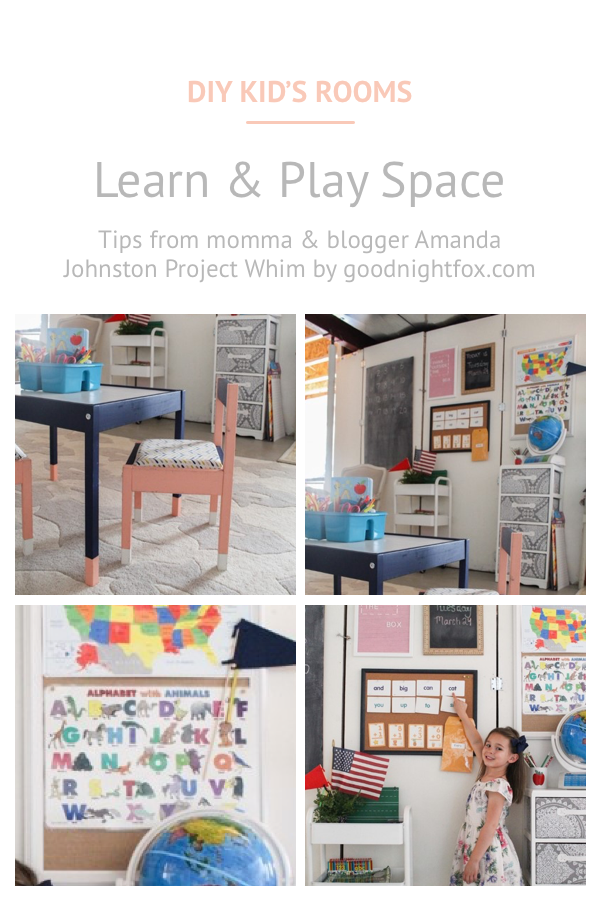
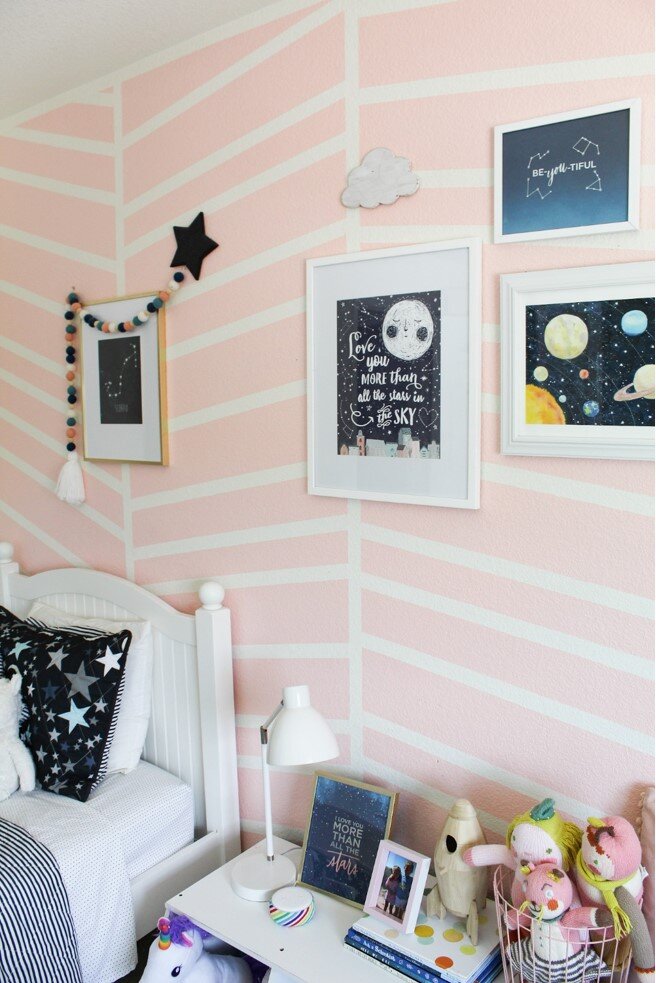
I’m so excited to share with you all an interview I just did with Amanda who shares her amazing everyday mom stories on her blog Project Whim. If you’re designing a kid’s space or just looking to liven up your do a DIY redesign of your kid’s bedroom, read on for some great tips! Plus, you’ll get to hear all about how she designed her daughters’ galaxy themed bedroom, her son’s Scandinavian themed bedroom, and

My name is Aakansha Jain, and I am an aspiring medical student who also helps my family run Freedom Montessori School, of which we are also owners. My mom is the director at the school which means she goes in every day and oversees all administrative work as well as manages the teachers. I mostly help with social media promotions and help clean and organize the school.
The Montessori Method dictates that there be a carefully curated environment in which a child can simultaneously learn and play at their own pace. Basically, Montessori encourages each child to learn topics at their own pace. Each material or toy within this environment reaffirms an academic lesson that child has had before.
At our school, children generally start off their mornings with “play time”. The teacher will take out one or two types of toys that encourages collaborative play and allows the child to wake up and be more prepared for their lessons during the day. During this time, children who have brought breakfast with them also have the chance to eat it. Once all the children have arrived, or 9am hits, the teachers will hold circle time. At this time, the children will have split into their respective class based on their age (infant, pre-primary, and primary). Circle time generally consists of reviewing the date and time, discussing the weather outside, important events that occur during that month (i.e. holidays or celebrations) and a broad overview of they learned the previous day. After circle time, the children start their “work time”. At this time, each child will have worksheets curated for where they are in their lessons. The children also have the choice to choose which subject they want to focus on that day within options the teacher gives. For example, a child might be asked if he or she wants to work on math or geography that day, and depending on the answer, the teacher will give that child a worksheet to do. These worksheets always require the use of Montessori materials such as marbles for counting in math, or large geographic map puzzles used in geography lessons. After work time, children have their lunch and their naps. For the older children, as our school also offers kindergarten, they have the option to read or complete worksheets that they couldn’t before. In the afternoon, children will have a little more time for work and depending on the day, may go outside to the playground or on an adventure walk. Towards the end of the day, when children begin to leave, play time resumes and most classes are combined (infants are kept separate for safety reasons).
The biggest difference in Montessori methods is the autonomy children have in their academics. By giving them choices, I have seen that children have a greater inclination to complete their work and are excited to do it. At the same time, the progress is recorded and carefully monitored by teachers making sure that the child does improve and grow upon what they do each day. This also ensures that no child feels like they are behind in the lesson since they are going at their own pace.
The biggest and, in my opinion the easiest, thing a parent can do to encourage Montessori method is give the child options on what they want to do. This helps them build their independence while you still get to nudge them in the direction you want.
Encourage practical life skills whenever you can! Having your child “help” you while you cook by asking them to measure, setting/clearing the table, pouring water into a jug. All of these tiny lessons not only give the child a sense of responsibility and the importance of the task, but also helps support the fine skills required in academics, such as a steady hand and strength for handwriting, or math skills.
Let them be bored! Without introducing a screen, see how your child uses their imagination to take up their time. A lot of times, they will unknowingly incorporate many of the lessons they learned at school or with you into their play, helping to reinforce it continuously over time.
It’s been shown that different teaching methods have different effects on children. From my own experience, being approached in a way that doesn’t work with my learning style make me not want to continue learning that topic. And this is the trend I’ve also seen with other children. A lot of times, parents are hung up on skills that they think their child needs to have and push them even though the child isn’t ready. This could really intimidate the child and make them feel as if they are behind, which only makes them reluctant to try and learn it in the future. I think the best teaching method is one in which the child’s parent and teacher confer with each other and support during their time with the child.
You don’t have to go too crazy with materials! I would say biggest thing that would create a Montessori environment at home is maybe creating a corner for the child. In this, you can incorporate a small bookshelf, a table and chair, and some practical life materials, like a duster. One piece of material which I think kids love to use and benefits them the most are sandpaper letters. These come as uppercase, lowercase, or cursive and are used as tracing material. Children use their pointer and middle finger together and trace the letter in the way they would right it. Due to the different texture, children love to use this material, and it has shown great improvements in their handwriting. (There is also a number version of these available). In terms of mathematics, I would highly suggest number rods. These red and blue rods are used to match a number 1-10 to the respective rod. Each rod increases in height by one unit and has an alternative pattern of red & blue. This allows kids to not only do their math problems, but also create different color patterns.
My mom has been an educator for my entire life, and for years before we owned Freedom Montessori School, taught at a different Montessori, so I grew up with it. I took a child psychology class in college which discussed the benefits of Montessori education and to read about the psychological effects the Montessori methods have on children made me believe that we were in the right field. I think the most appealing aspect is the autonomy children are given in their schoolwork. I know that I love having autonomy in my life and the classes I tried the hardest in growing up were the ones I got the choice to take.

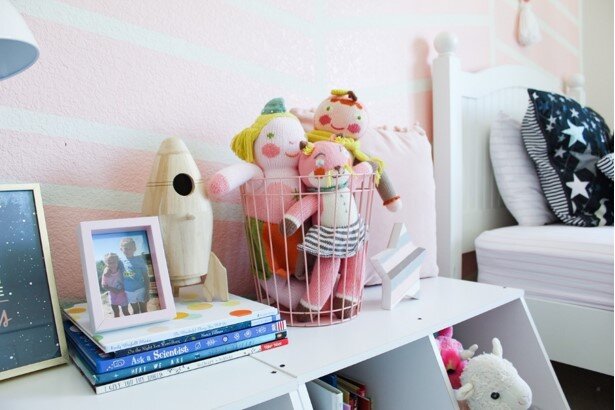
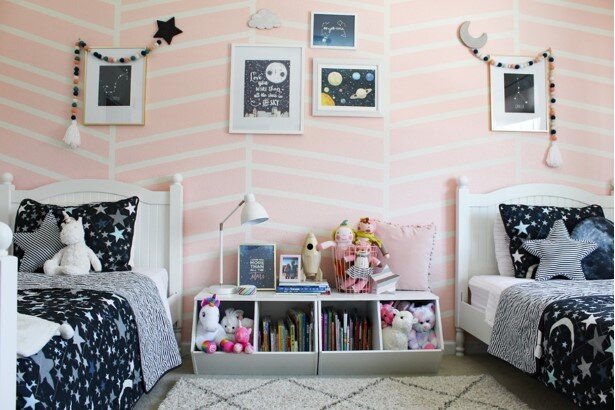
Storage, storage, storage! With two beds taking up most of the space in the girl’s room, I had to get creative on where to store all their clothes and favorite items. My first rule was no toys allowed in the room except for all their books and their stuffed animals. I found THESE stackable storage bins and put 2 side by side to create a long nightstand/storage solution for between the beds. They each have a bin with 2 compartments that they put all stuffed animals in and all their books. I love how I can then use the top of it for their lamp and some fun décor items. At one time we made it into a little bench where they could sit and read. This storage solution is great because it’s simple and allows them to clean up on their own. For clothes they share the closet and I use hanging canvas storage bins like THESE to store folded items like pajamas, shorts, undies, swimsuits and t shirts. This give us organization like a dresser but without having a big bulky piece of furniture. I labeled the bins so the girls can easily find what they need.
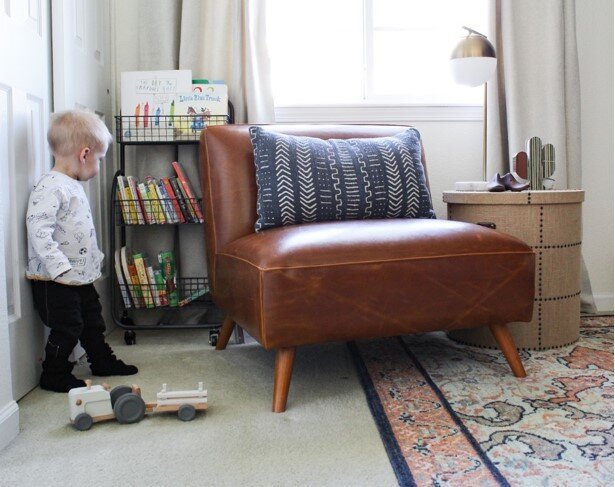
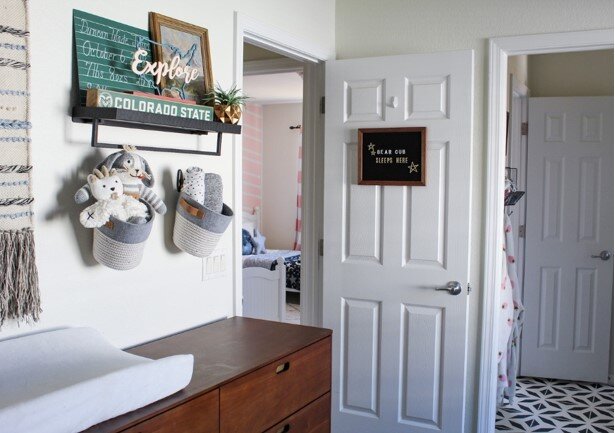
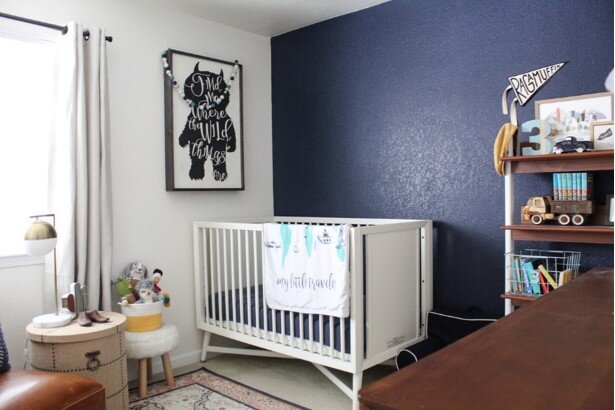
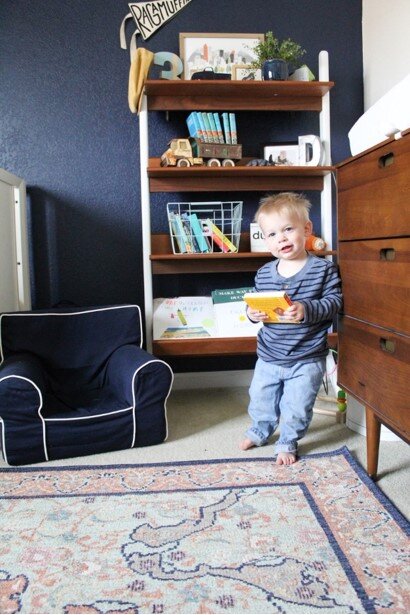
I wanted a minimalist, Scandinavian, mid century vibe for Duncan’s nursery. I really did not want the room to be “babyish”. I wanted it to be more of a grown up boy theme and something he could grow into as he got older. There are a lot of Mid Century features like his dresser/changing table, the bookshelf and the large faux leather chair. These are all items we will be able to use for a very long time. I used a lot of storage solutions for him too. I hung 2 small woven baskets about the changing table to hold diaper changing essentials and burp cloths so they would be easily accessible while changing a little one and not having to dig through a drawer. His bookshelf is one of my favorite pieces. It holds some old Hardy Boy Books in a vintage dump truck, a minimalist sketch of the City of Denver, a galvanized “D” for his name and the bottom shelf is for books. I kept the walls really simple by painting one accent wall a solid navy blue. And then hung 1 large piece of art (The Wild Things Sign) and a “Ragamuffin” Pennant Flag. I love his large faux leather chair. It’s the perfect spot for all the kids to pile up and read a bedtime story.

Keep it simple. Clean lines and simple color scheme help create that Scandinavian look. I love incorporating natural wood in the design for texture and to give off that Scandi Vibe.
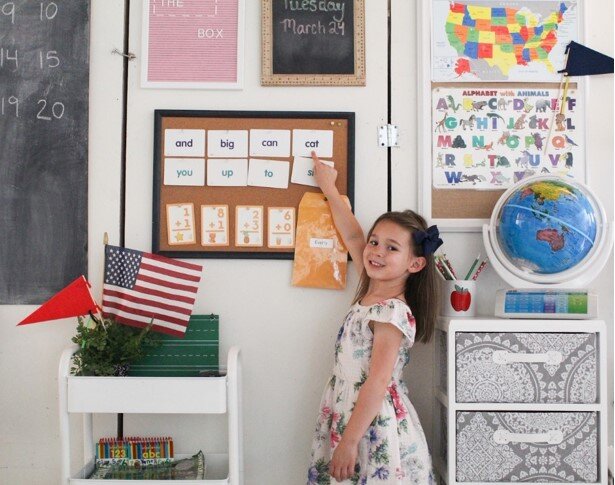
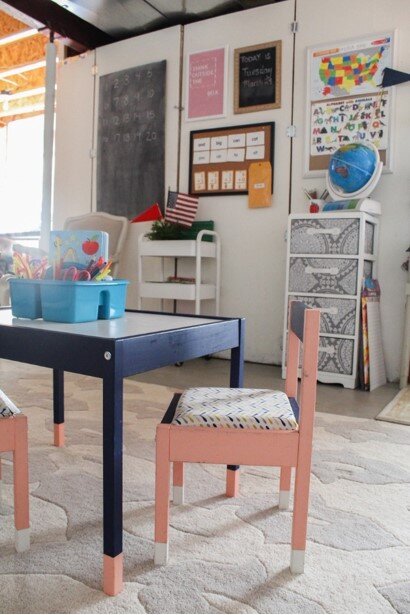
Since I mentioned before that the kids don’t really keep toys in their room, I keep all their toys in their play room in the basement. I use lots of storage bins to hold all the littler toys. I have it set up in sections for easy play and independent clean up. All the kitchen and food items are in a corner, all the color books and colors are by the table and chairs, all the babies toys are in his own section. With the recent remote learning going on at home I turned part of their play area into a “school” for the girls. A designated spot for us to do school work has really helped keep them excited about school and helped me stay organized in teaching the lessons from their teachers. I hung ABC charts and site words in this area and also put their globe and large chalk board to make it look like a classroom. I also had to add an American Flag so we could say the pledge of allegiance for the start of our school time each day. The girls really get a kick out of that. Take a peek into our DIY “classroom” set up on my Blog Post, Remote Learning Set Up.
My biggest tip for storage for kids is to separate the toys and store them in the room you use them in. For example, in the kids rooms we store all their books and stuffed animals because that is where we read and cuddle. In the living room is where we store all our games and puzzles. That is usually where we hang out as a family and play games. All other toys are stored in the playroom. I have bins to help separate toys, so barbies go in their own bin, cars go in another, blocks go in another. This does not always stay organized when the kids clean up themselves, but it’s an easy system that we can reorganize when we need to. For more organization ideas for kids you can check out my blog post on Organization Ideas for Kids.
Yes, I love decorating the kid’s rooms for the holidays. I like to keep it simple so it’s not overwhelming when it’s time to take it down. I like to add little touches to their spaces to make it more festive. A little Christmas Tree, an advent calendar, switching out some of their books for holiday themed books. One of my favorite tips is to swap out any faux plants for a seasonal one, little winter tree/winter berries. Swap out their blankets for a more holiday themed one to make it feel different and magical. And of course, twinkle lights. We add twinkle lights all throughout the house around Christmas and its so magical!
My biggest tip is Keep it Simple. A kid’s space does not need a lot of stuff. Make items multi-purpose like the storage bins in my girls room. I’m a big fan of using paint to transform a room because it’s inexpensive and the possibilities are endless. Whether you paint the wall a solid color, a mural or a fun modern design, even add DIY Ship Lap it makes a huge impact to a space. Get crafty and make your own décor. I loved the way the pom garlands looked in kids spaces so I bought my own felt pom poms and made them myself. Sew your own pillows or blankets or make your own yarn wall hanging. Its more sentimental knowing you made it yourself and can save some money too.

Thanks for letting me share my story and some of my favorite tips for designing and organizing kids spaces. For more inspiration and ideas please visit my blog Project Whim and for an inside peek into our daily lives head over to Instagram and let’s be friends!
xoxo, Amanda Johnston, Project Whim | Adding WHIM to the Everyday
There you have it! Some amazing tips for DIY kid’s rooms from designer, blogger, and mom of 3, Amanda Johnston! Check out her awesome blog for more great design tips and kid’s activities. And if you’re designing your own galaxy or space themed bedroom, be sure to check out this Solar System art print set by yours truly!

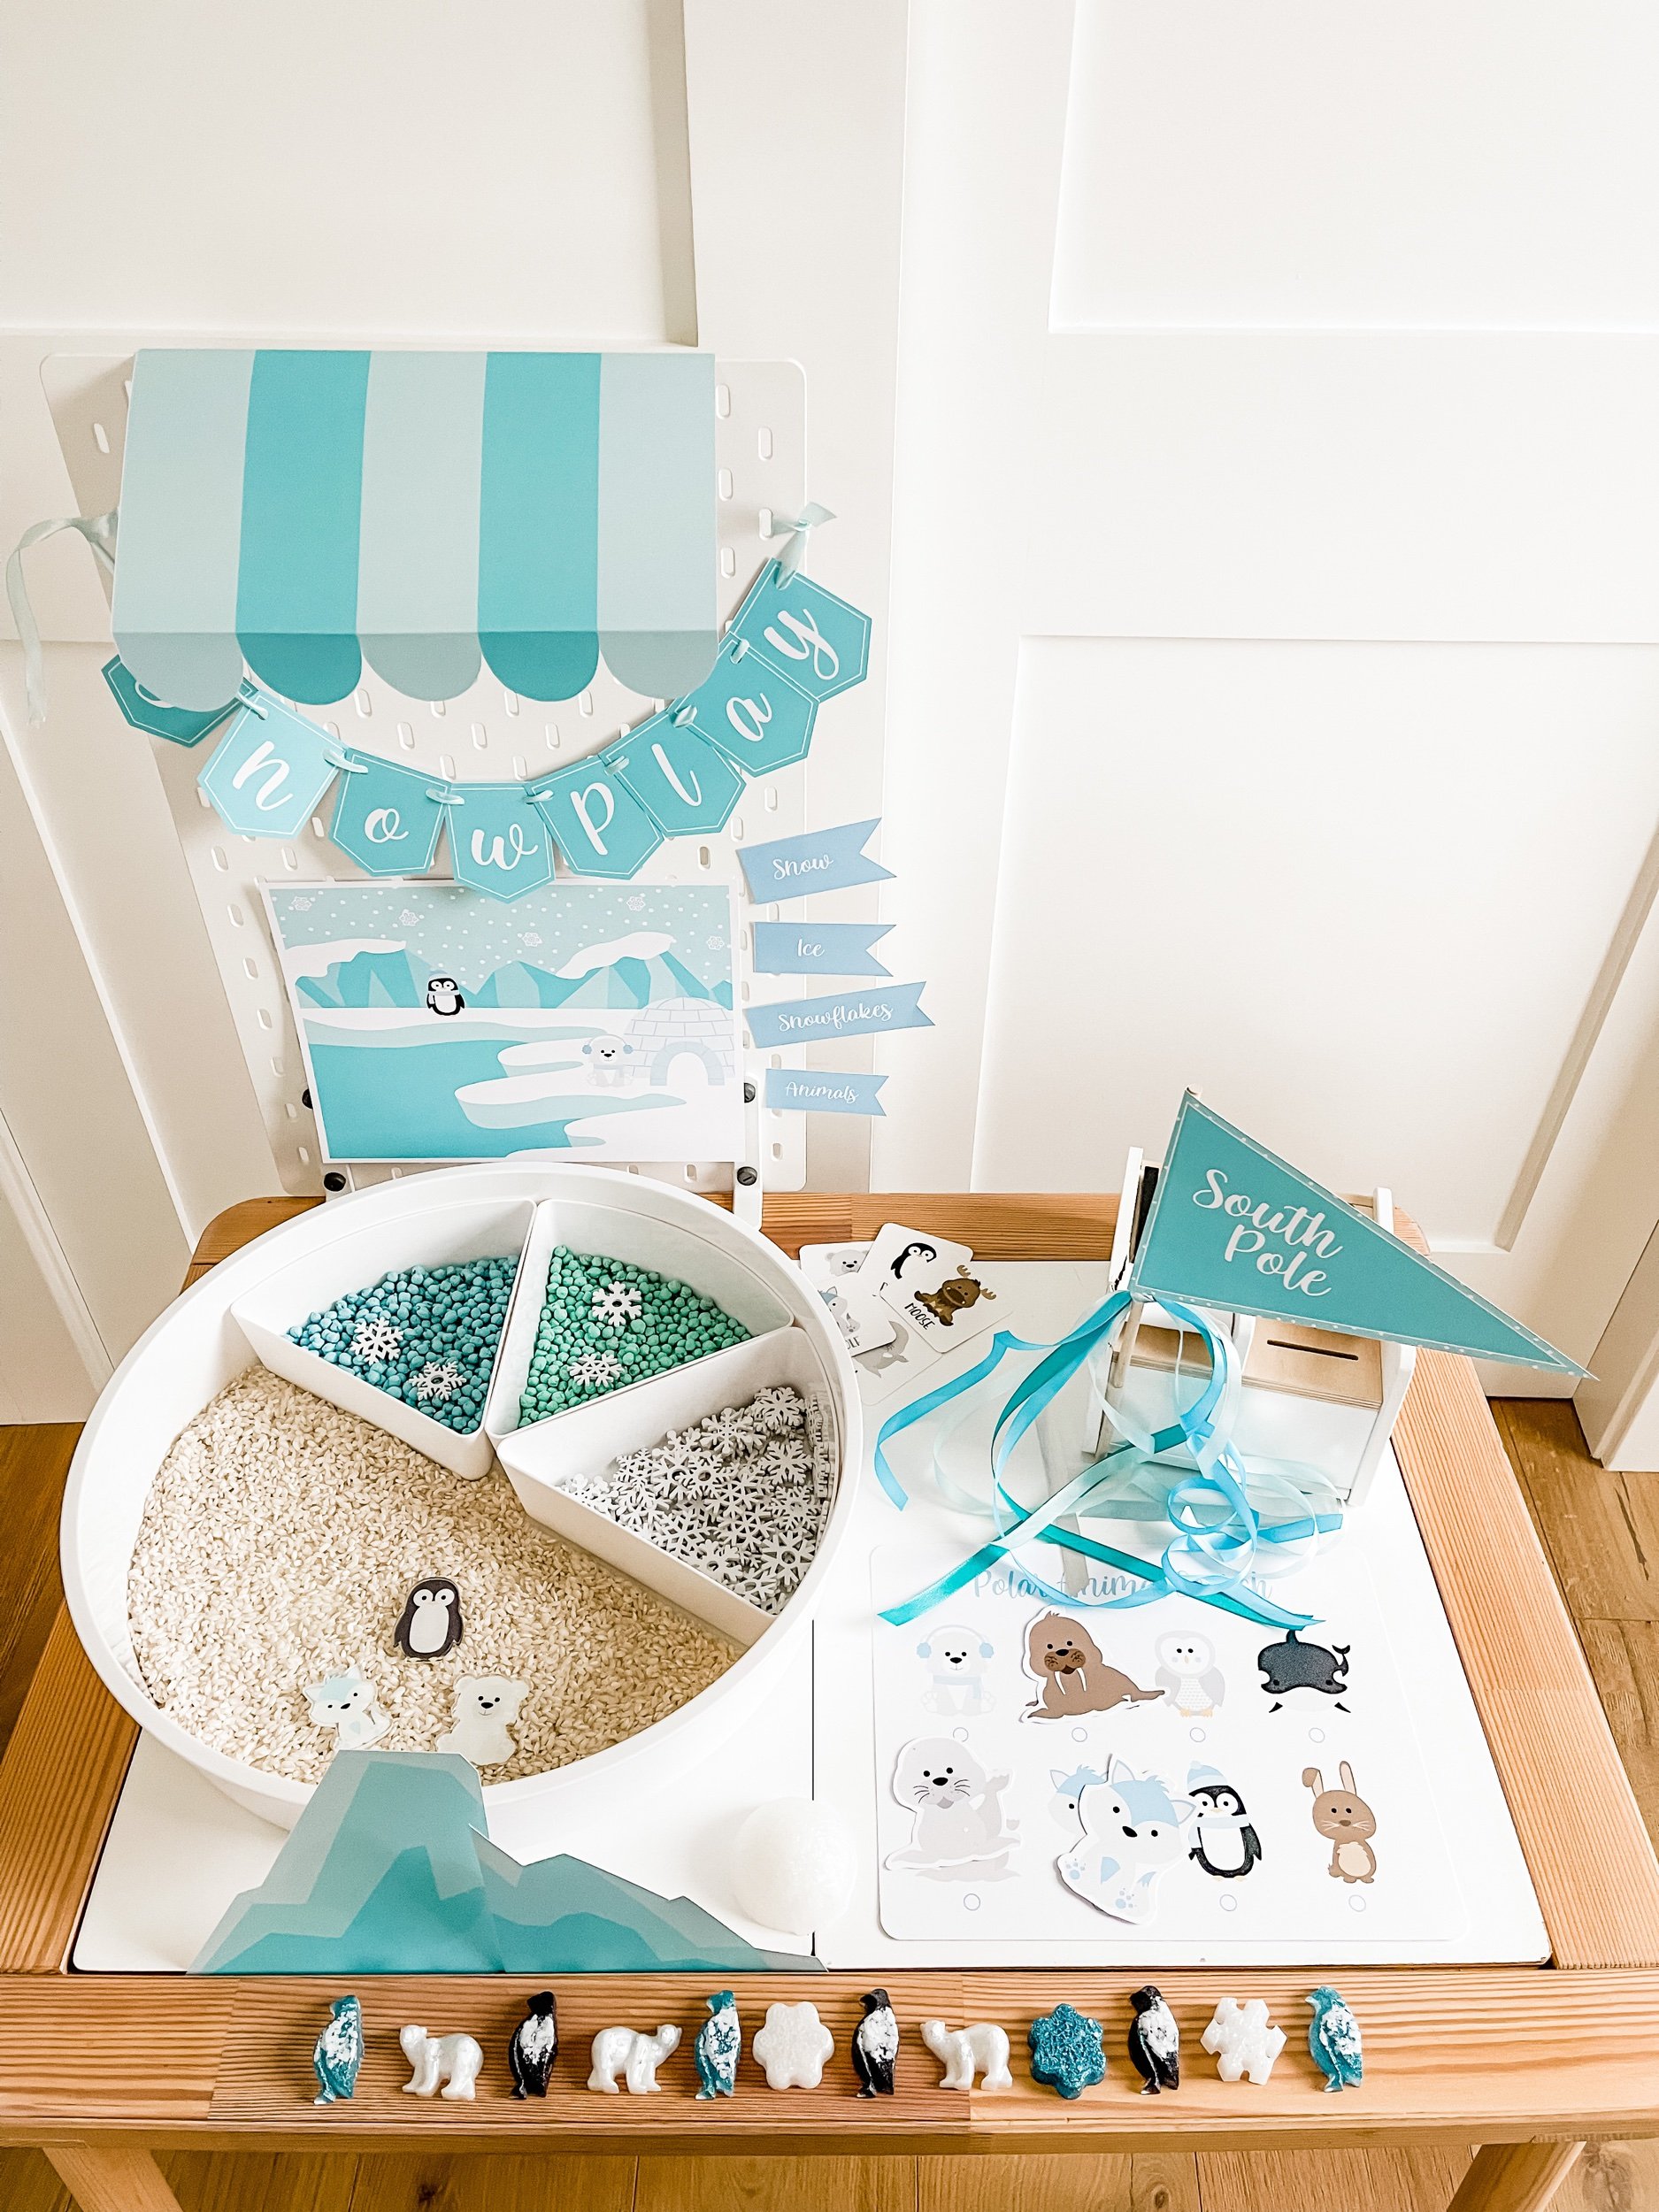
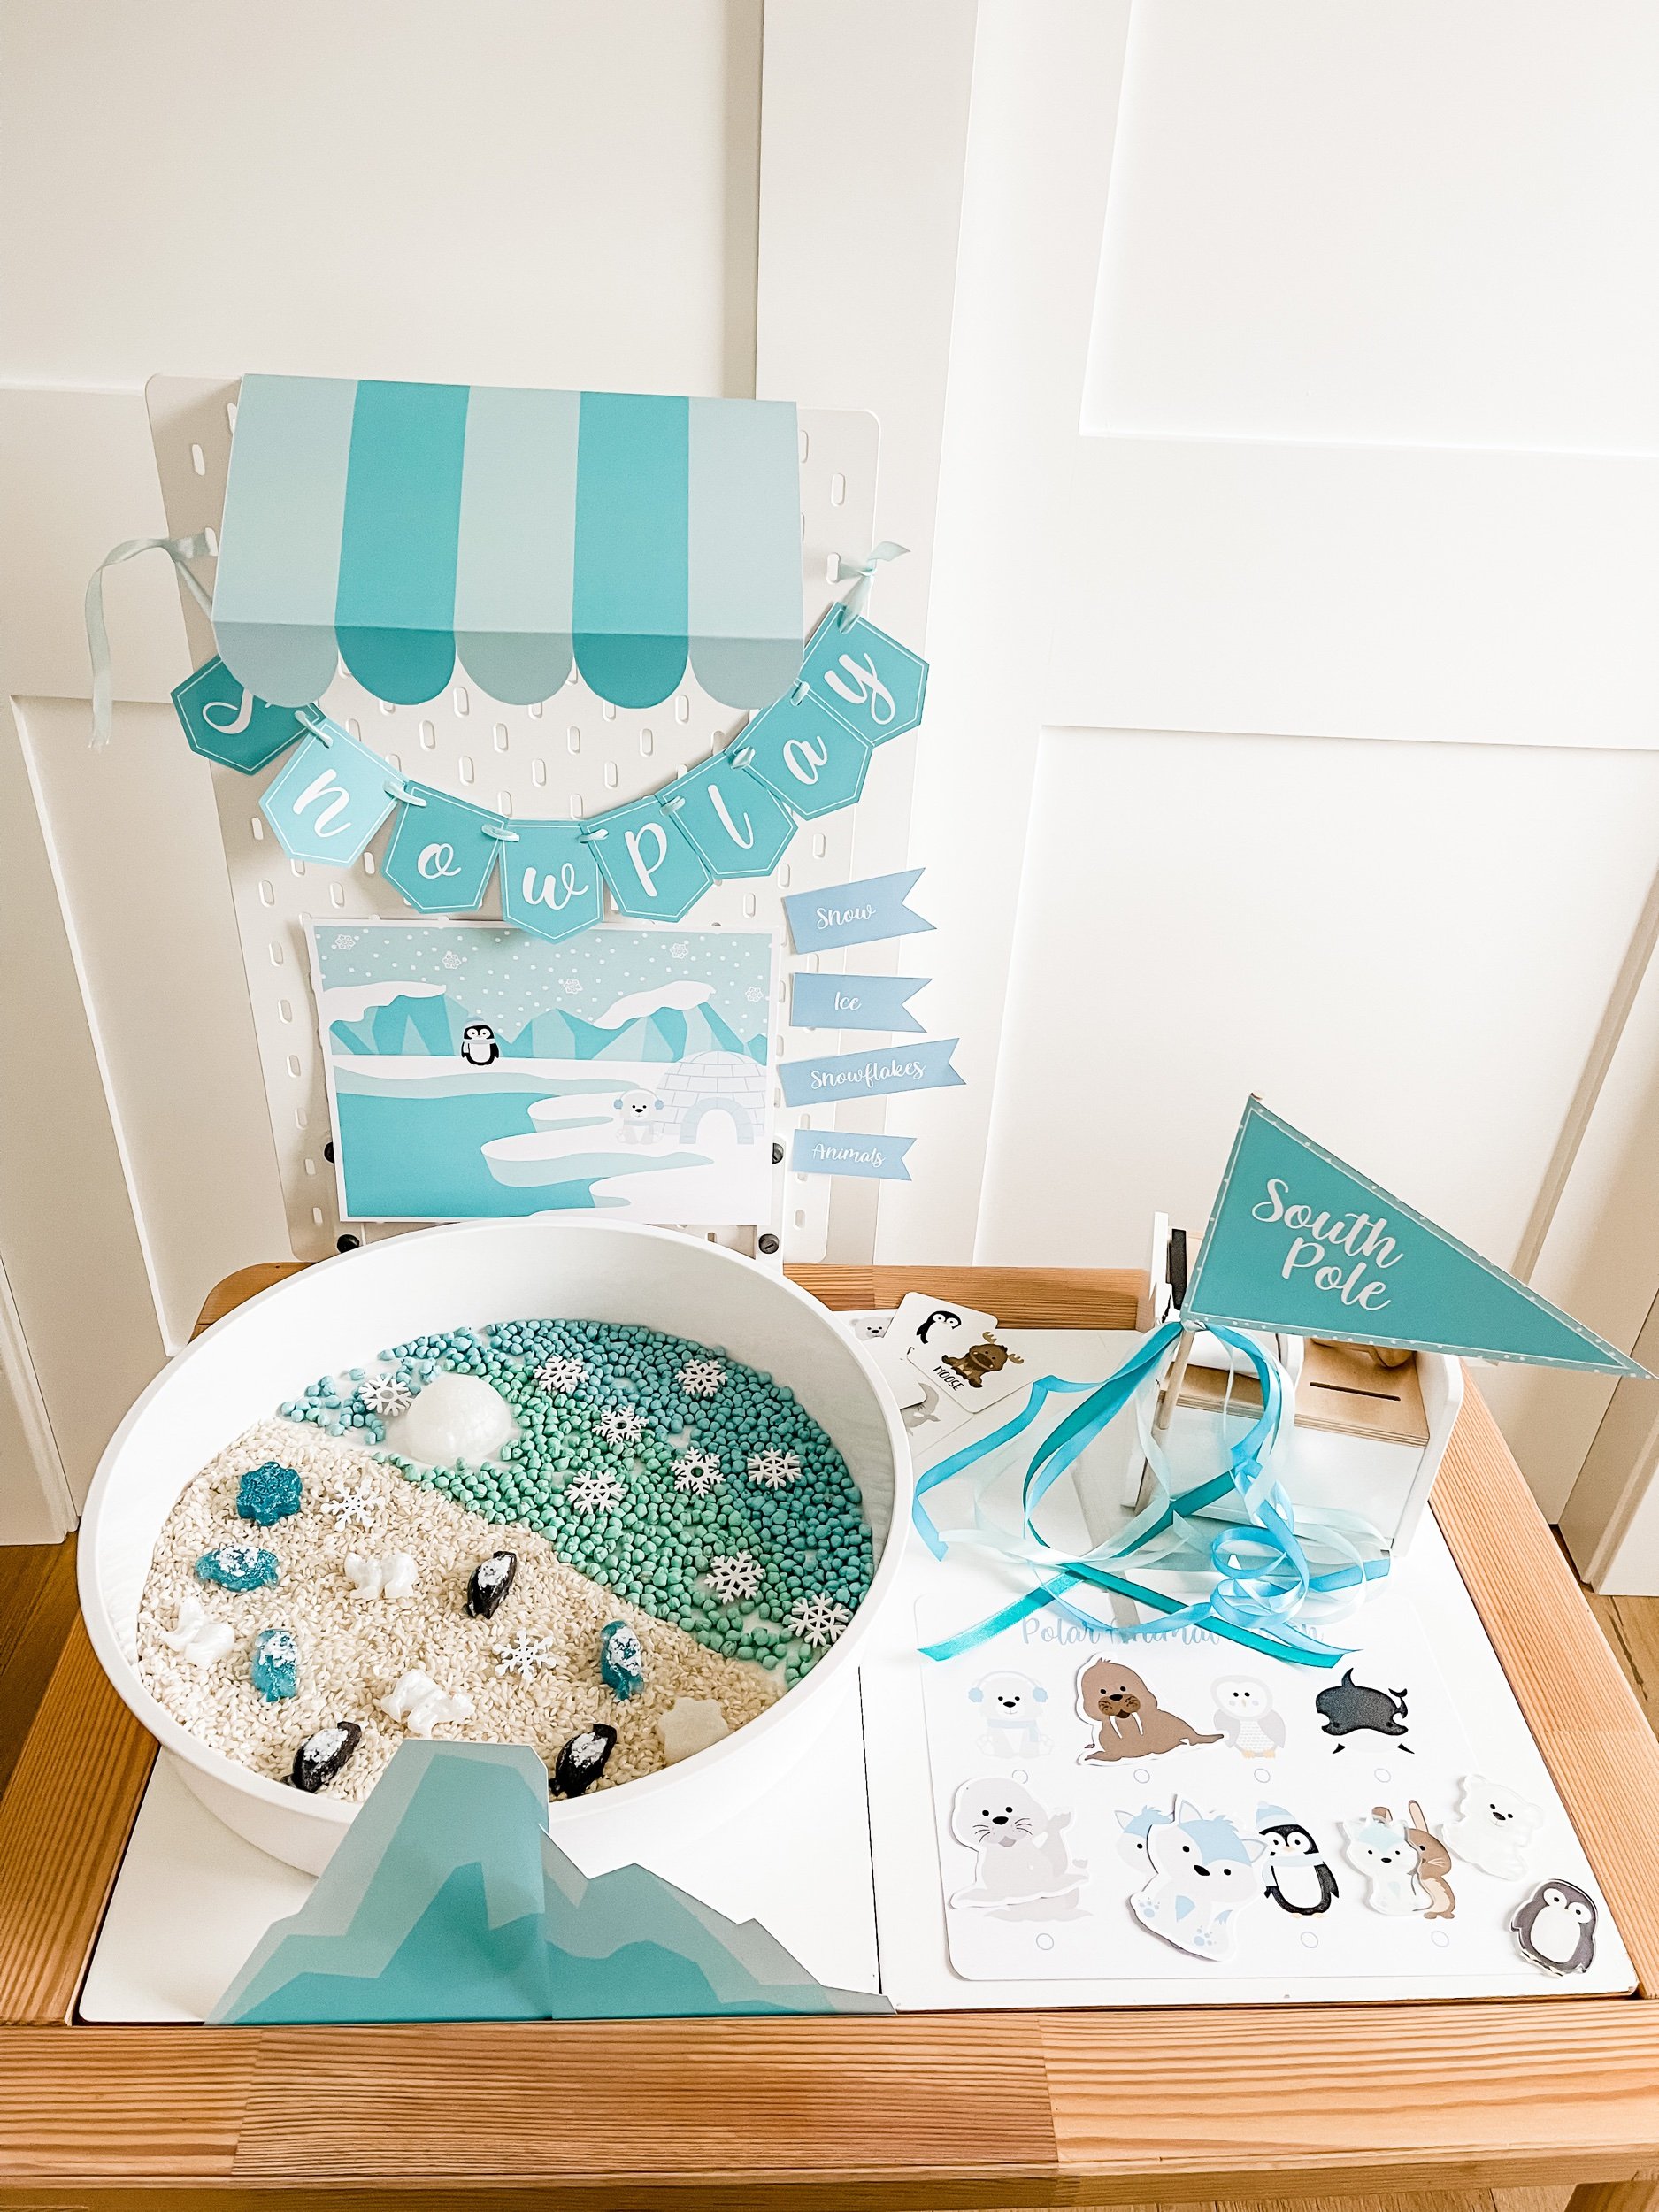
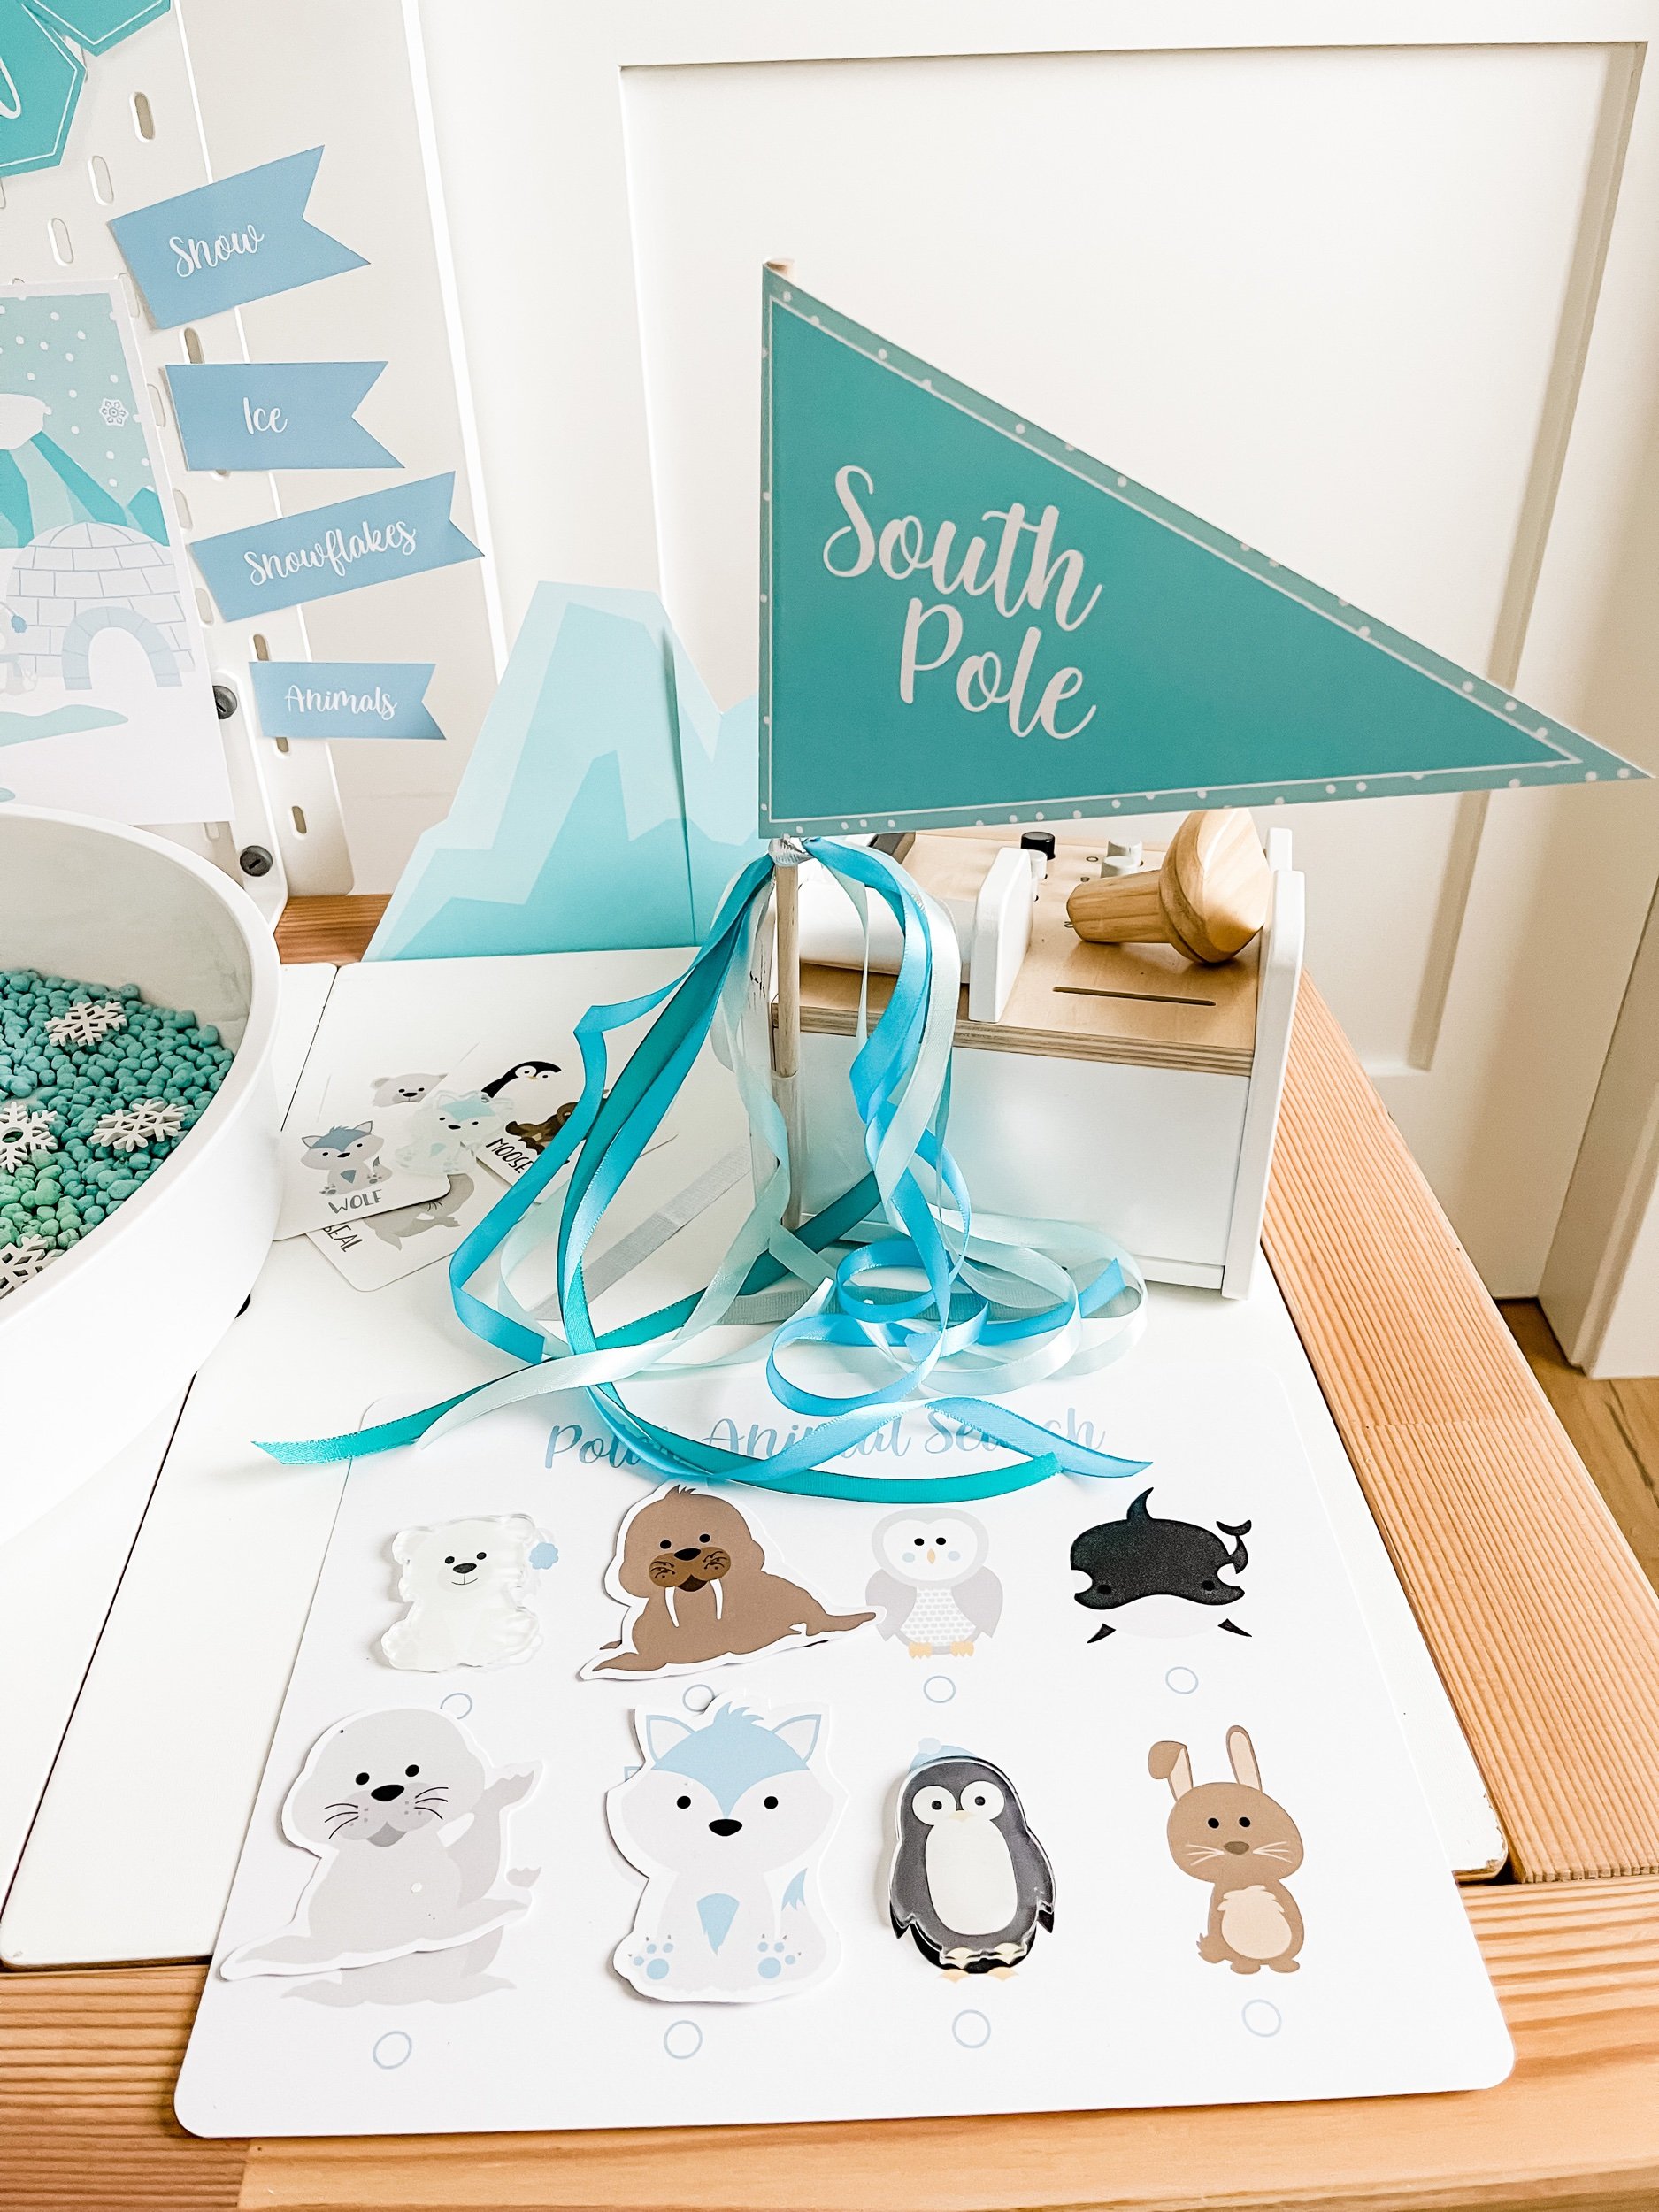
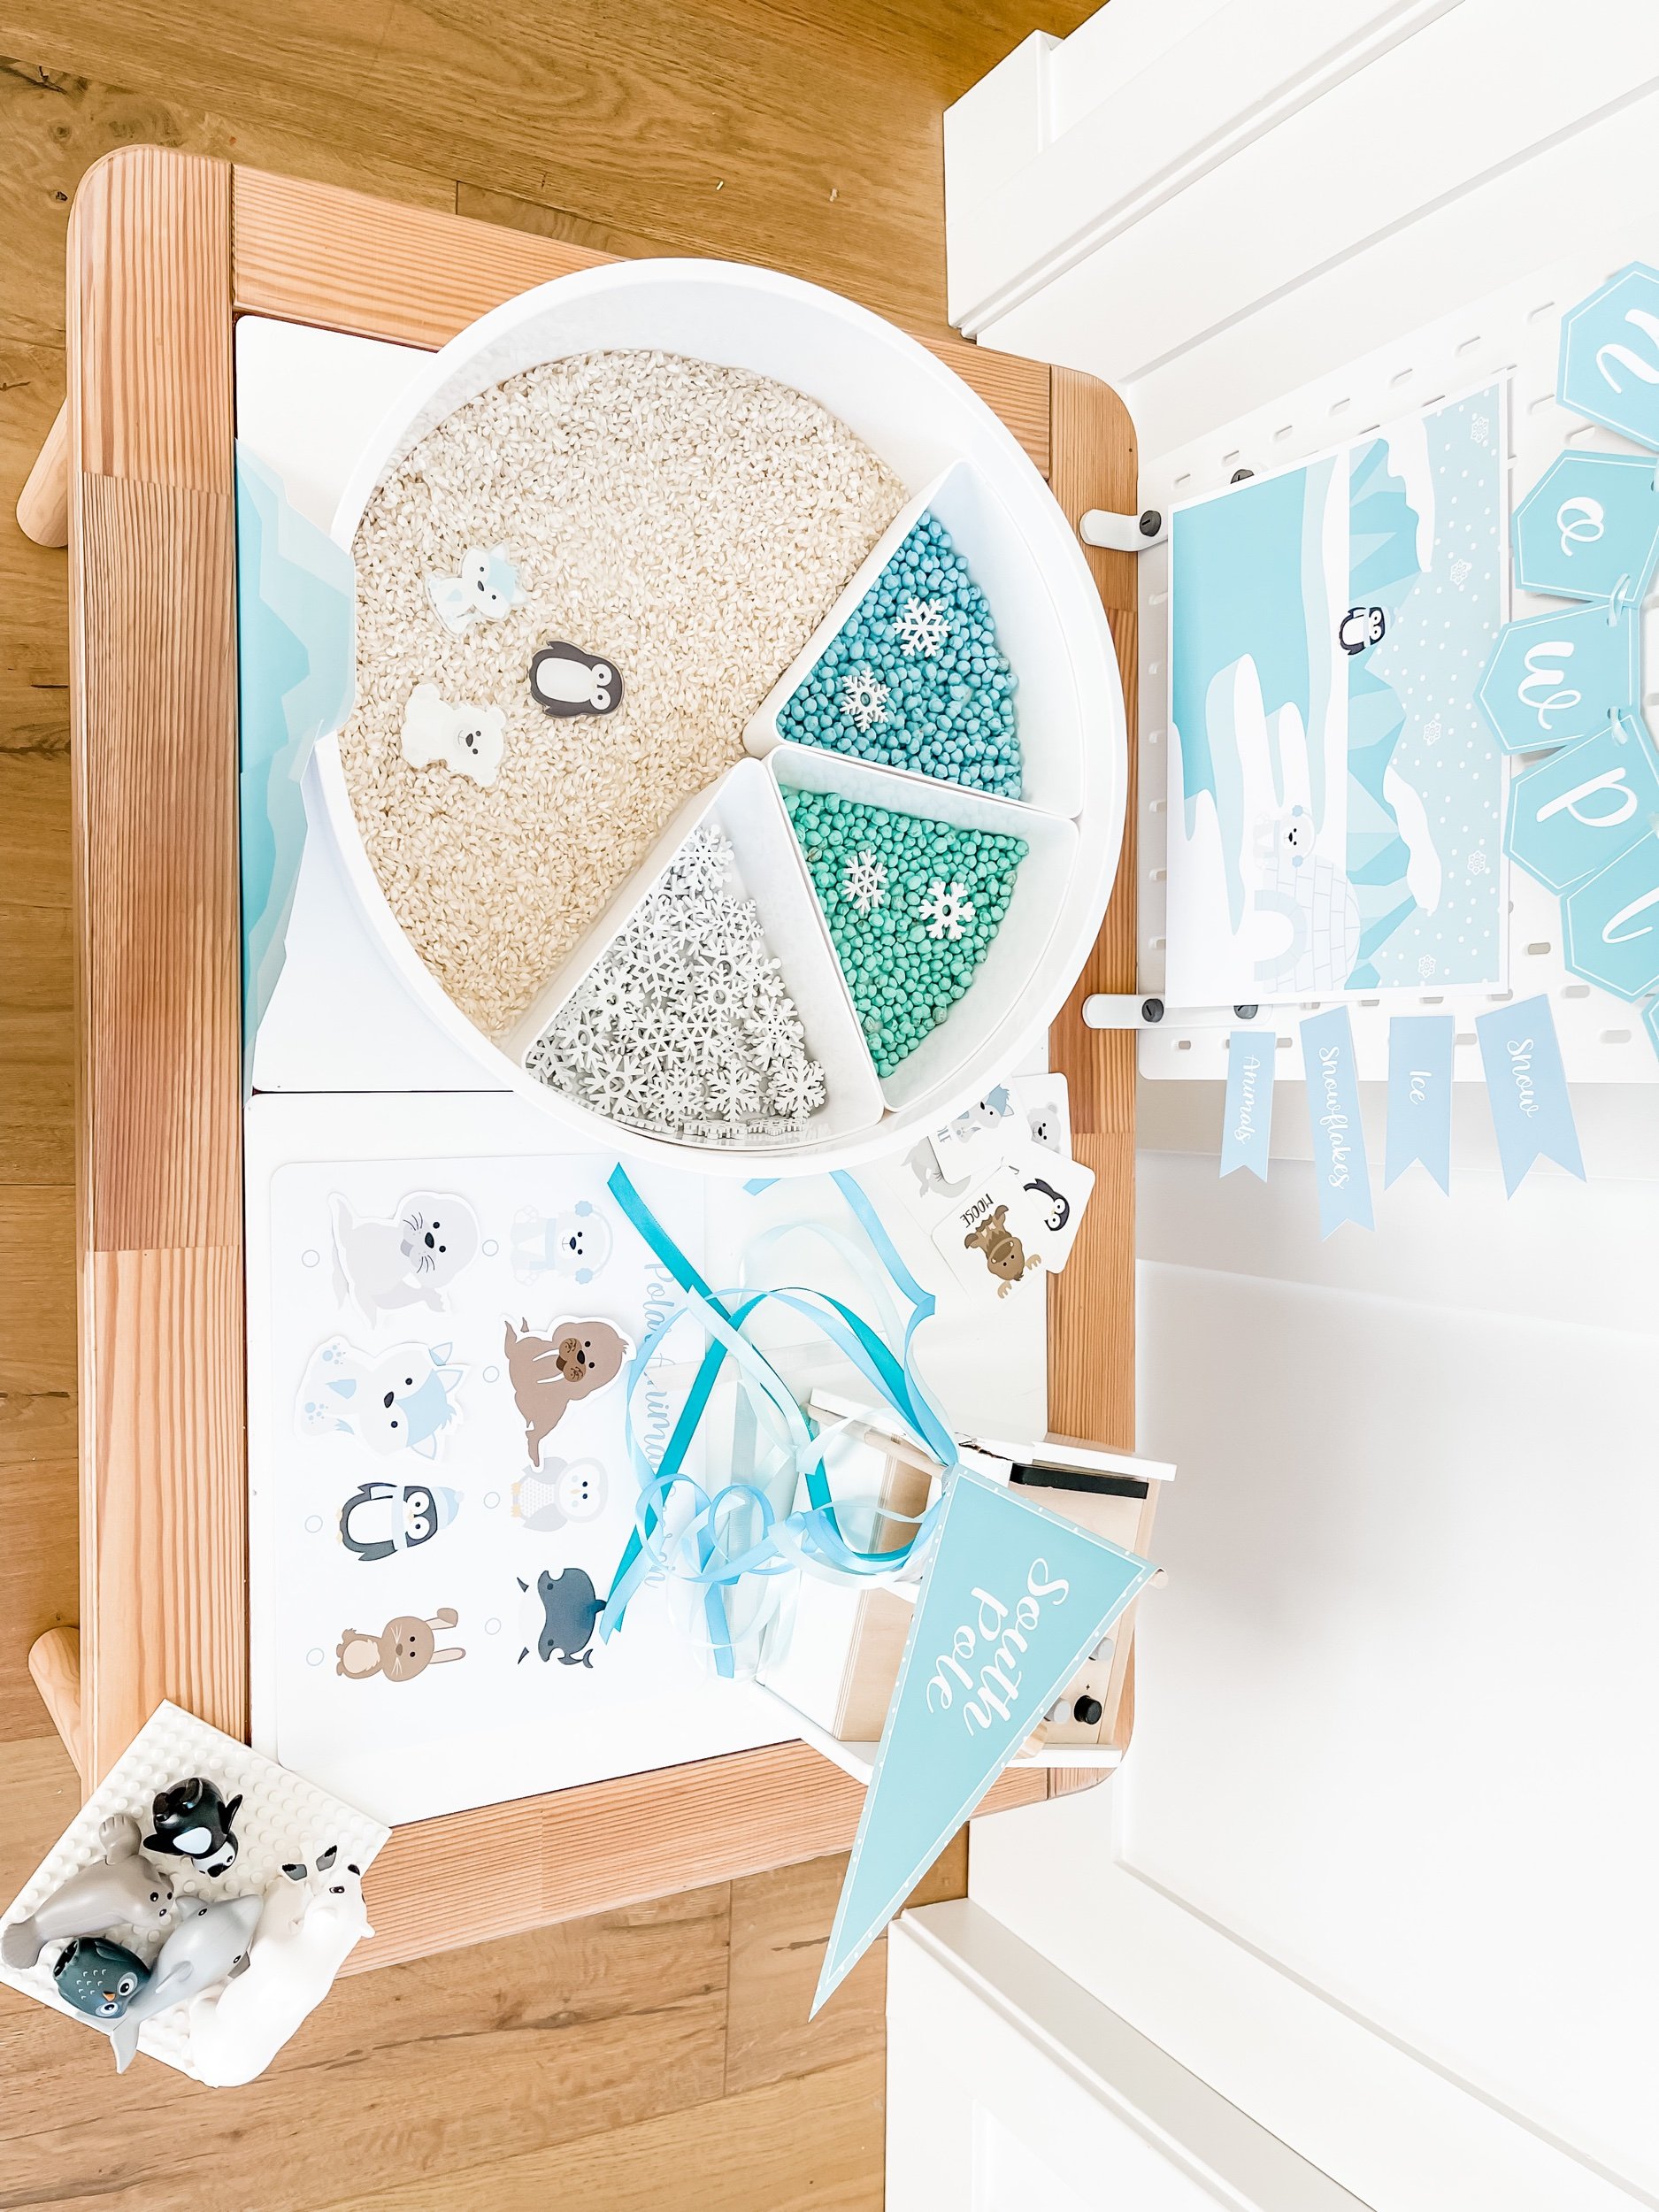
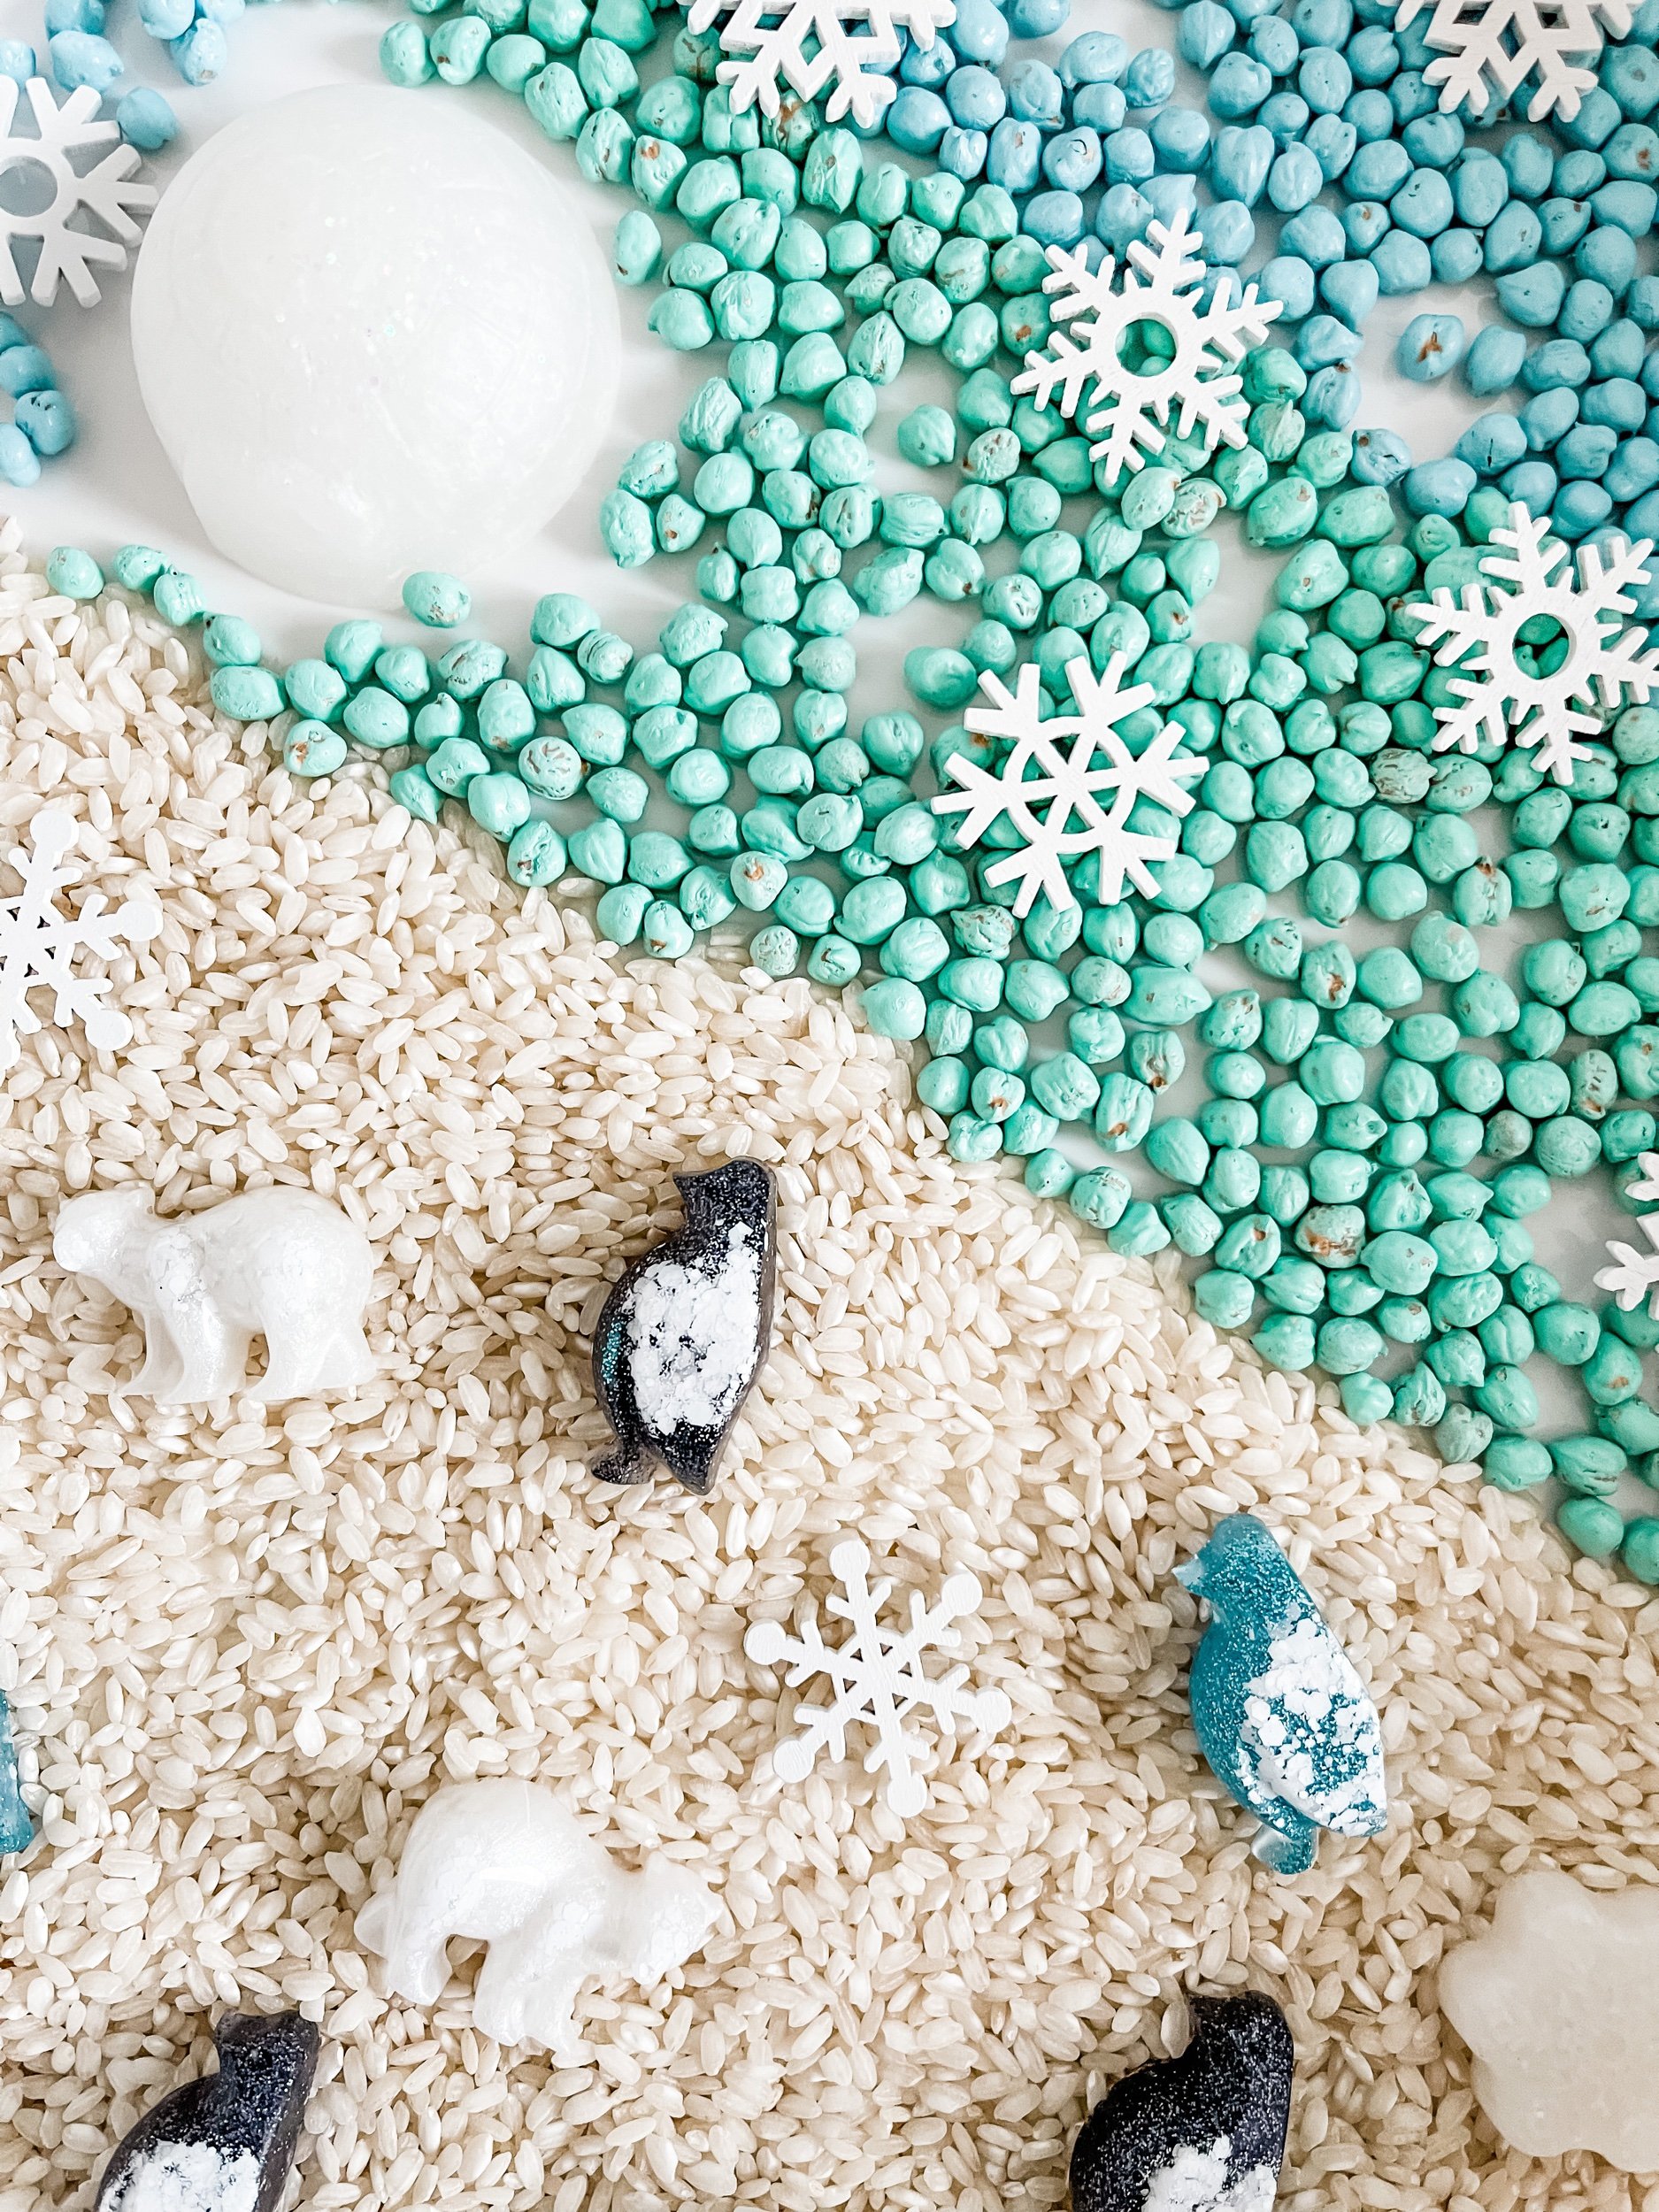
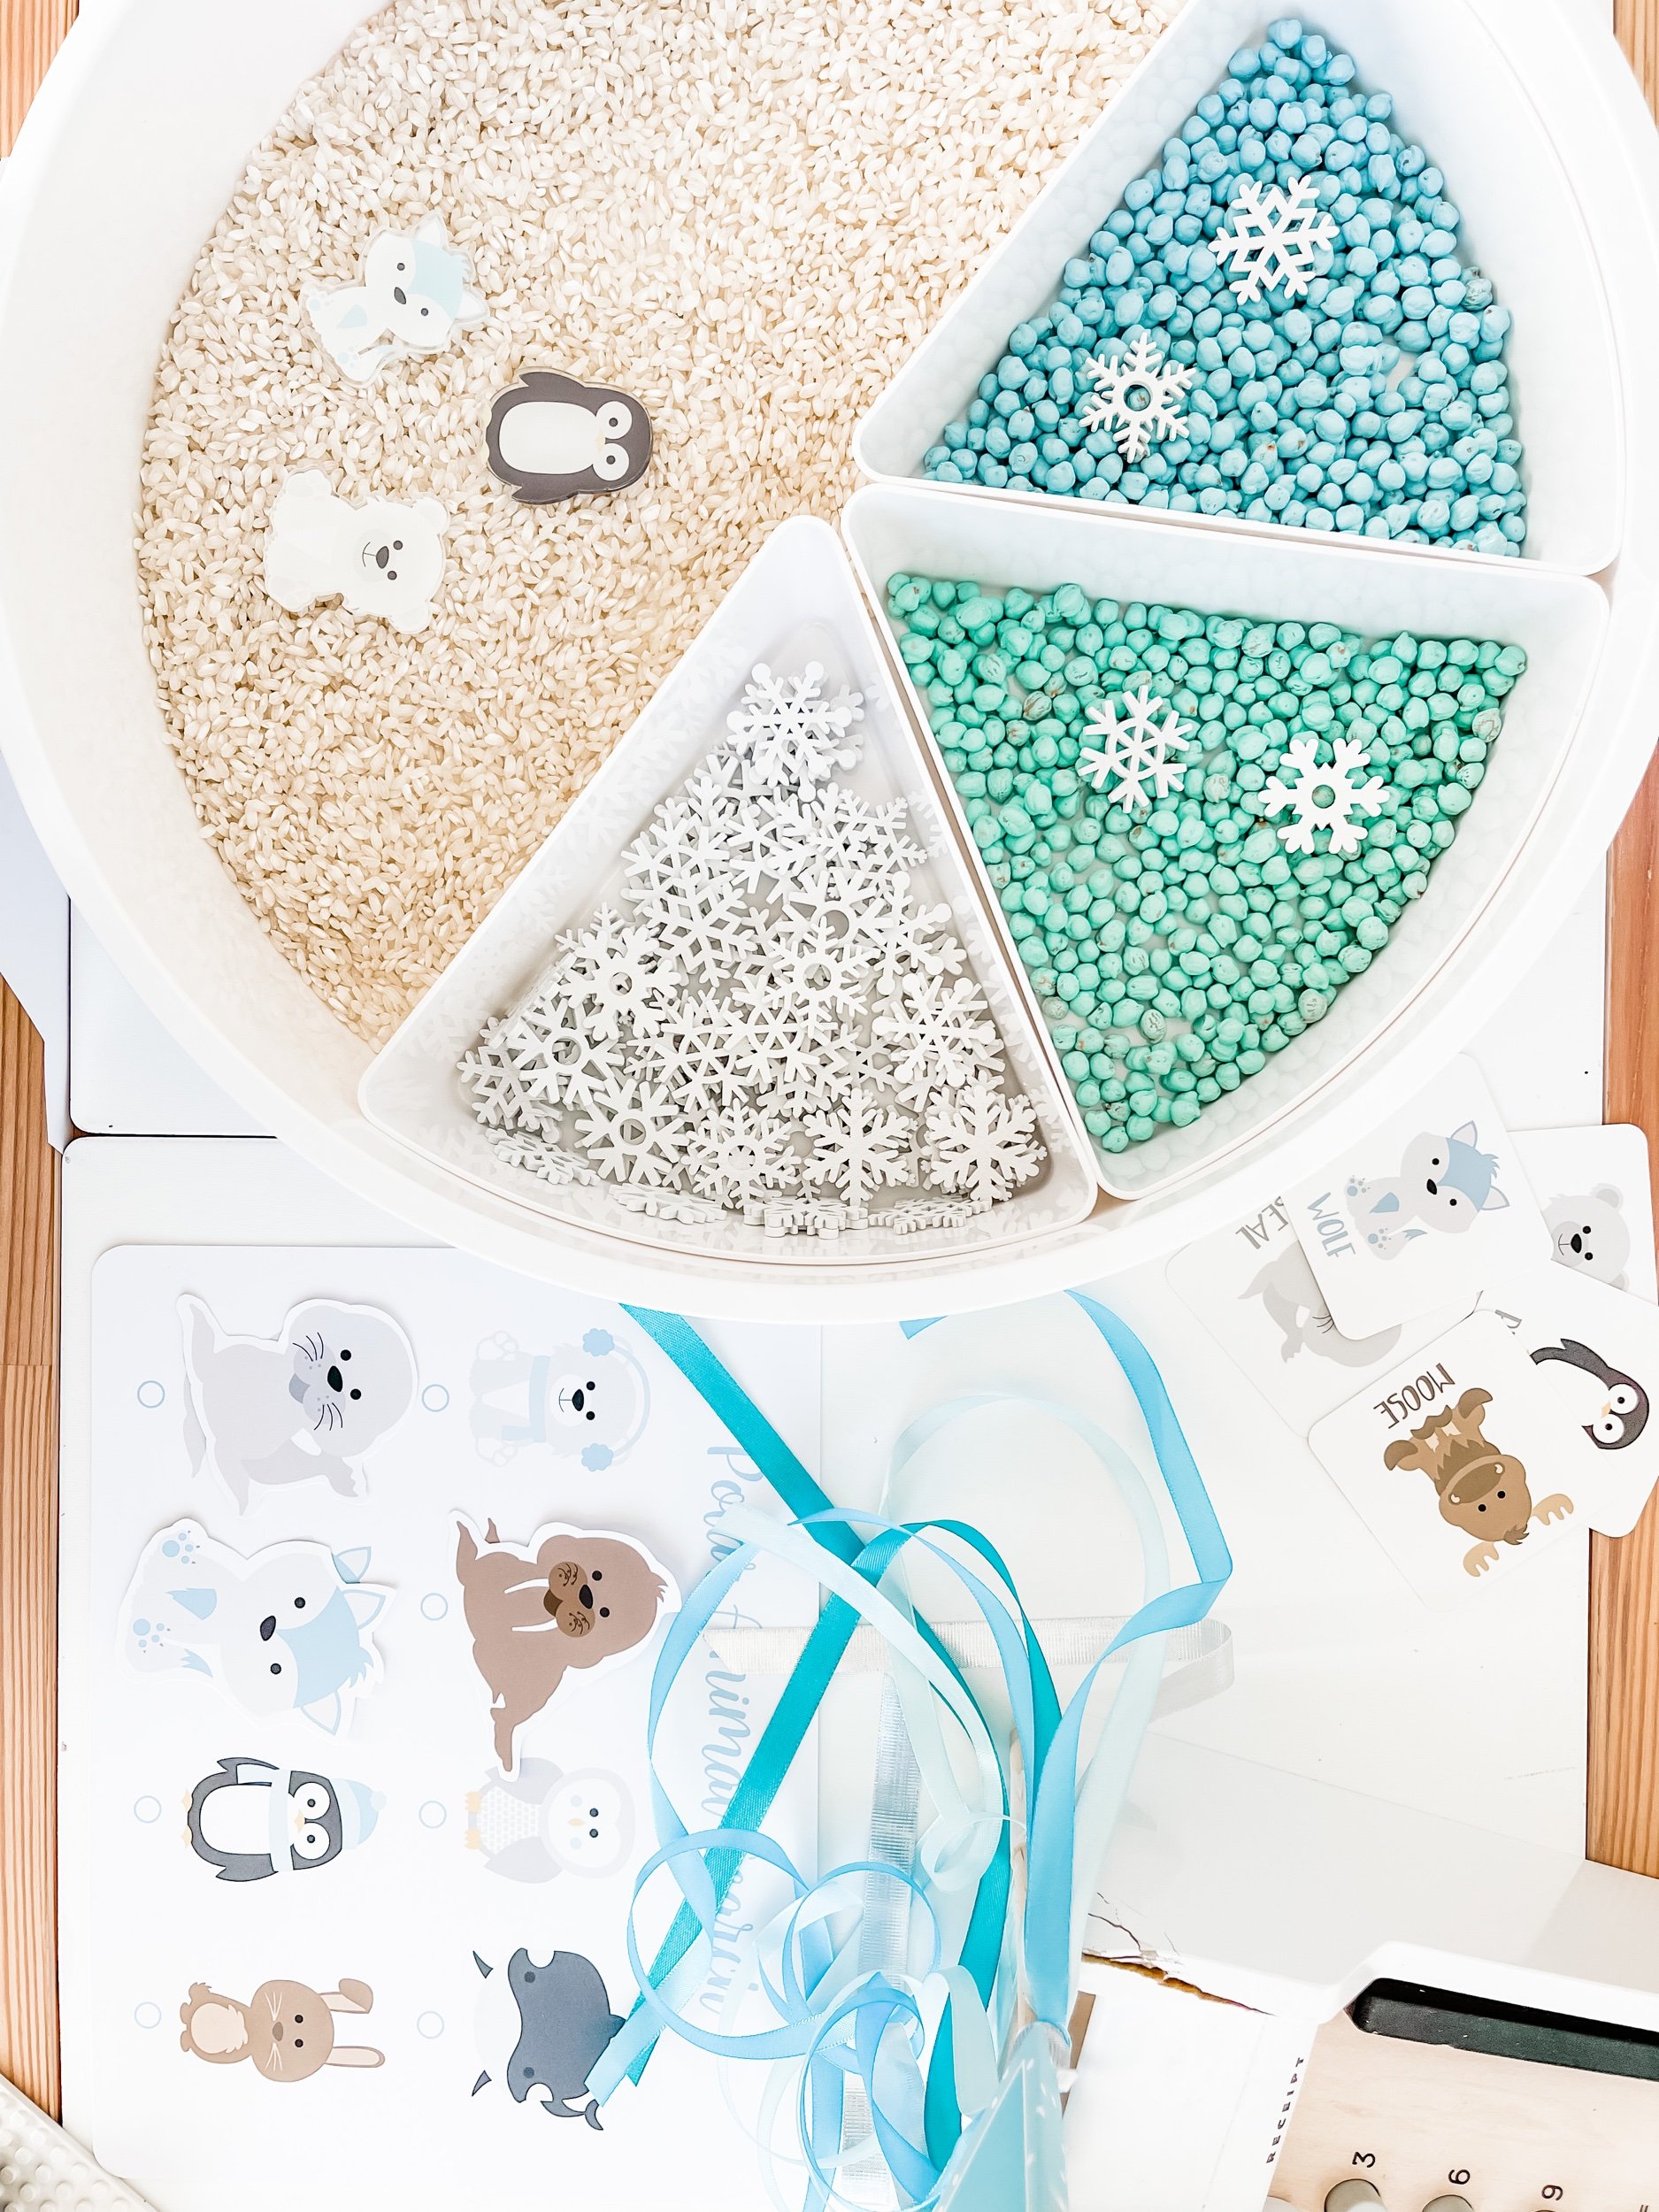
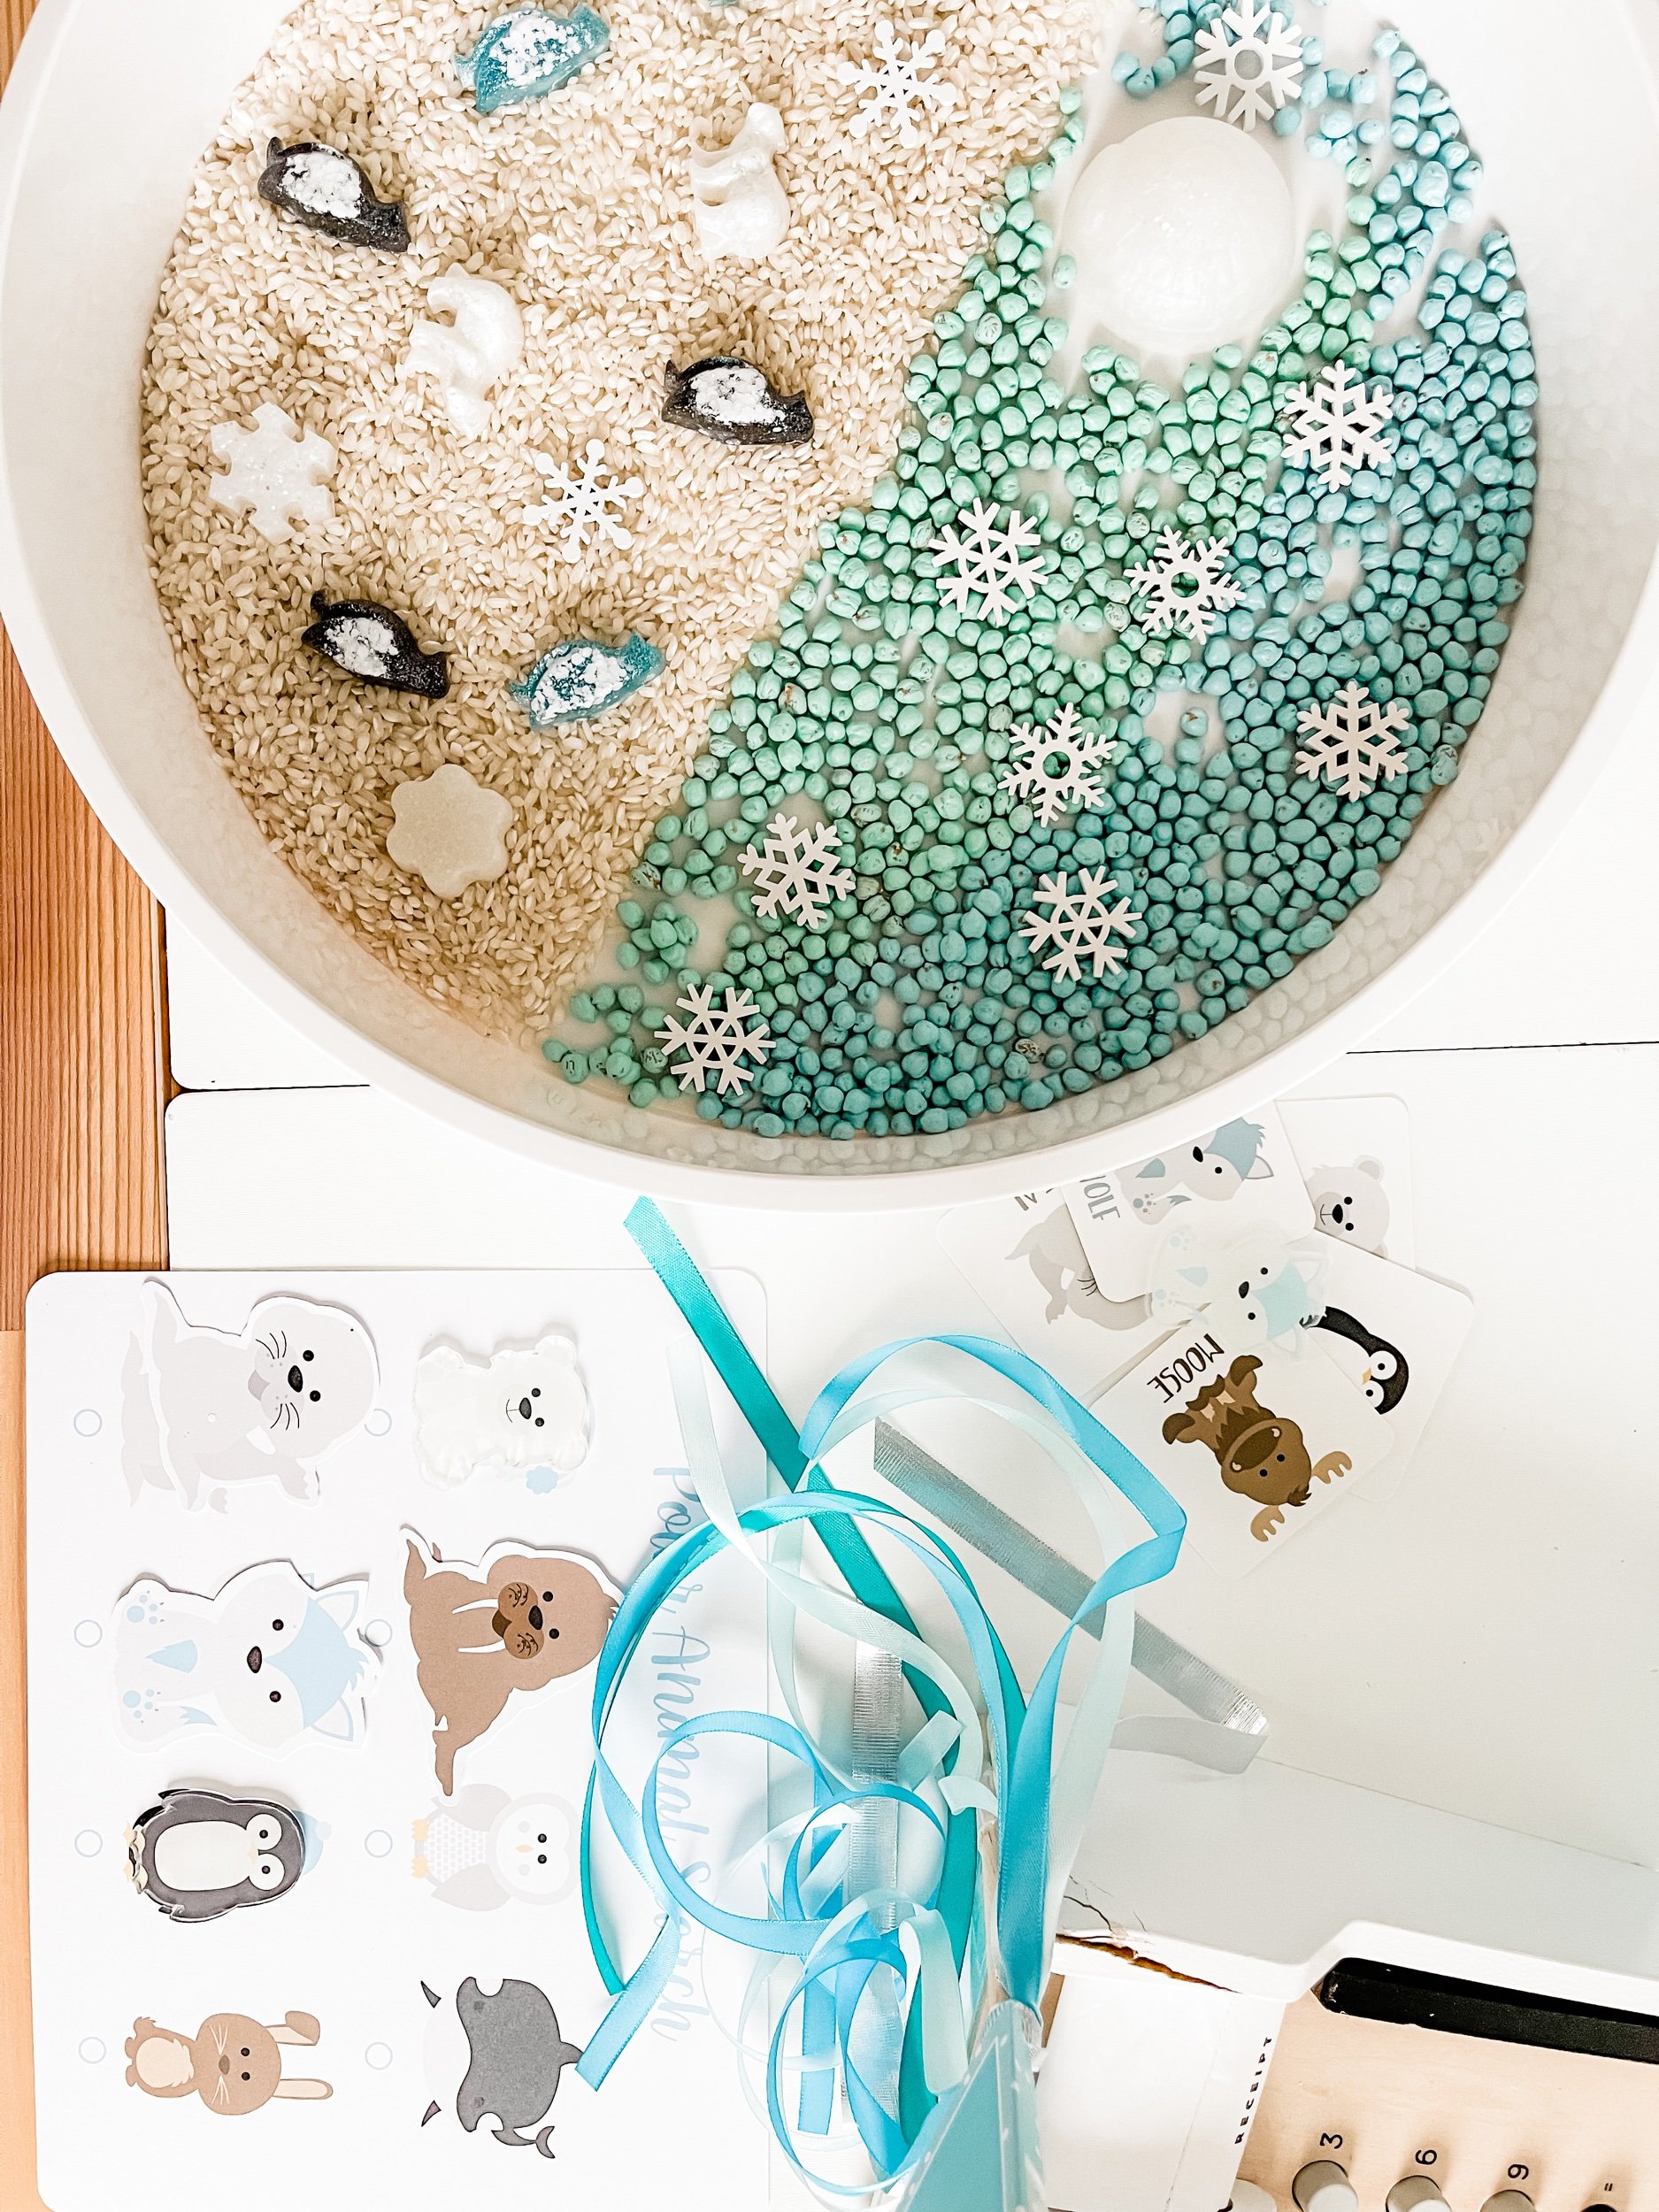
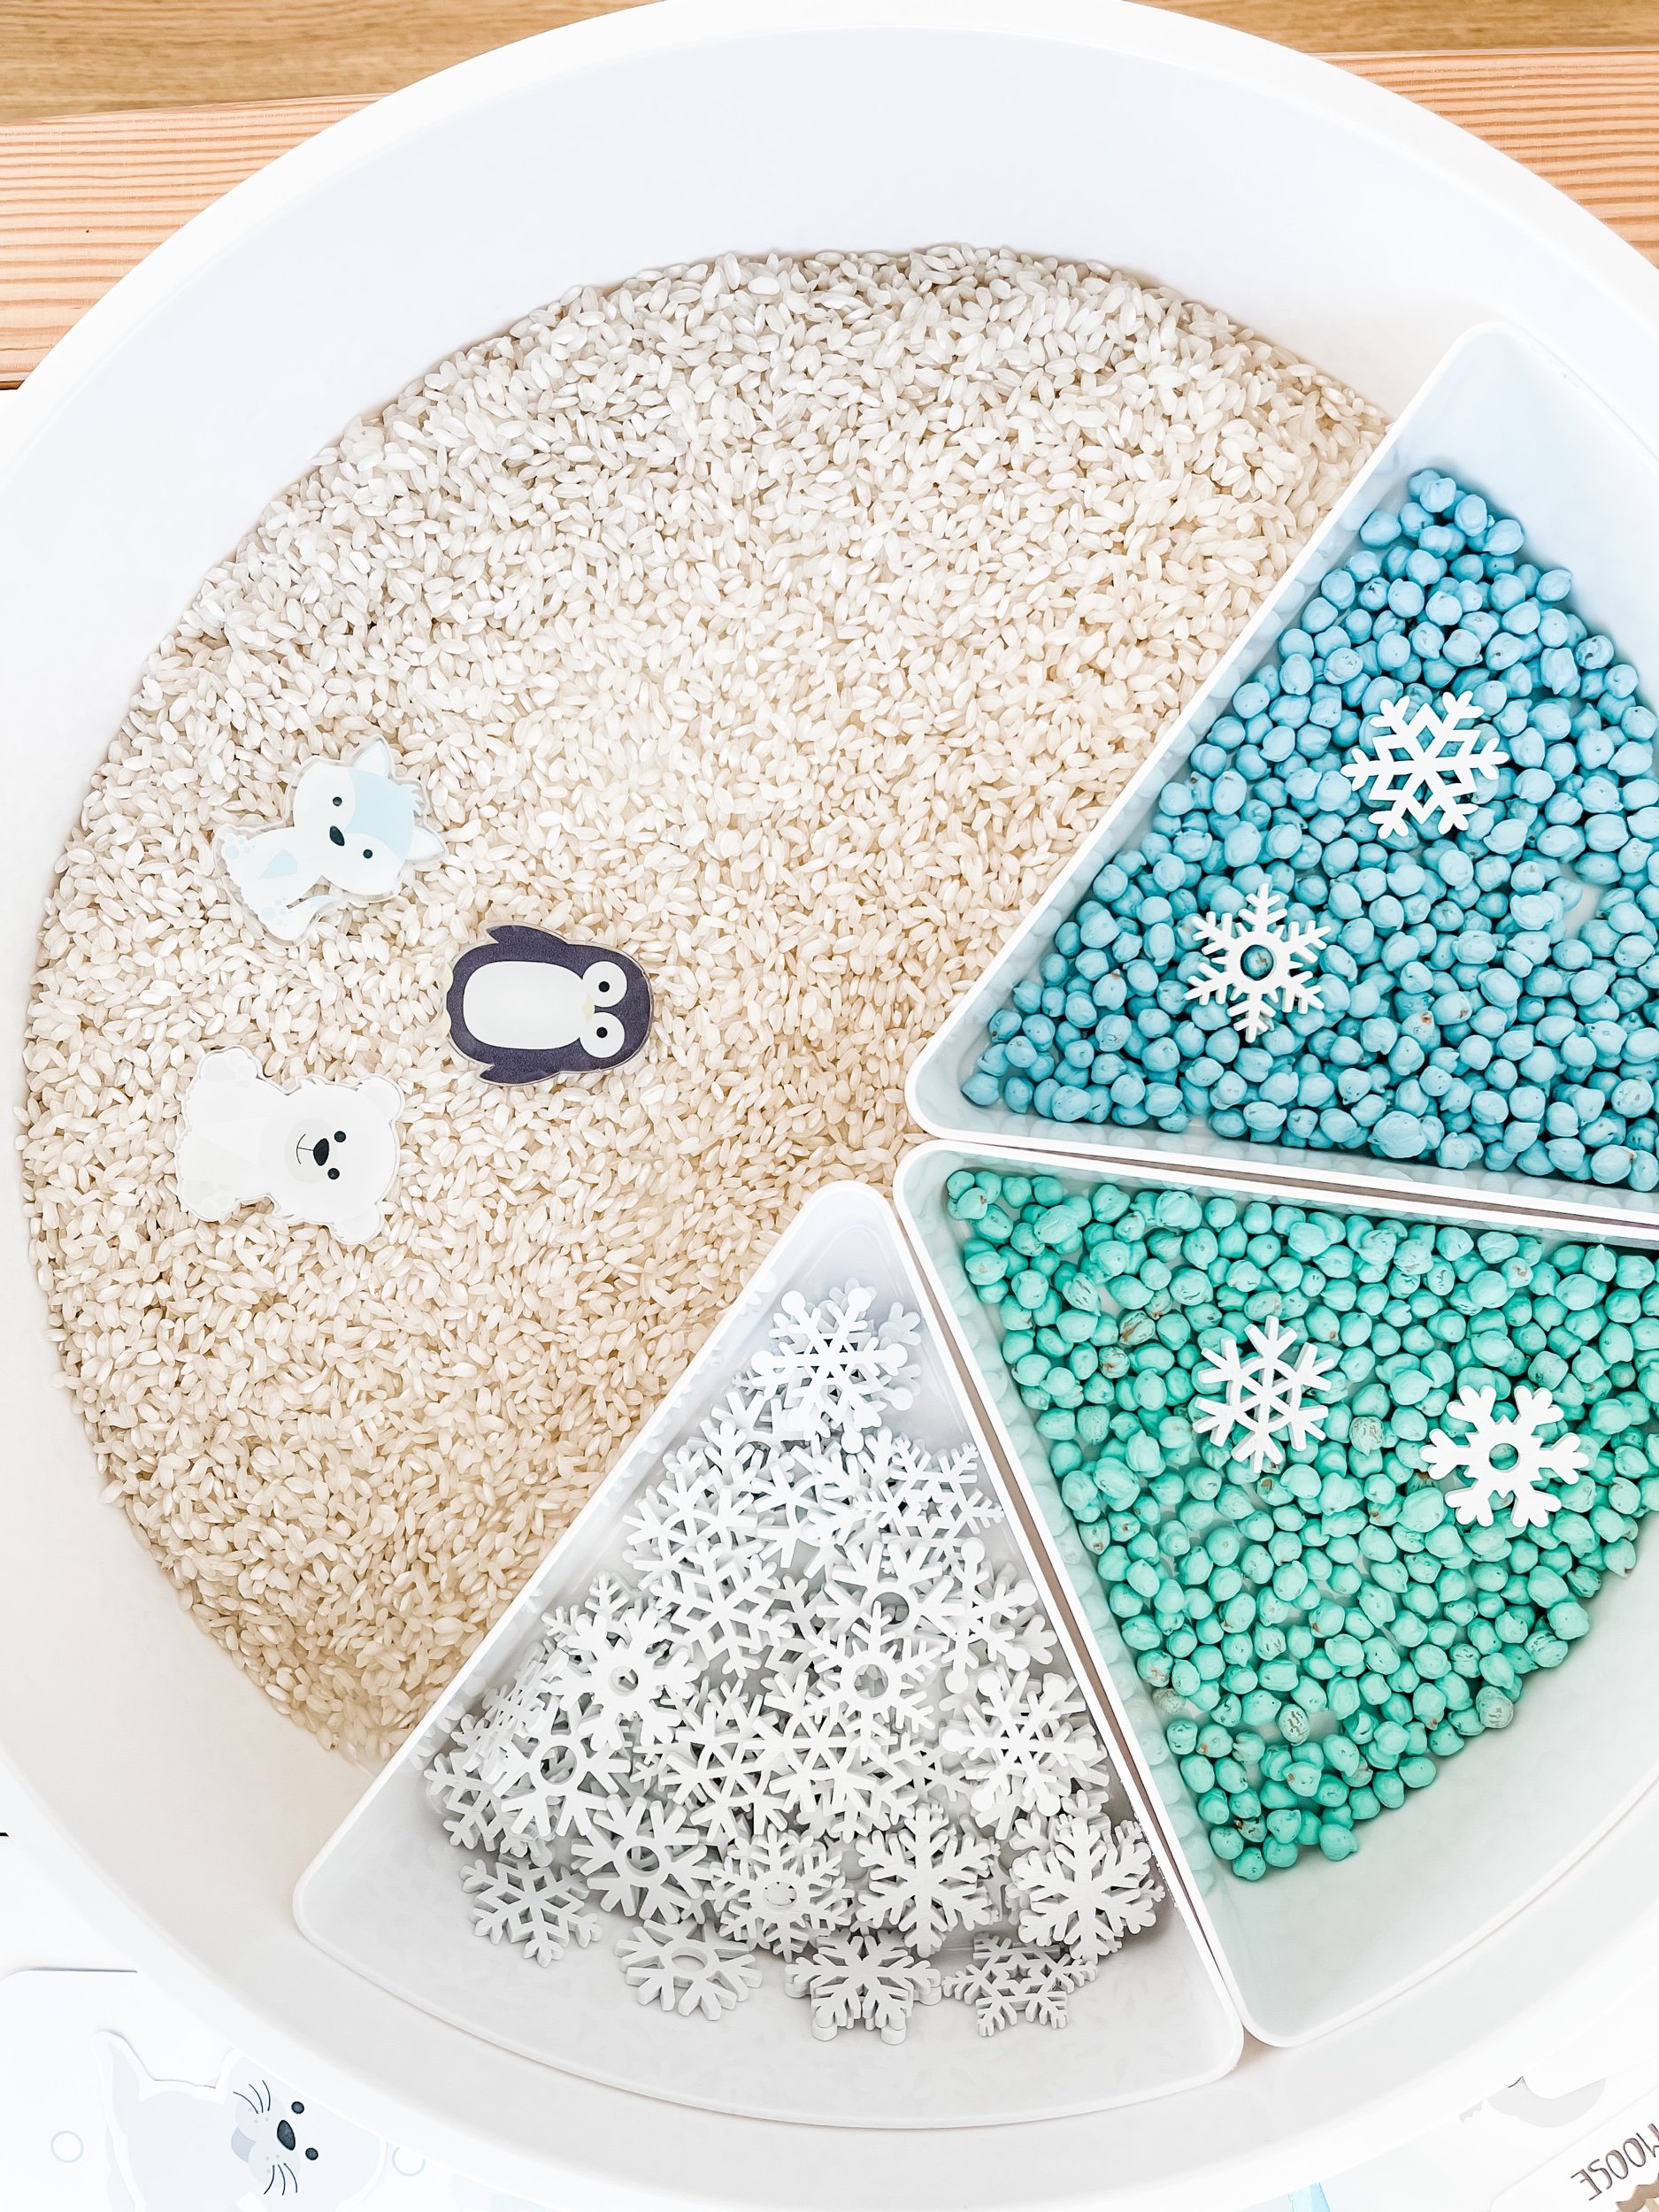
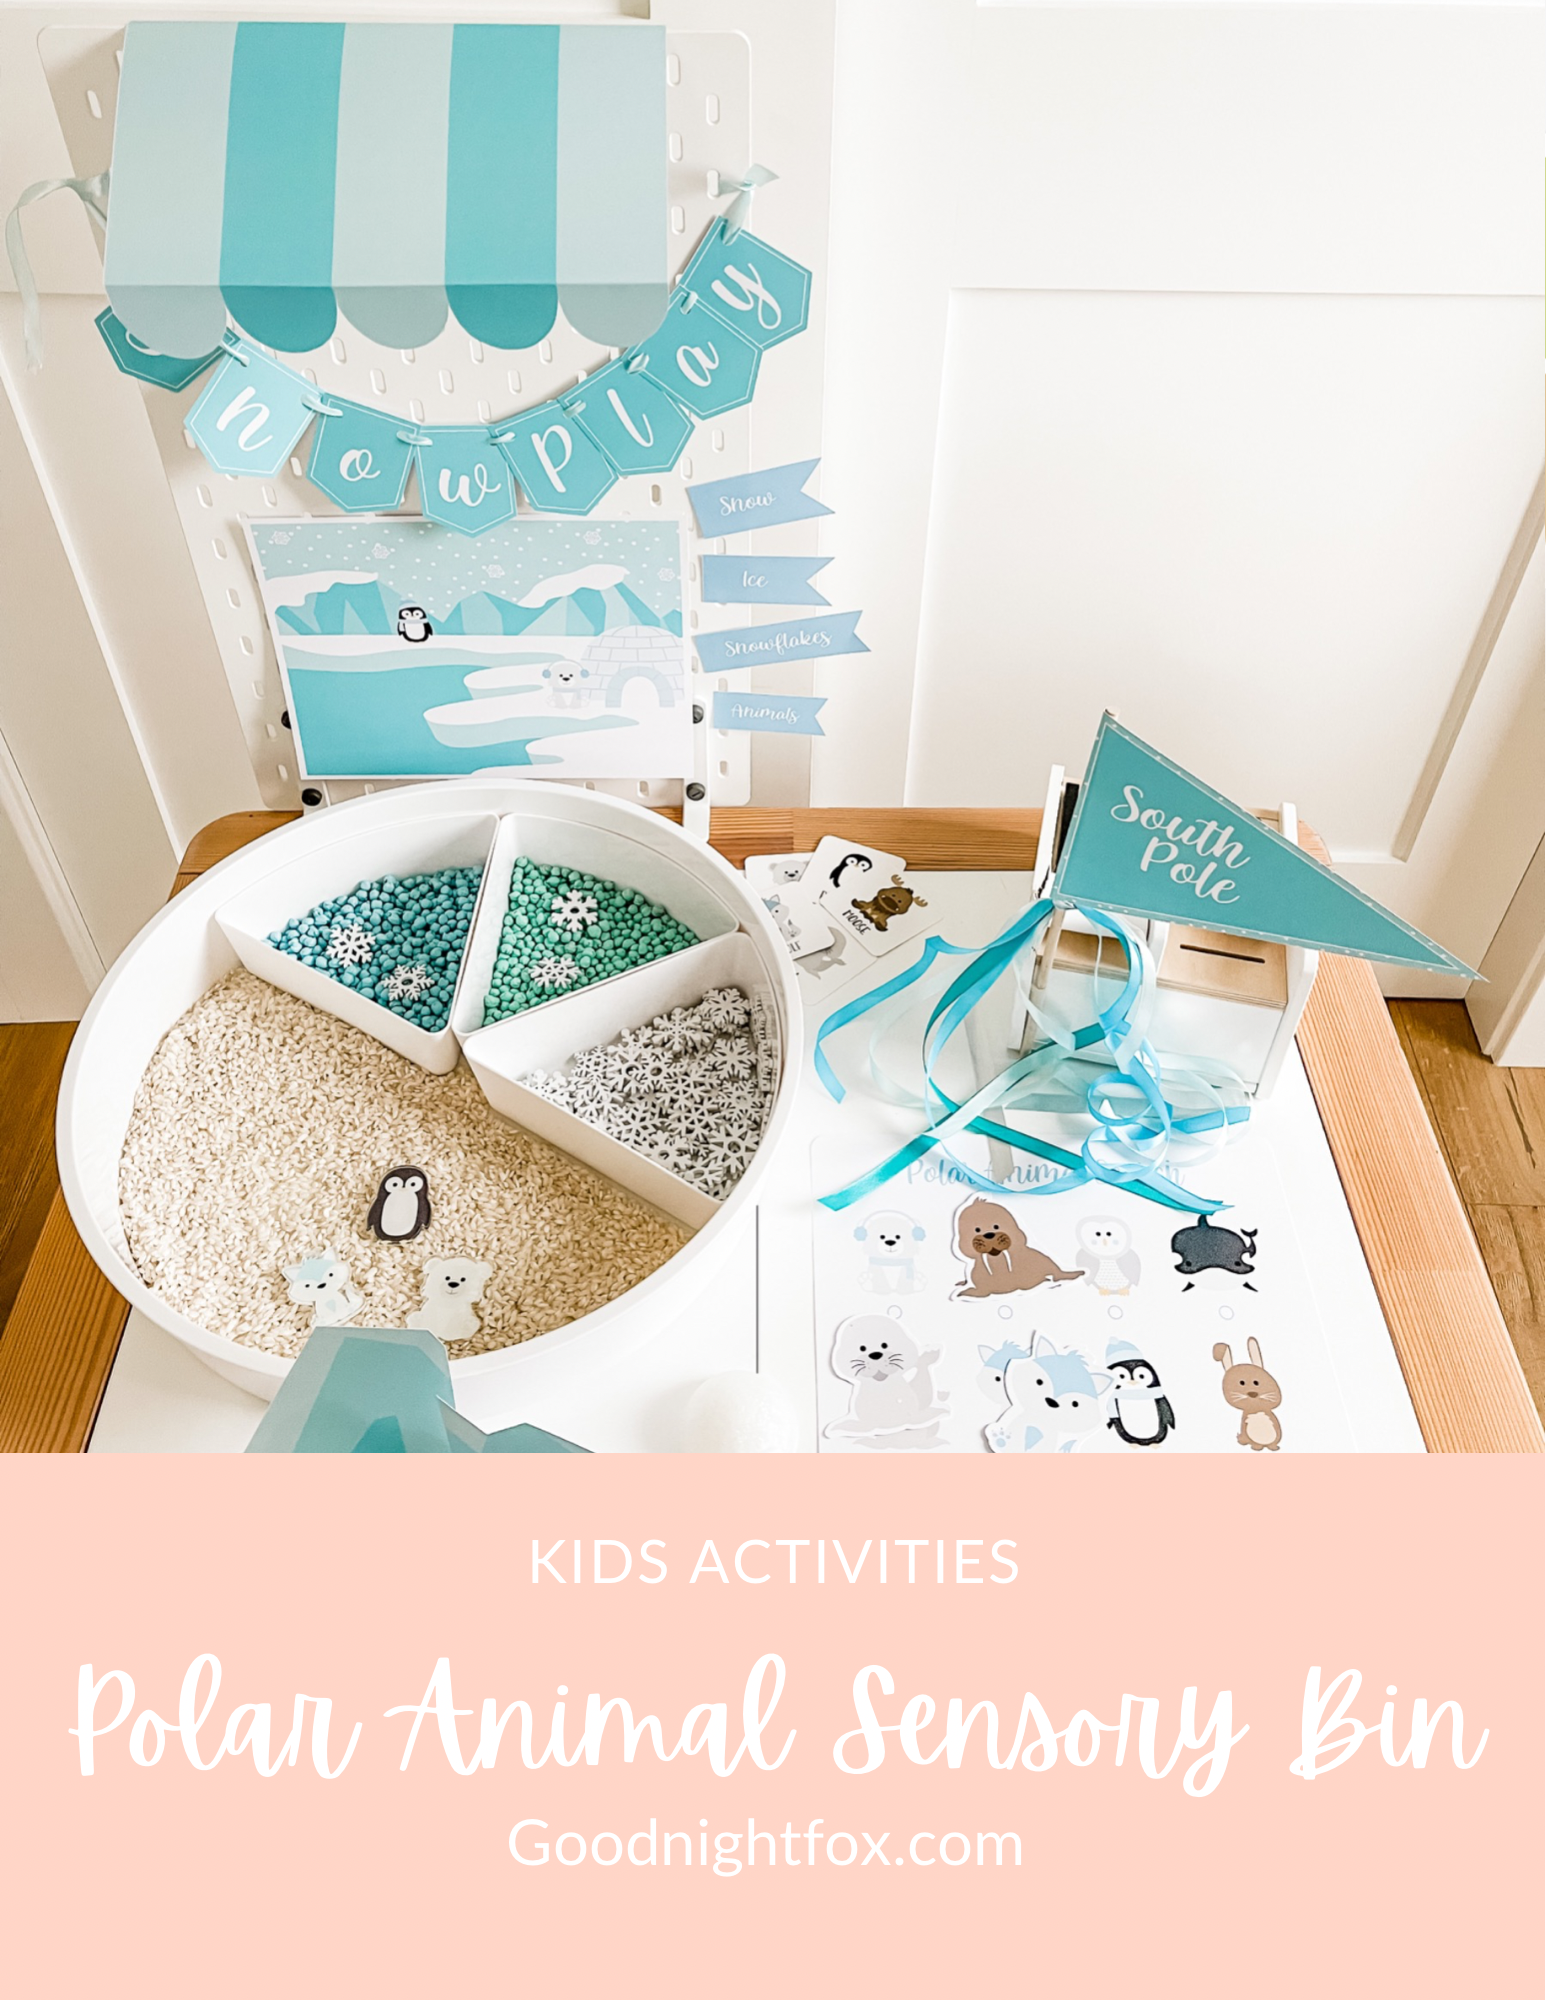
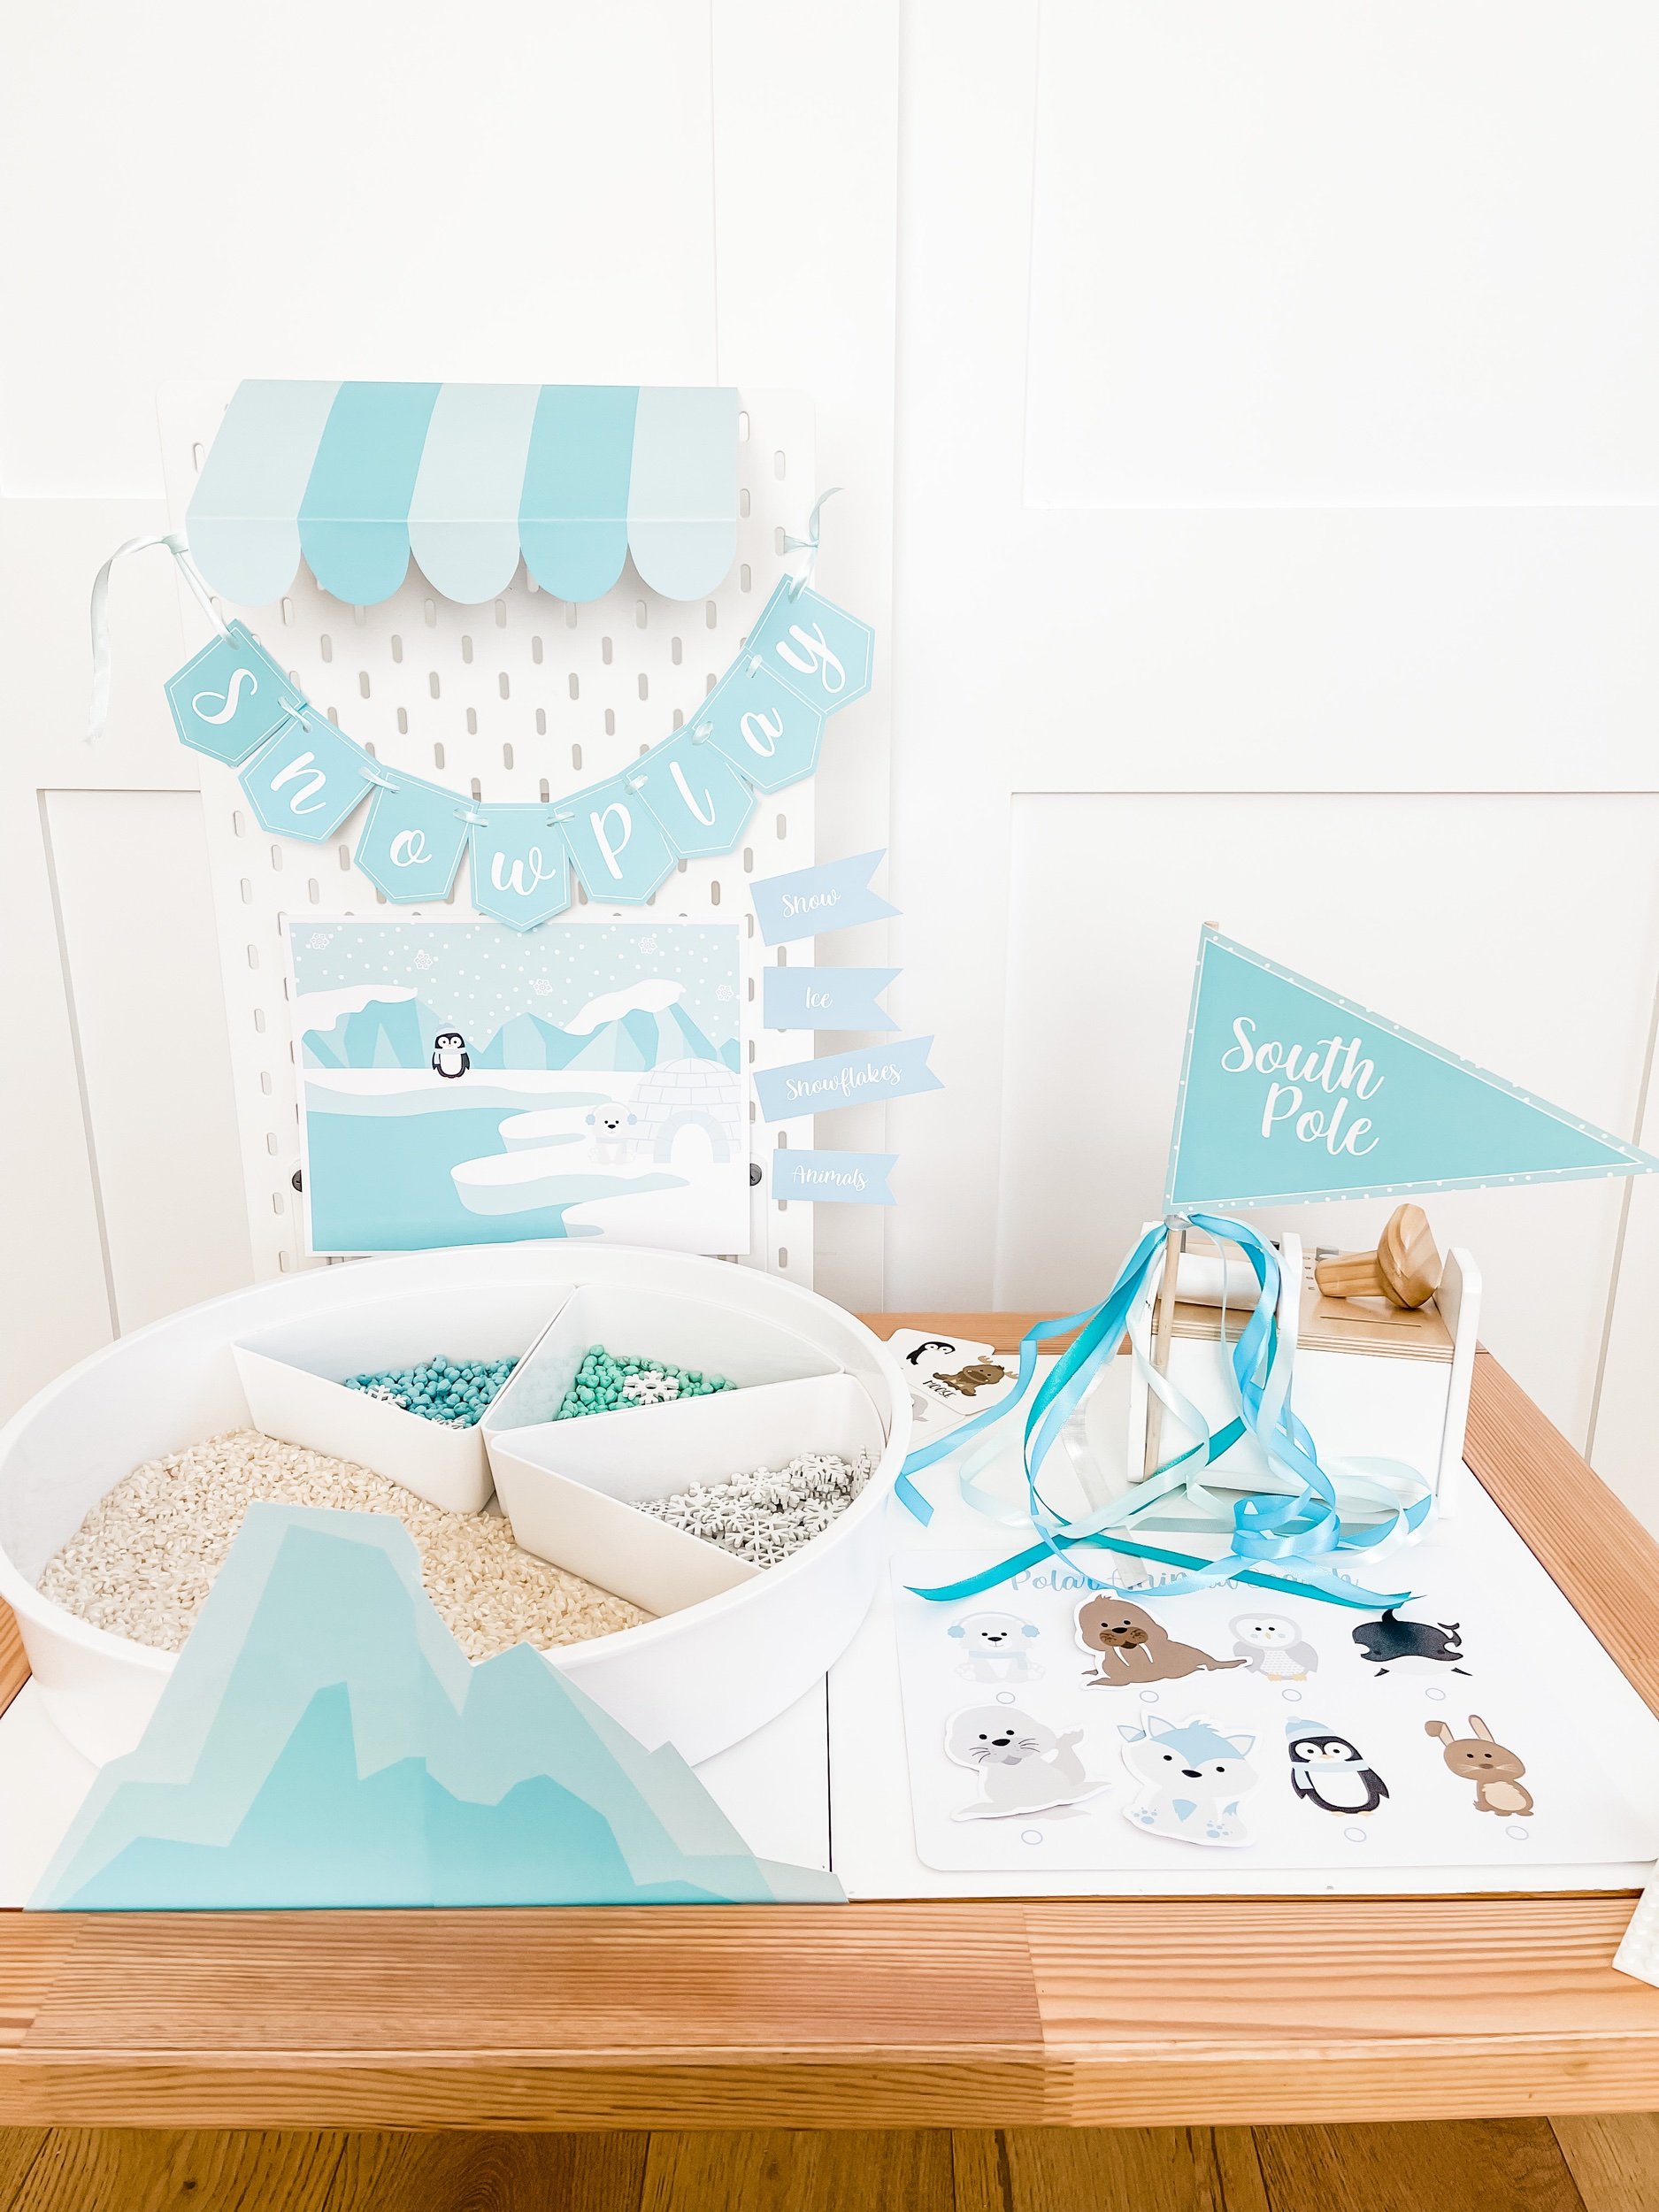
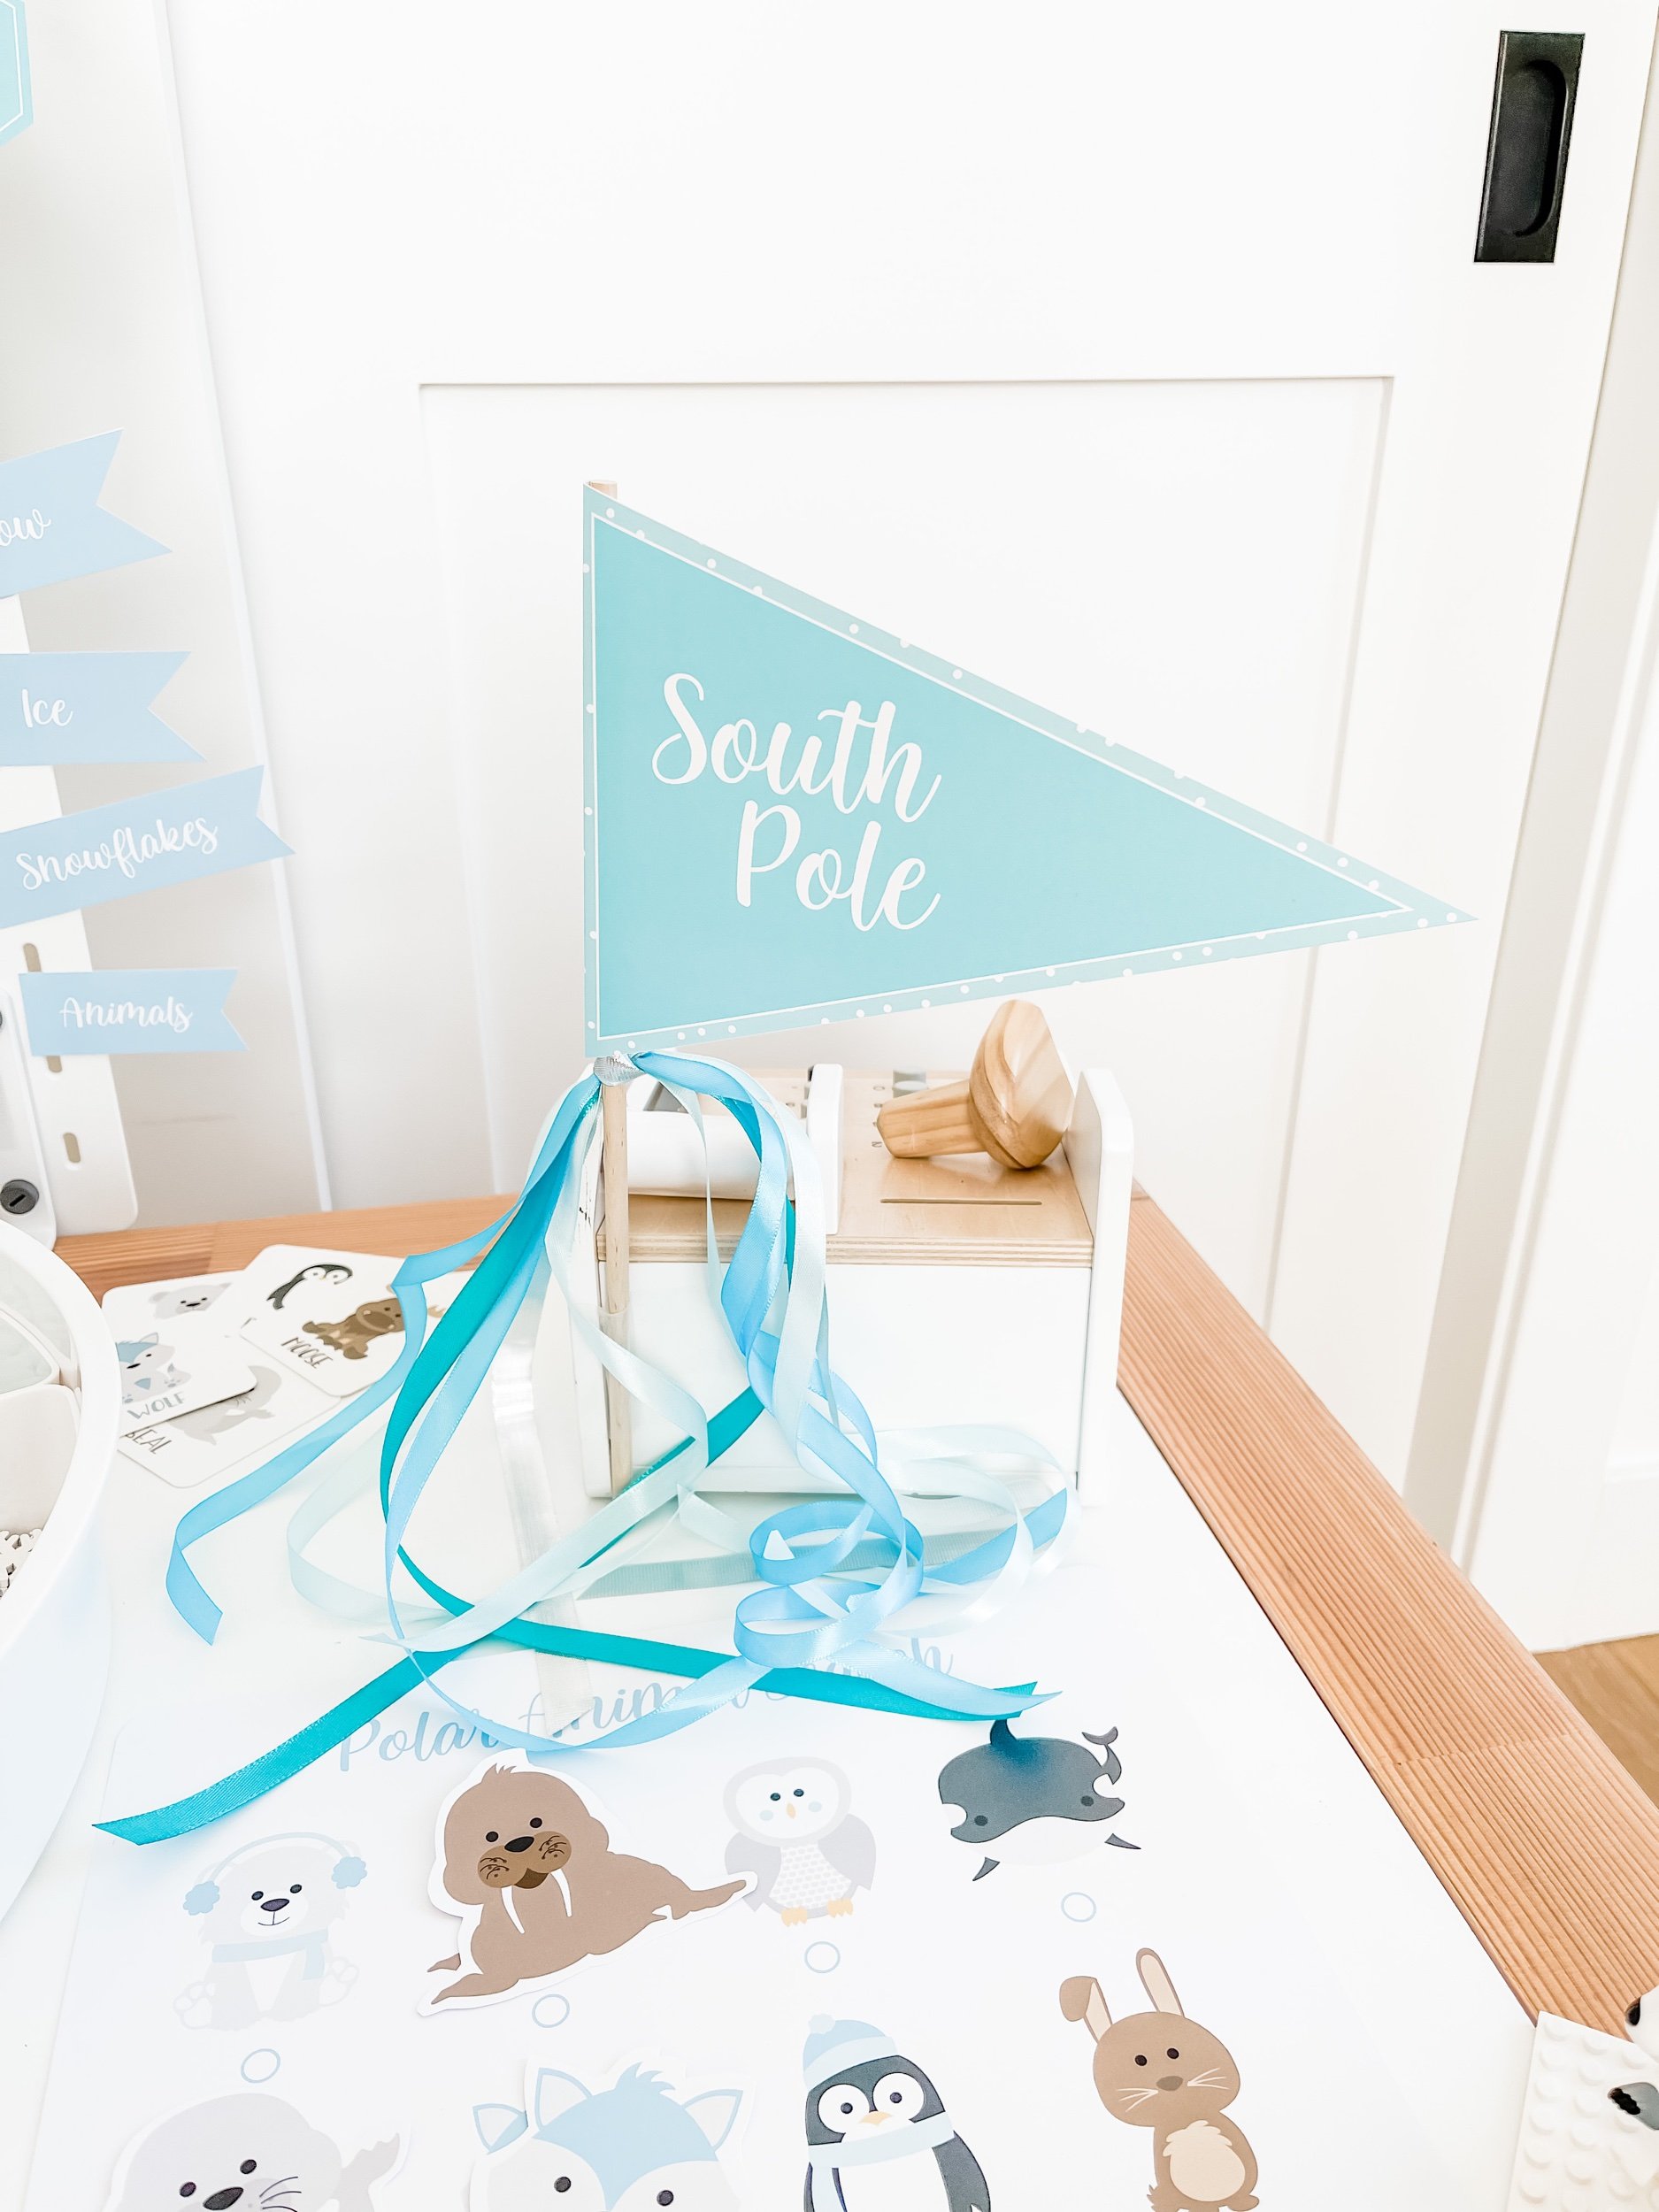
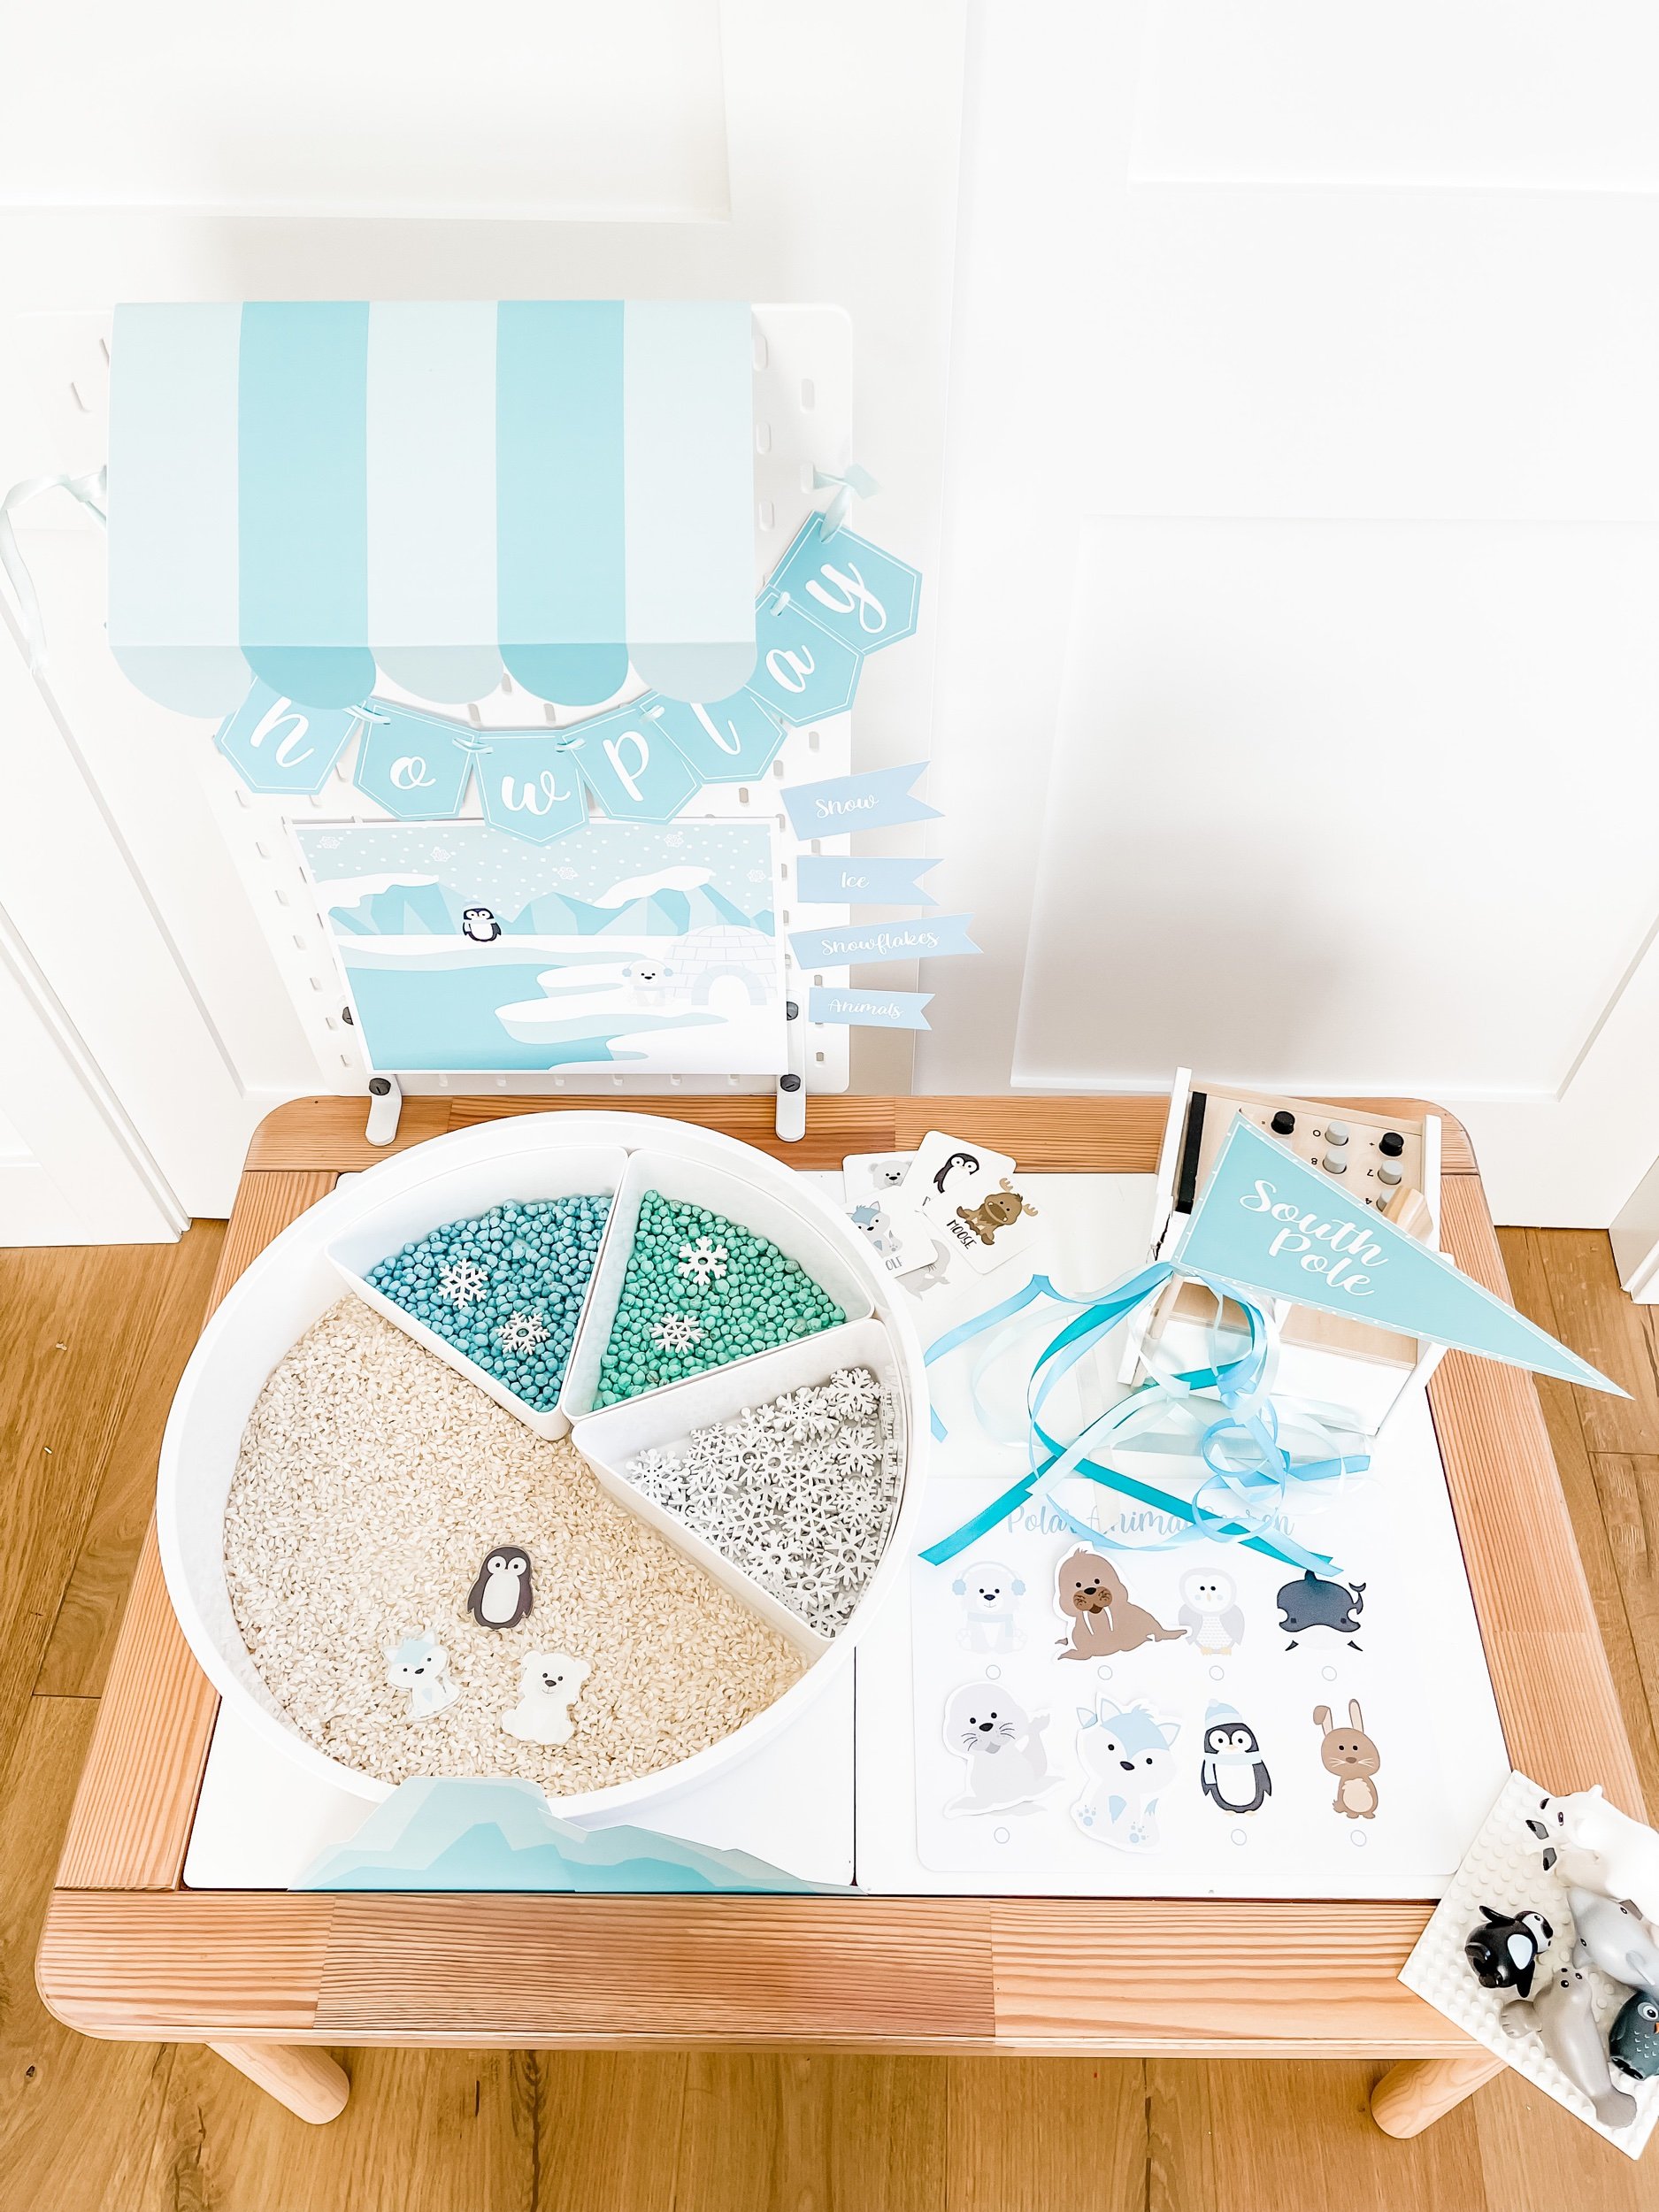
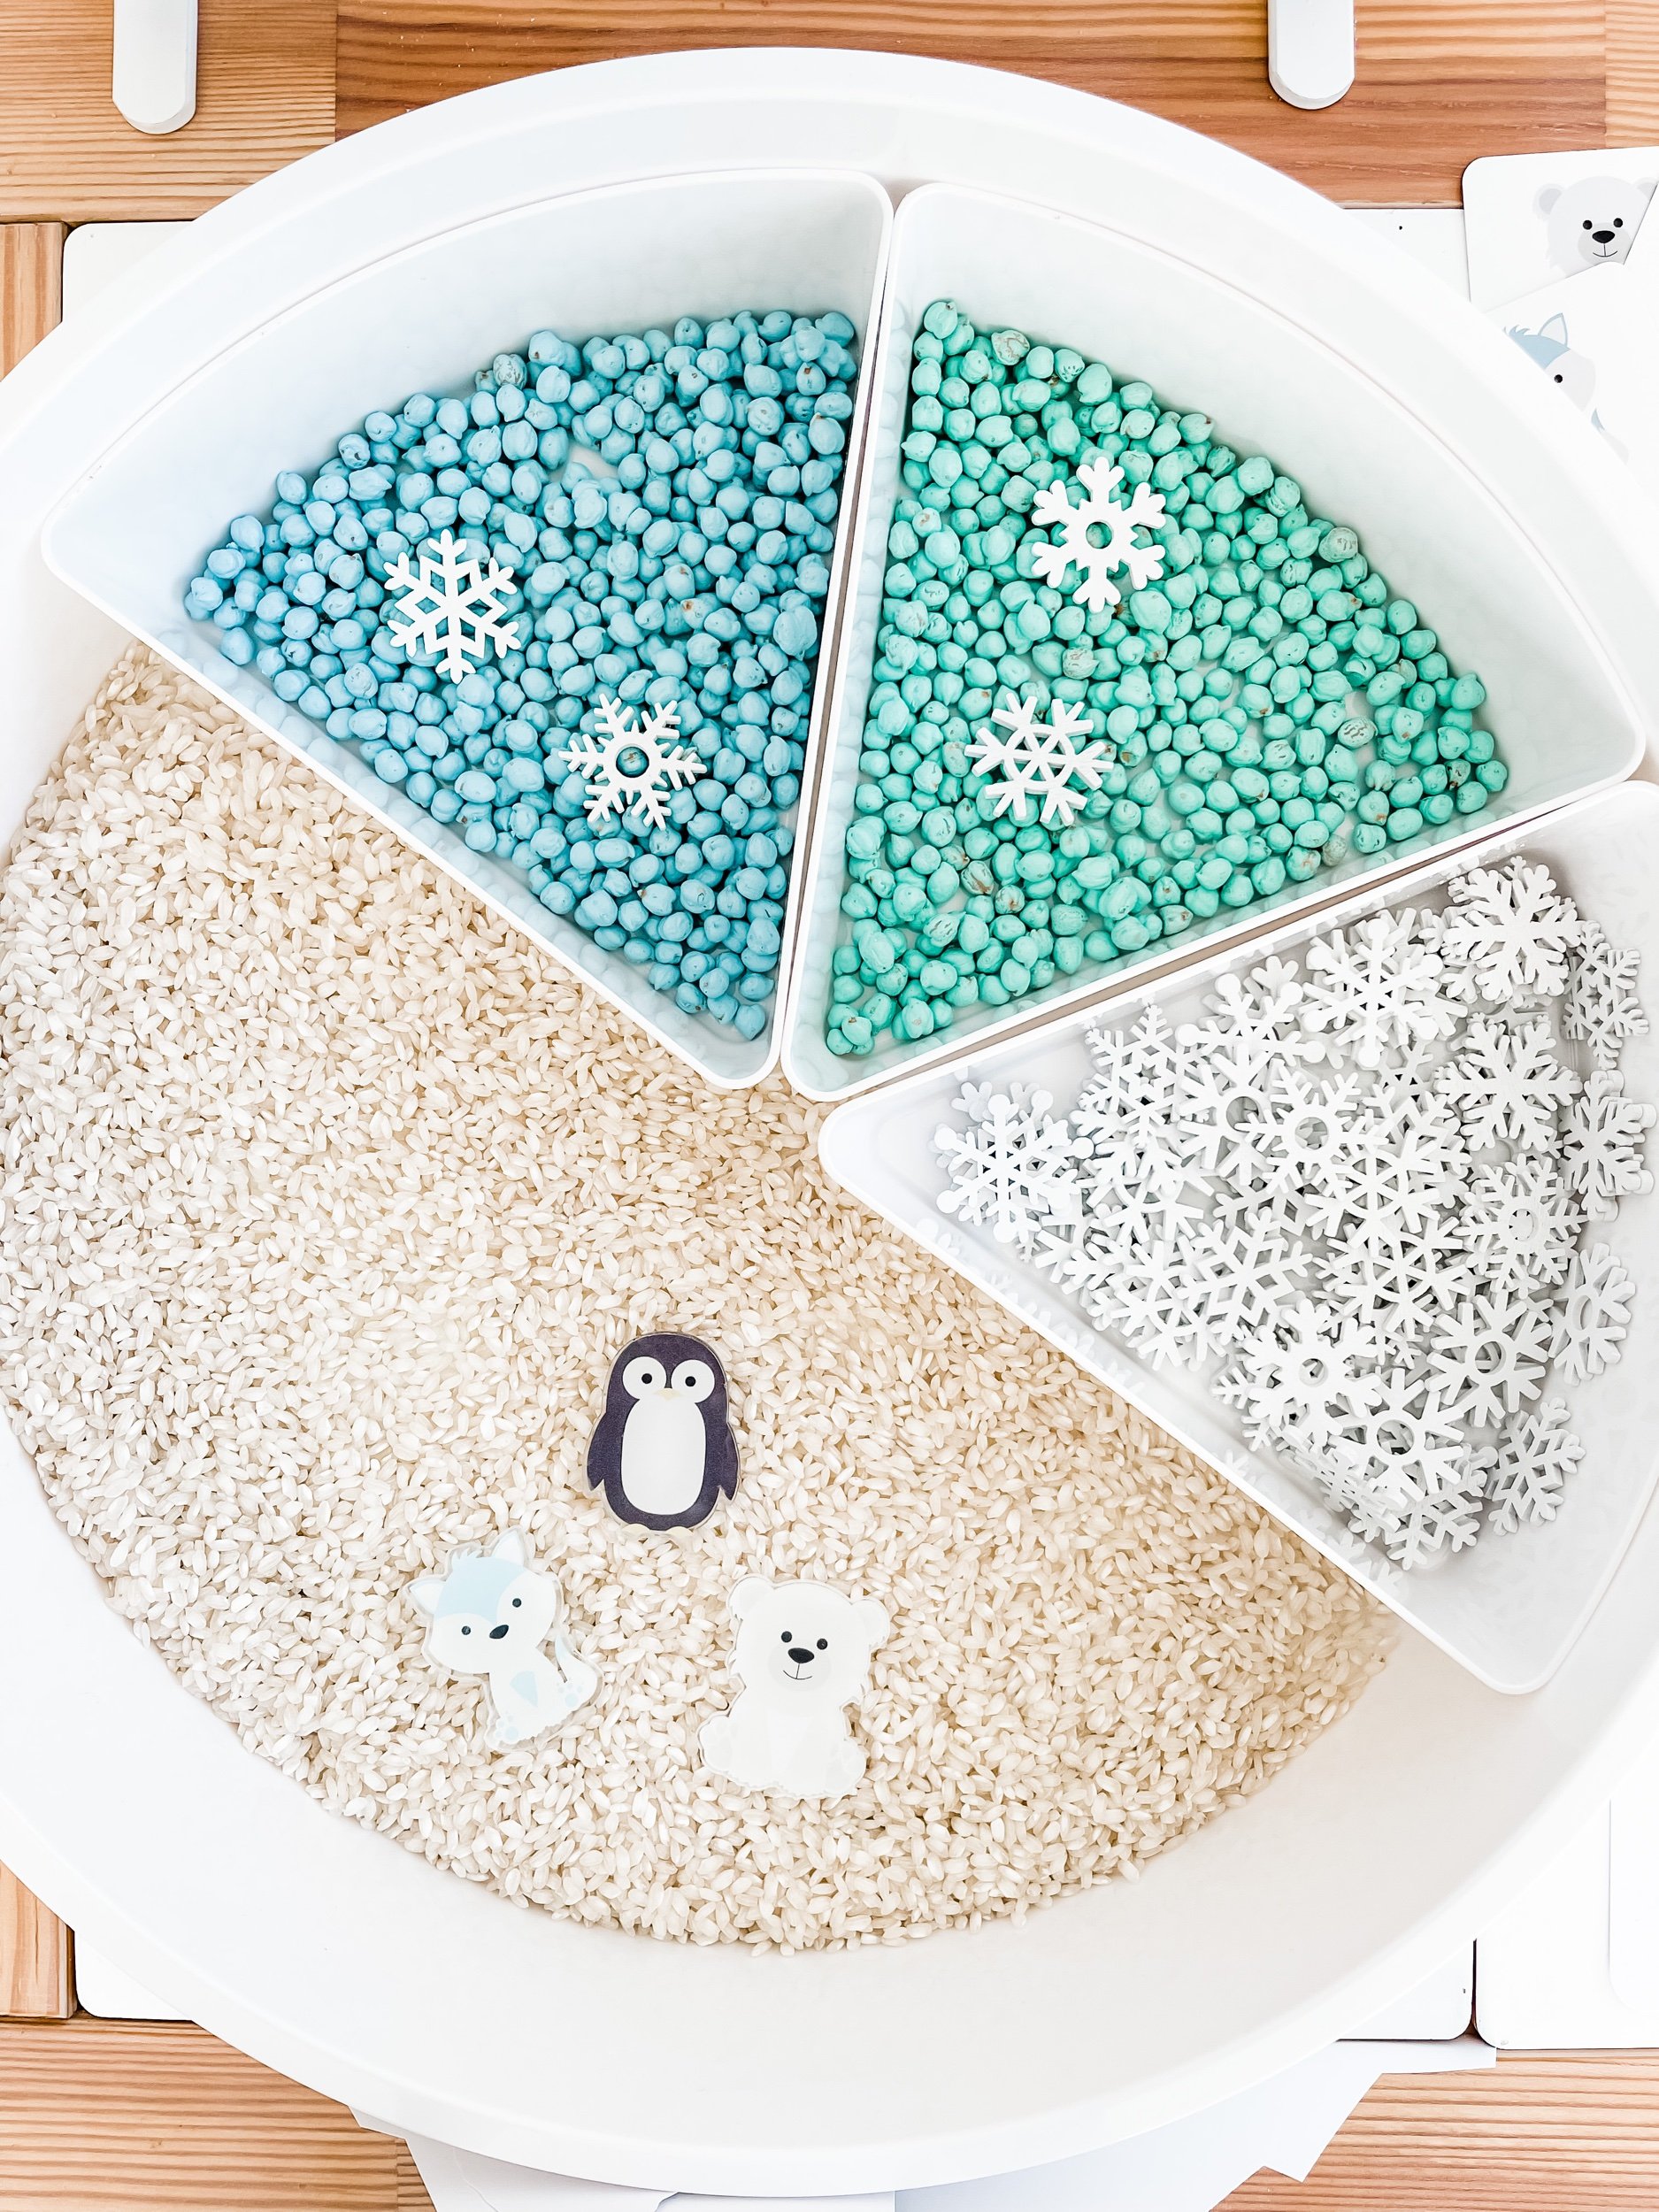
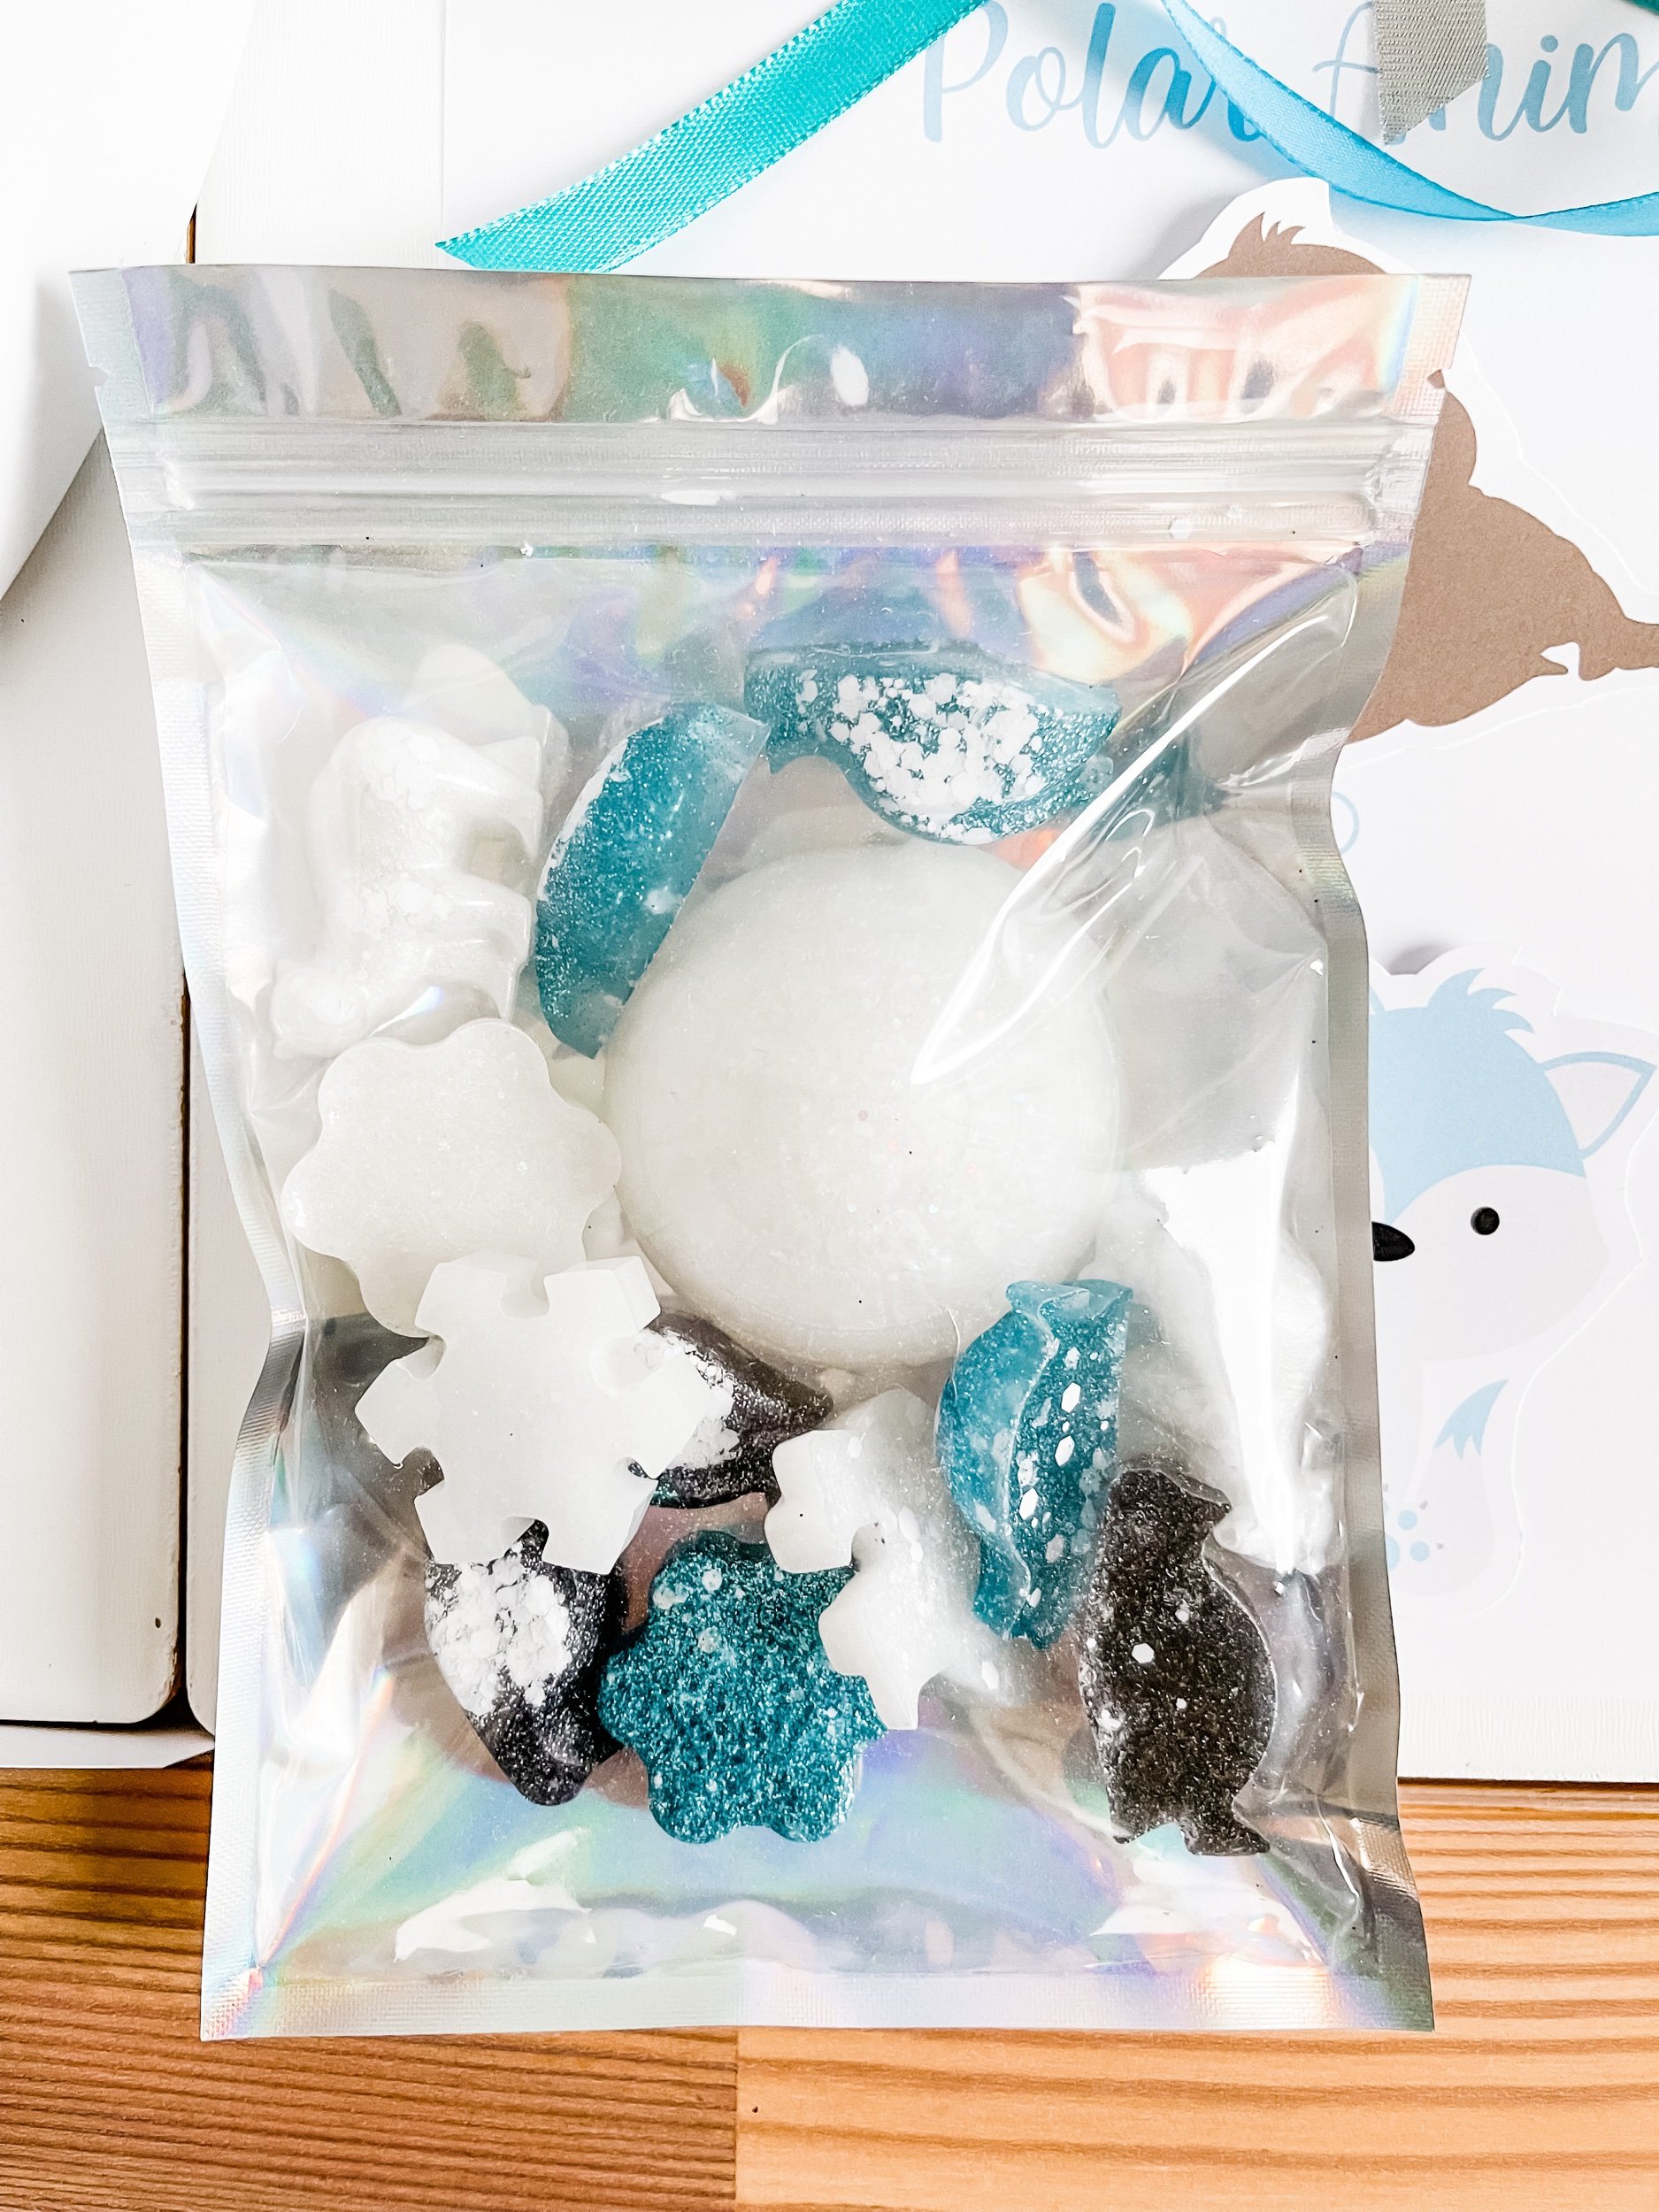
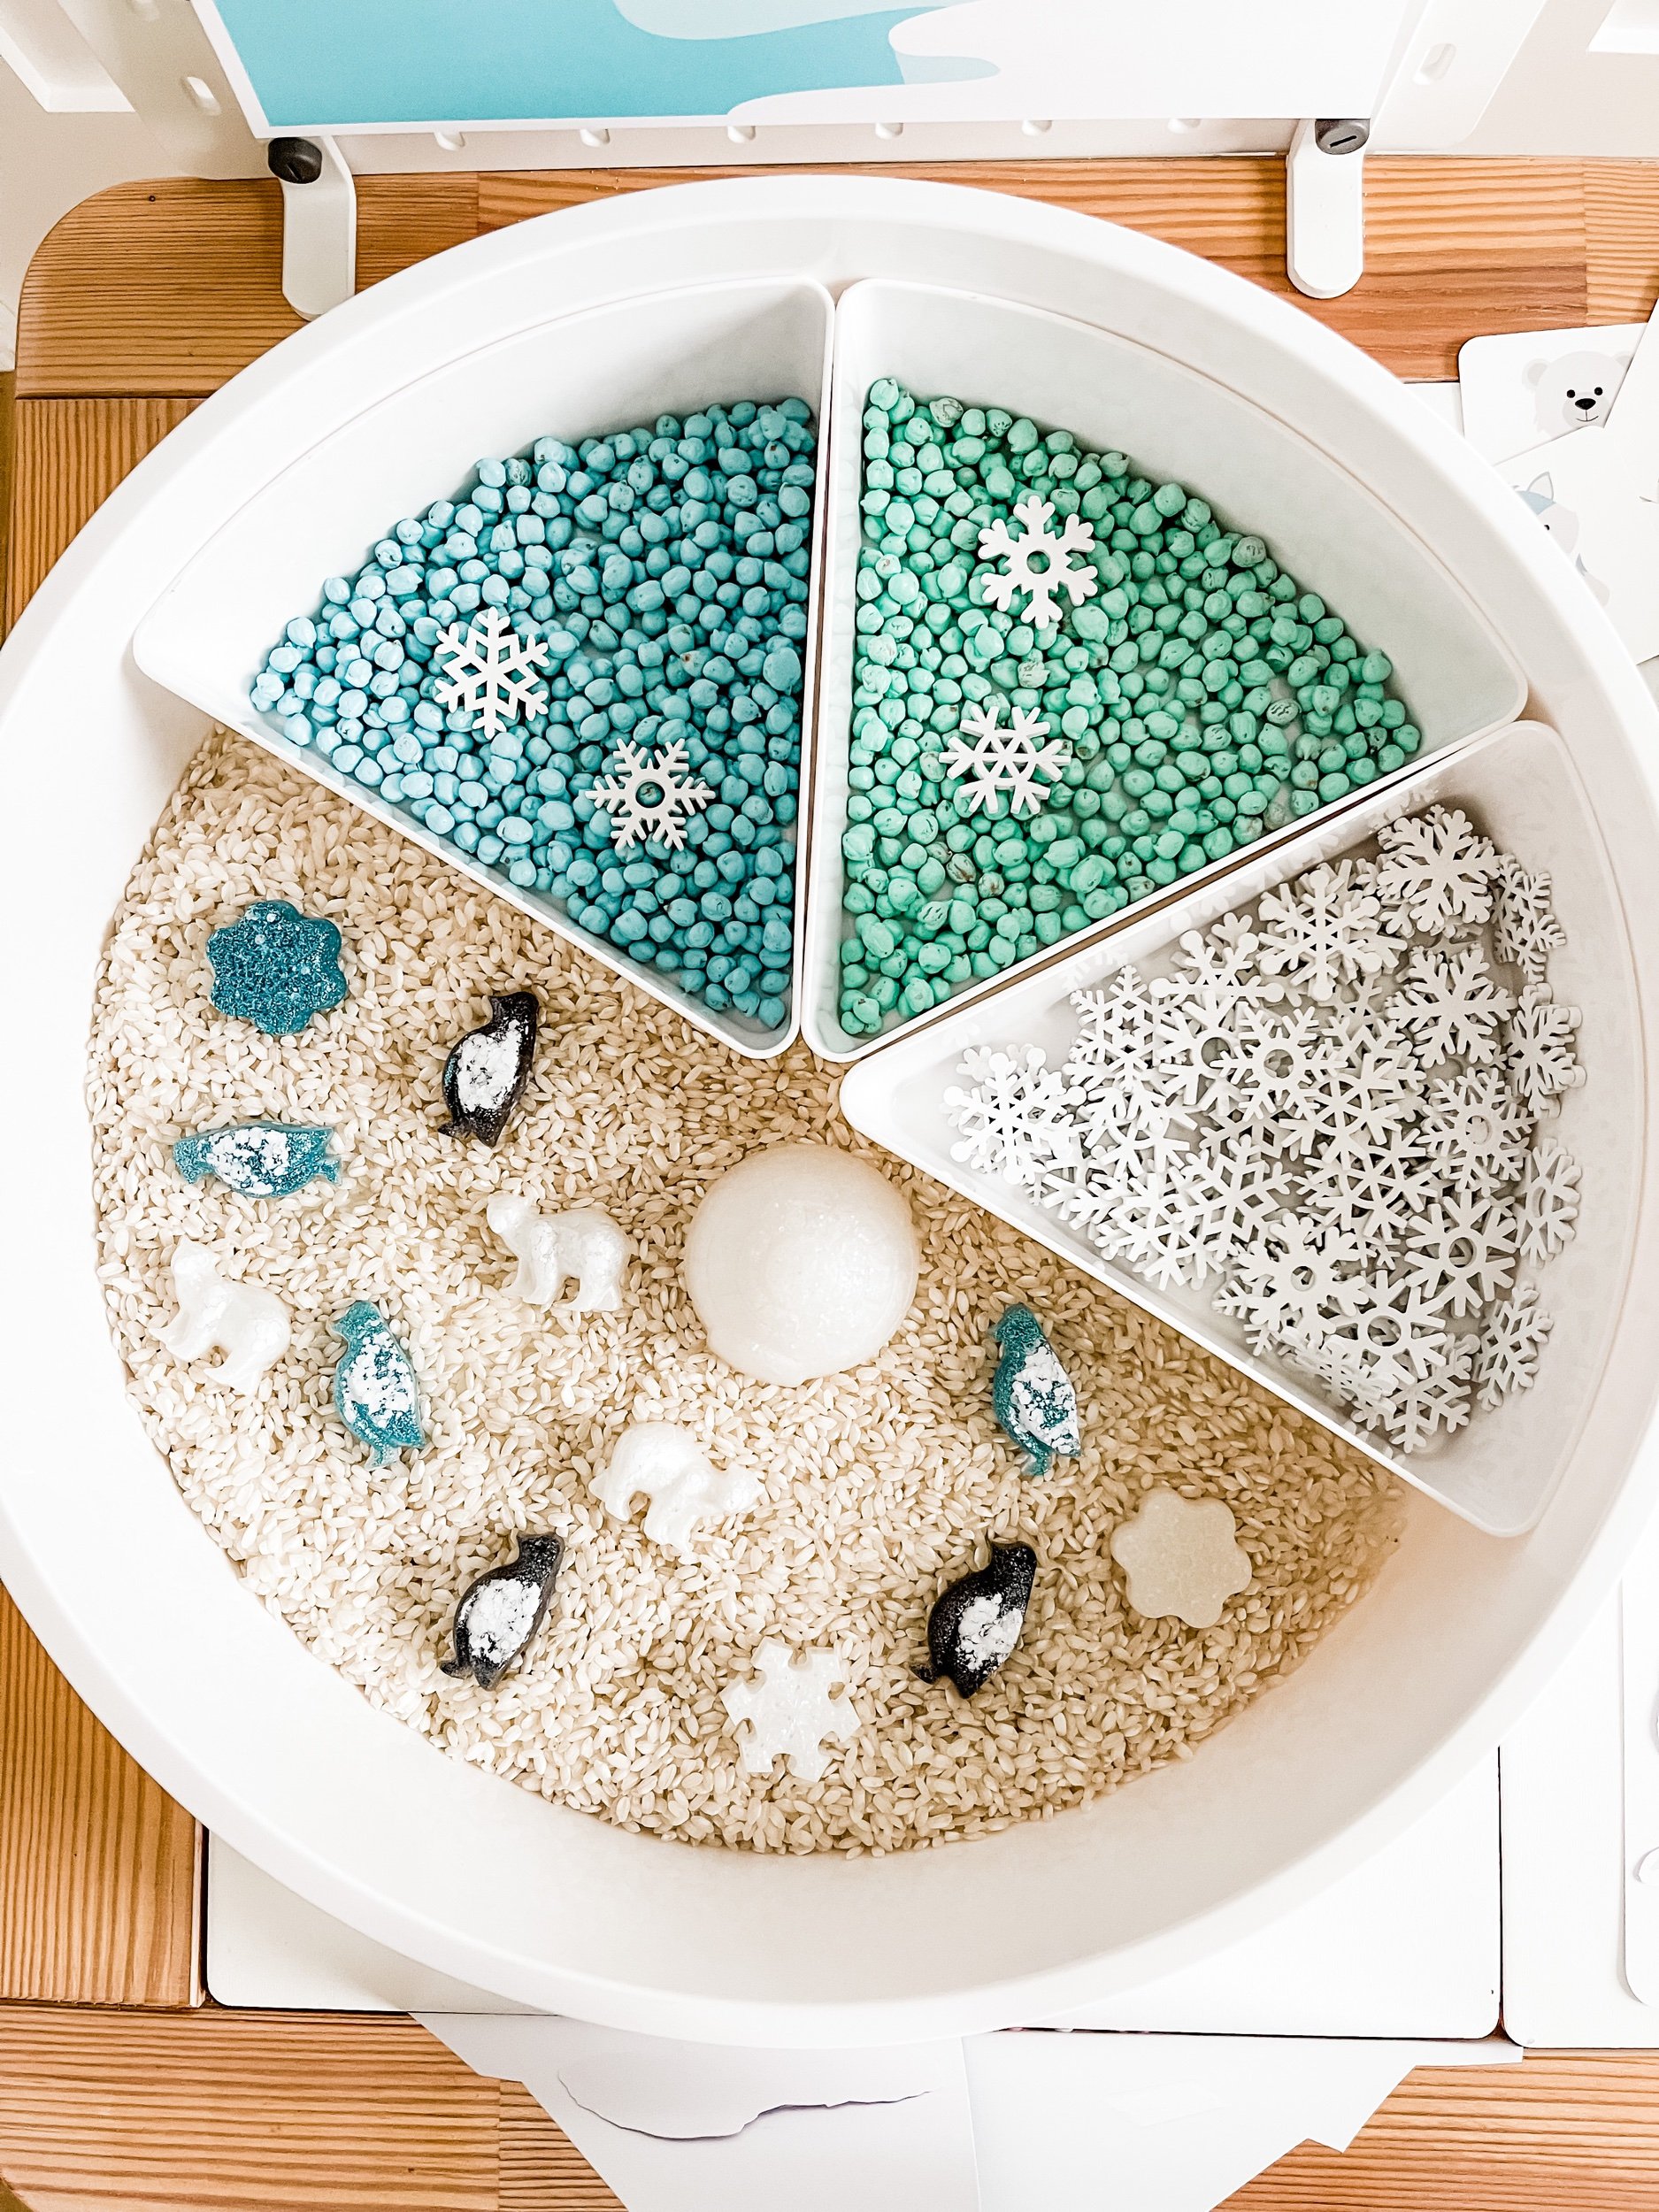
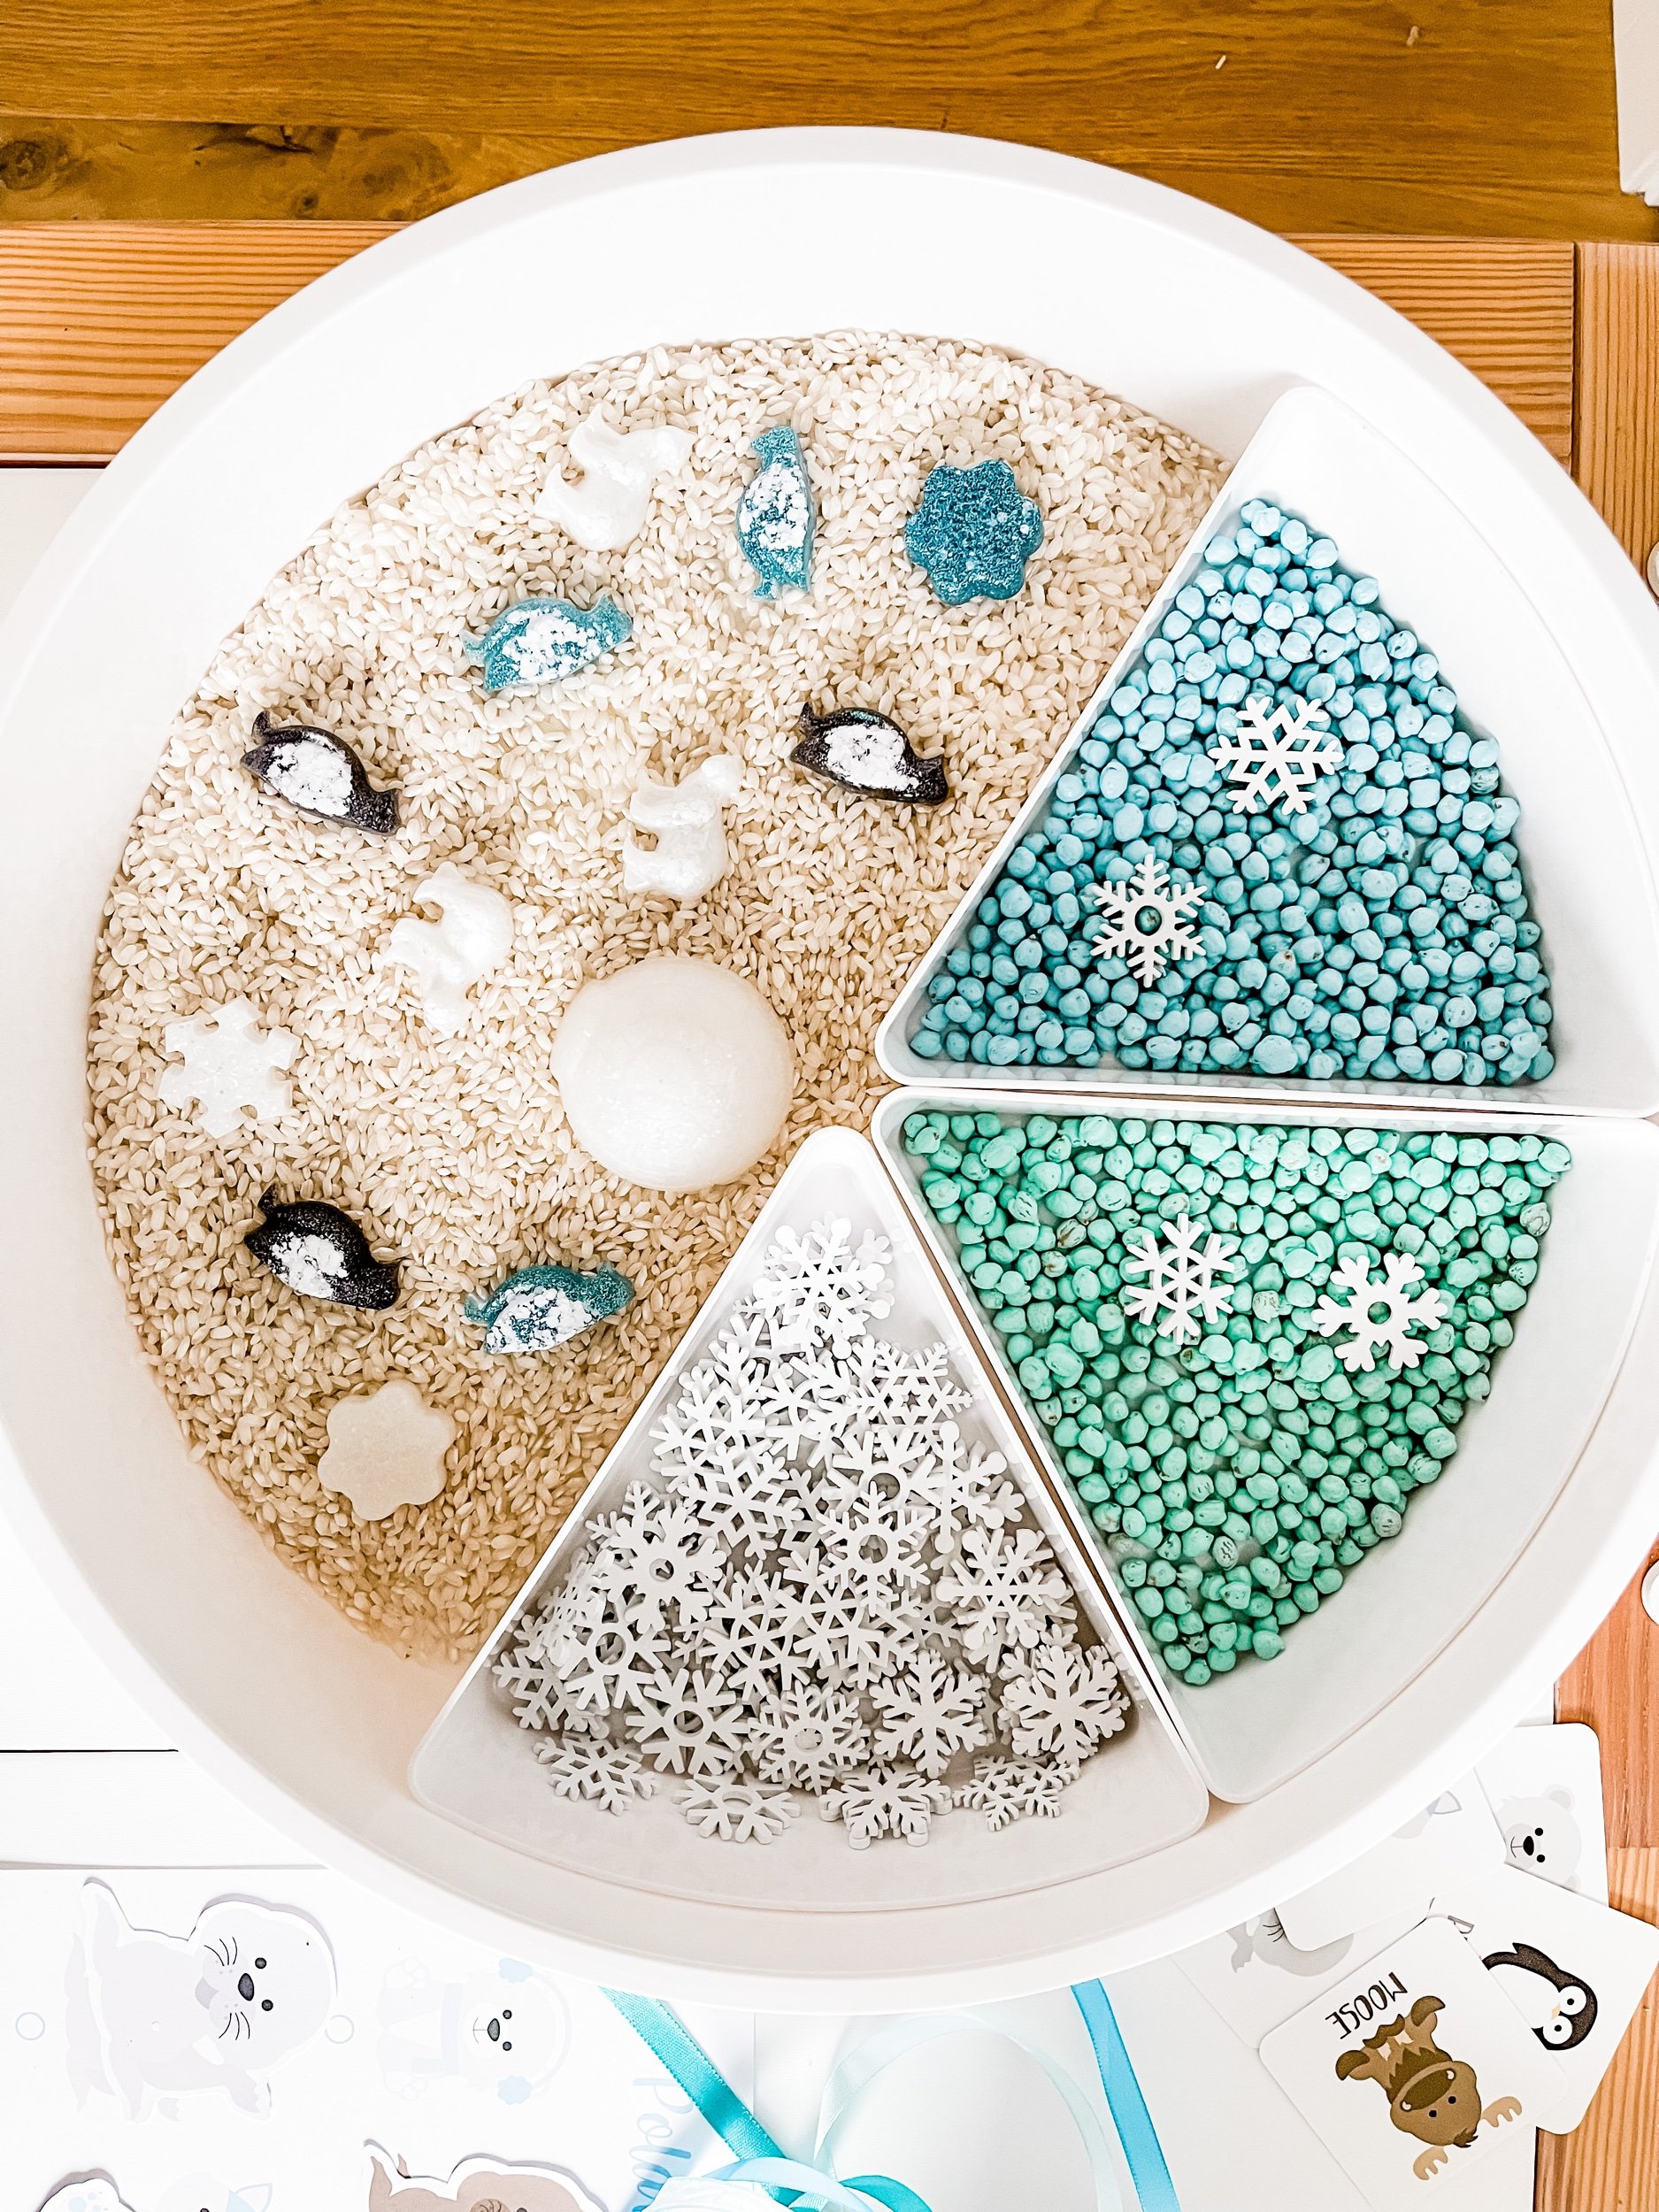
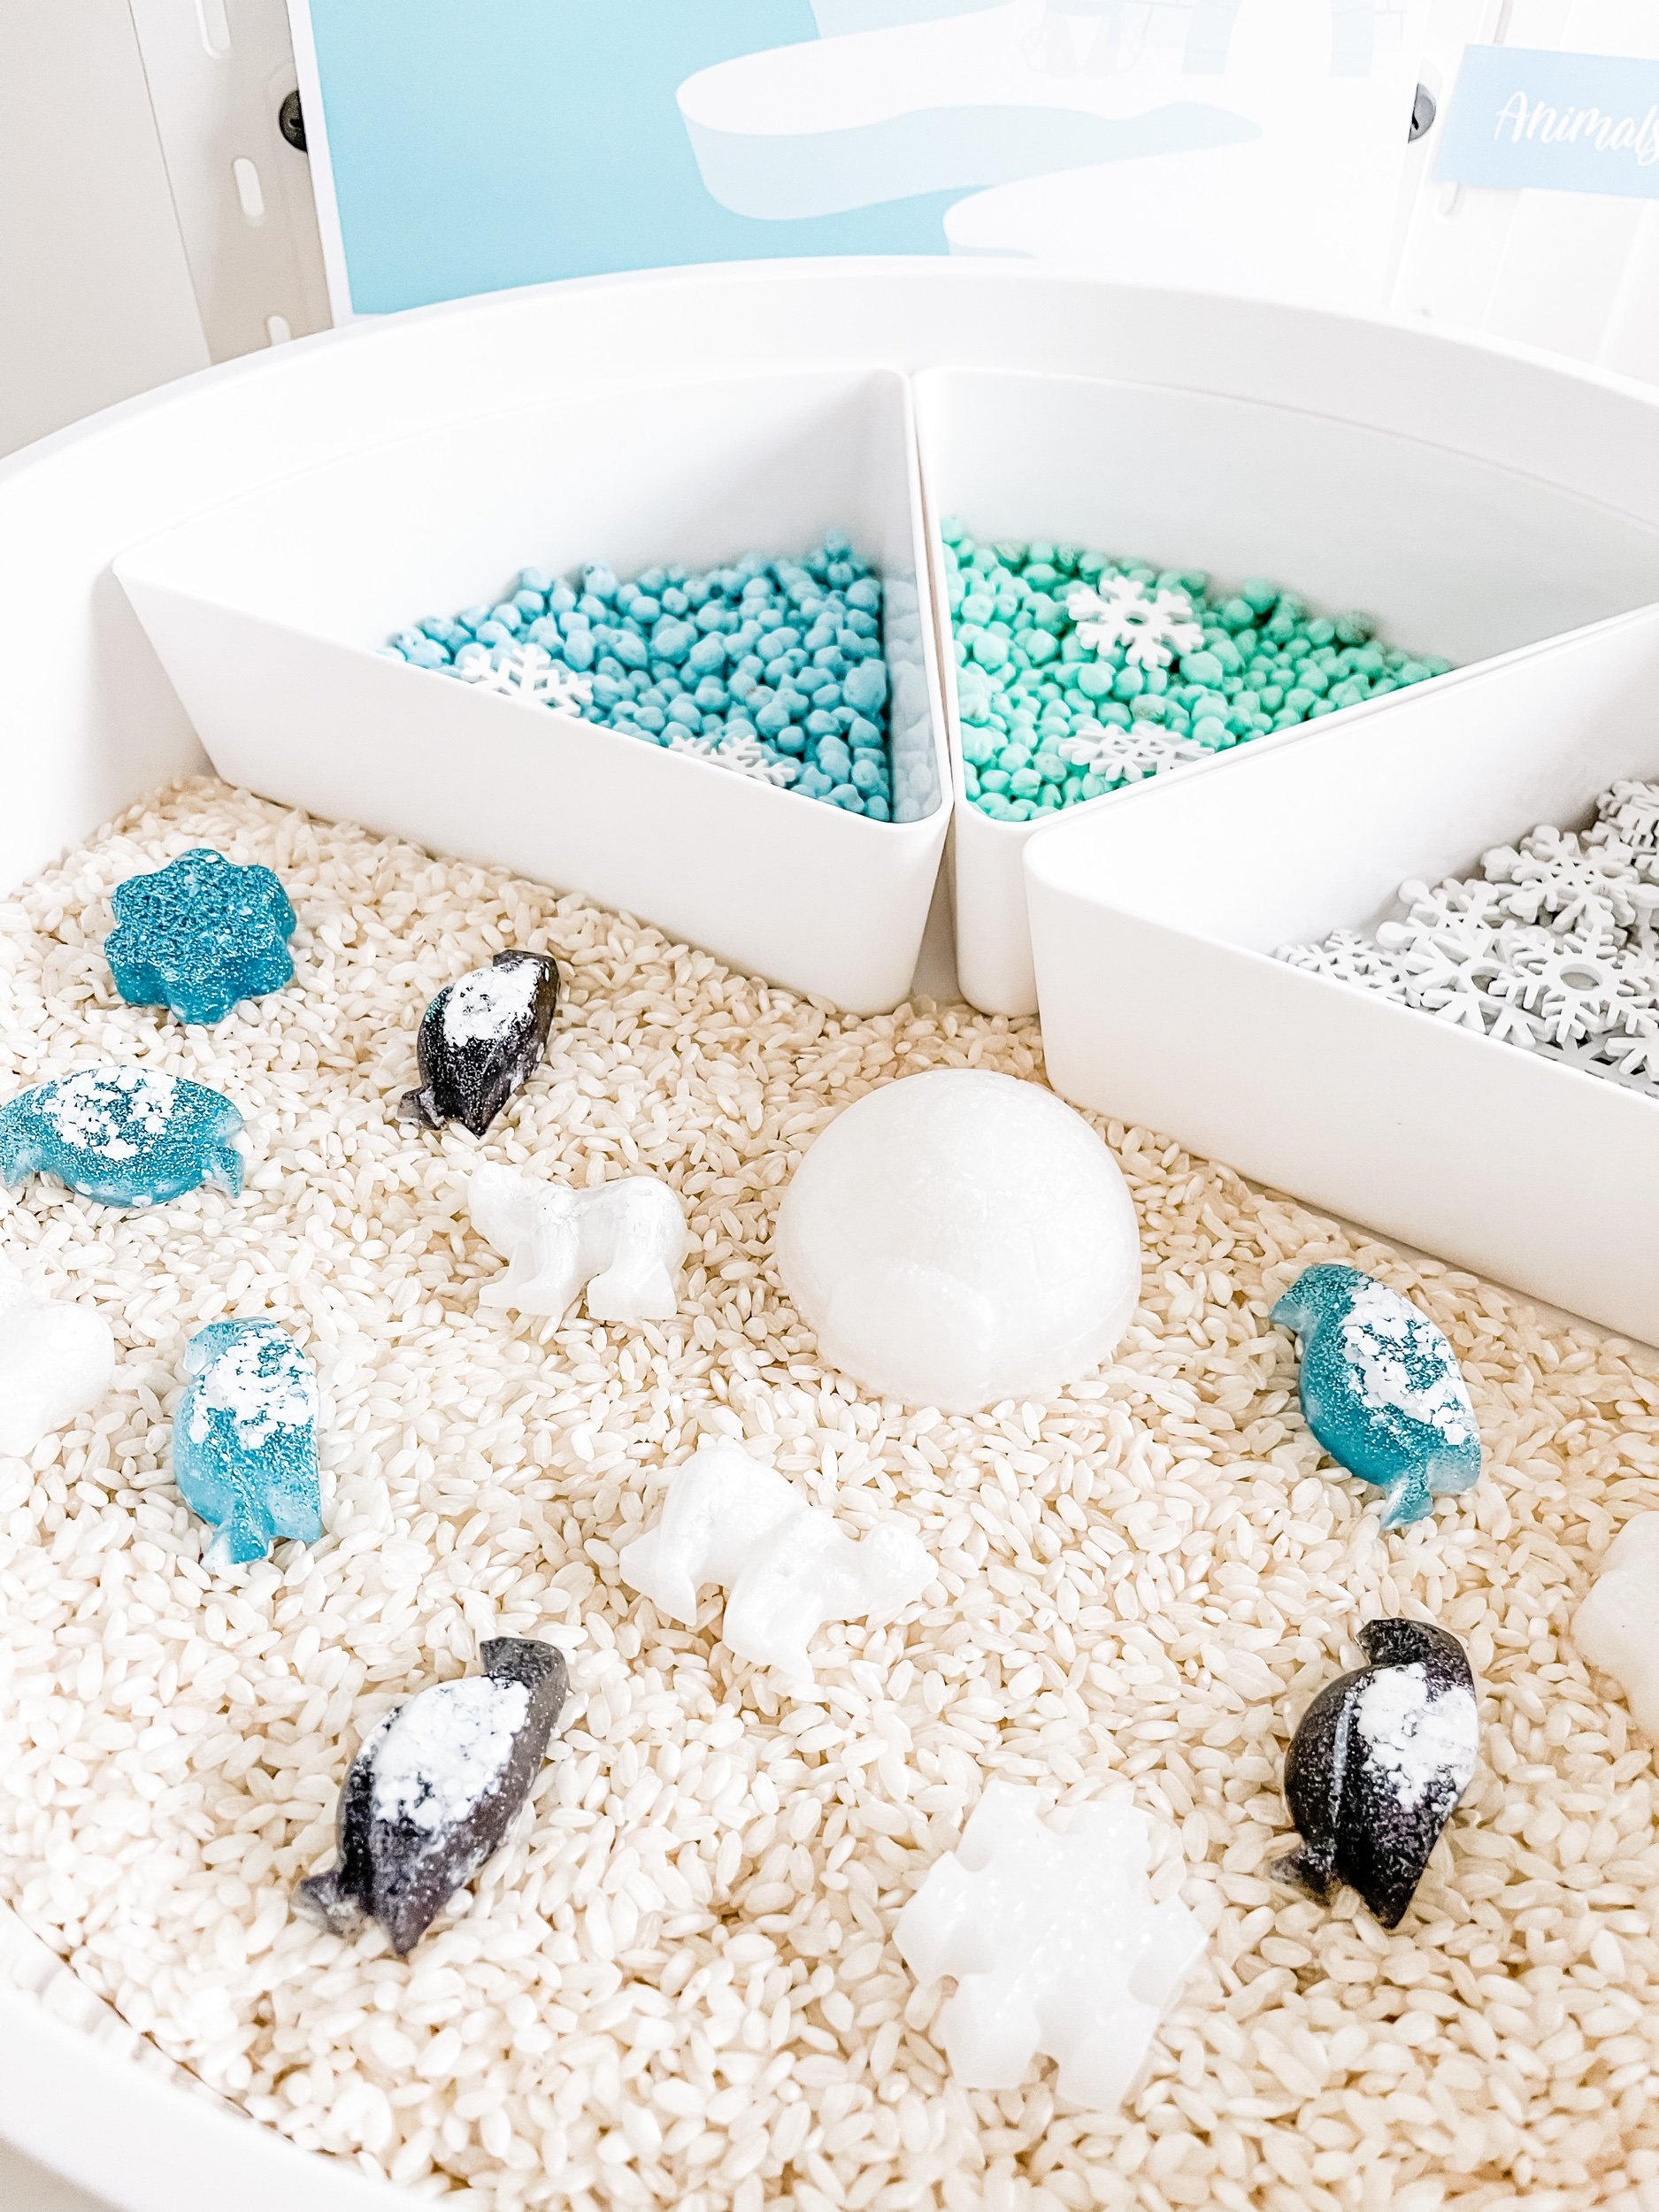
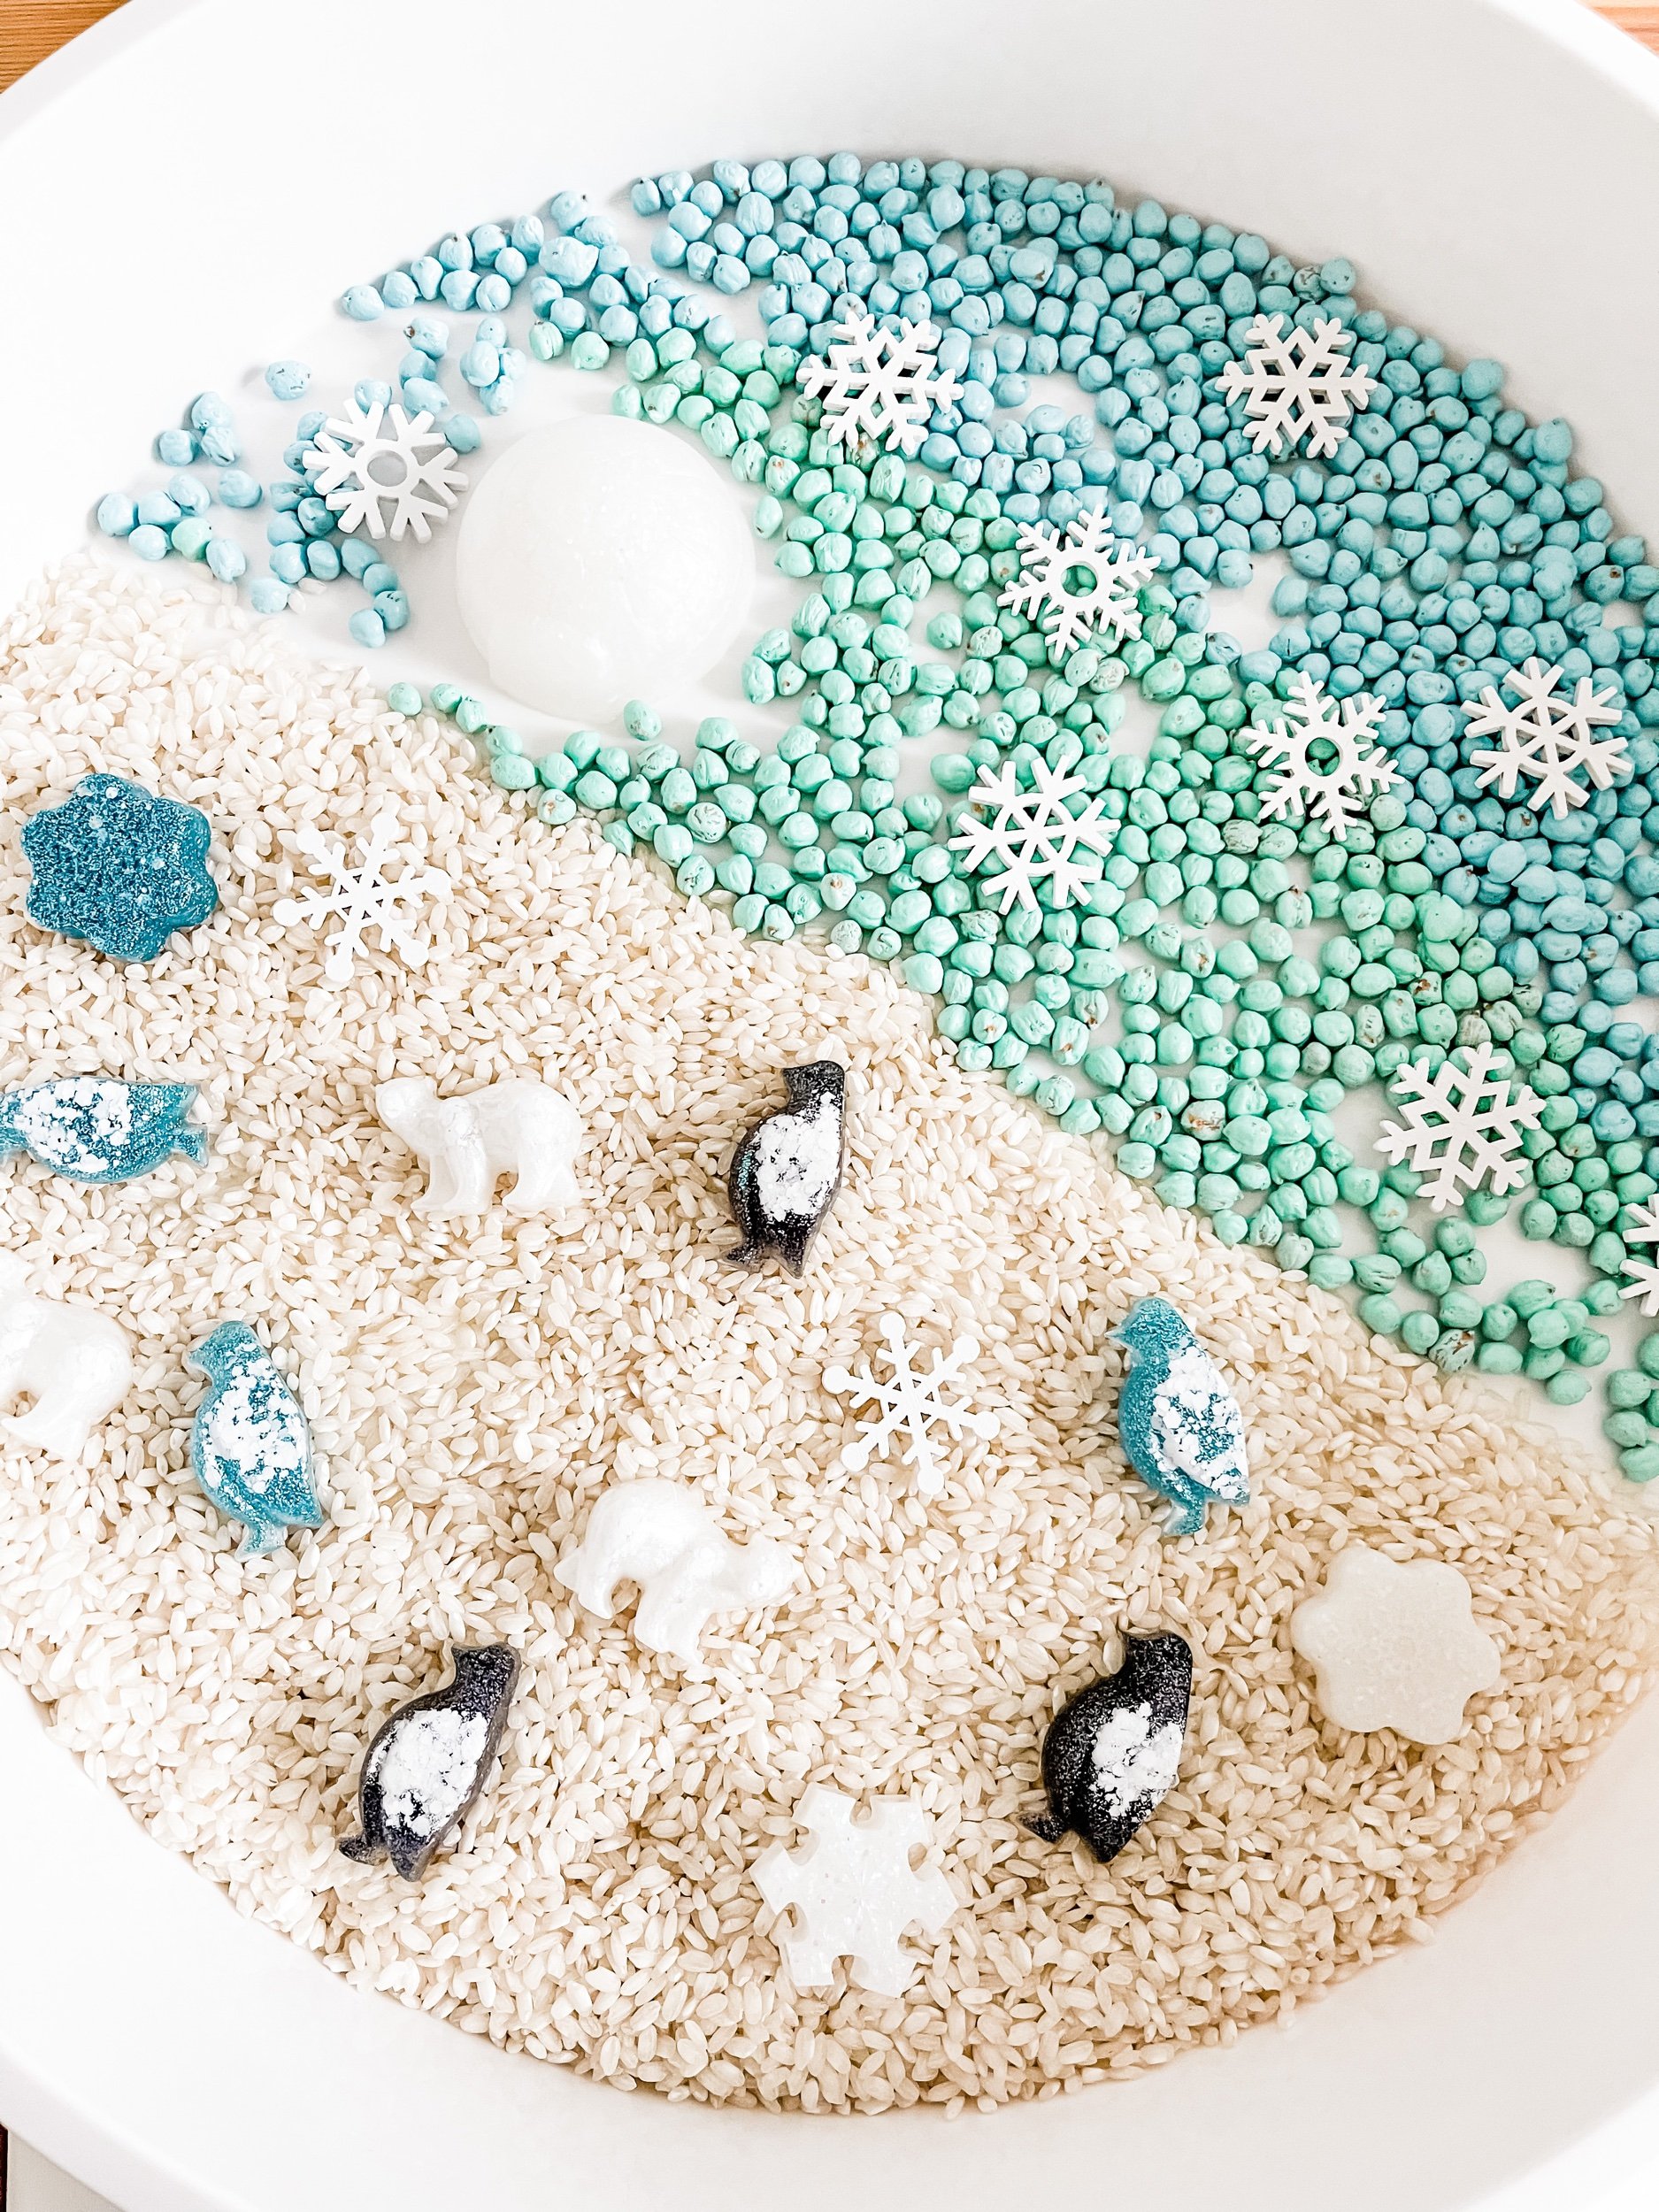
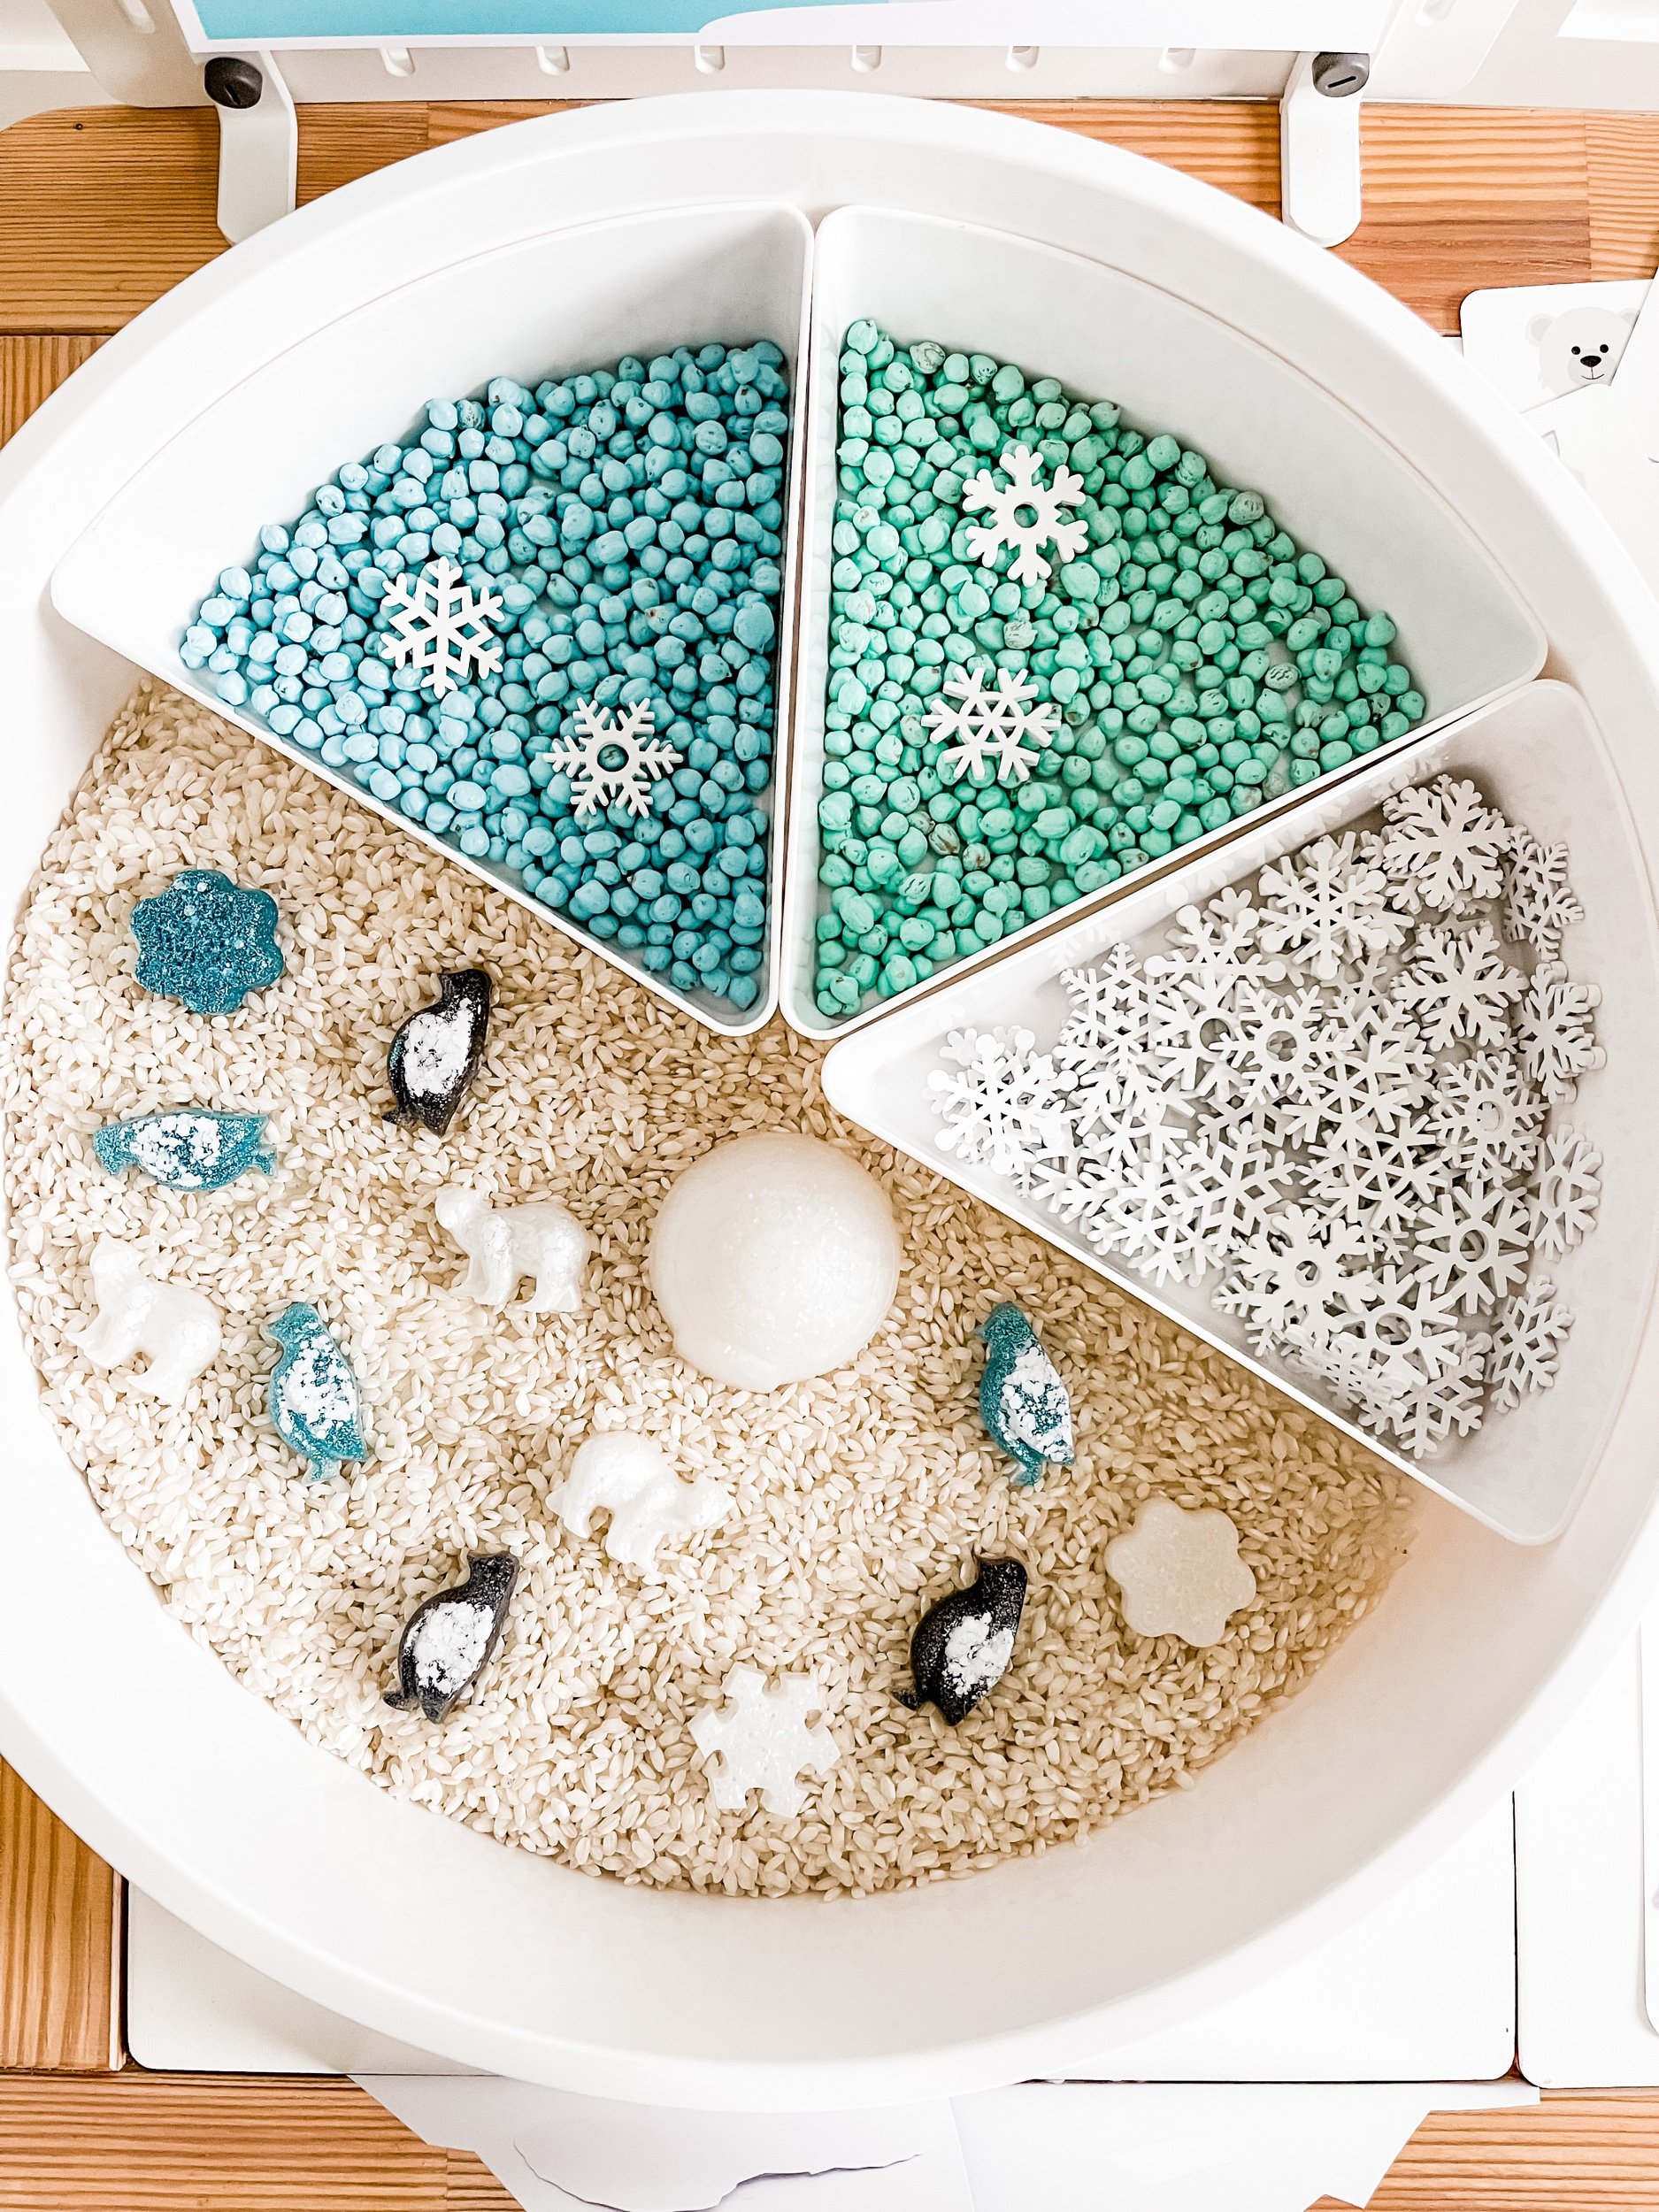
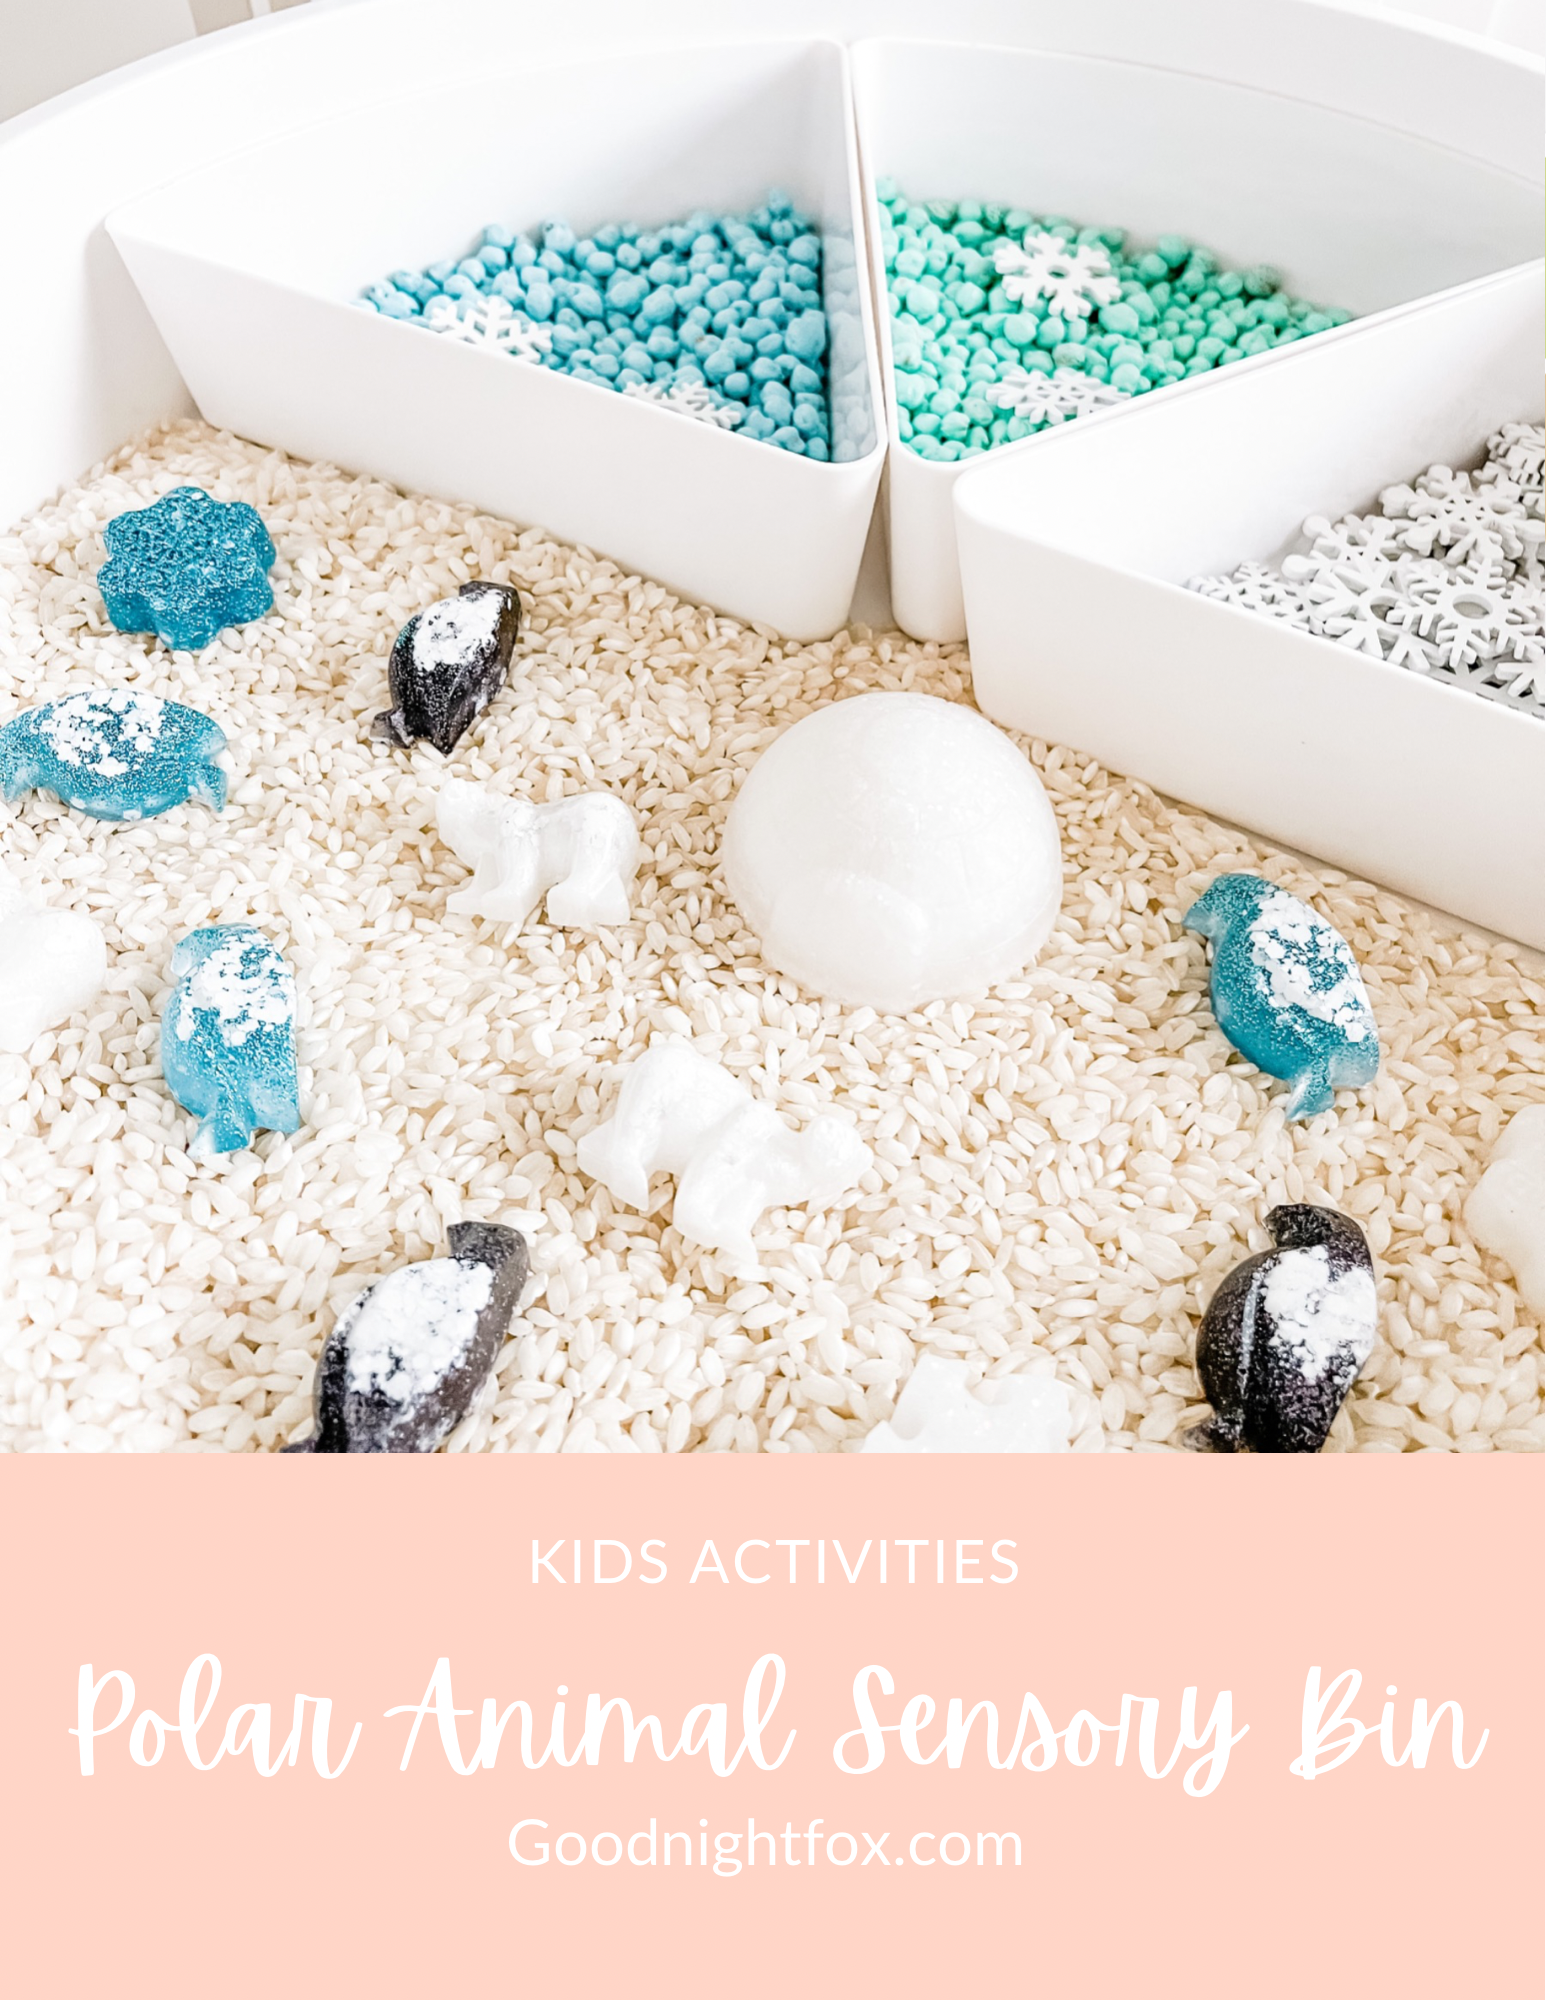
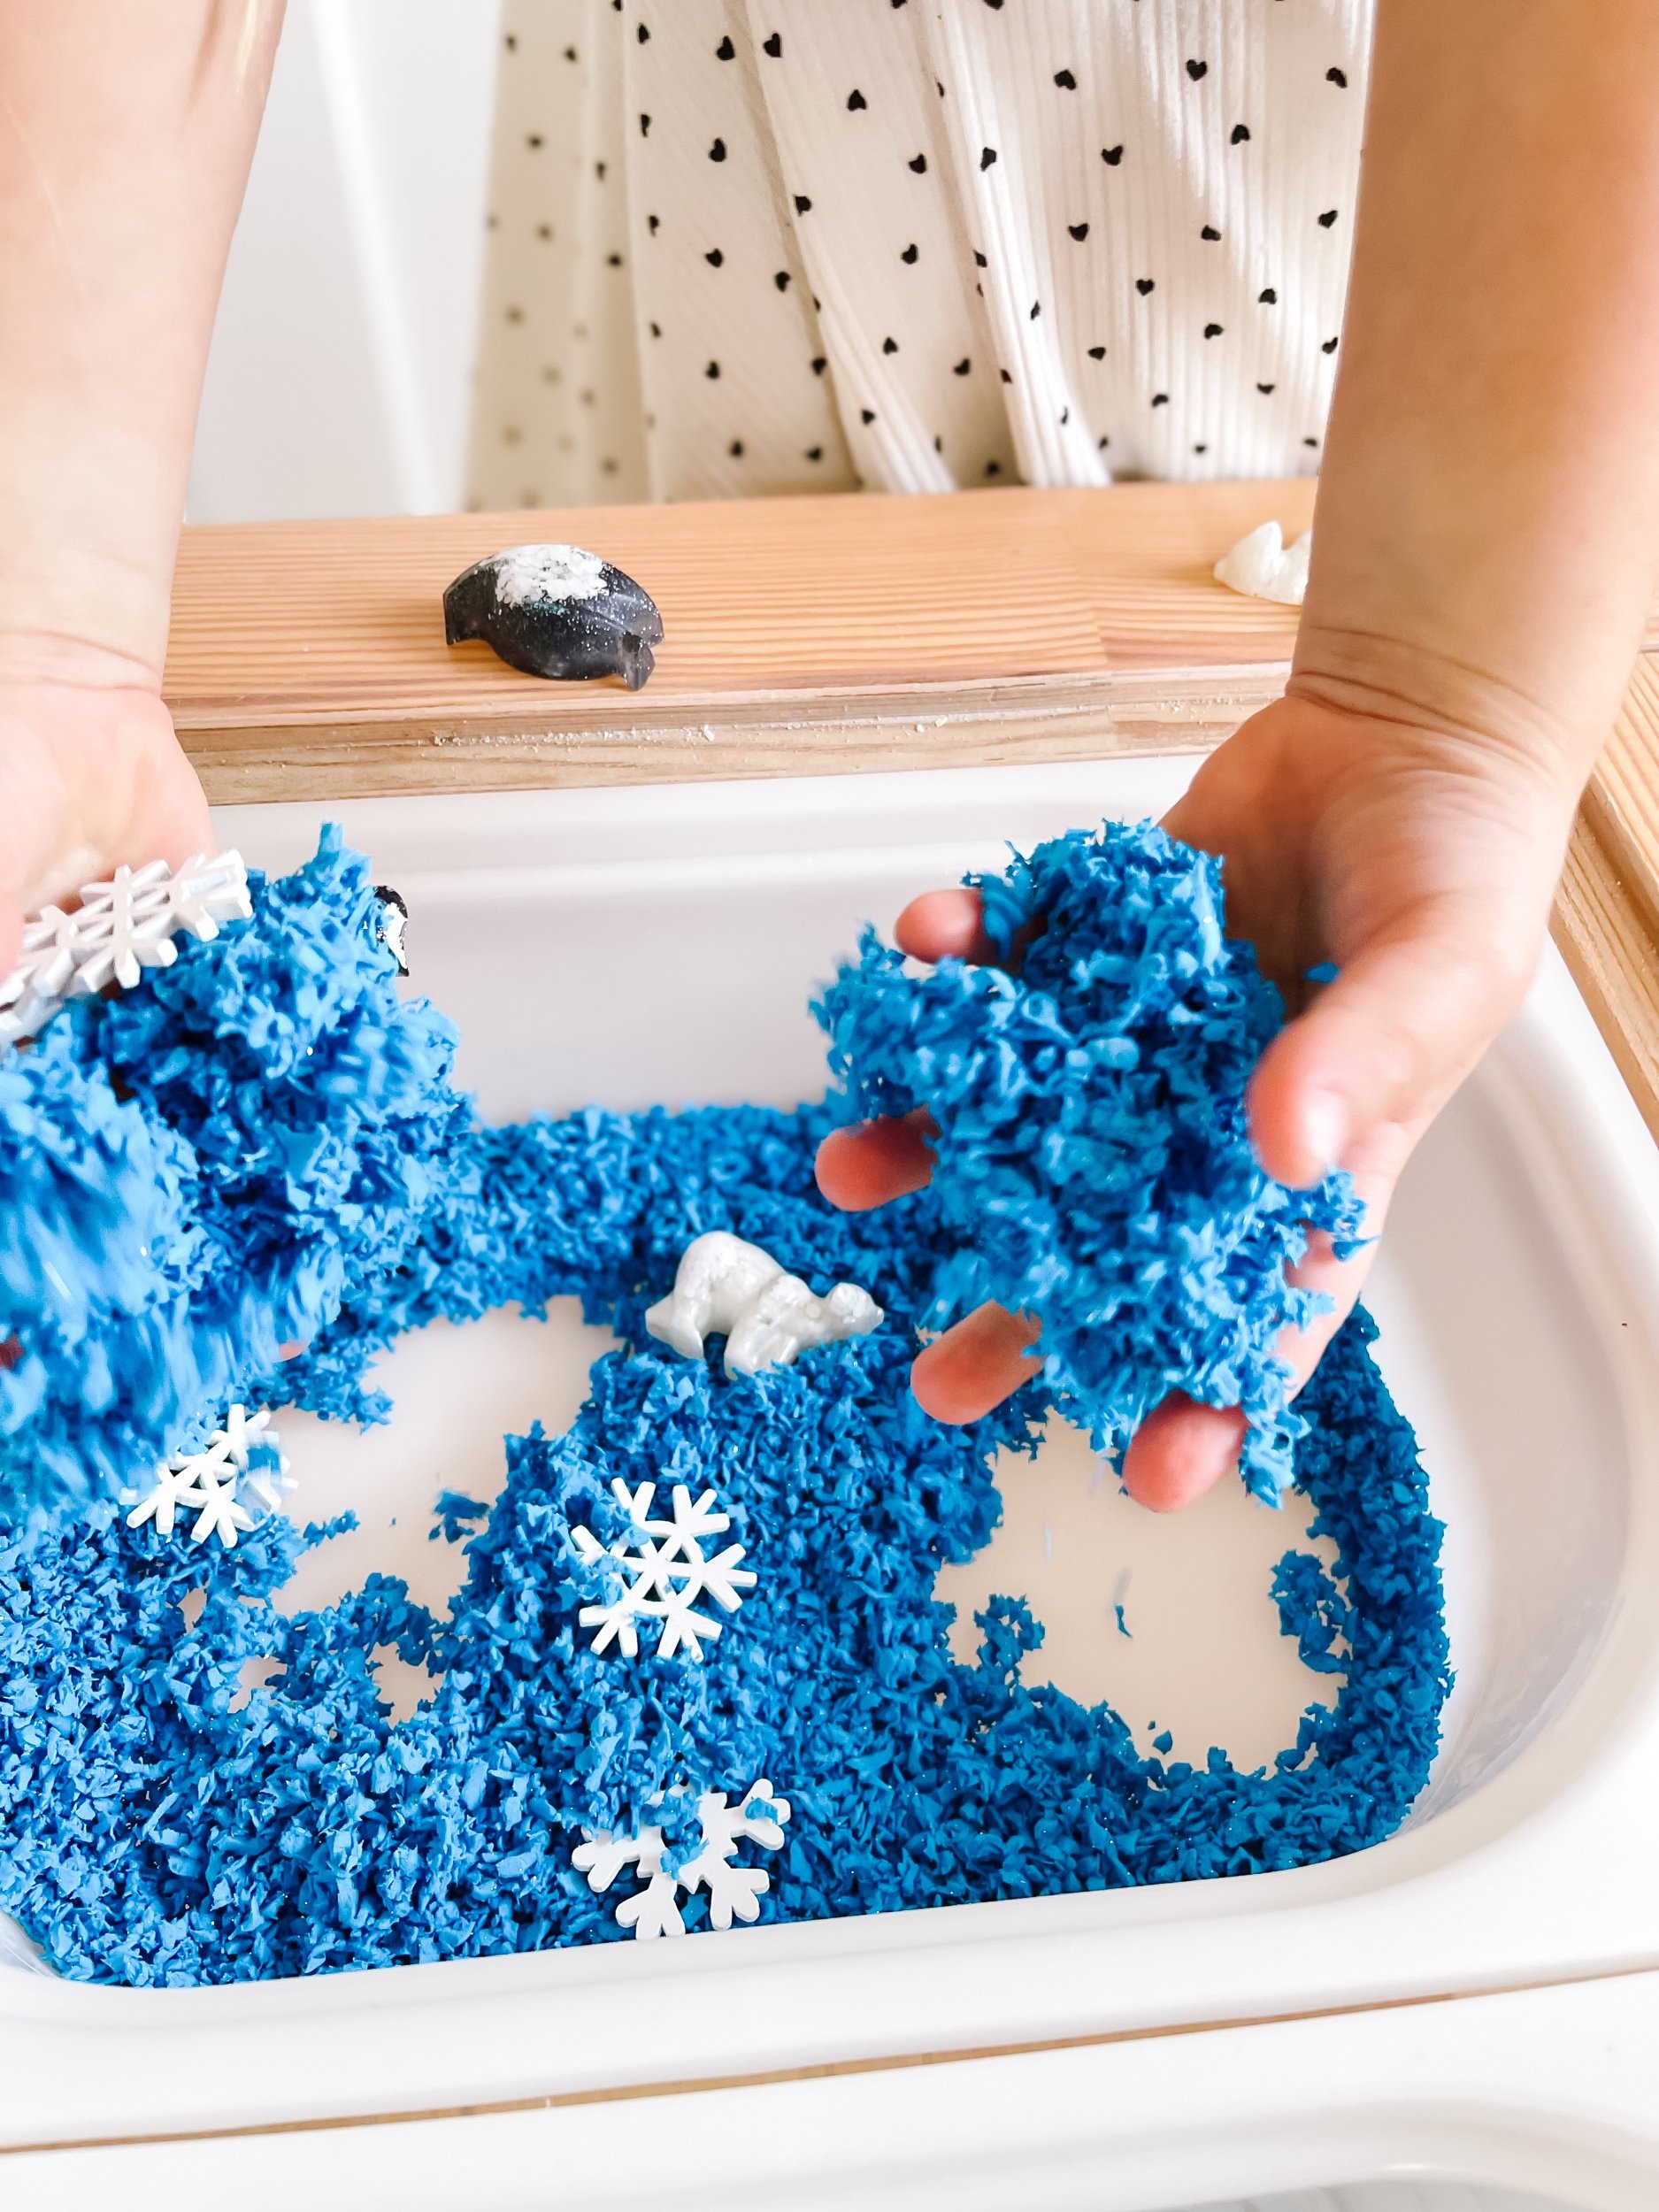
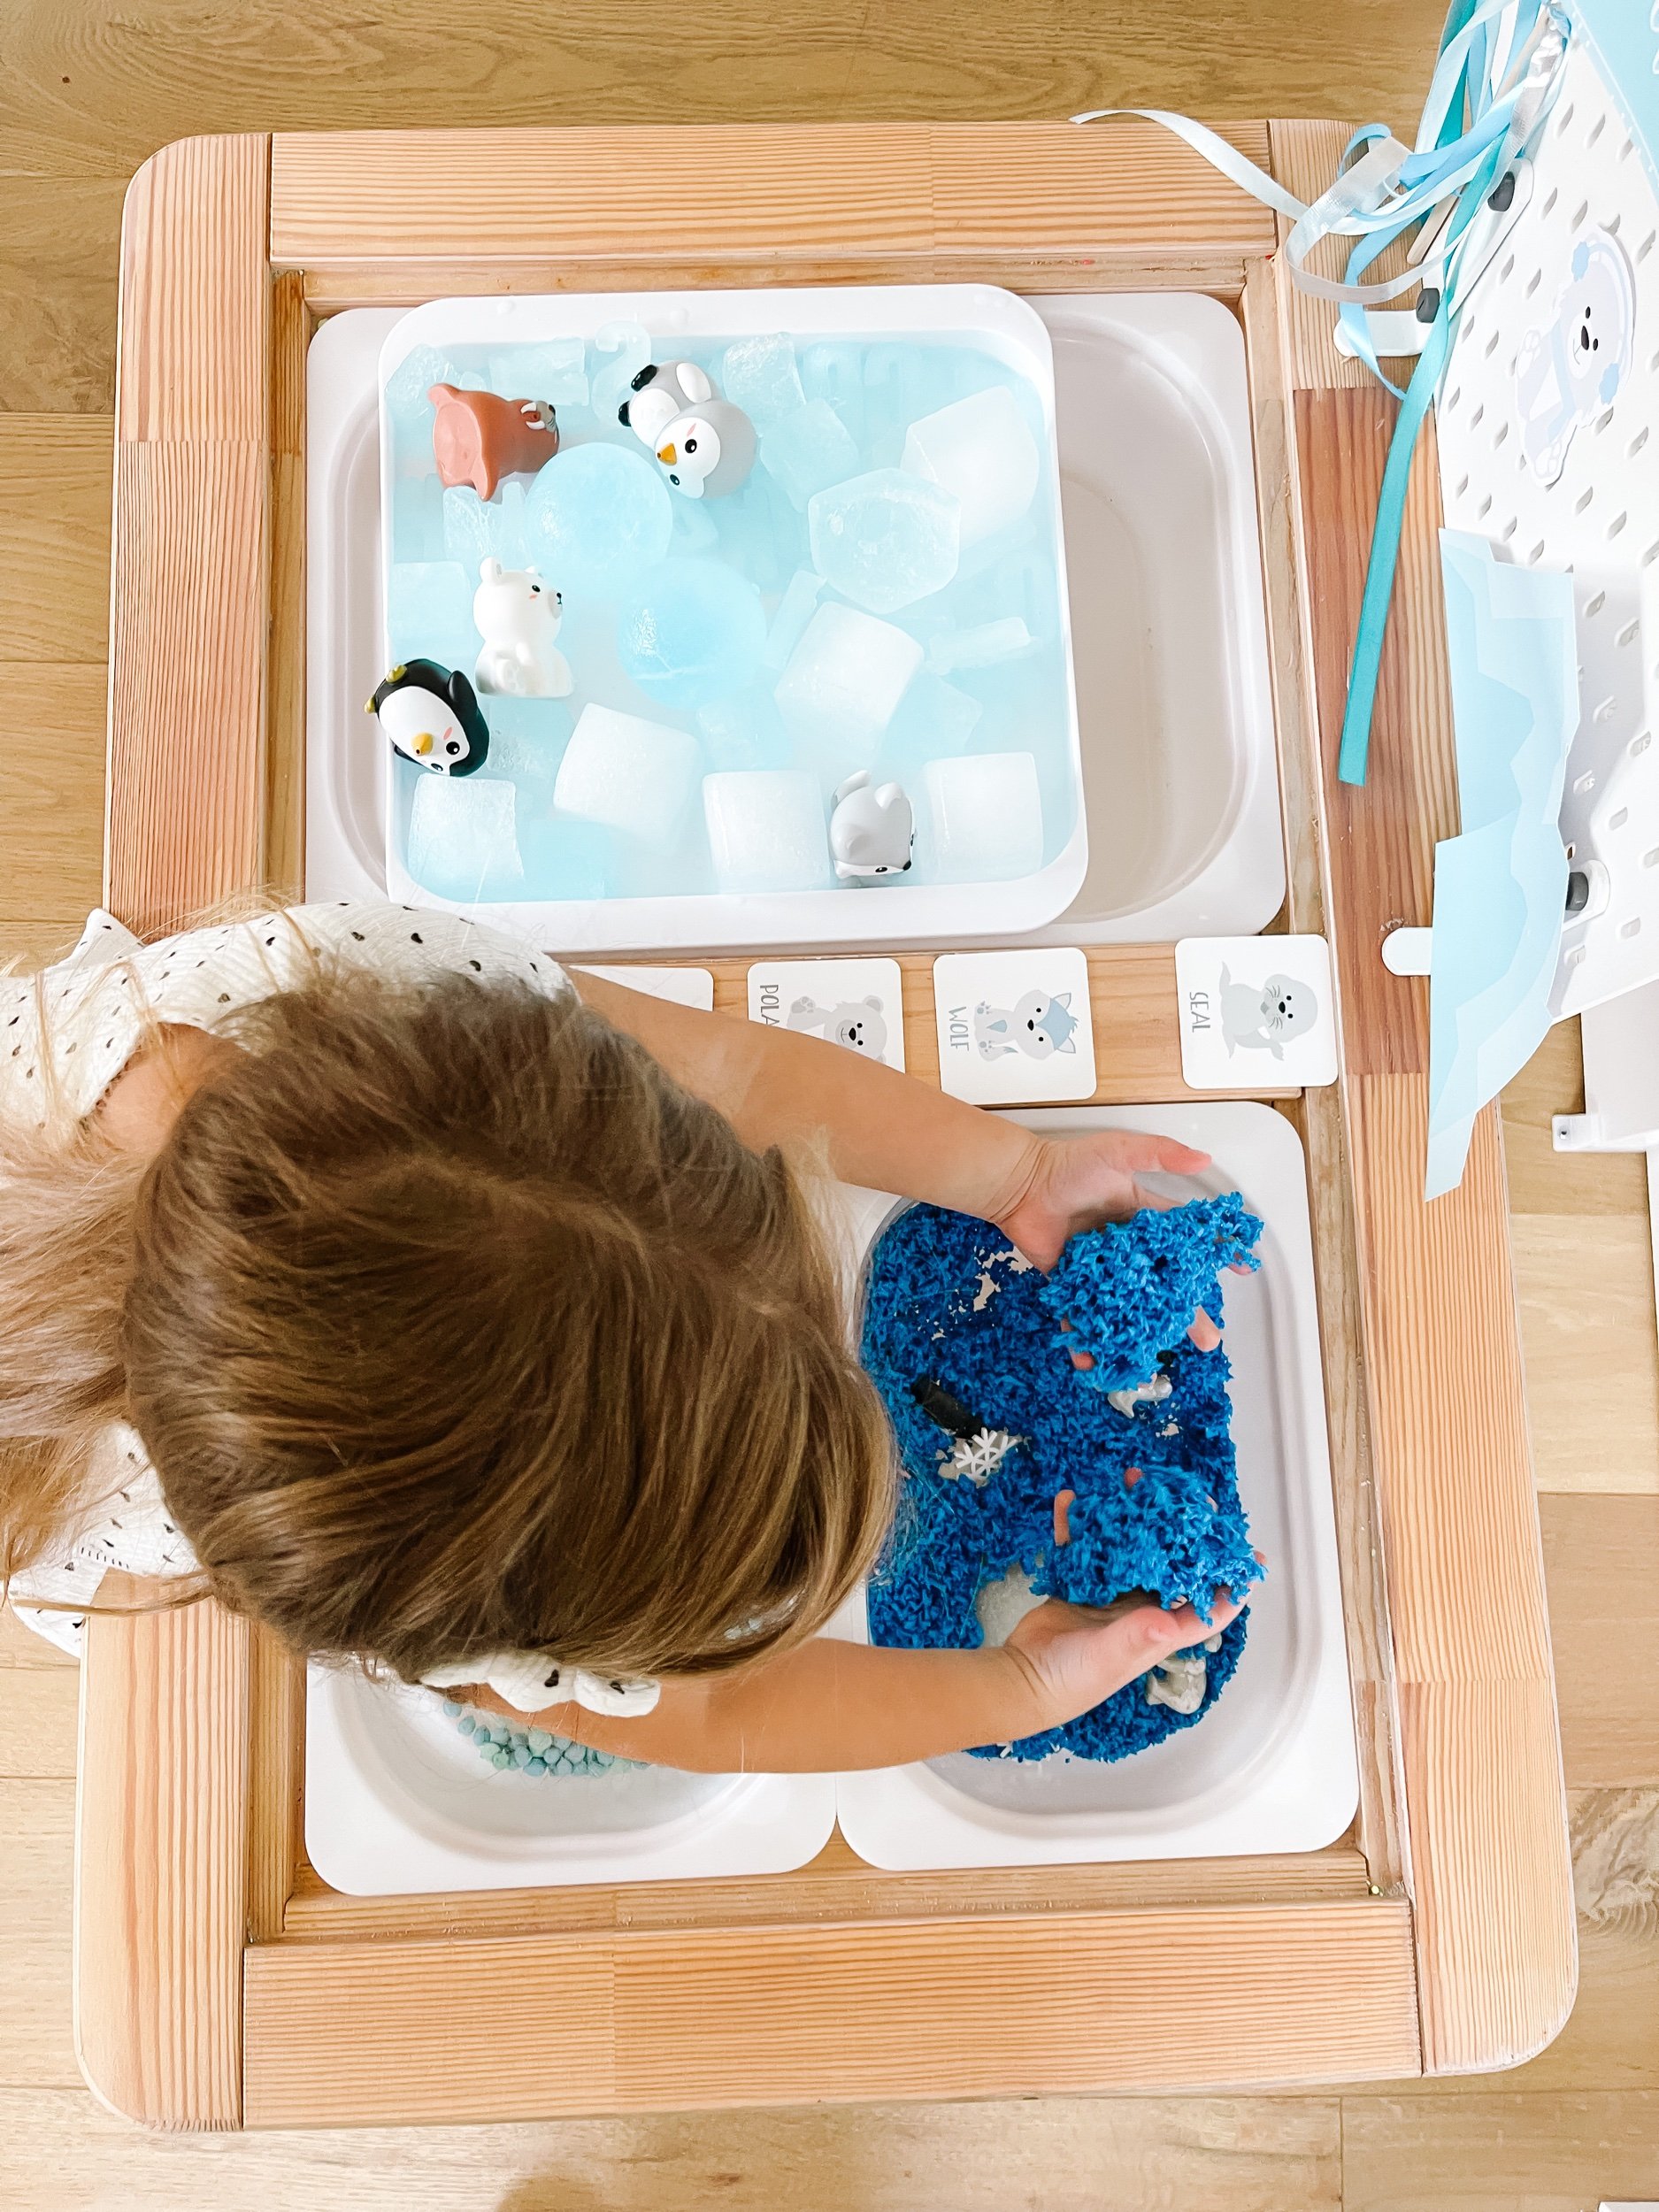
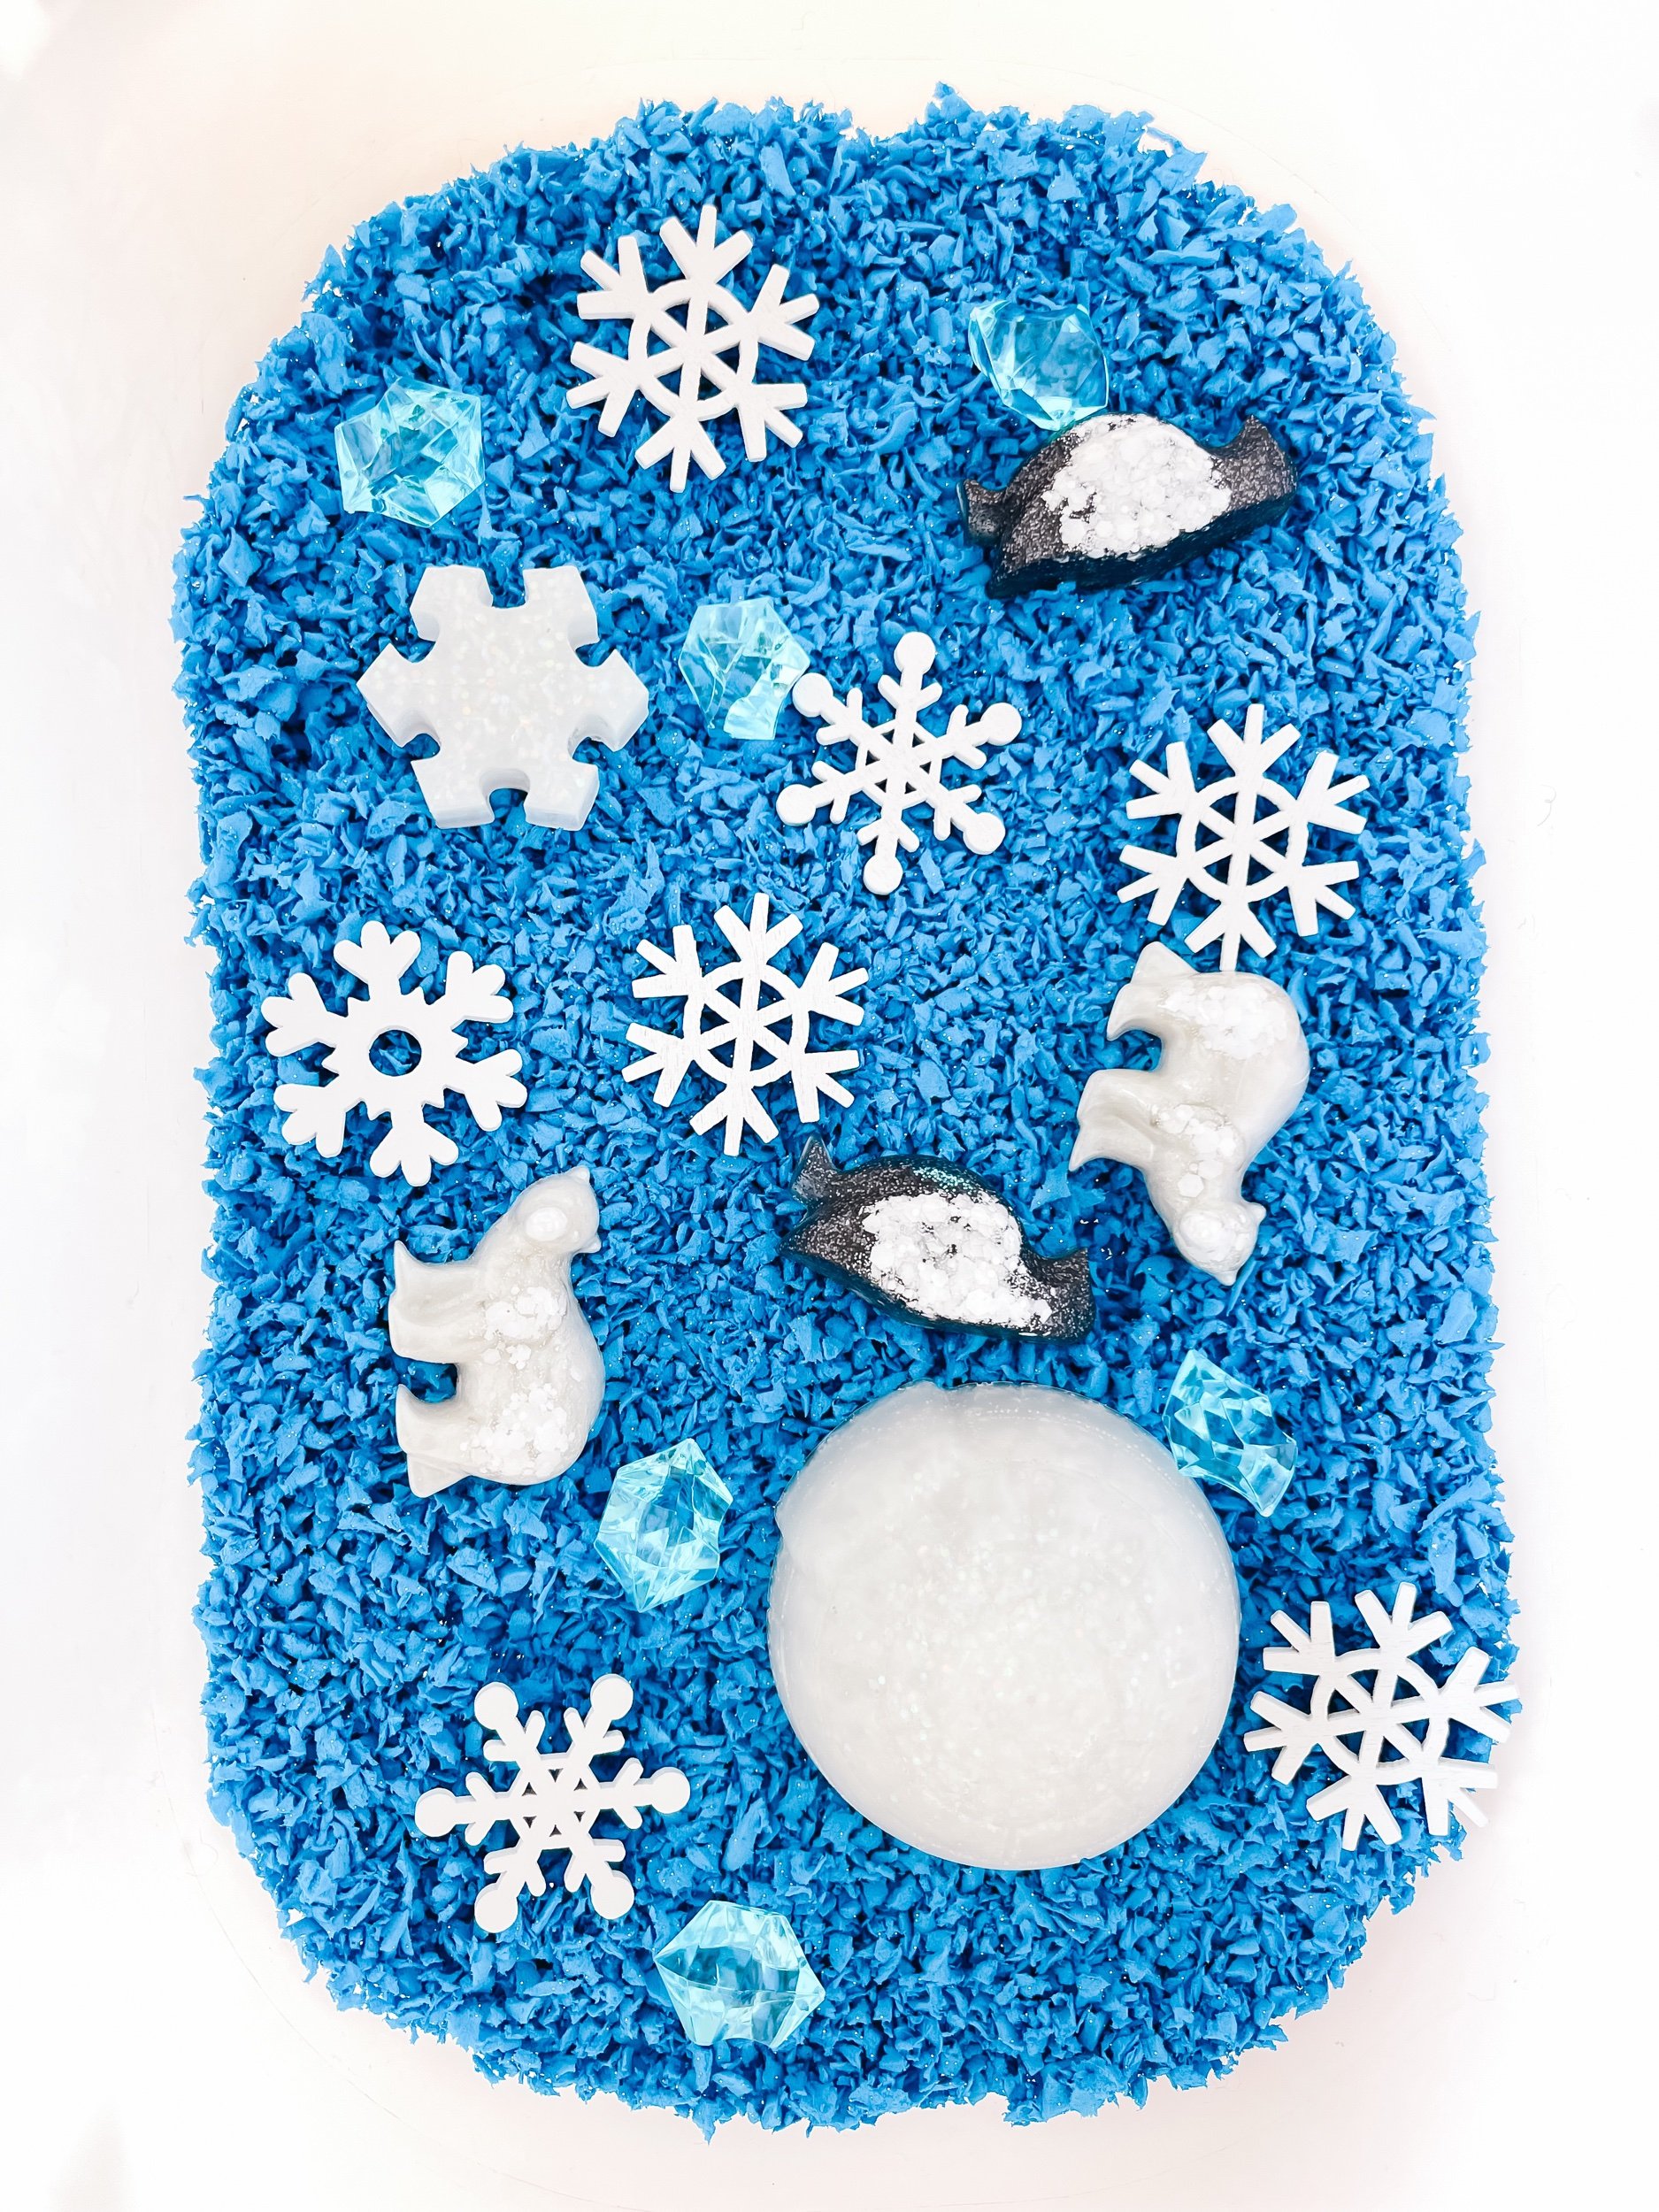
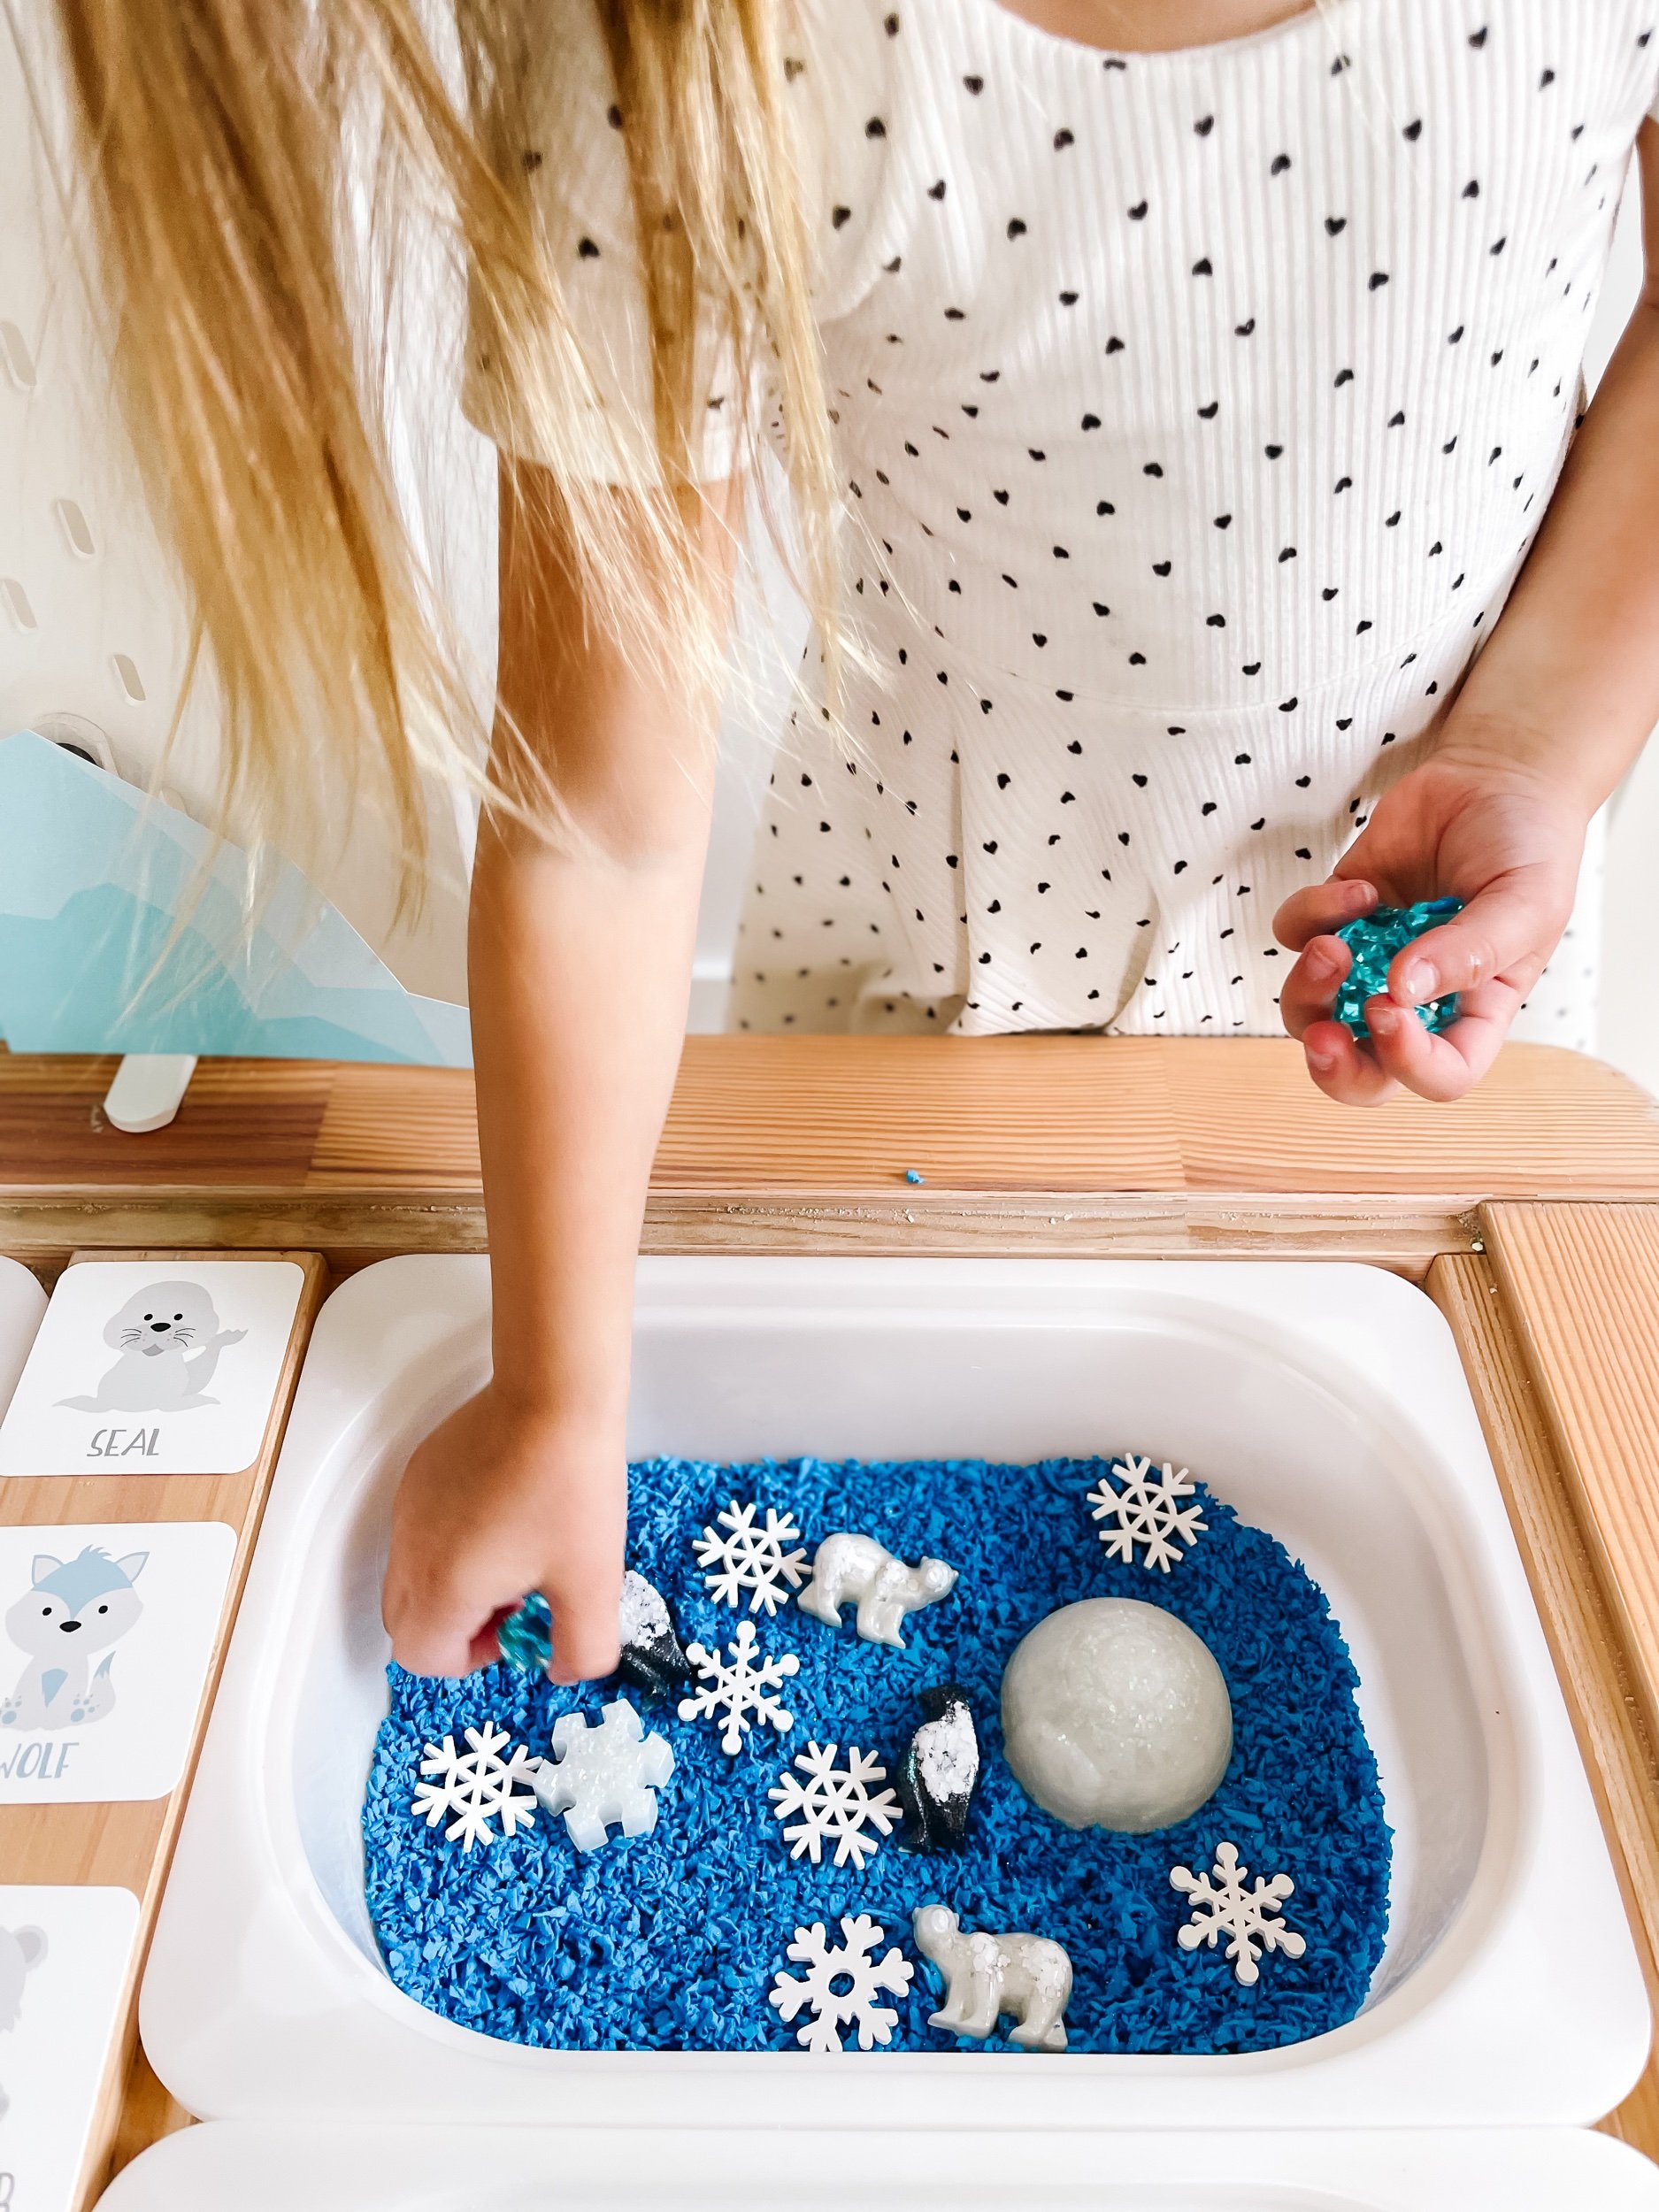
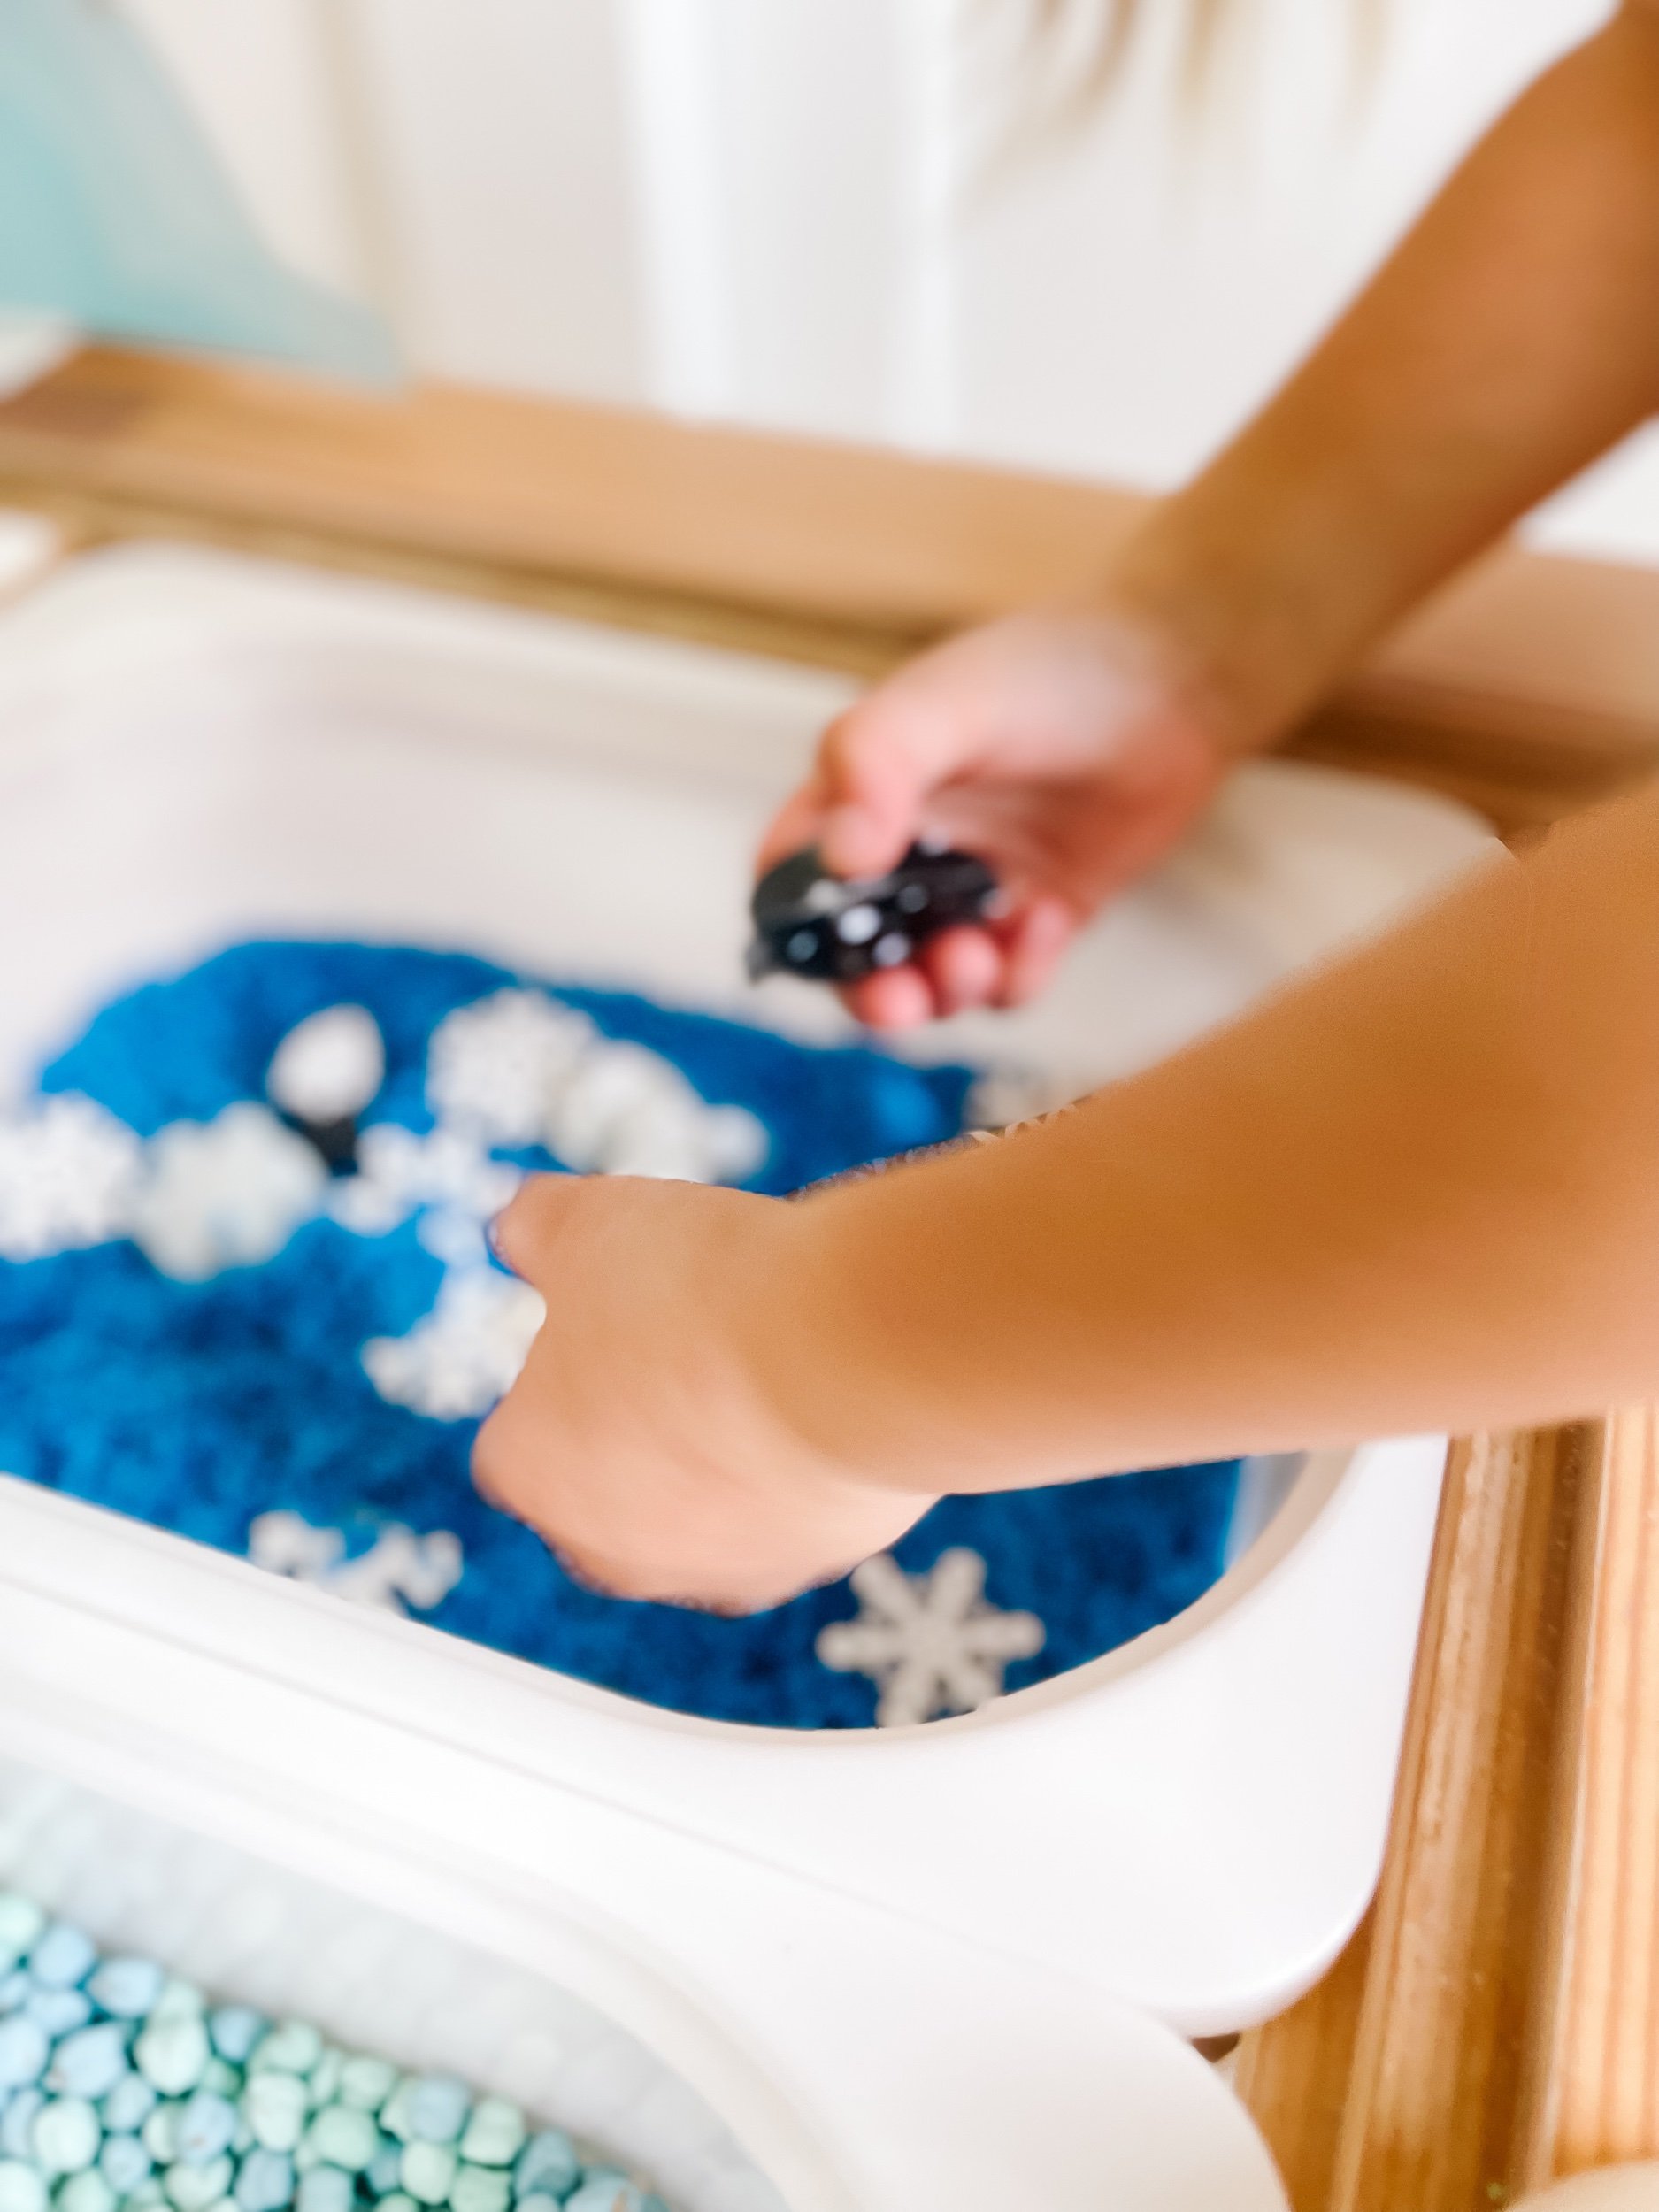
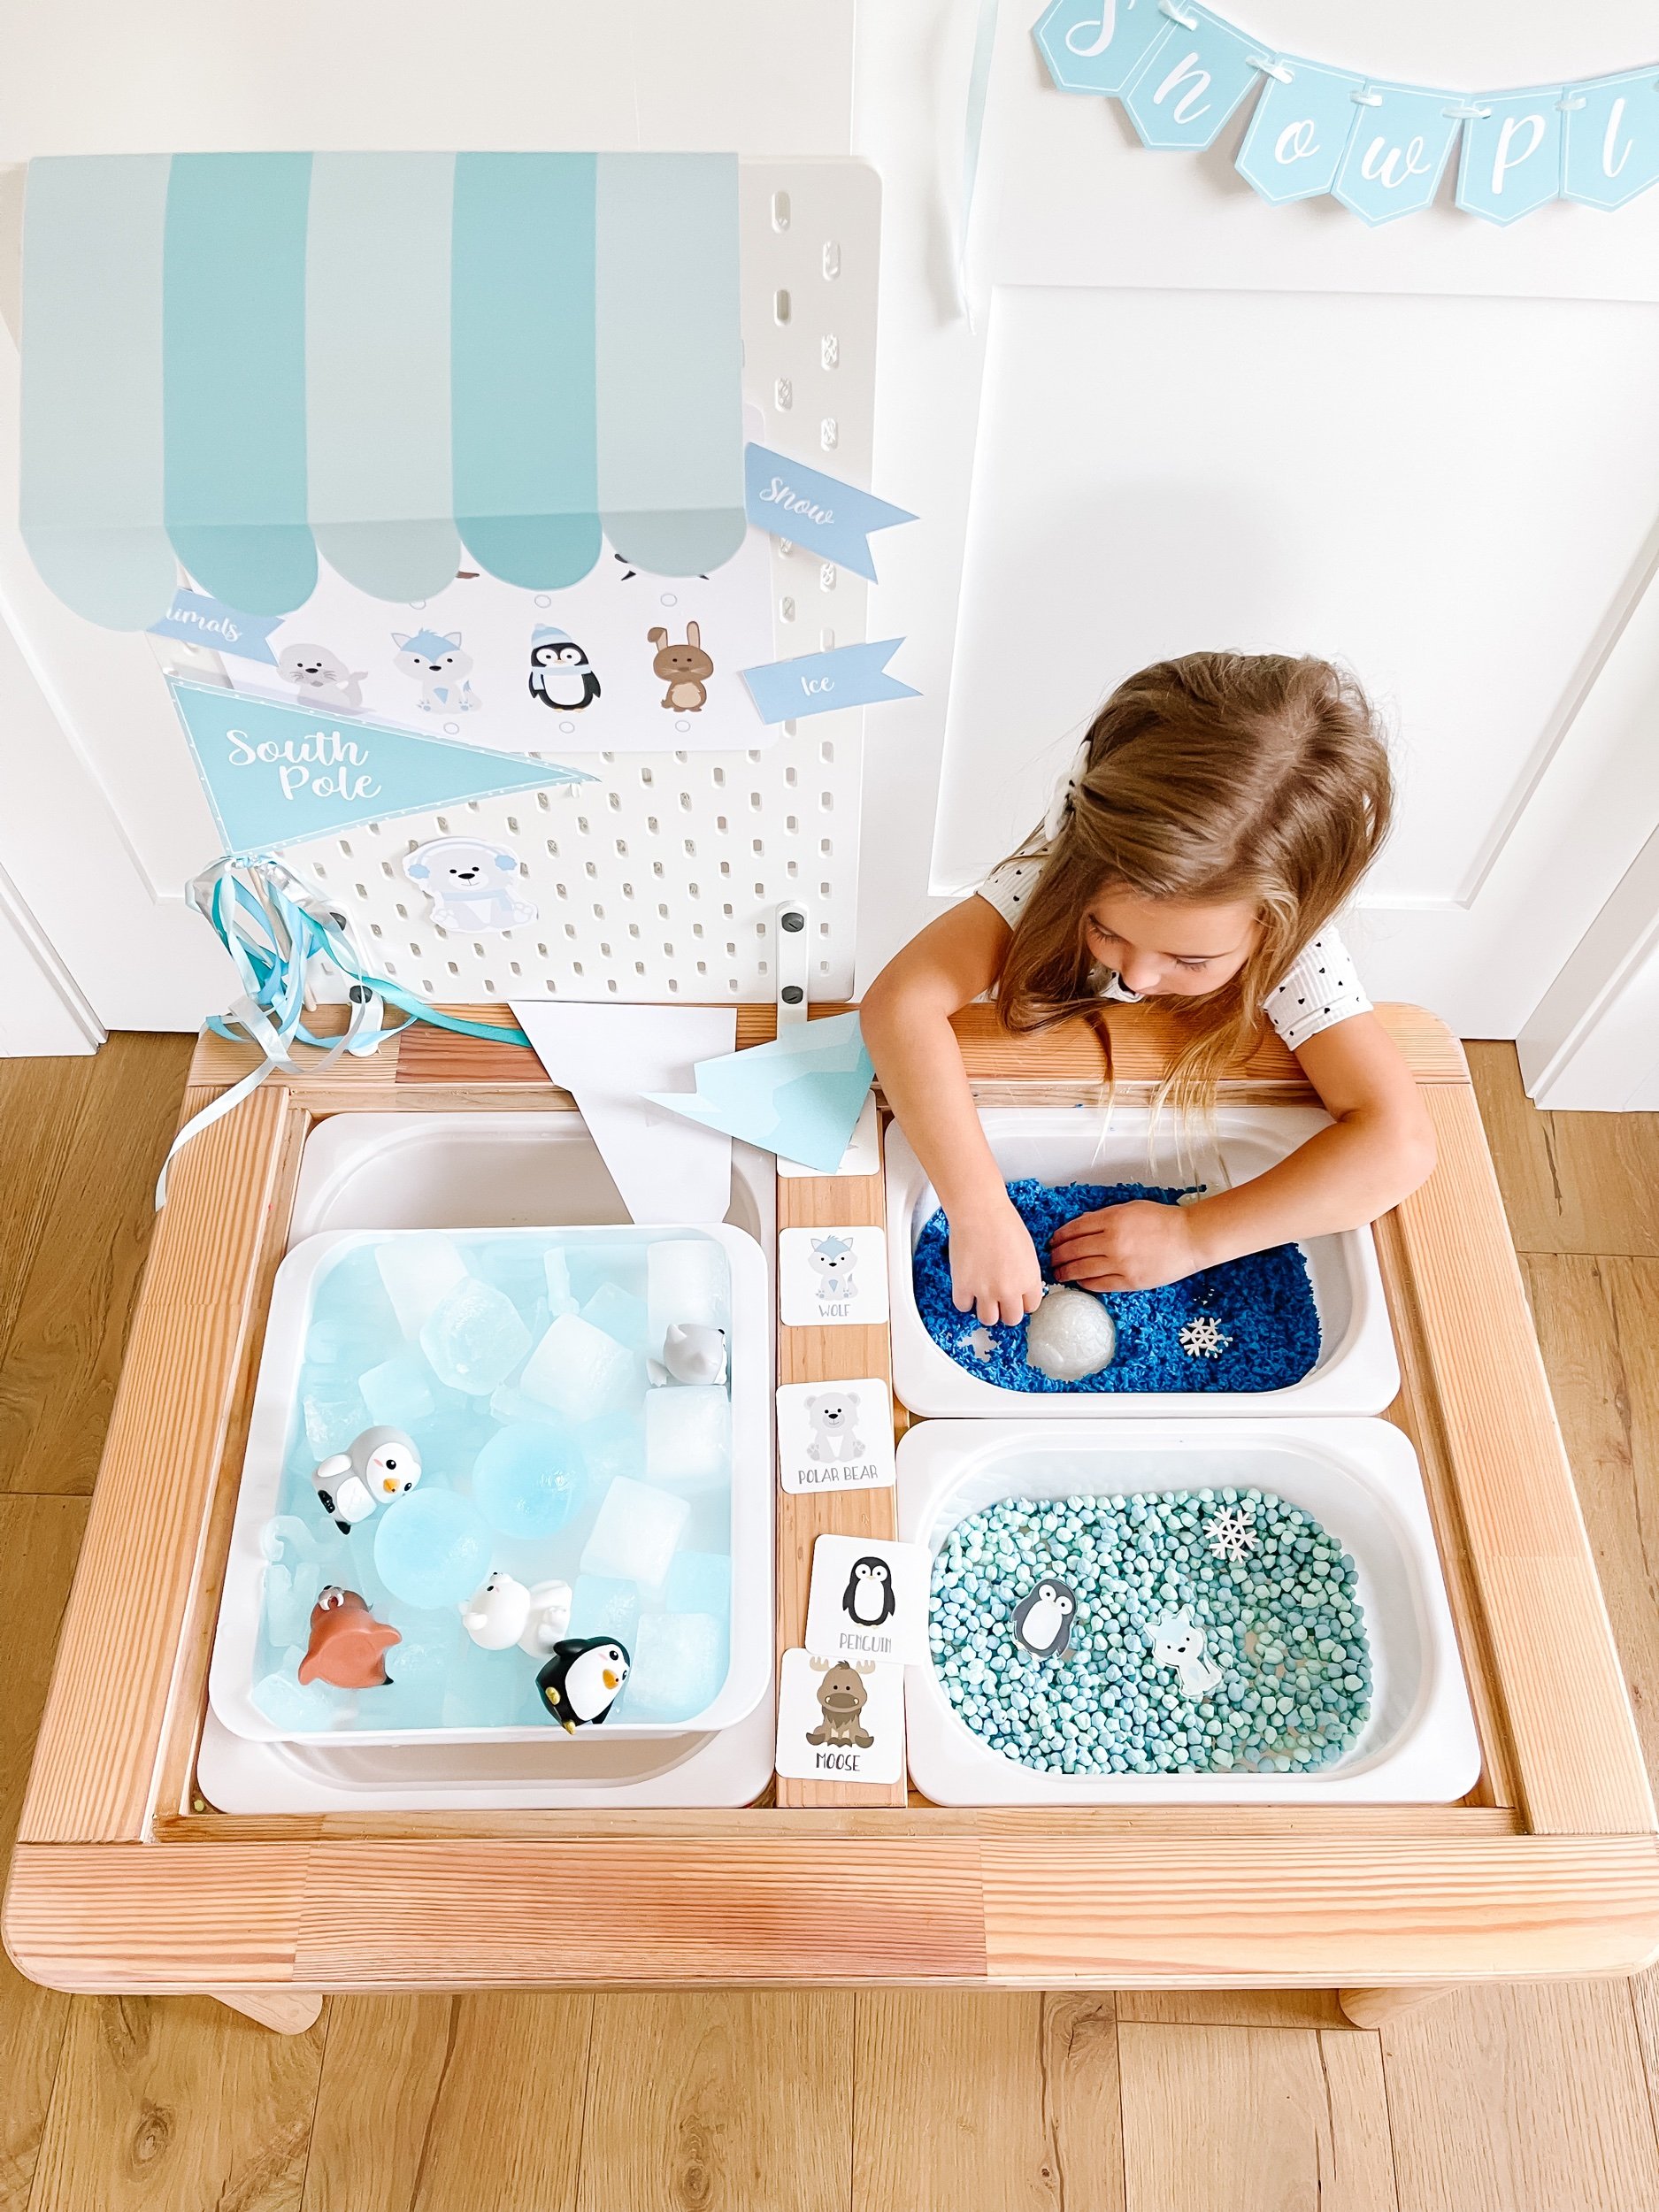
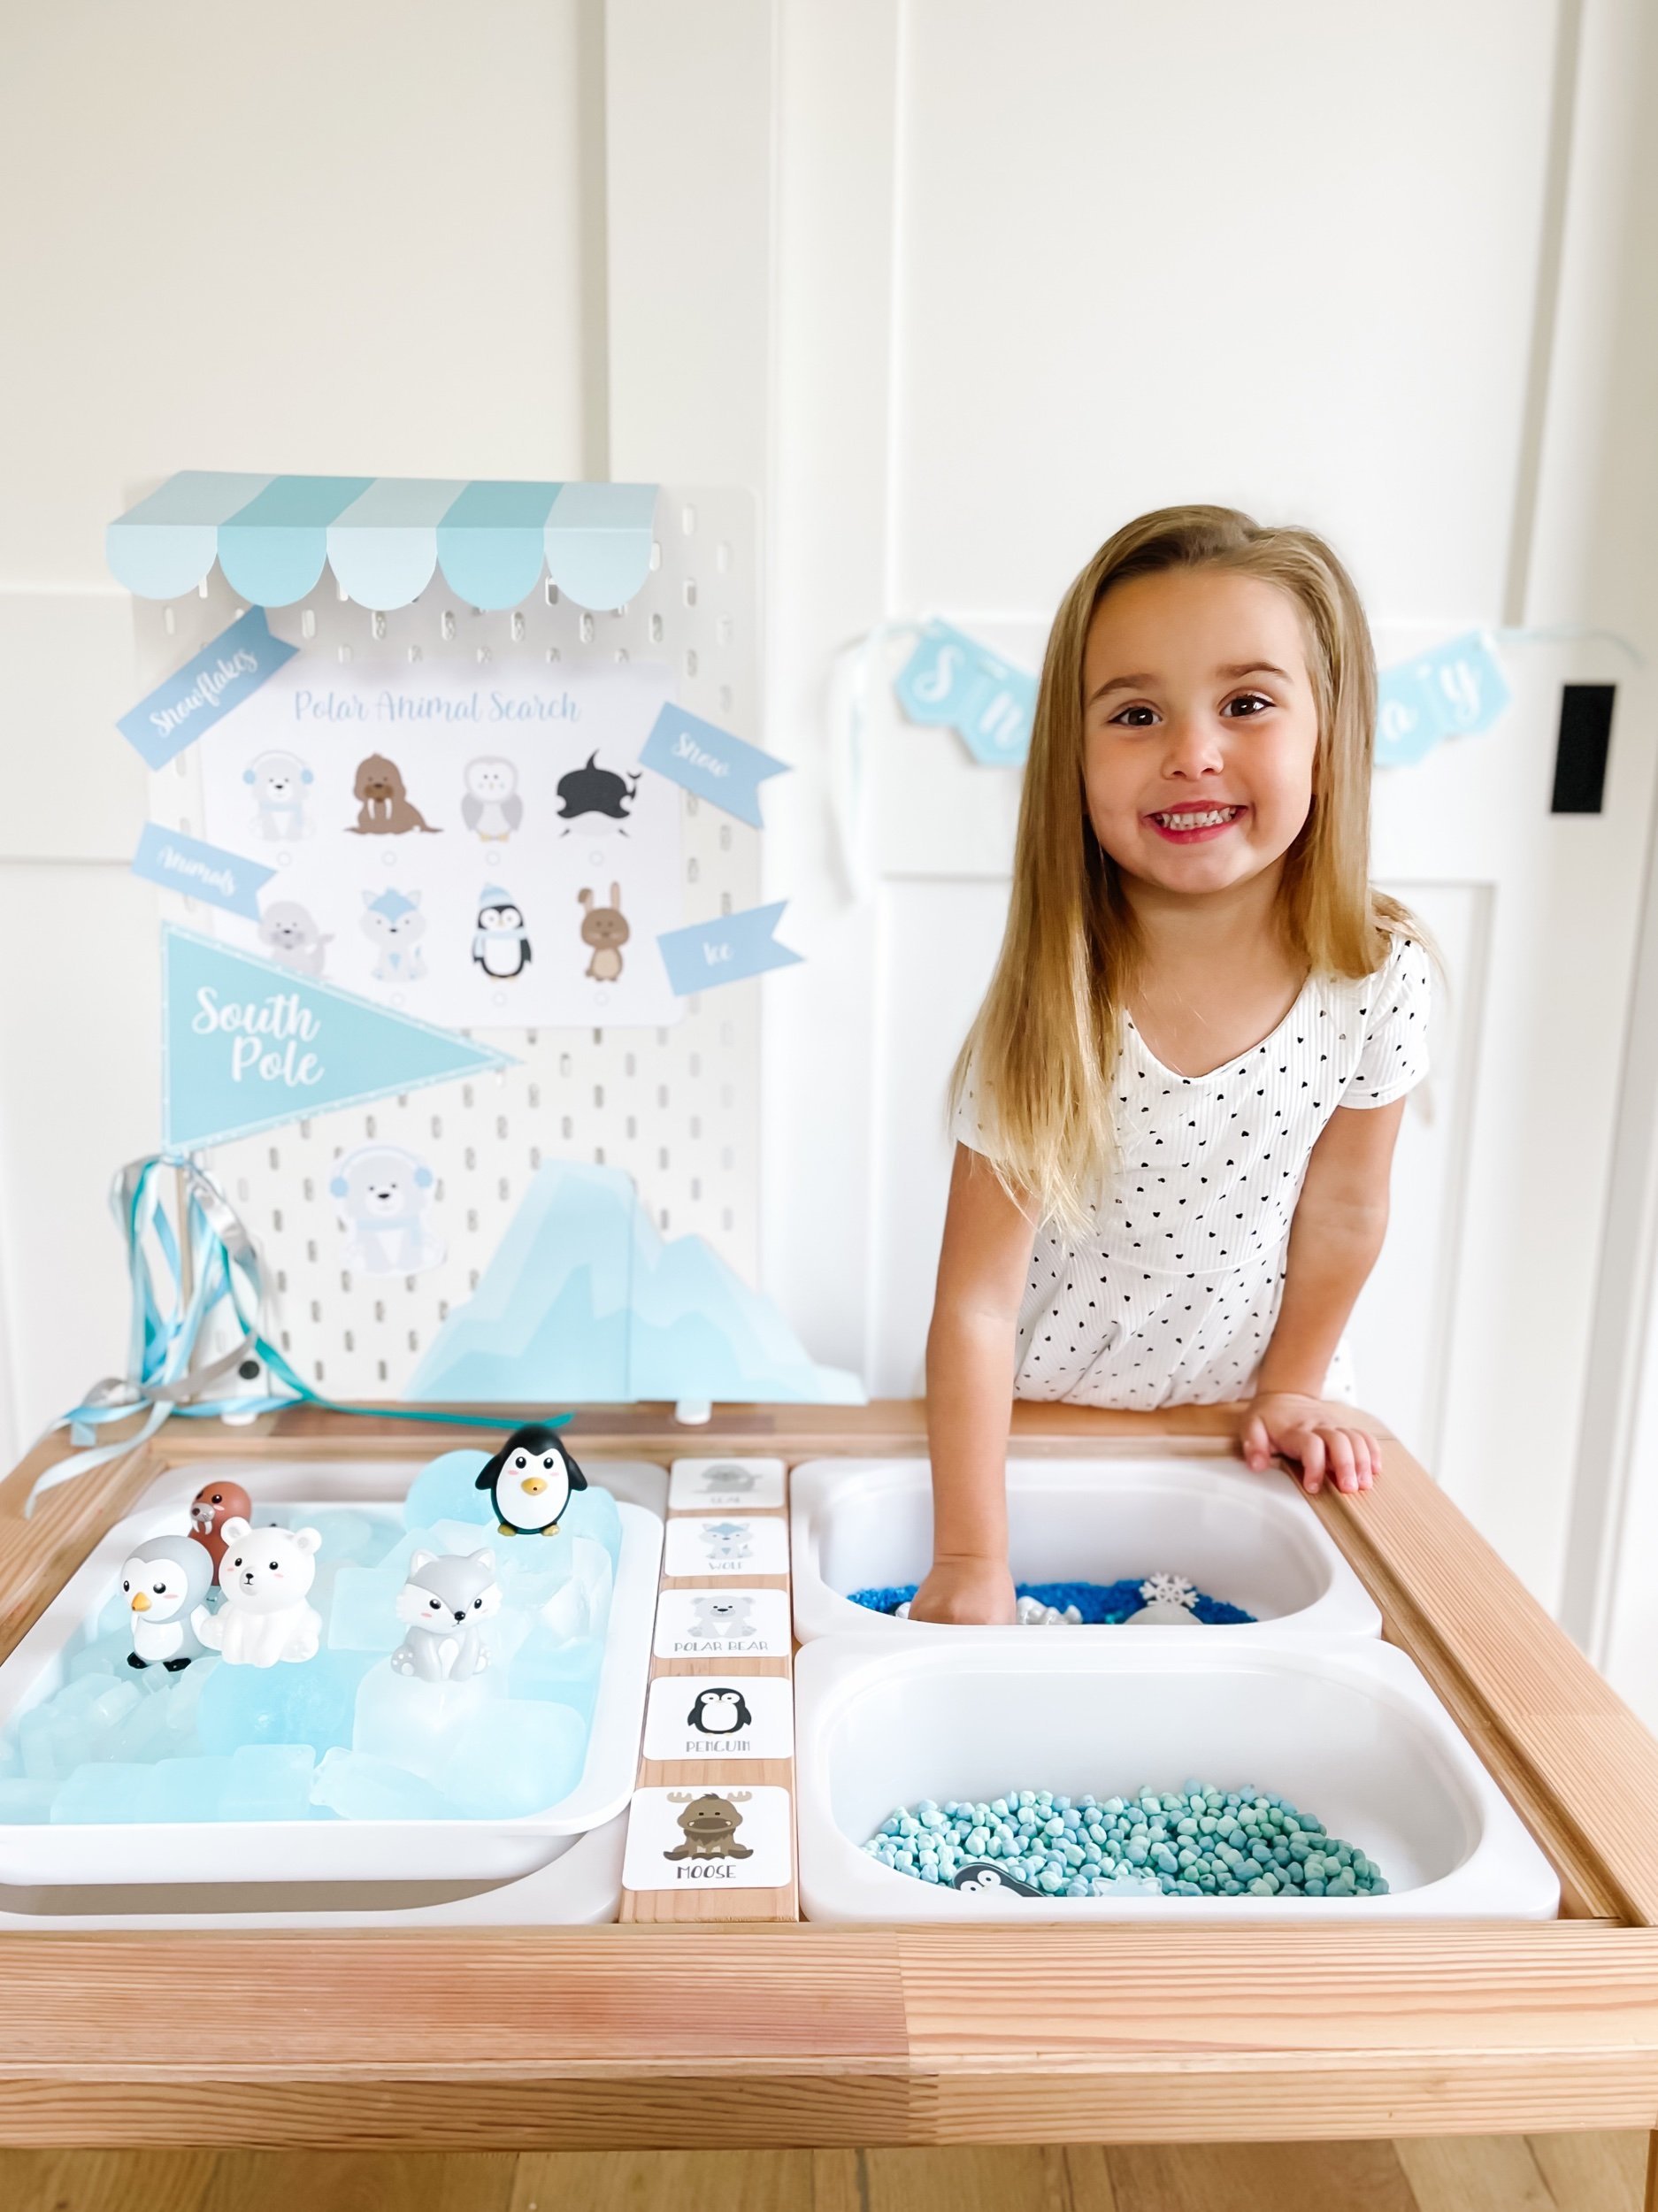
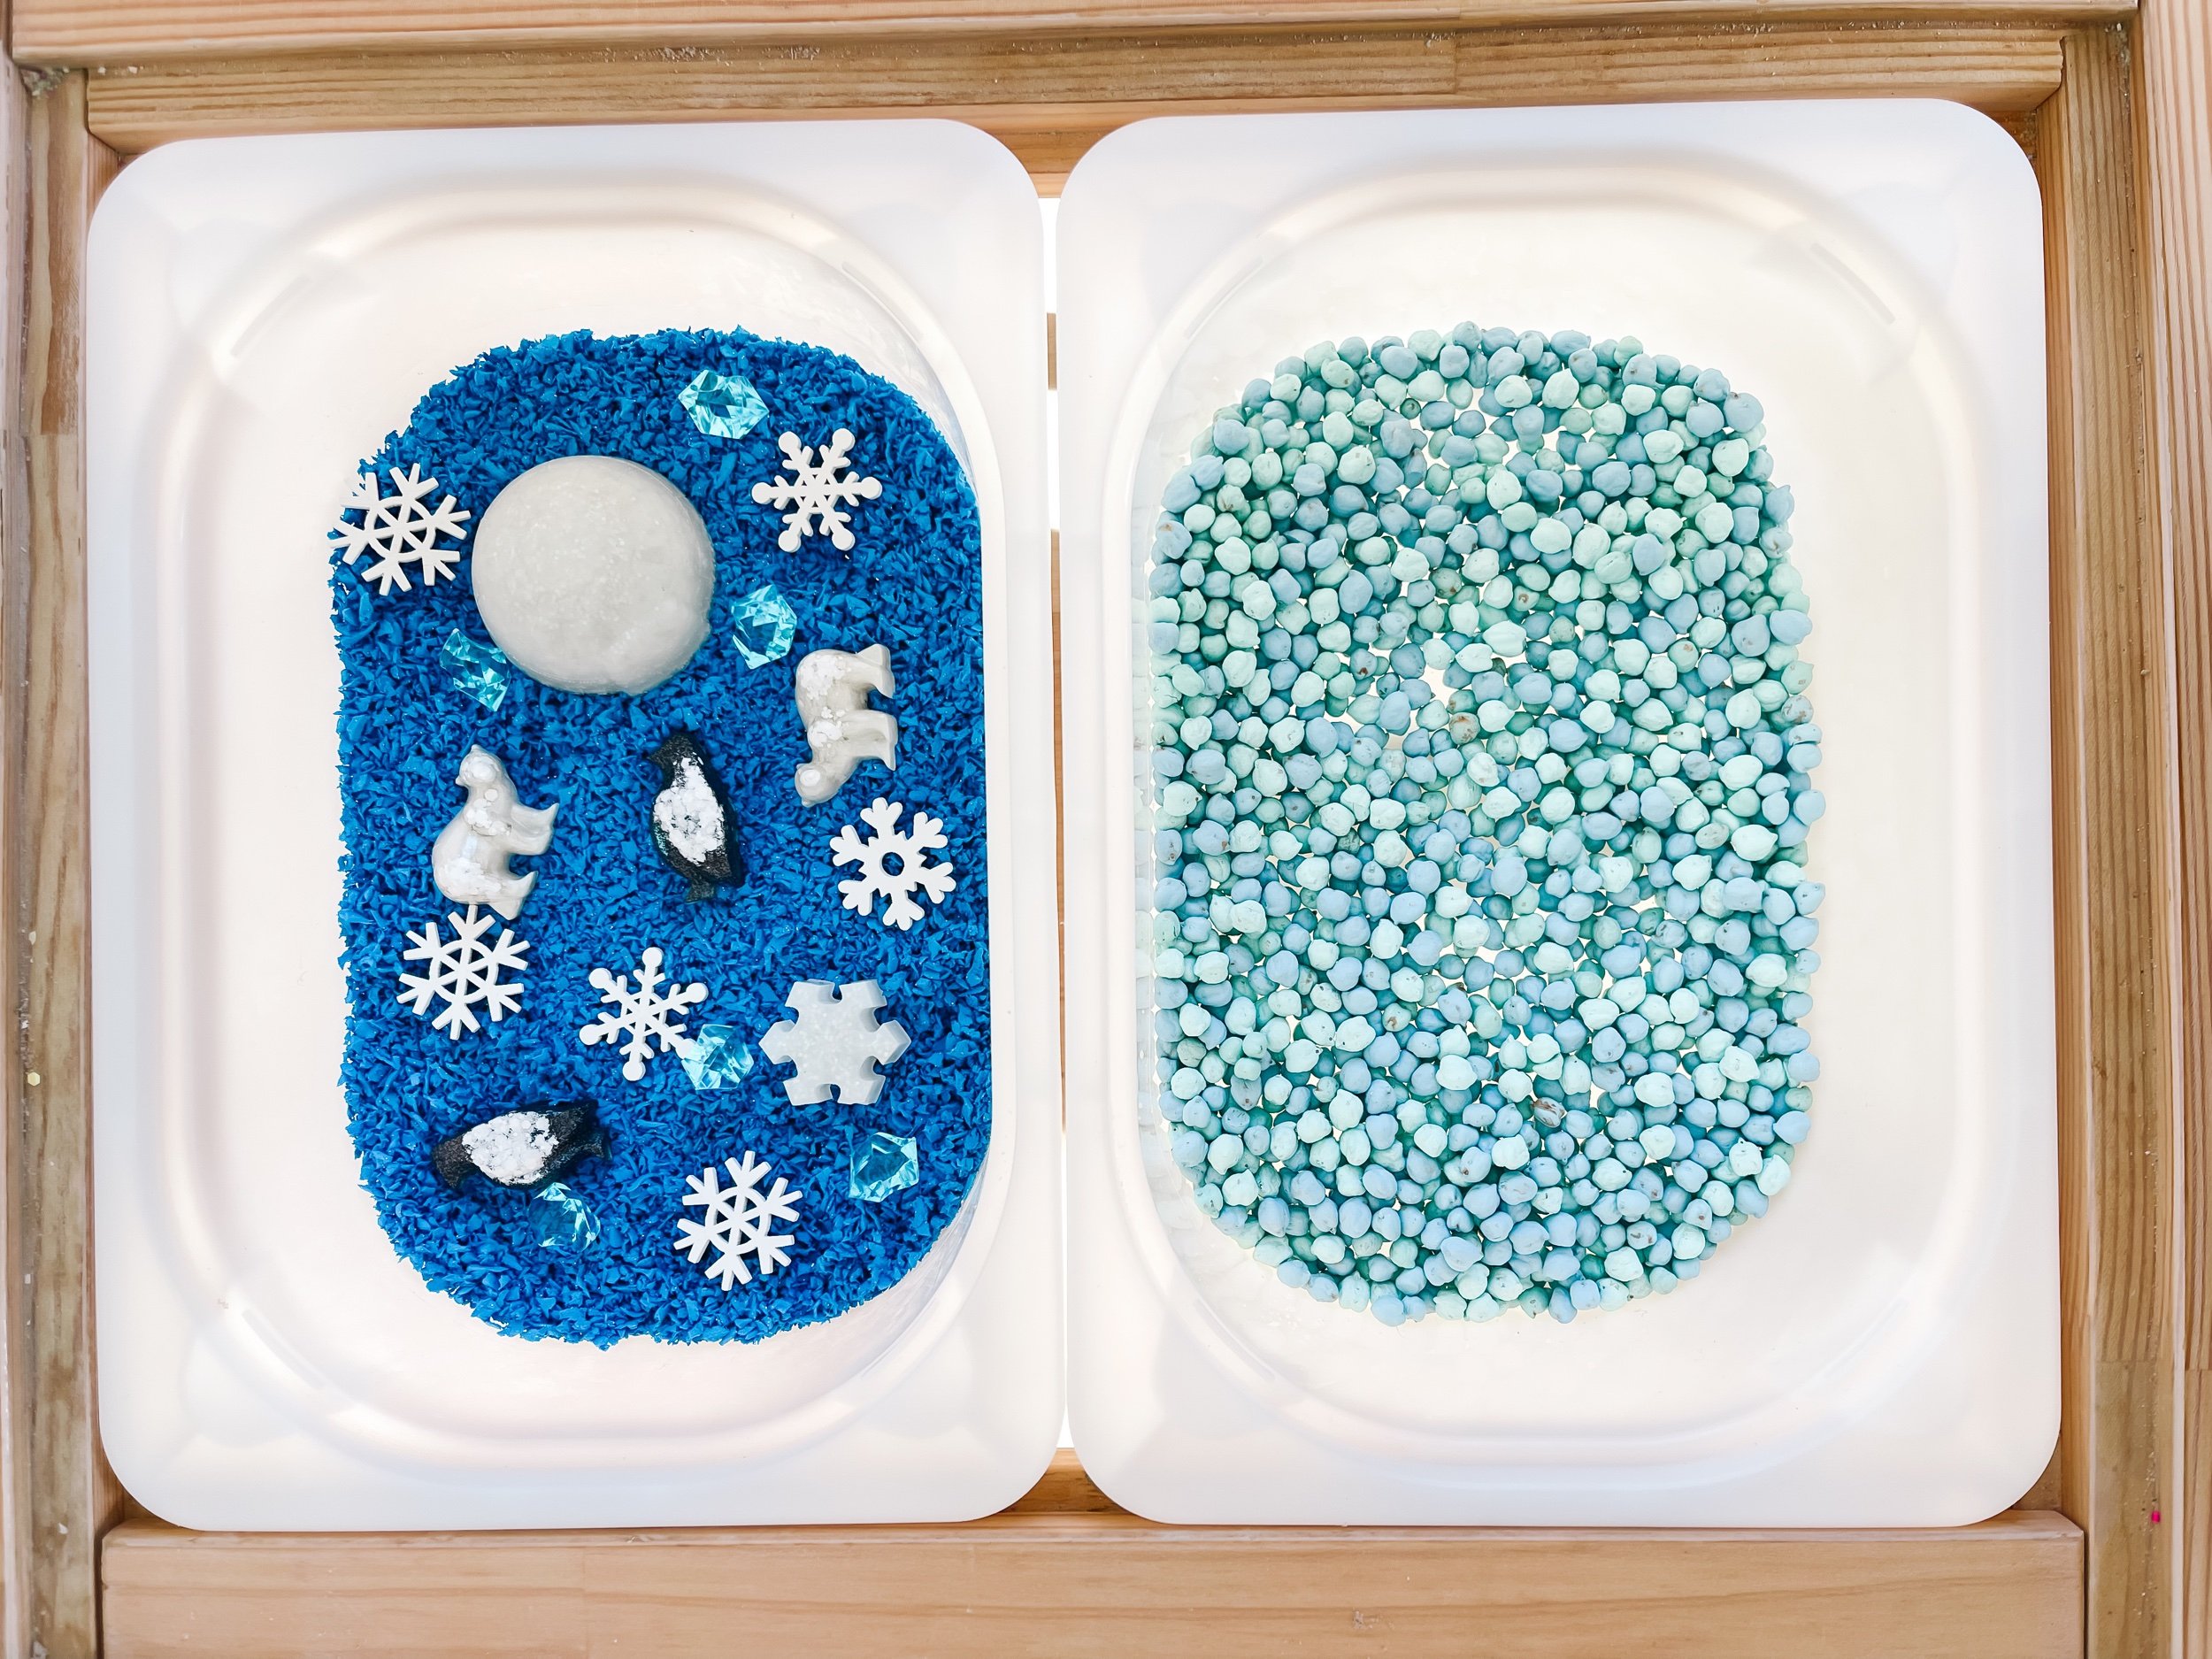
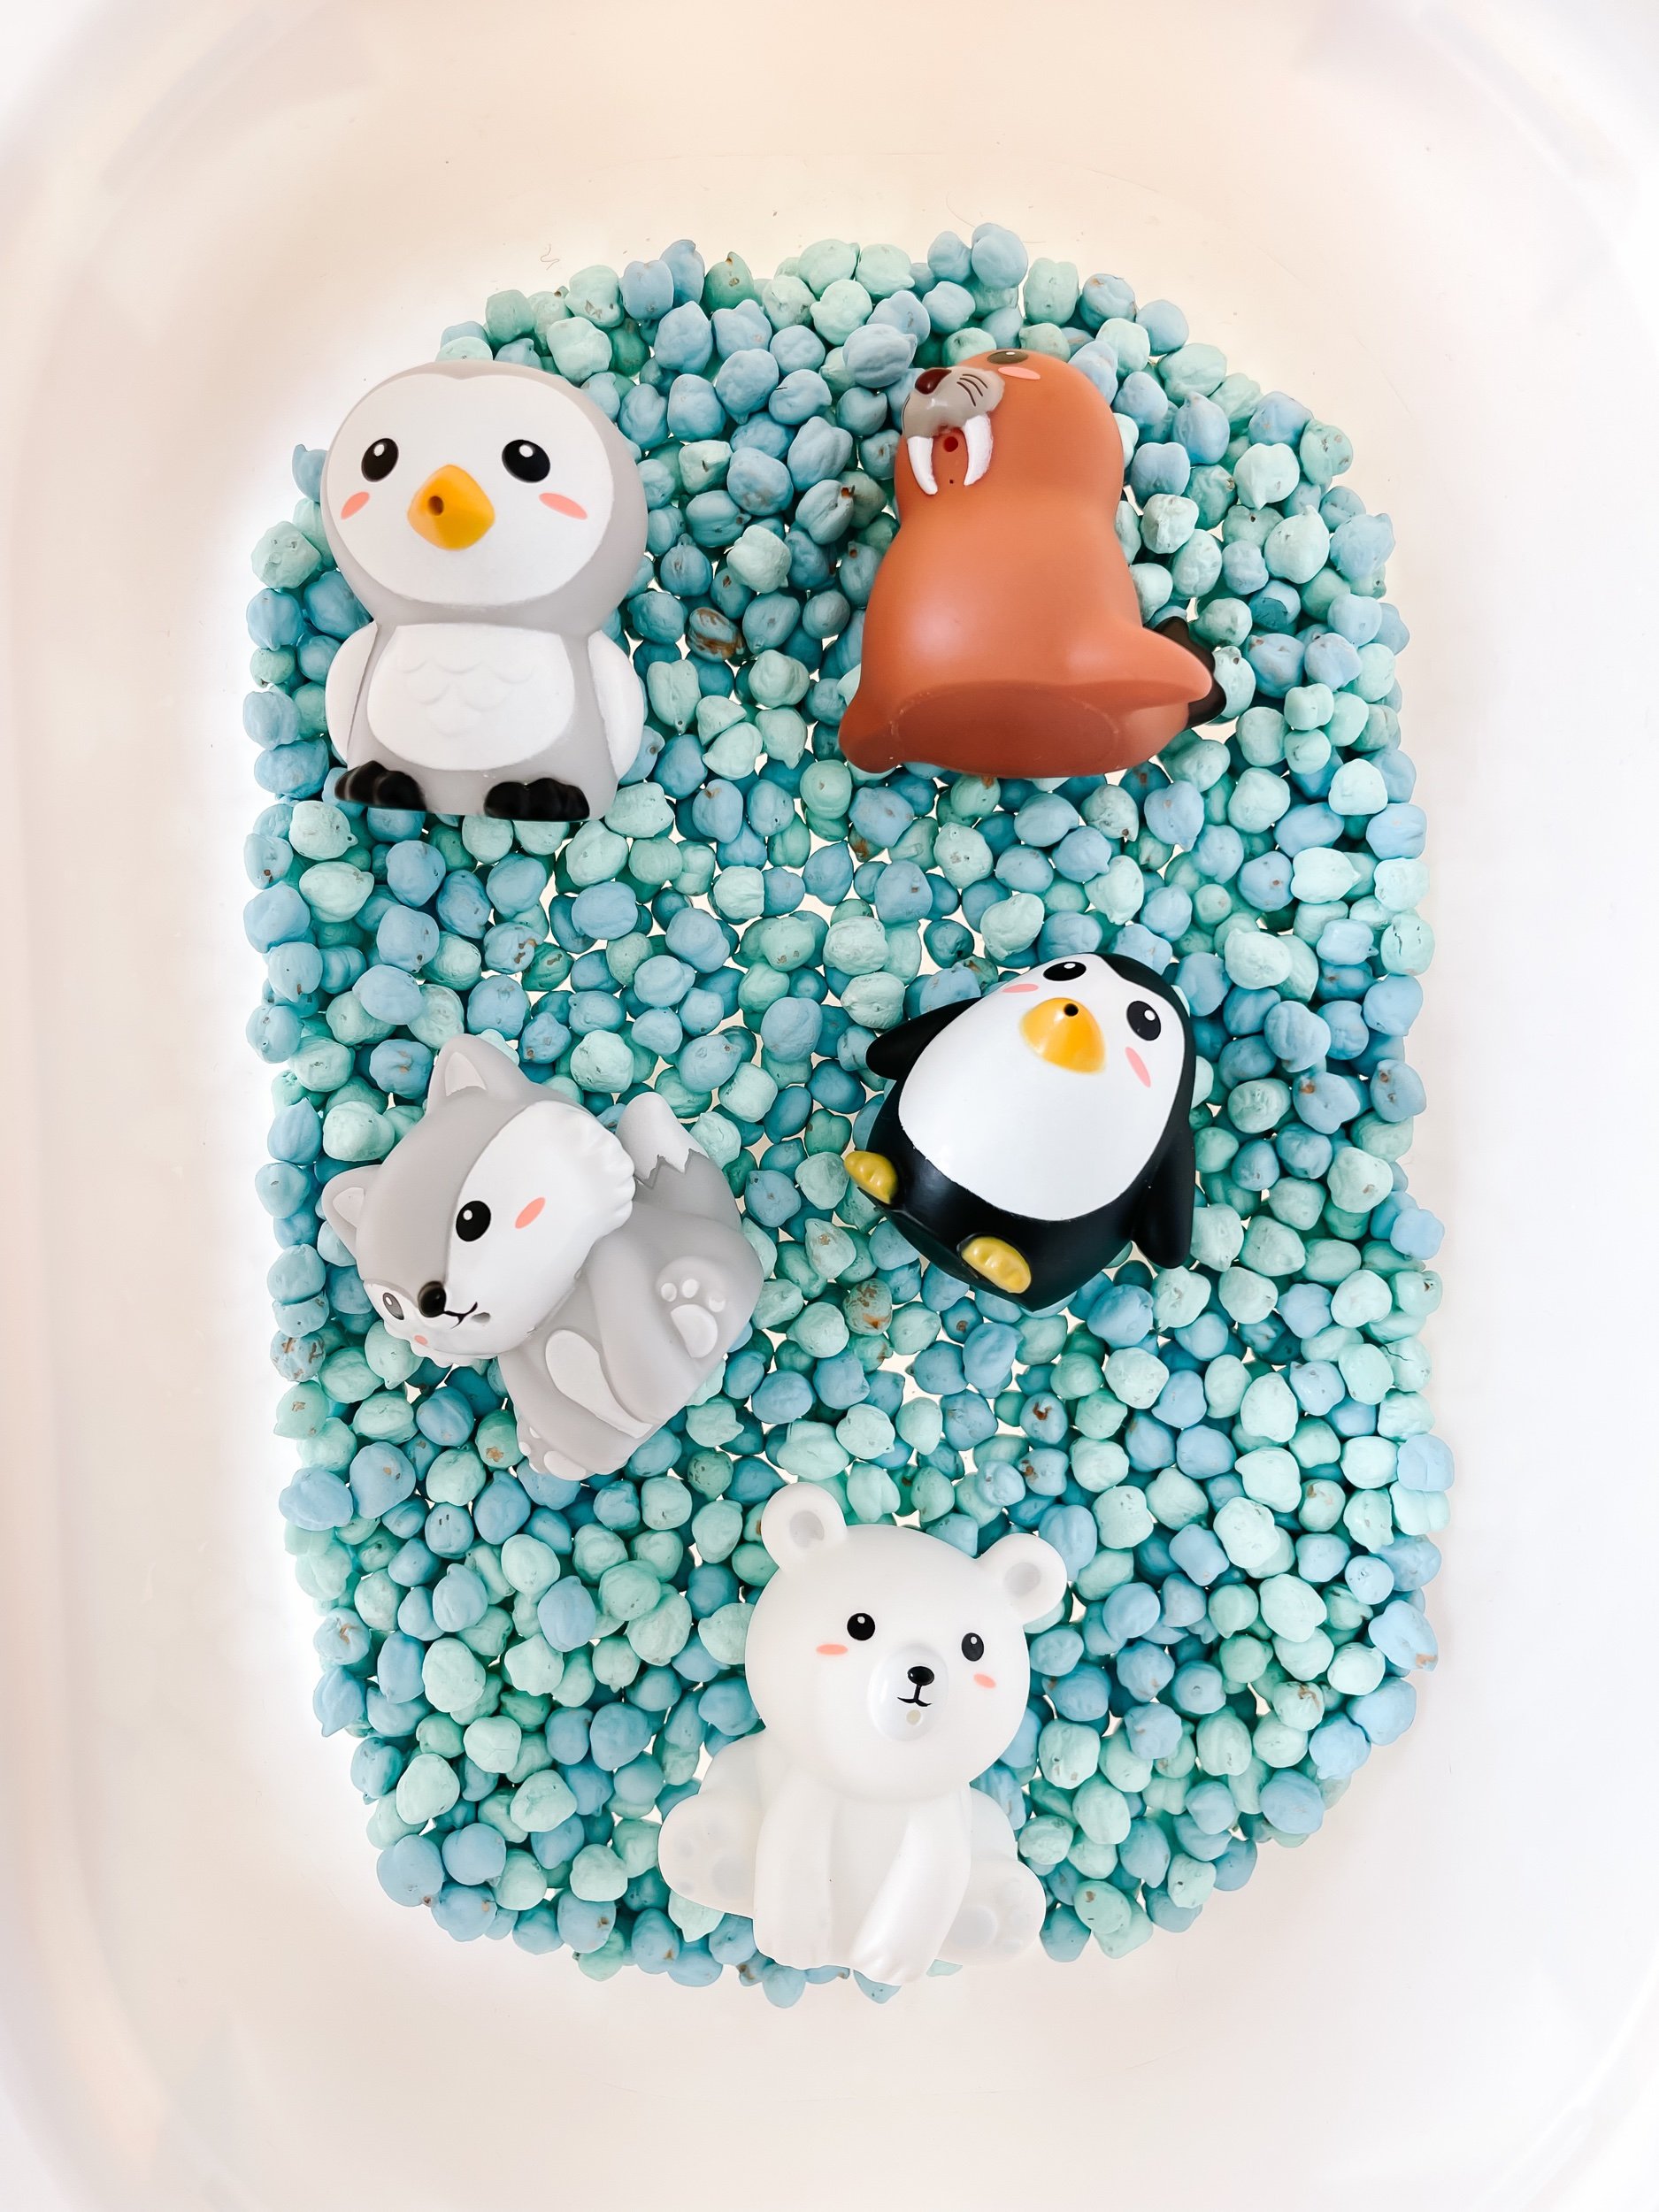
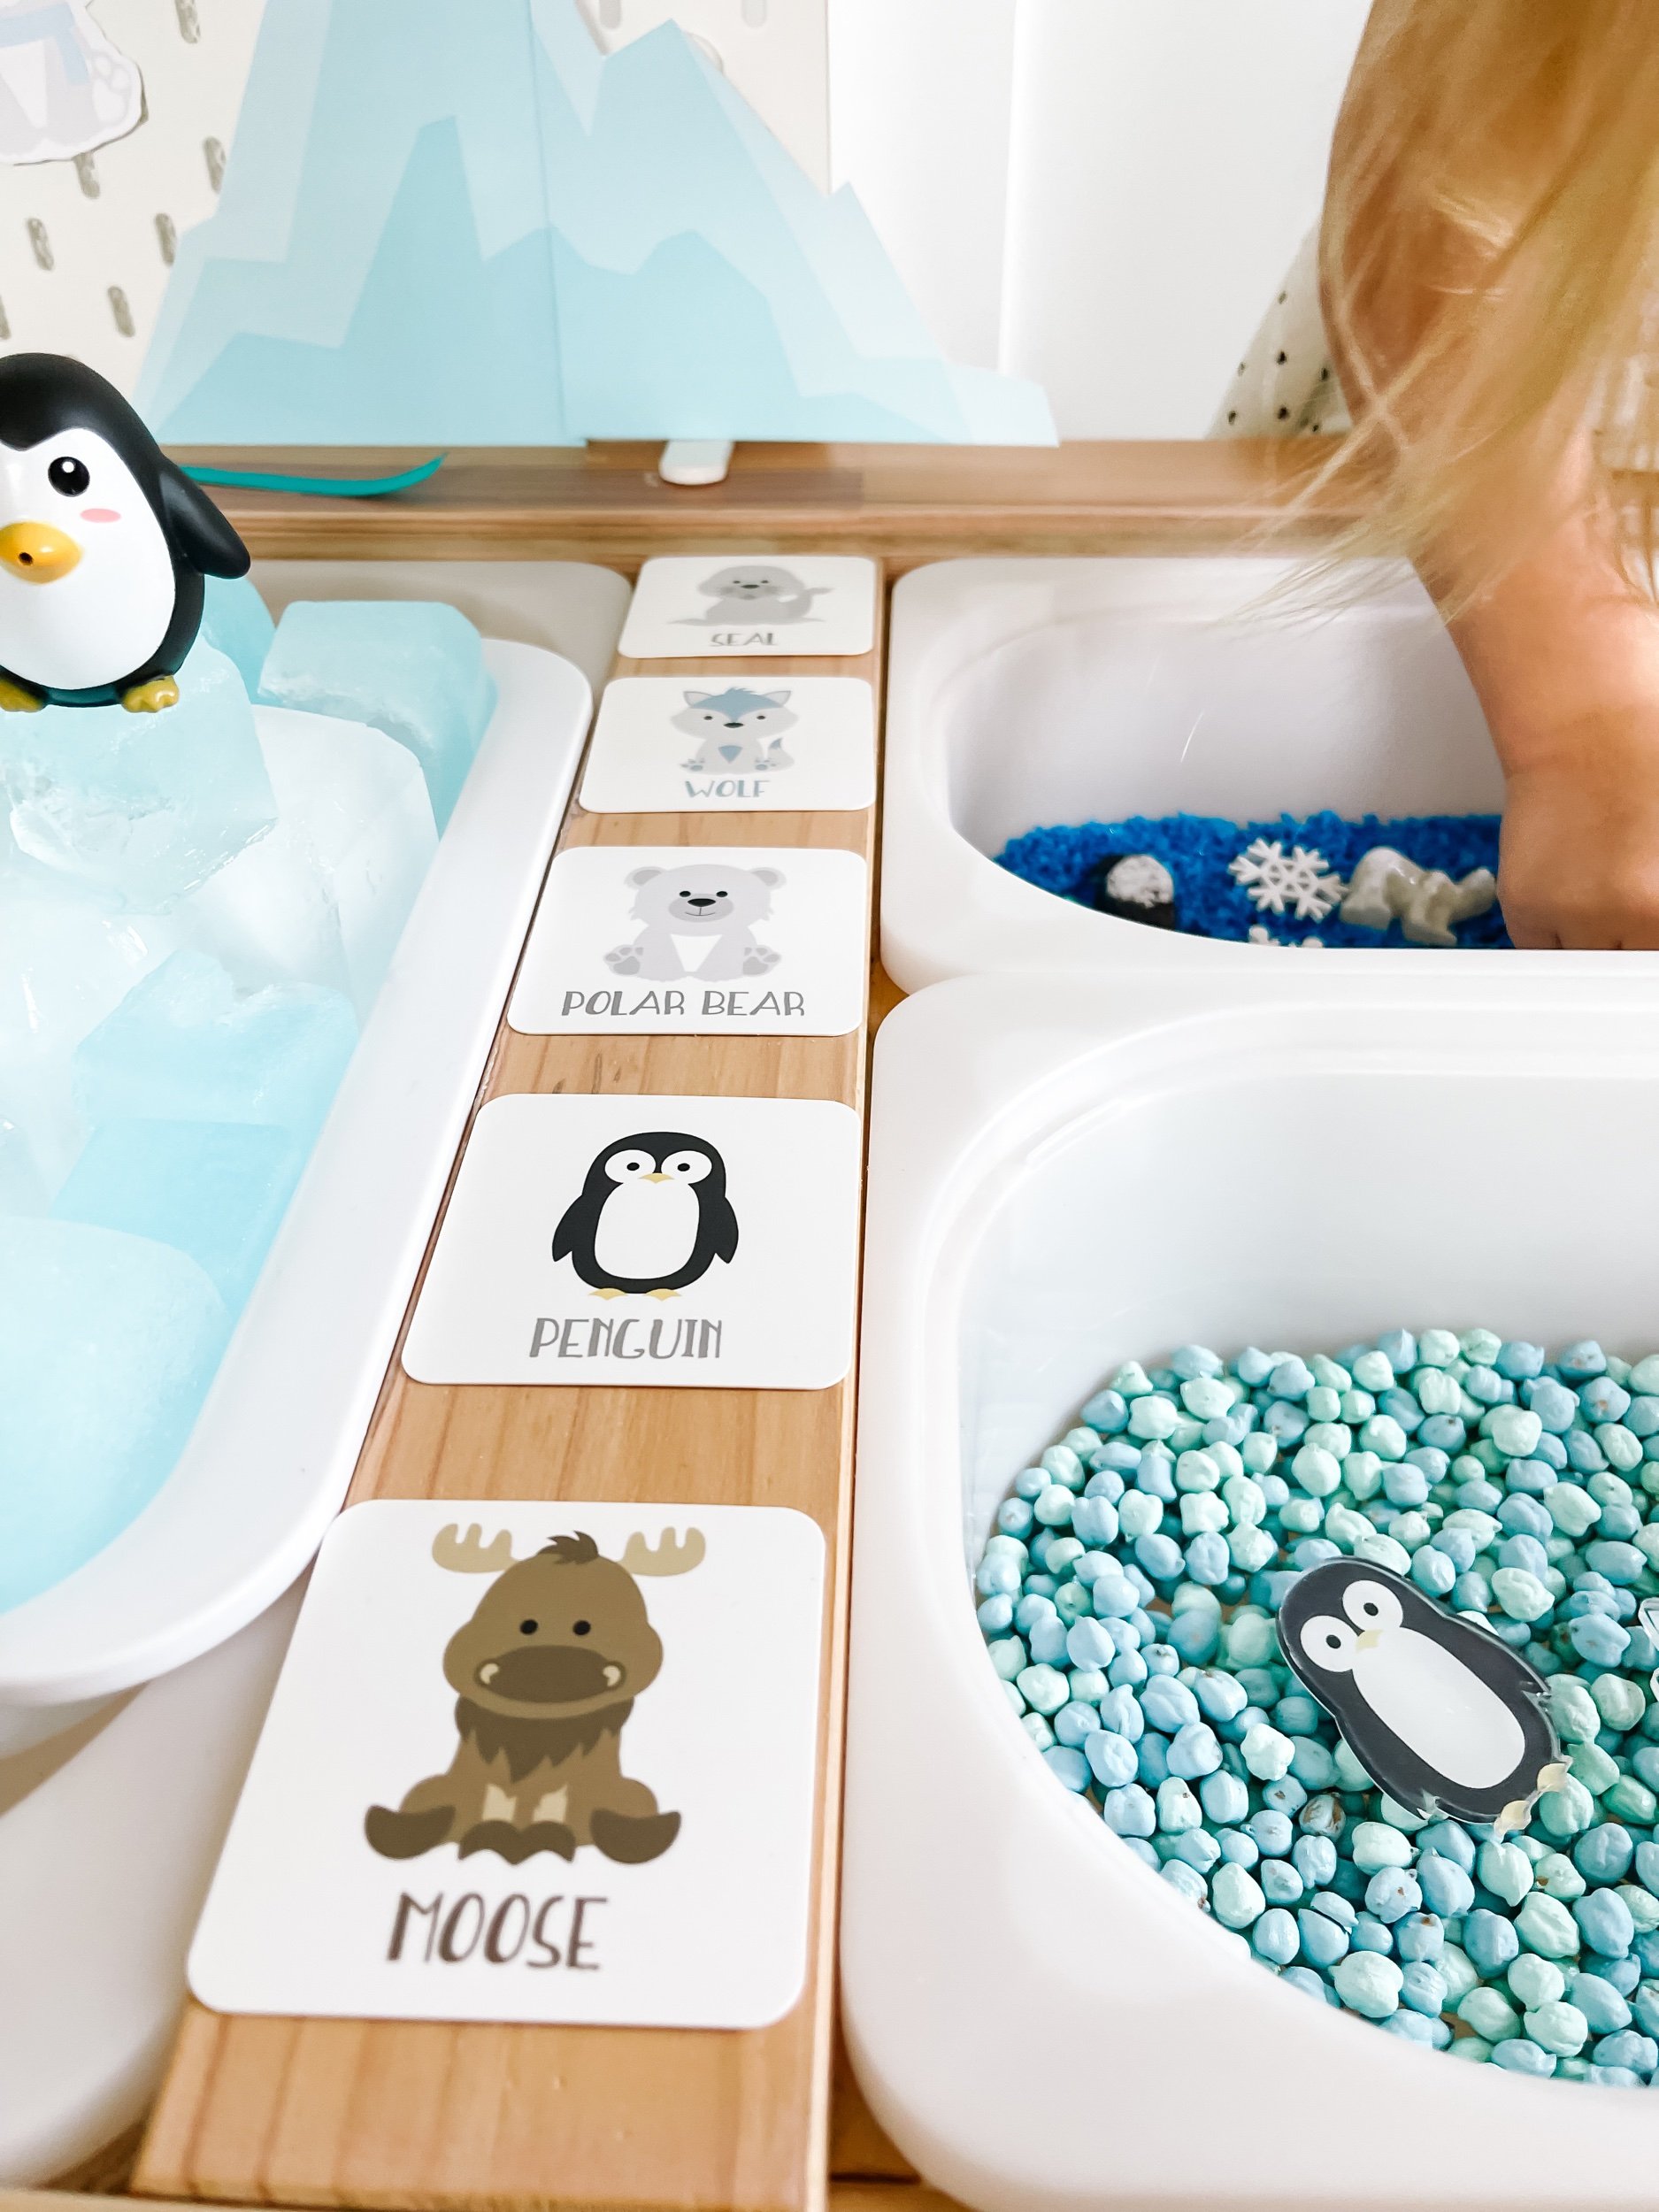
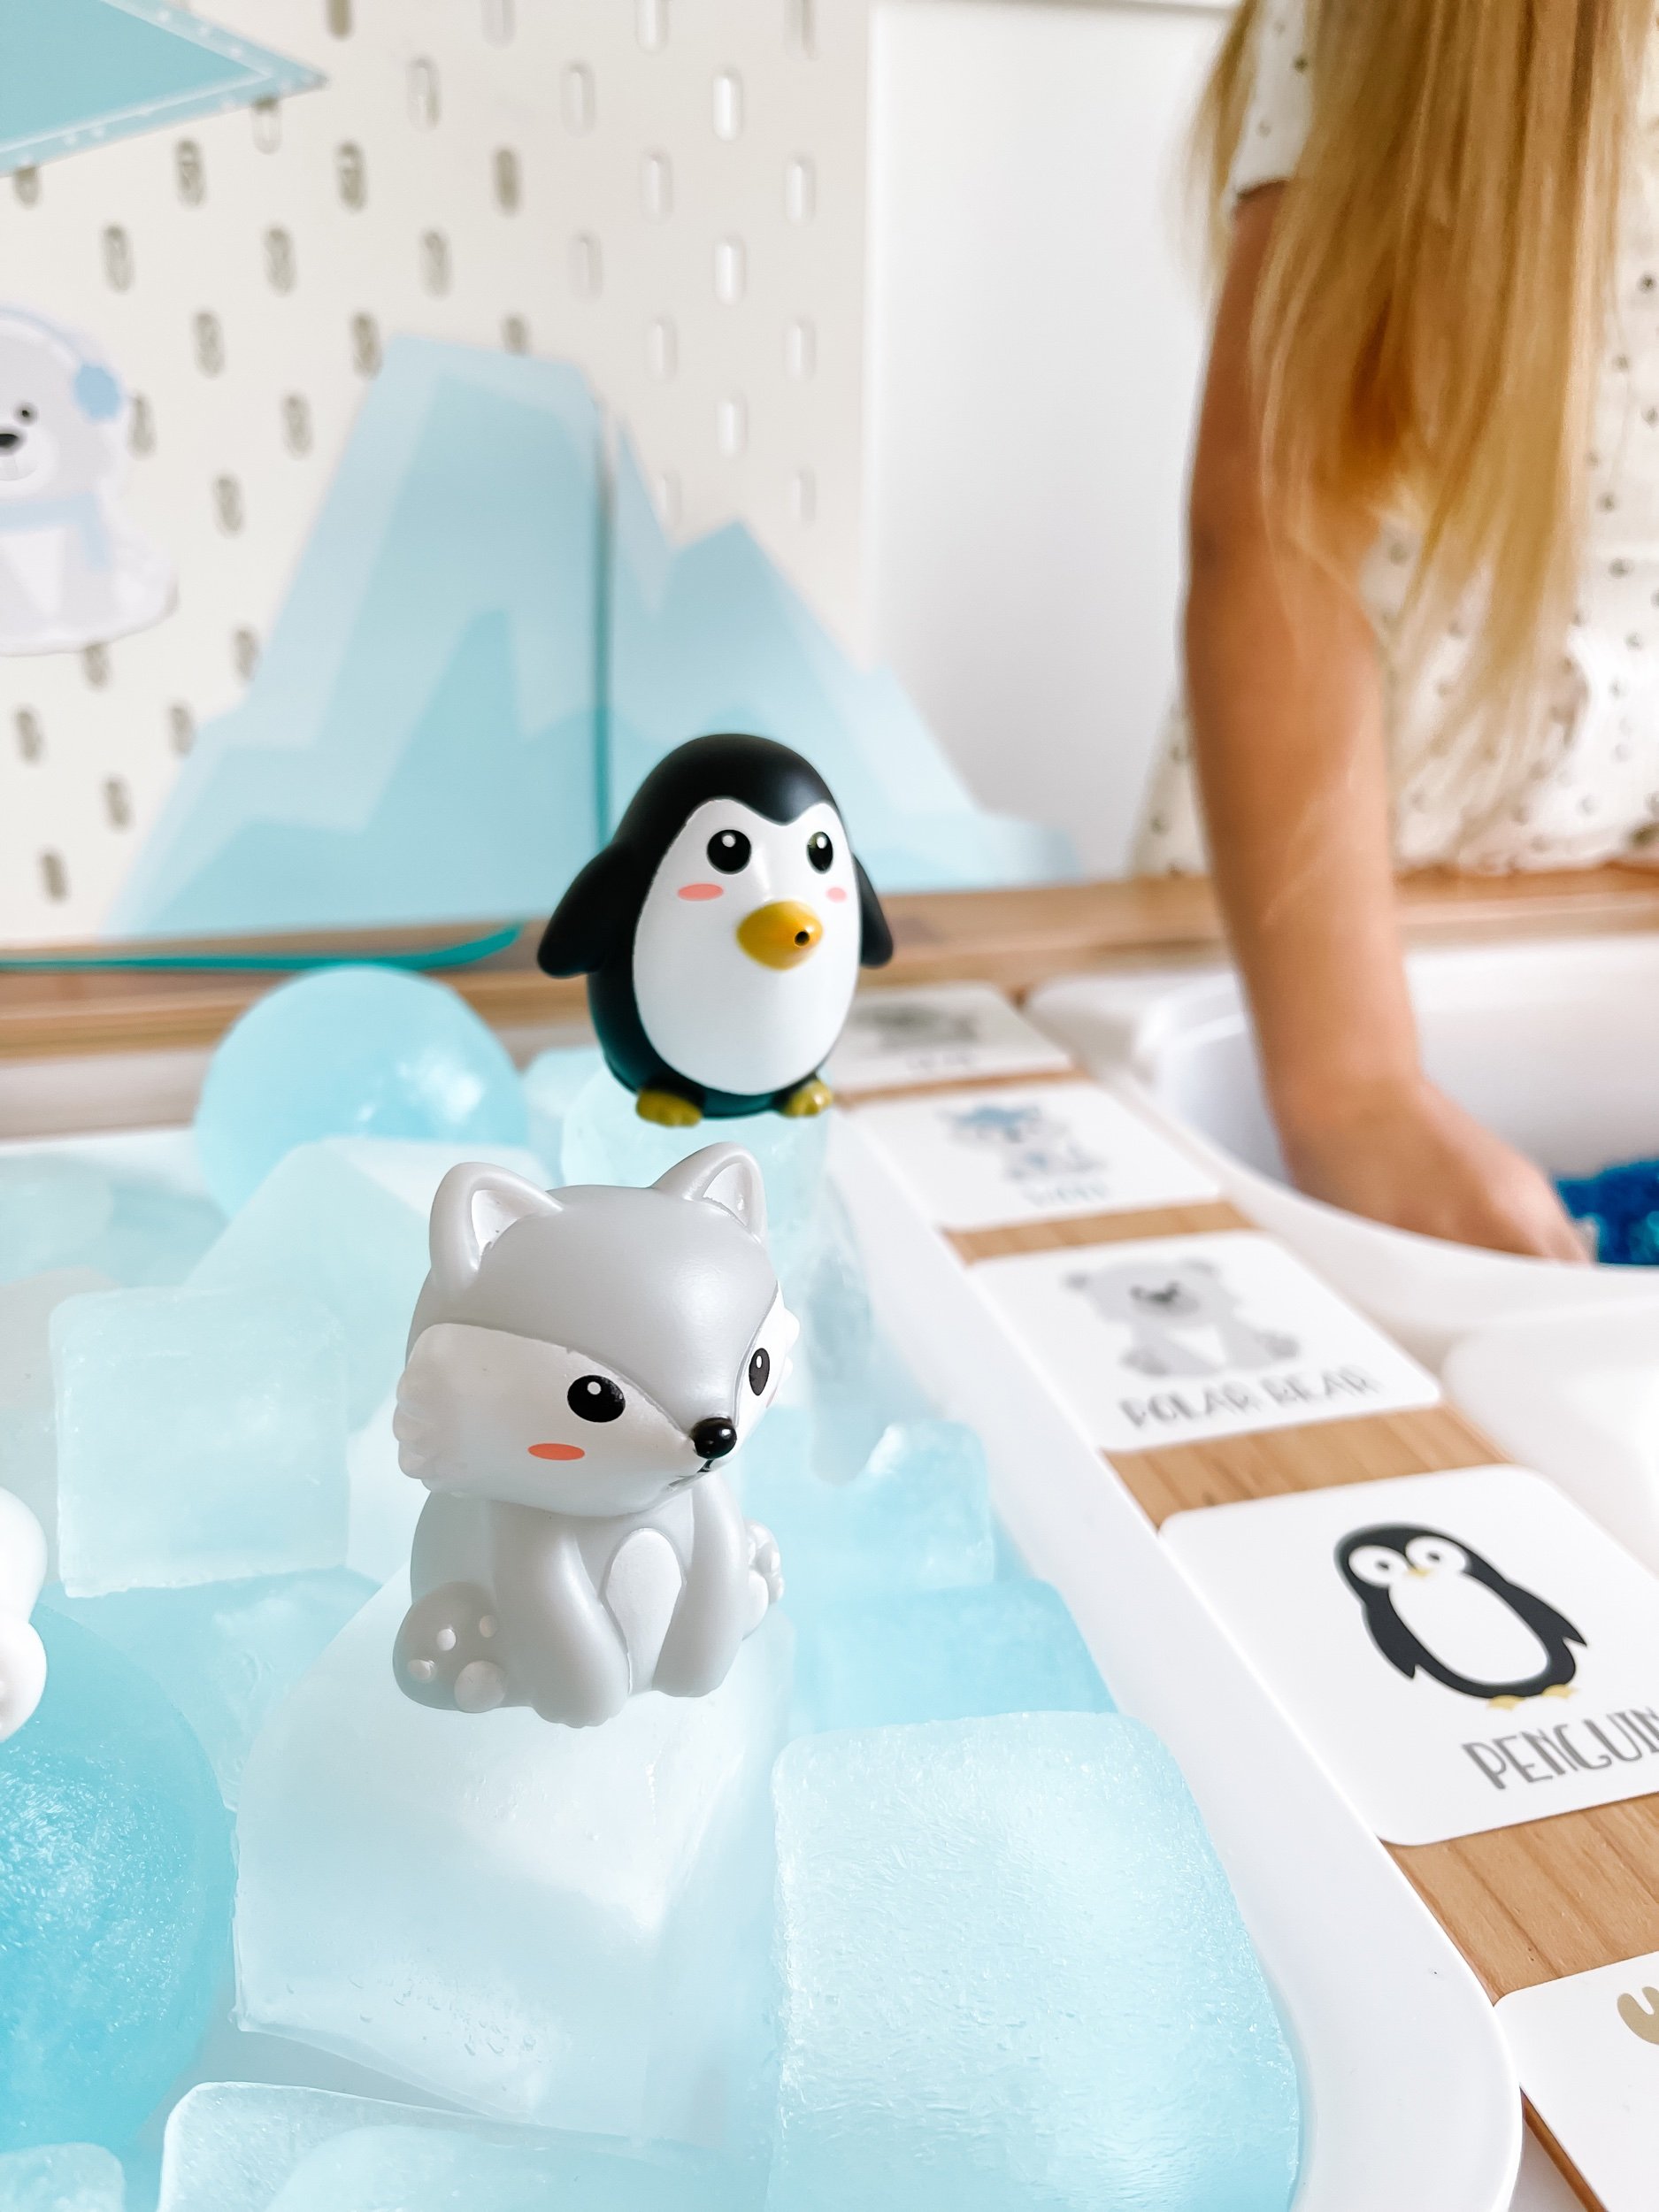
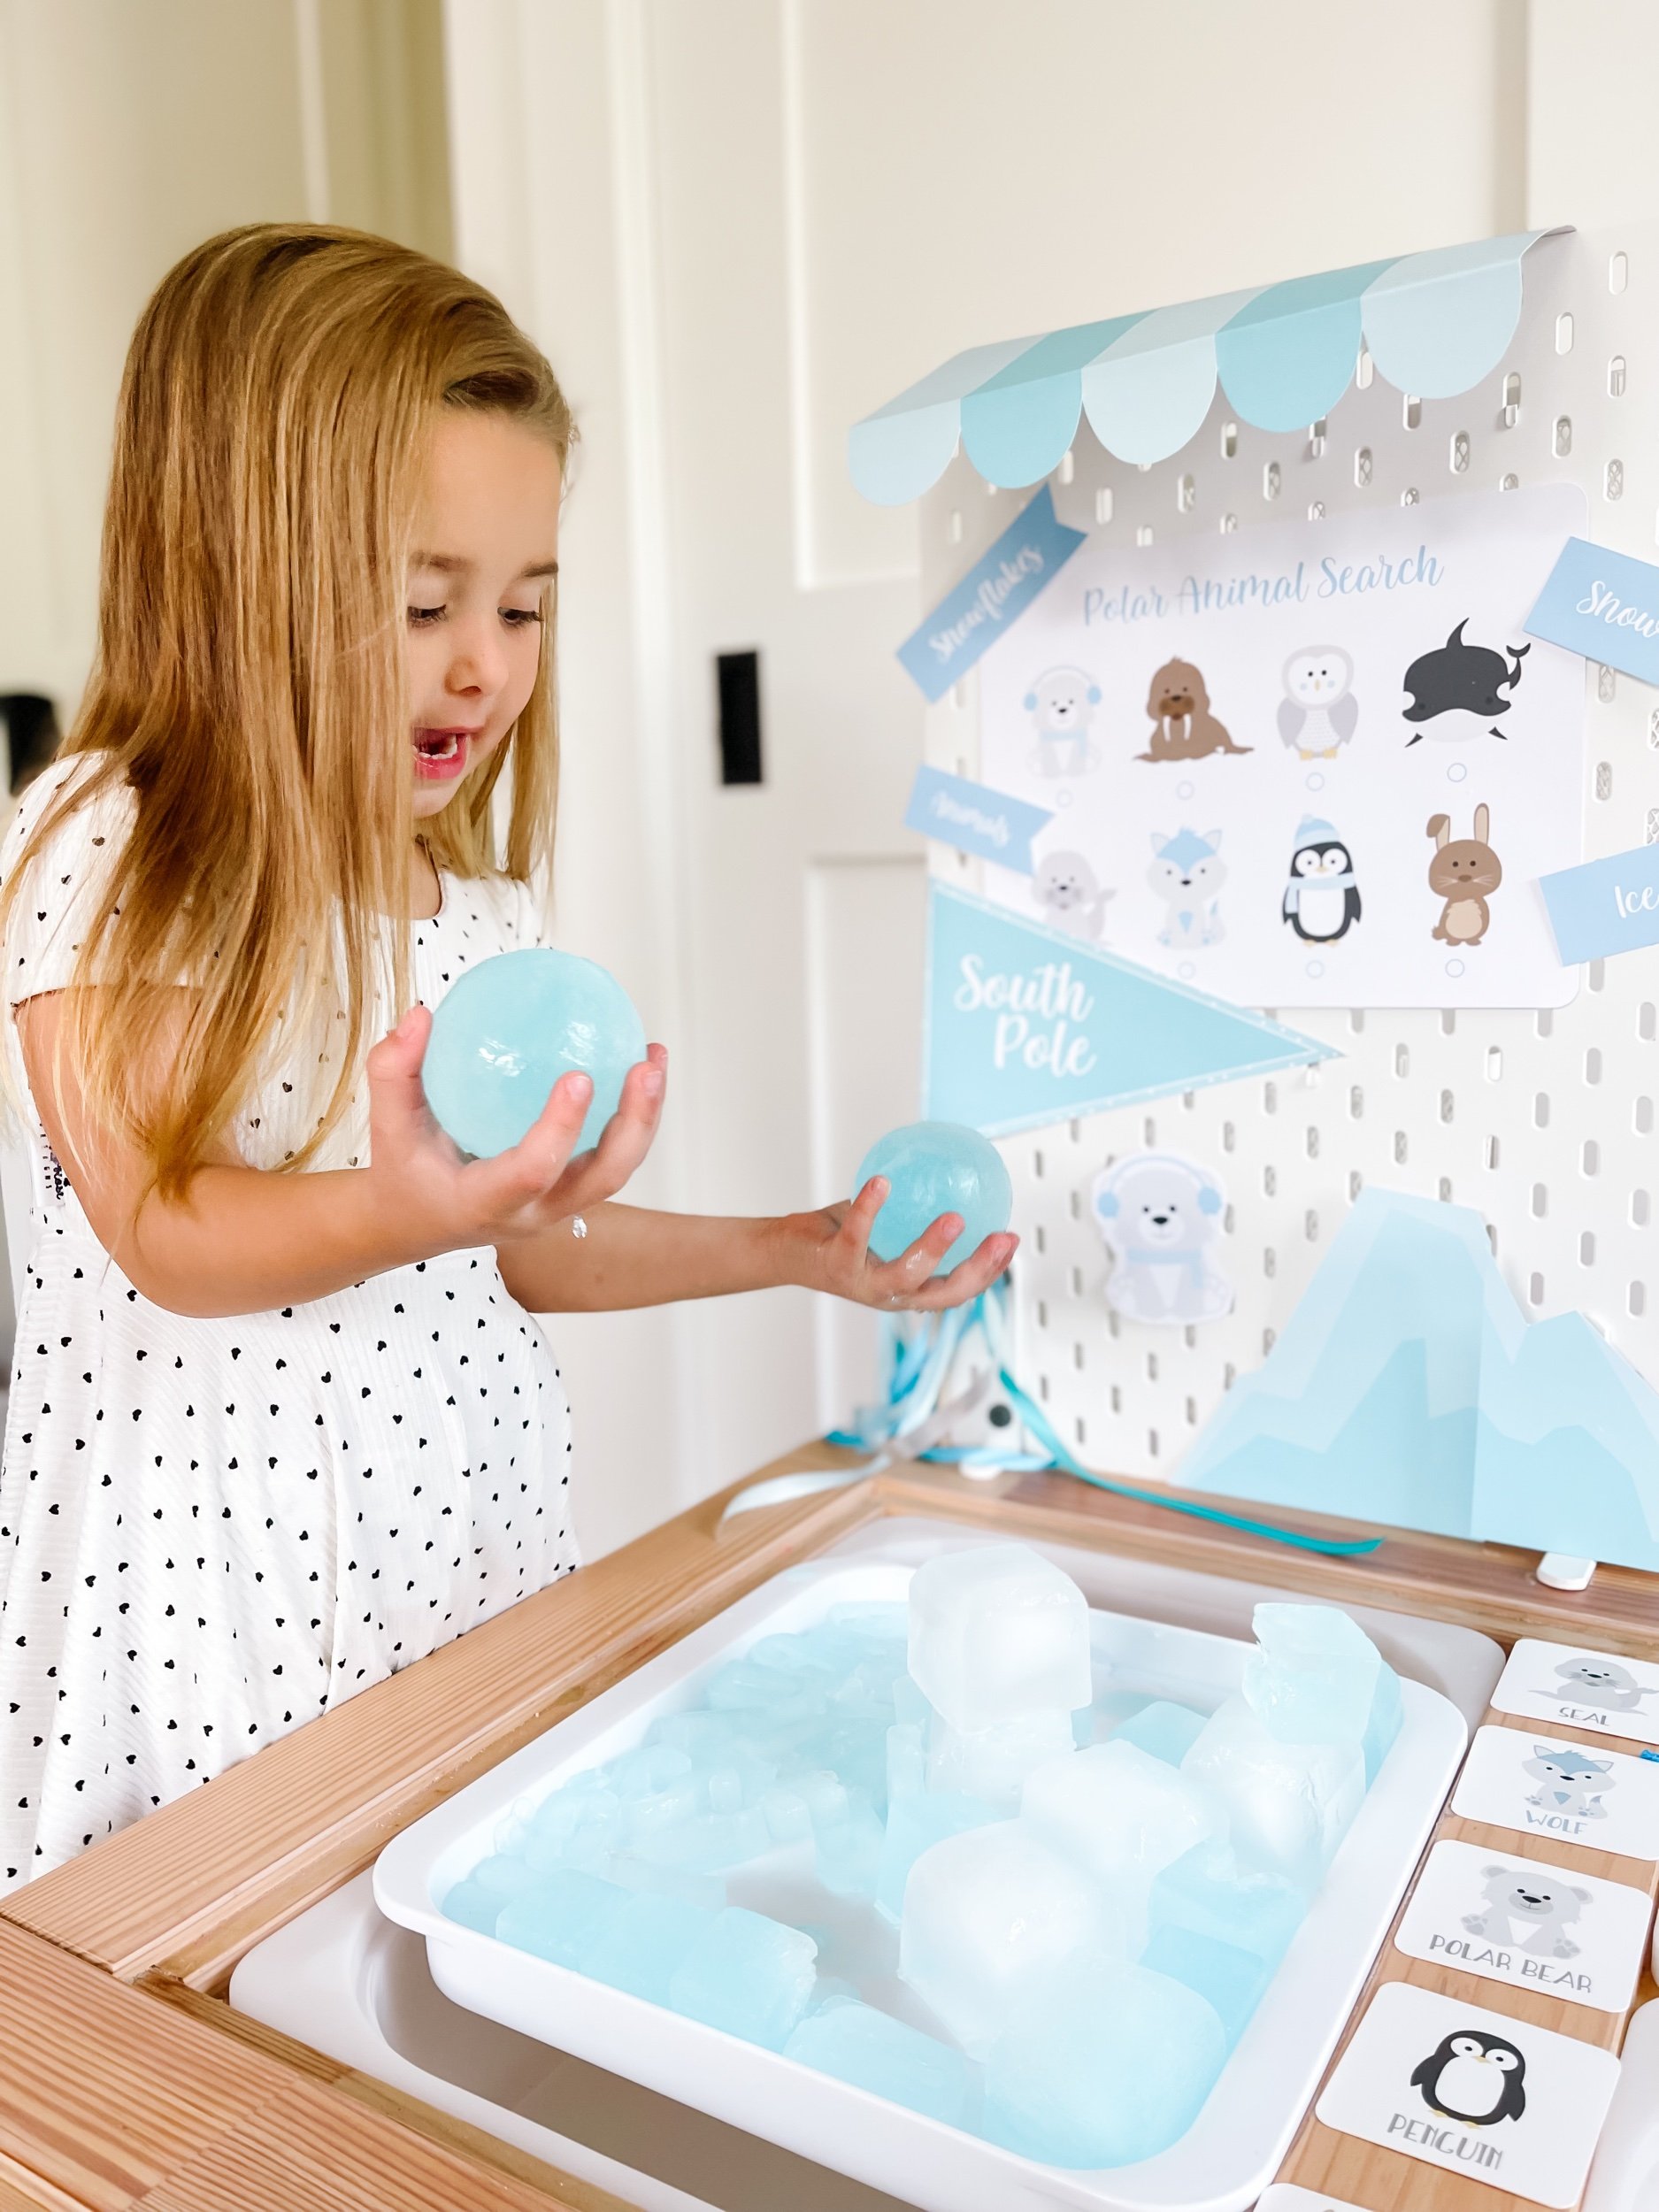
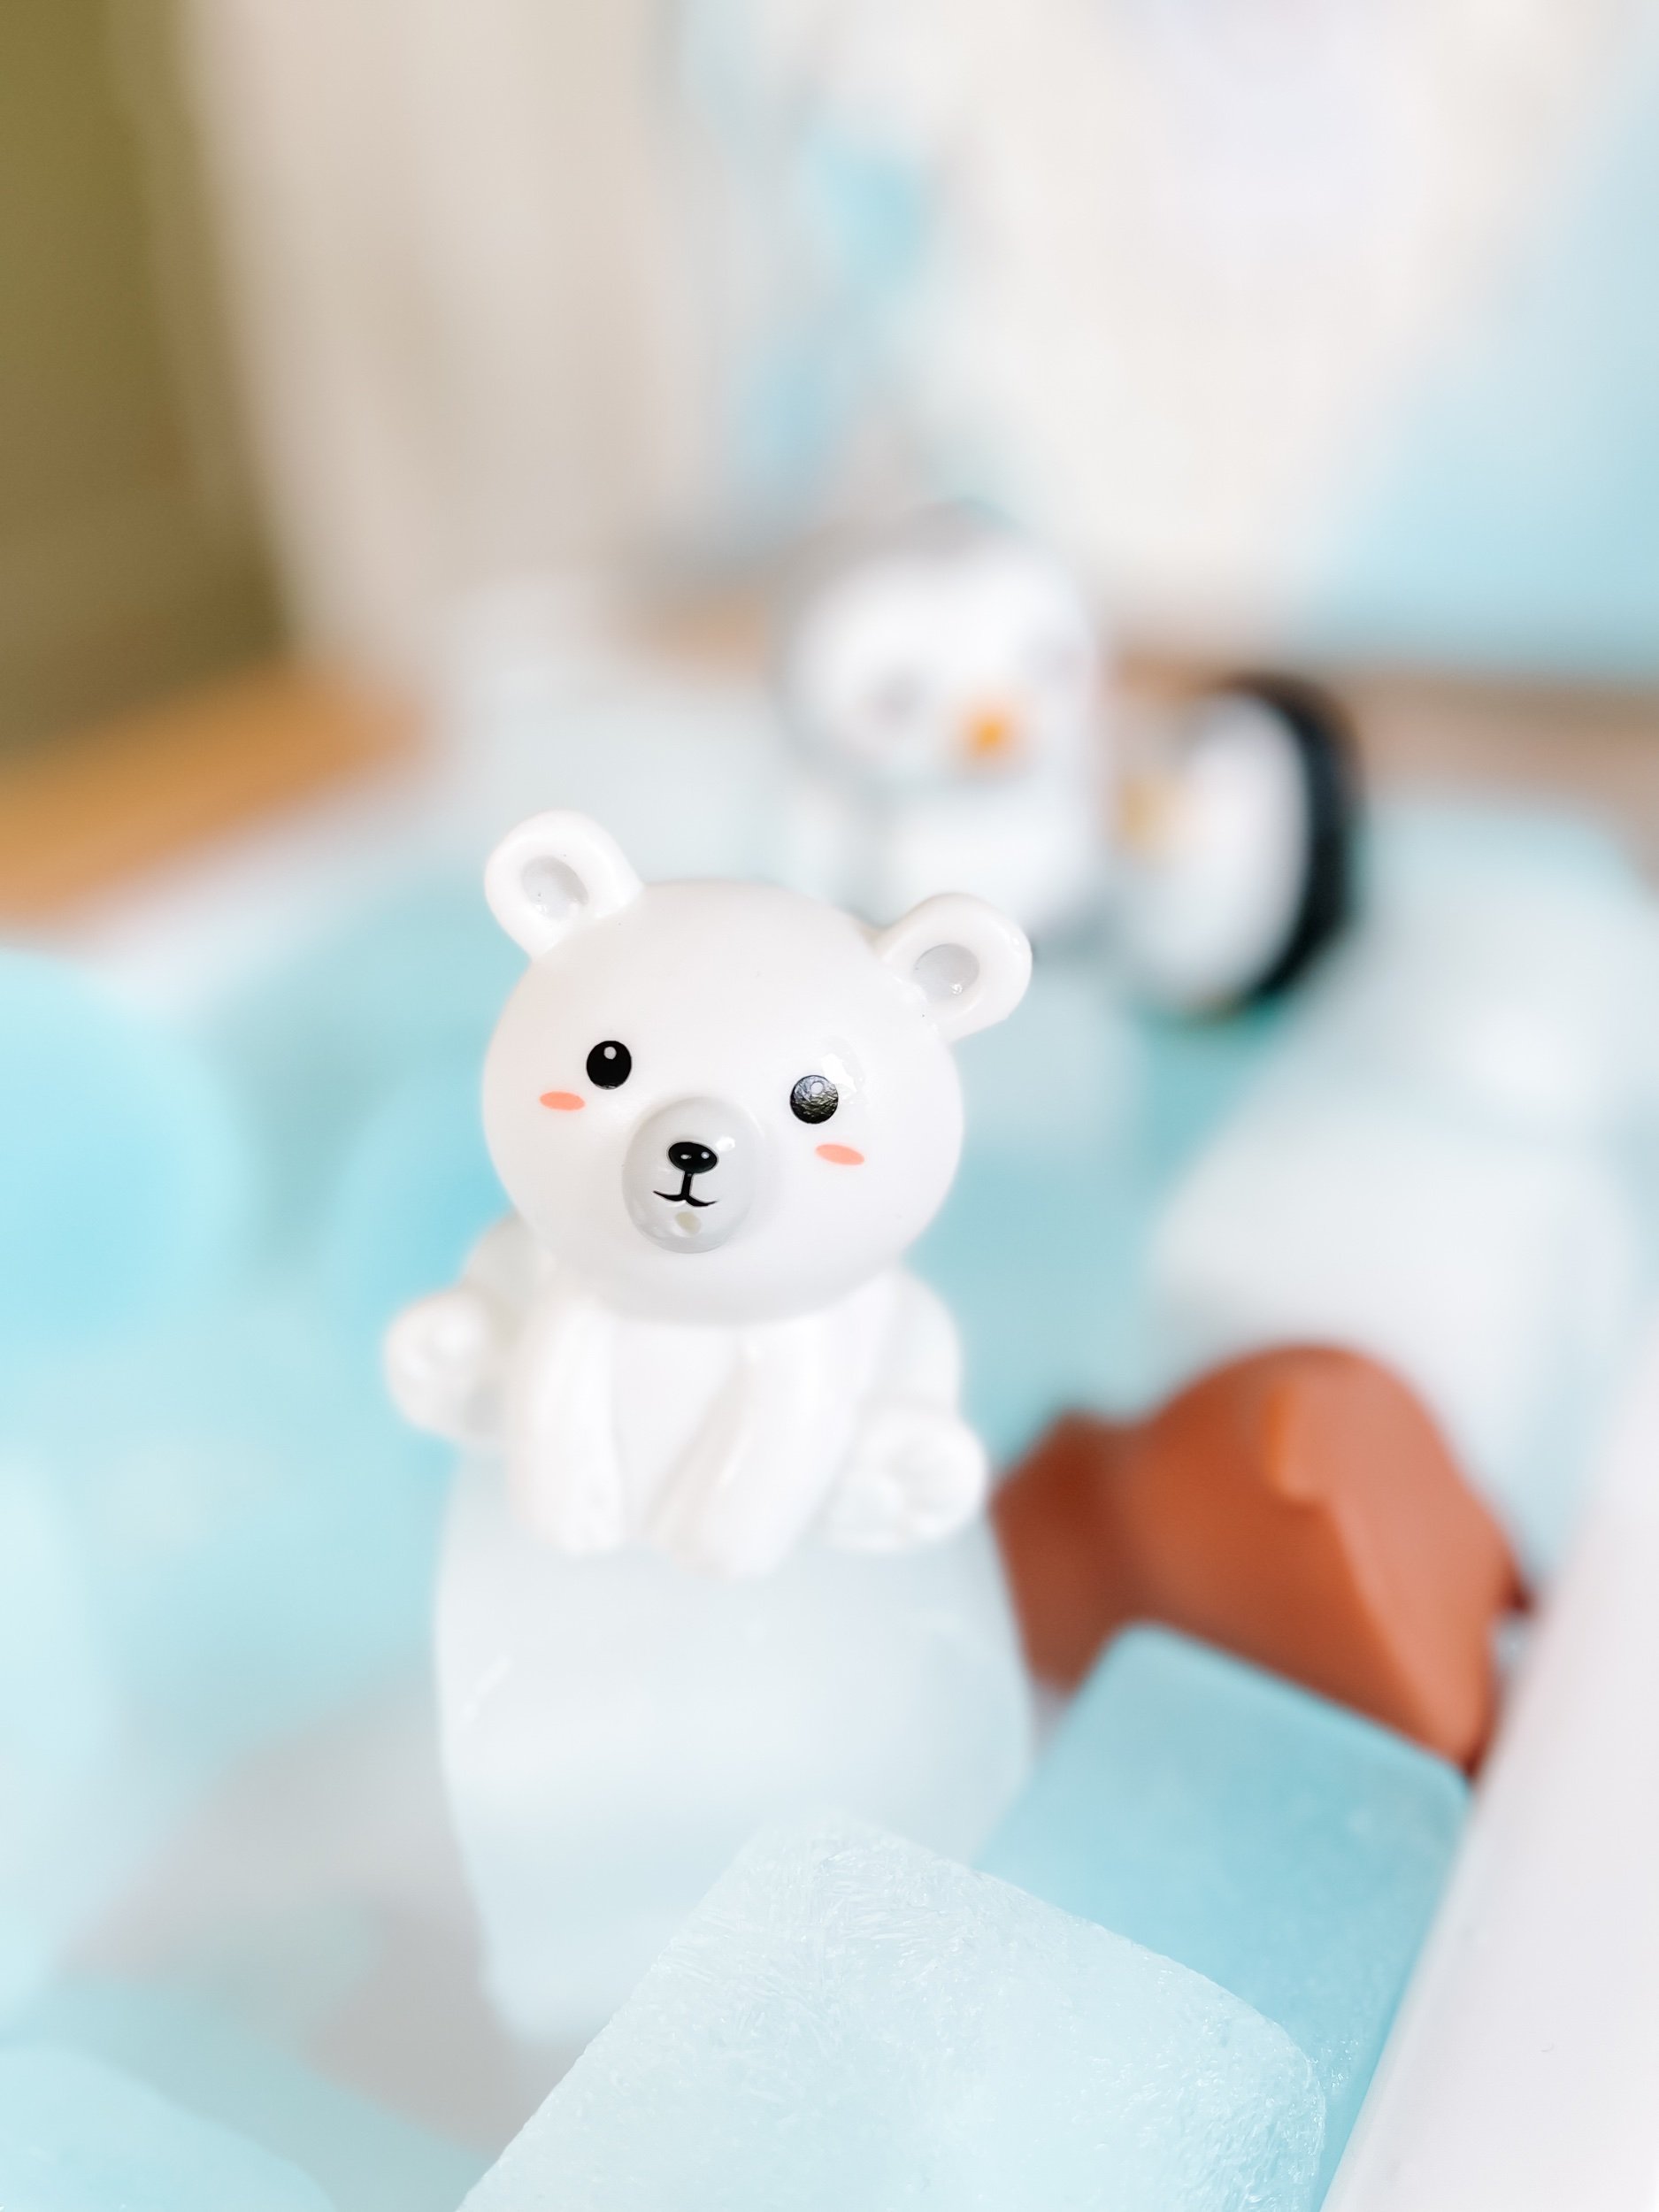
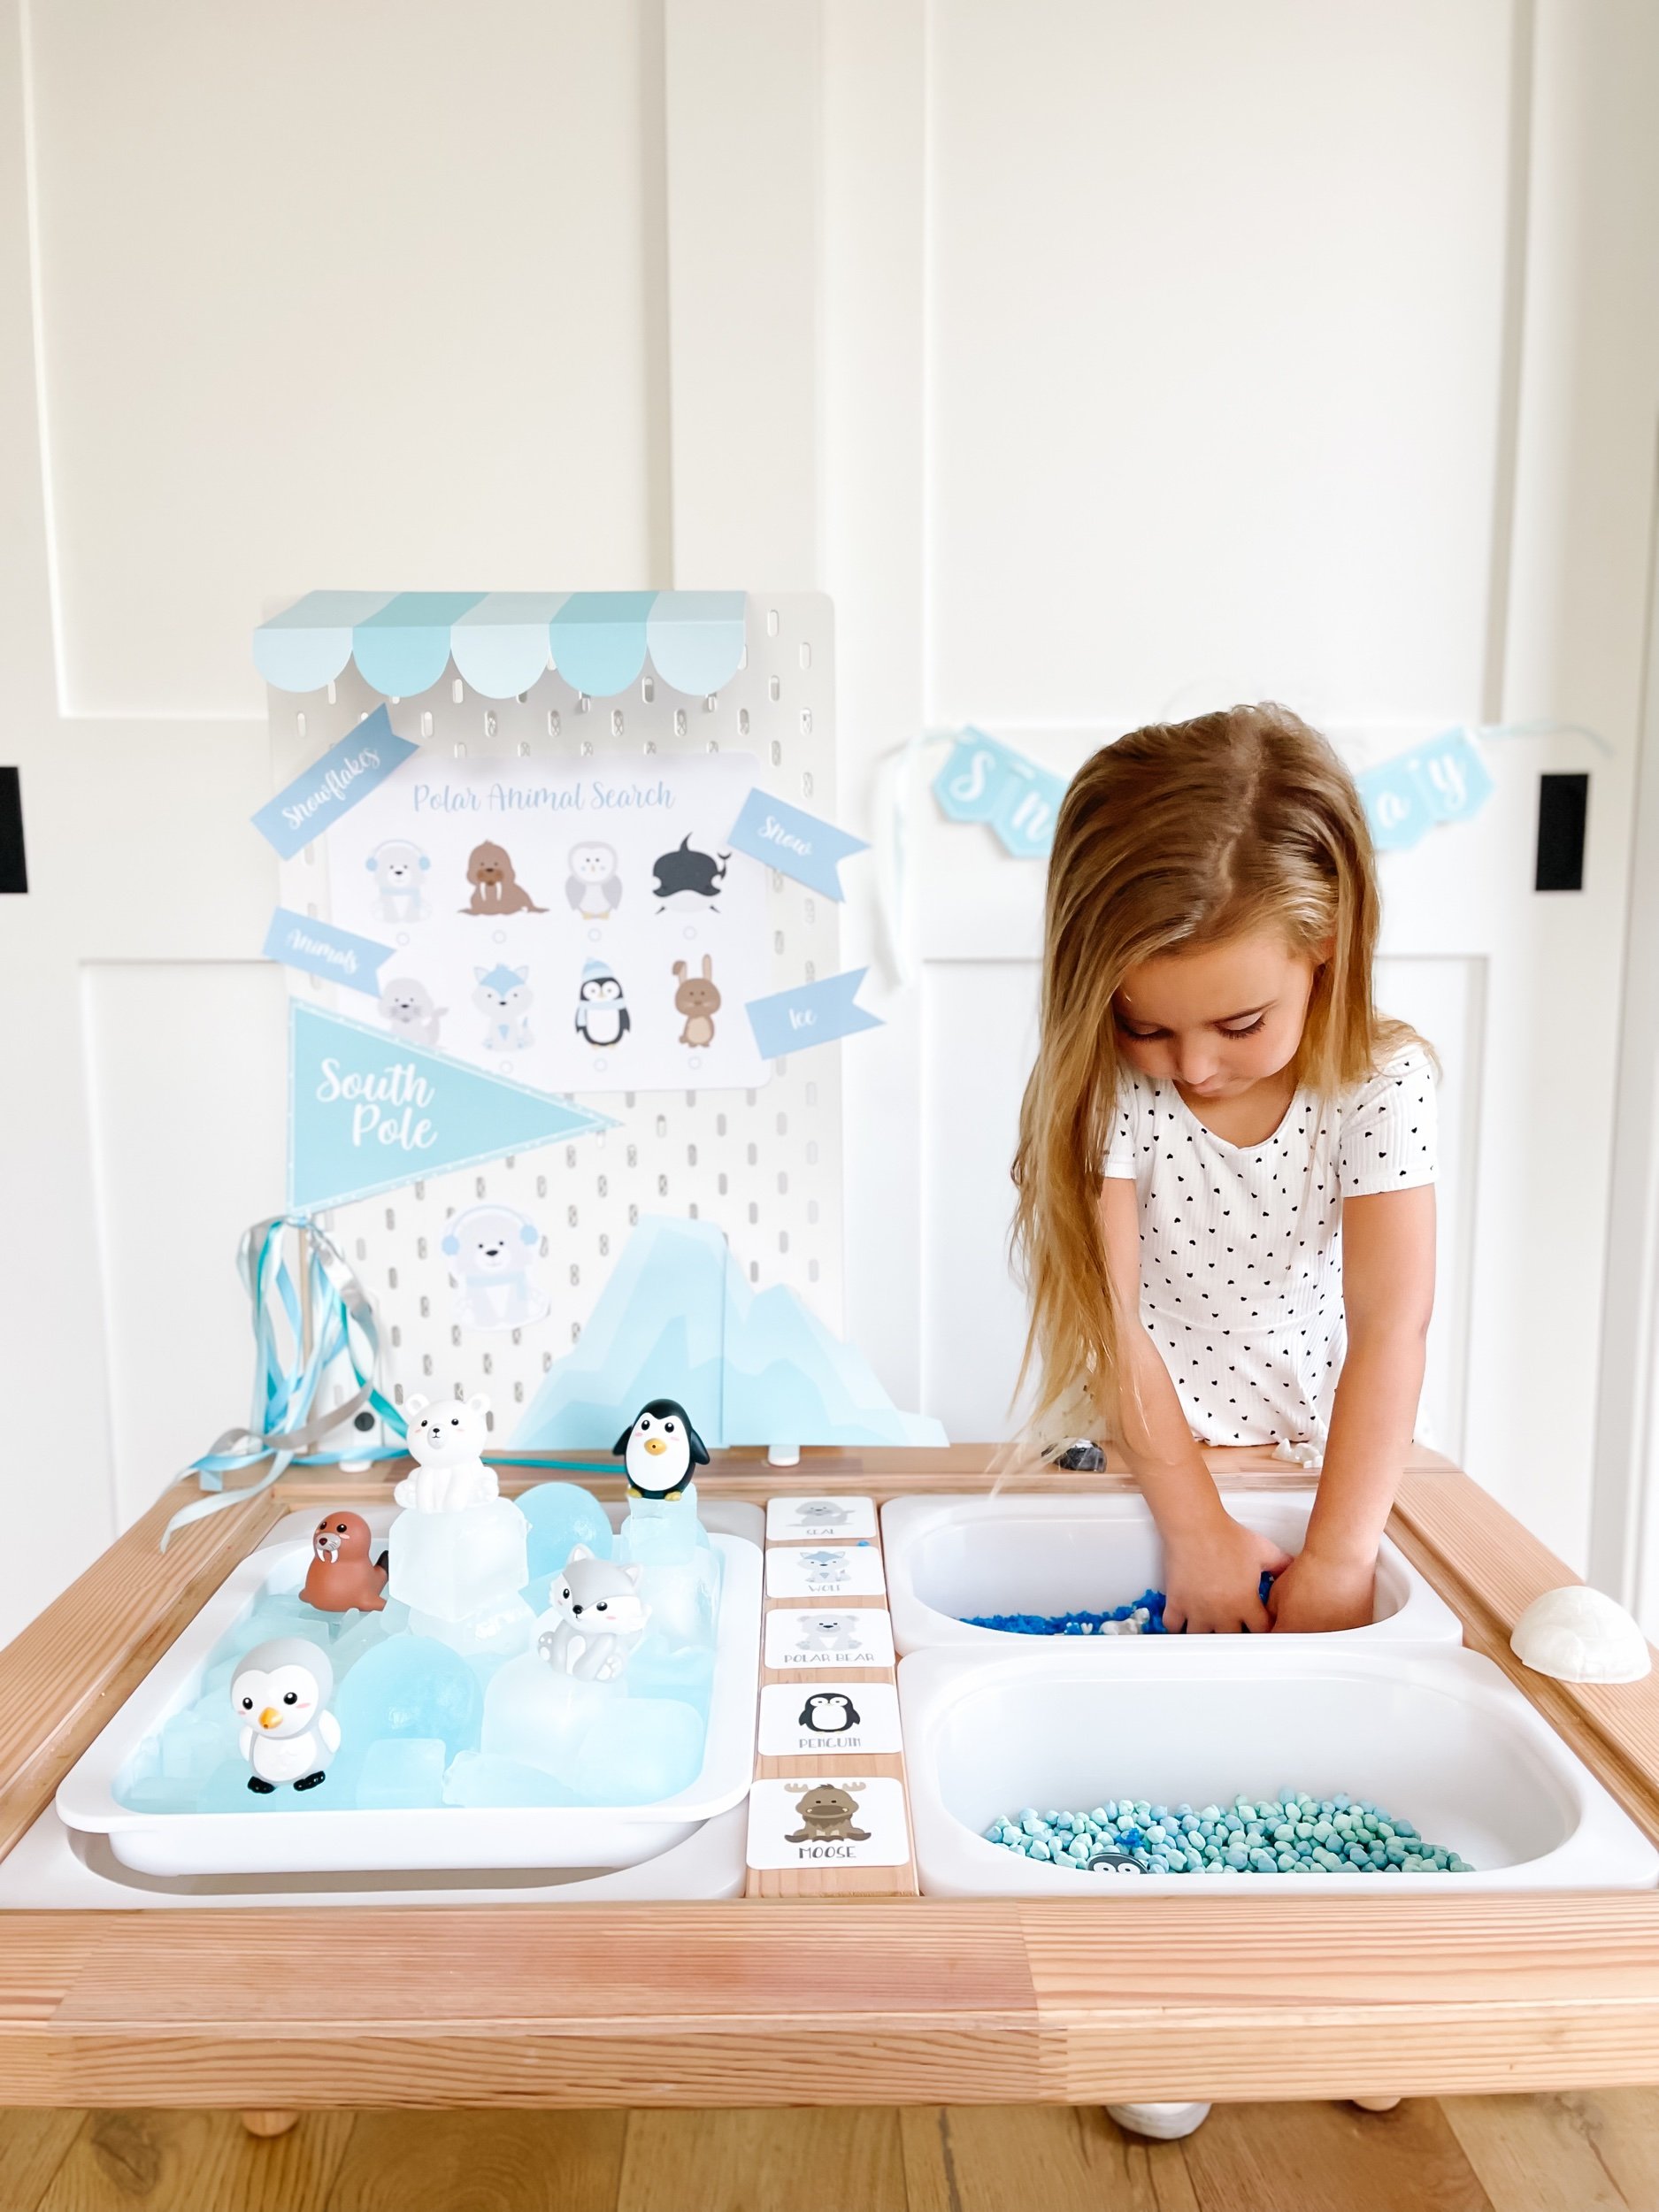
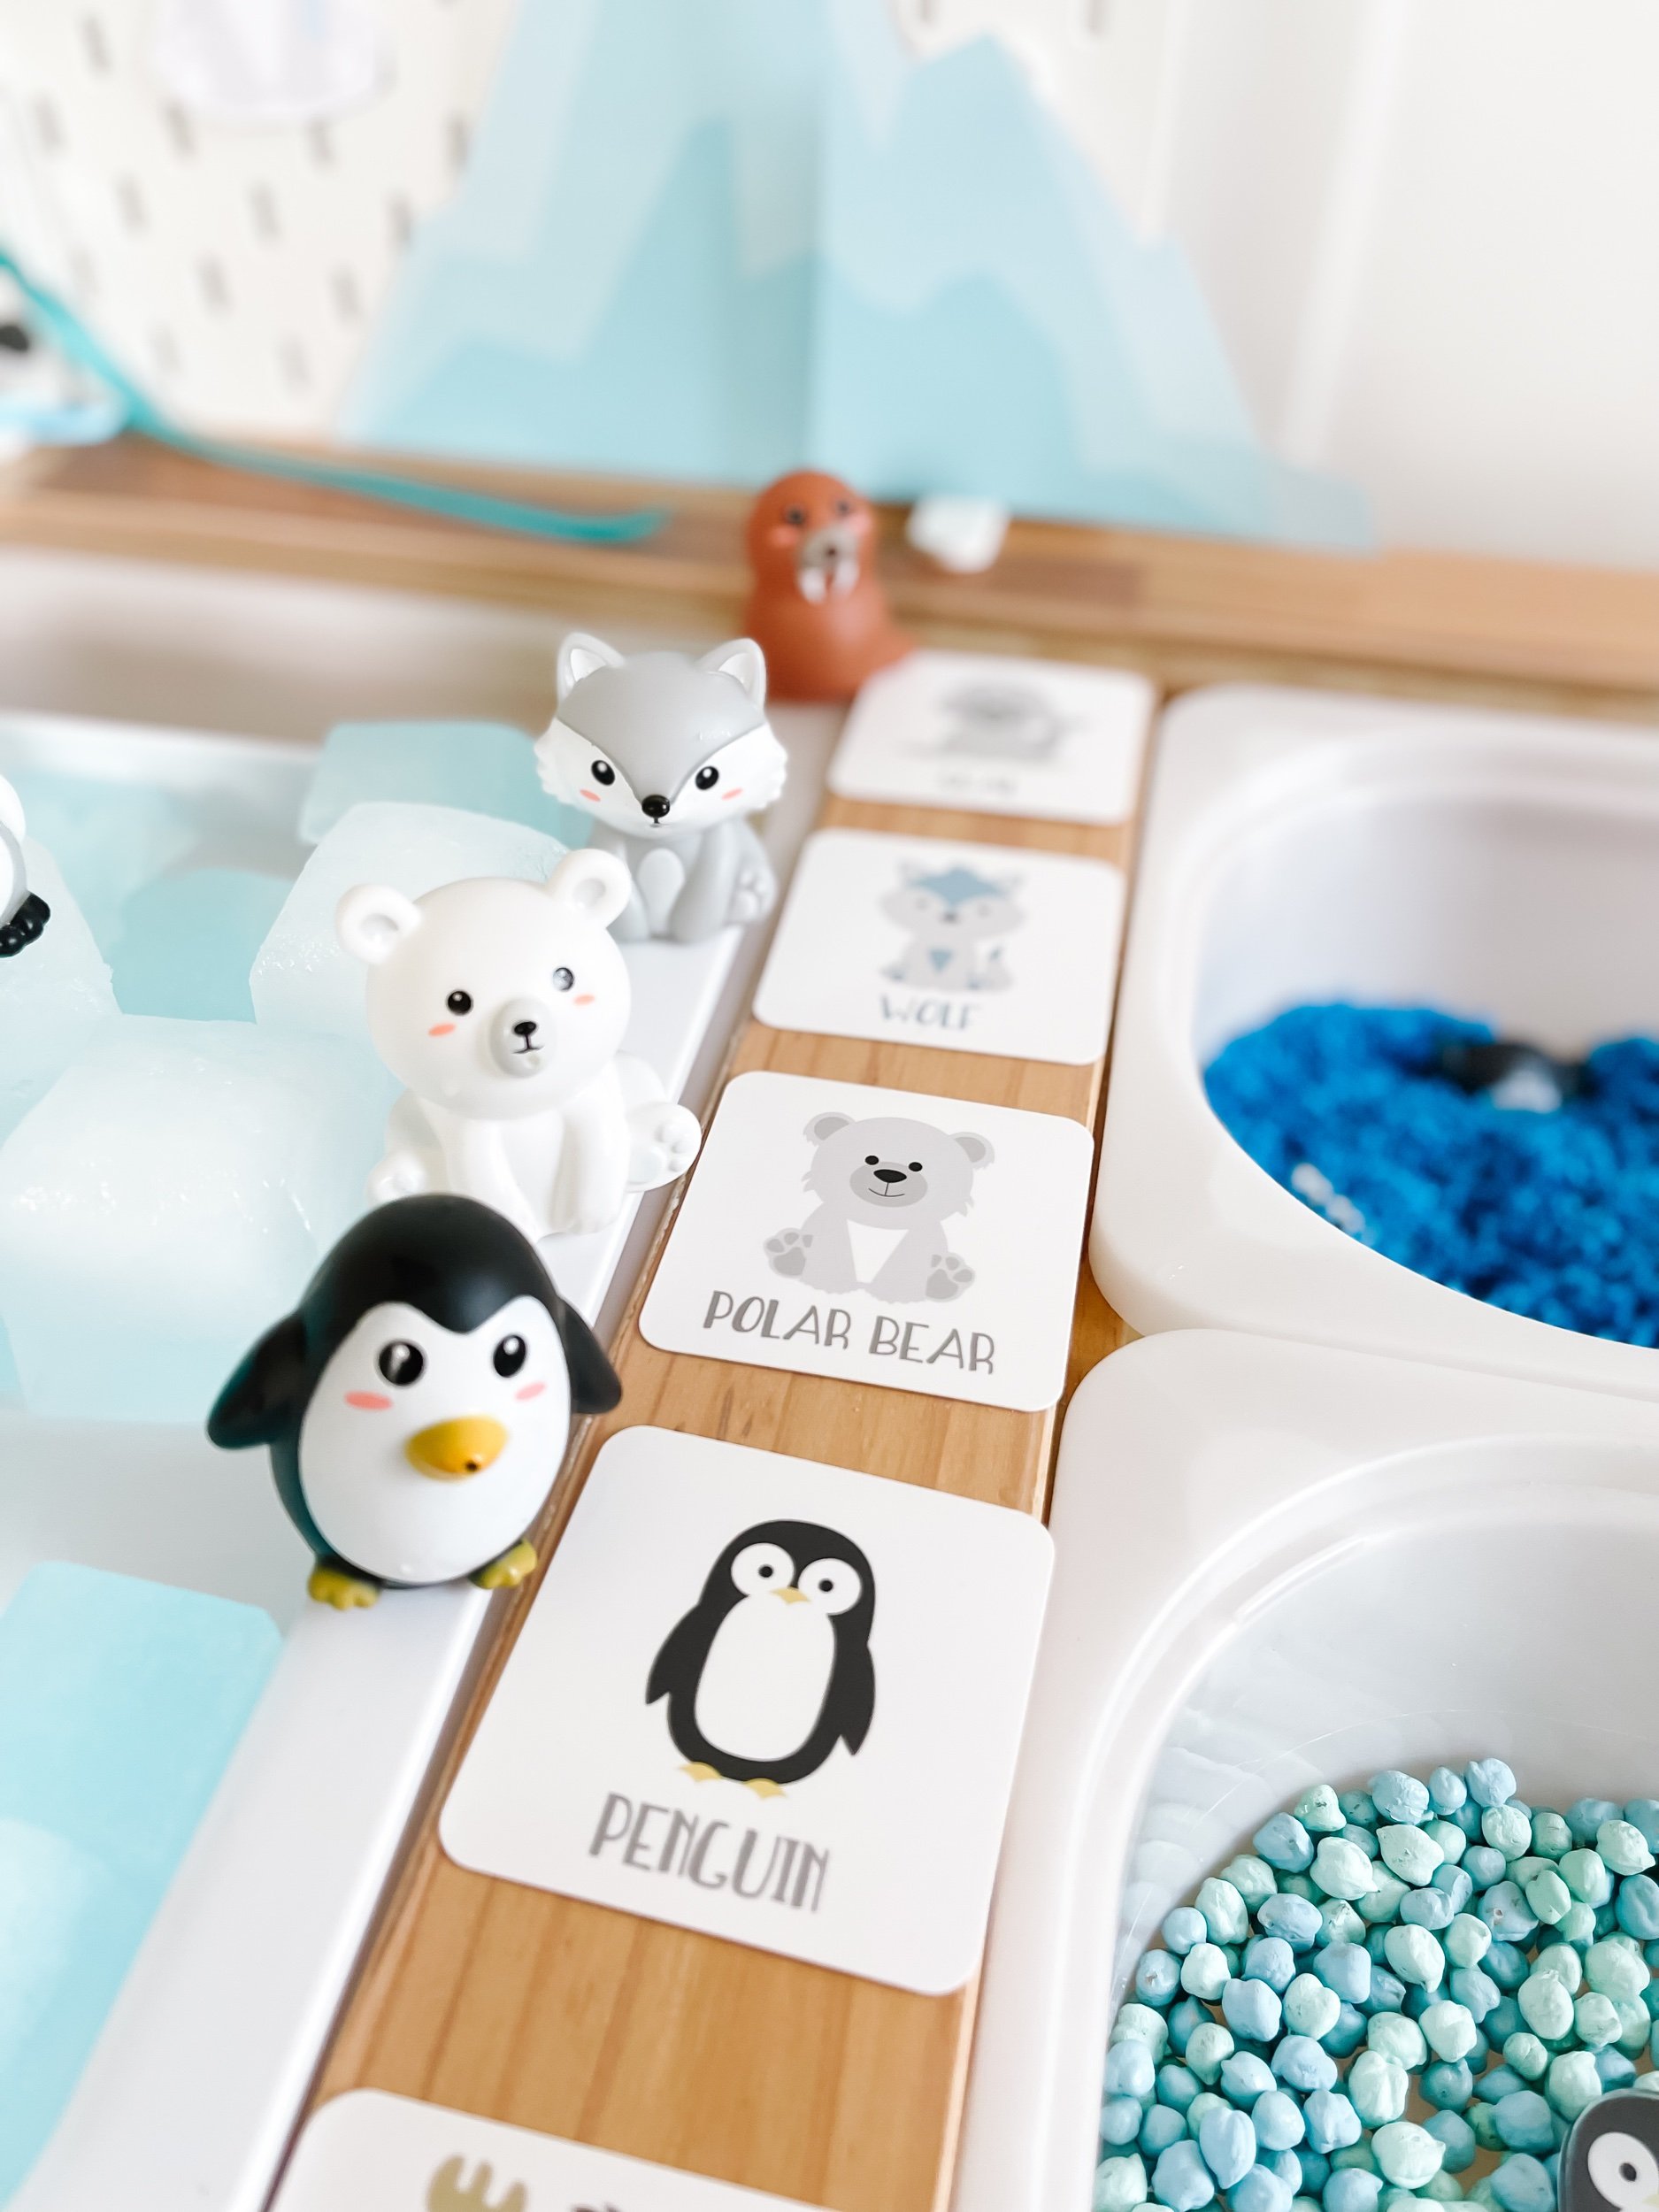
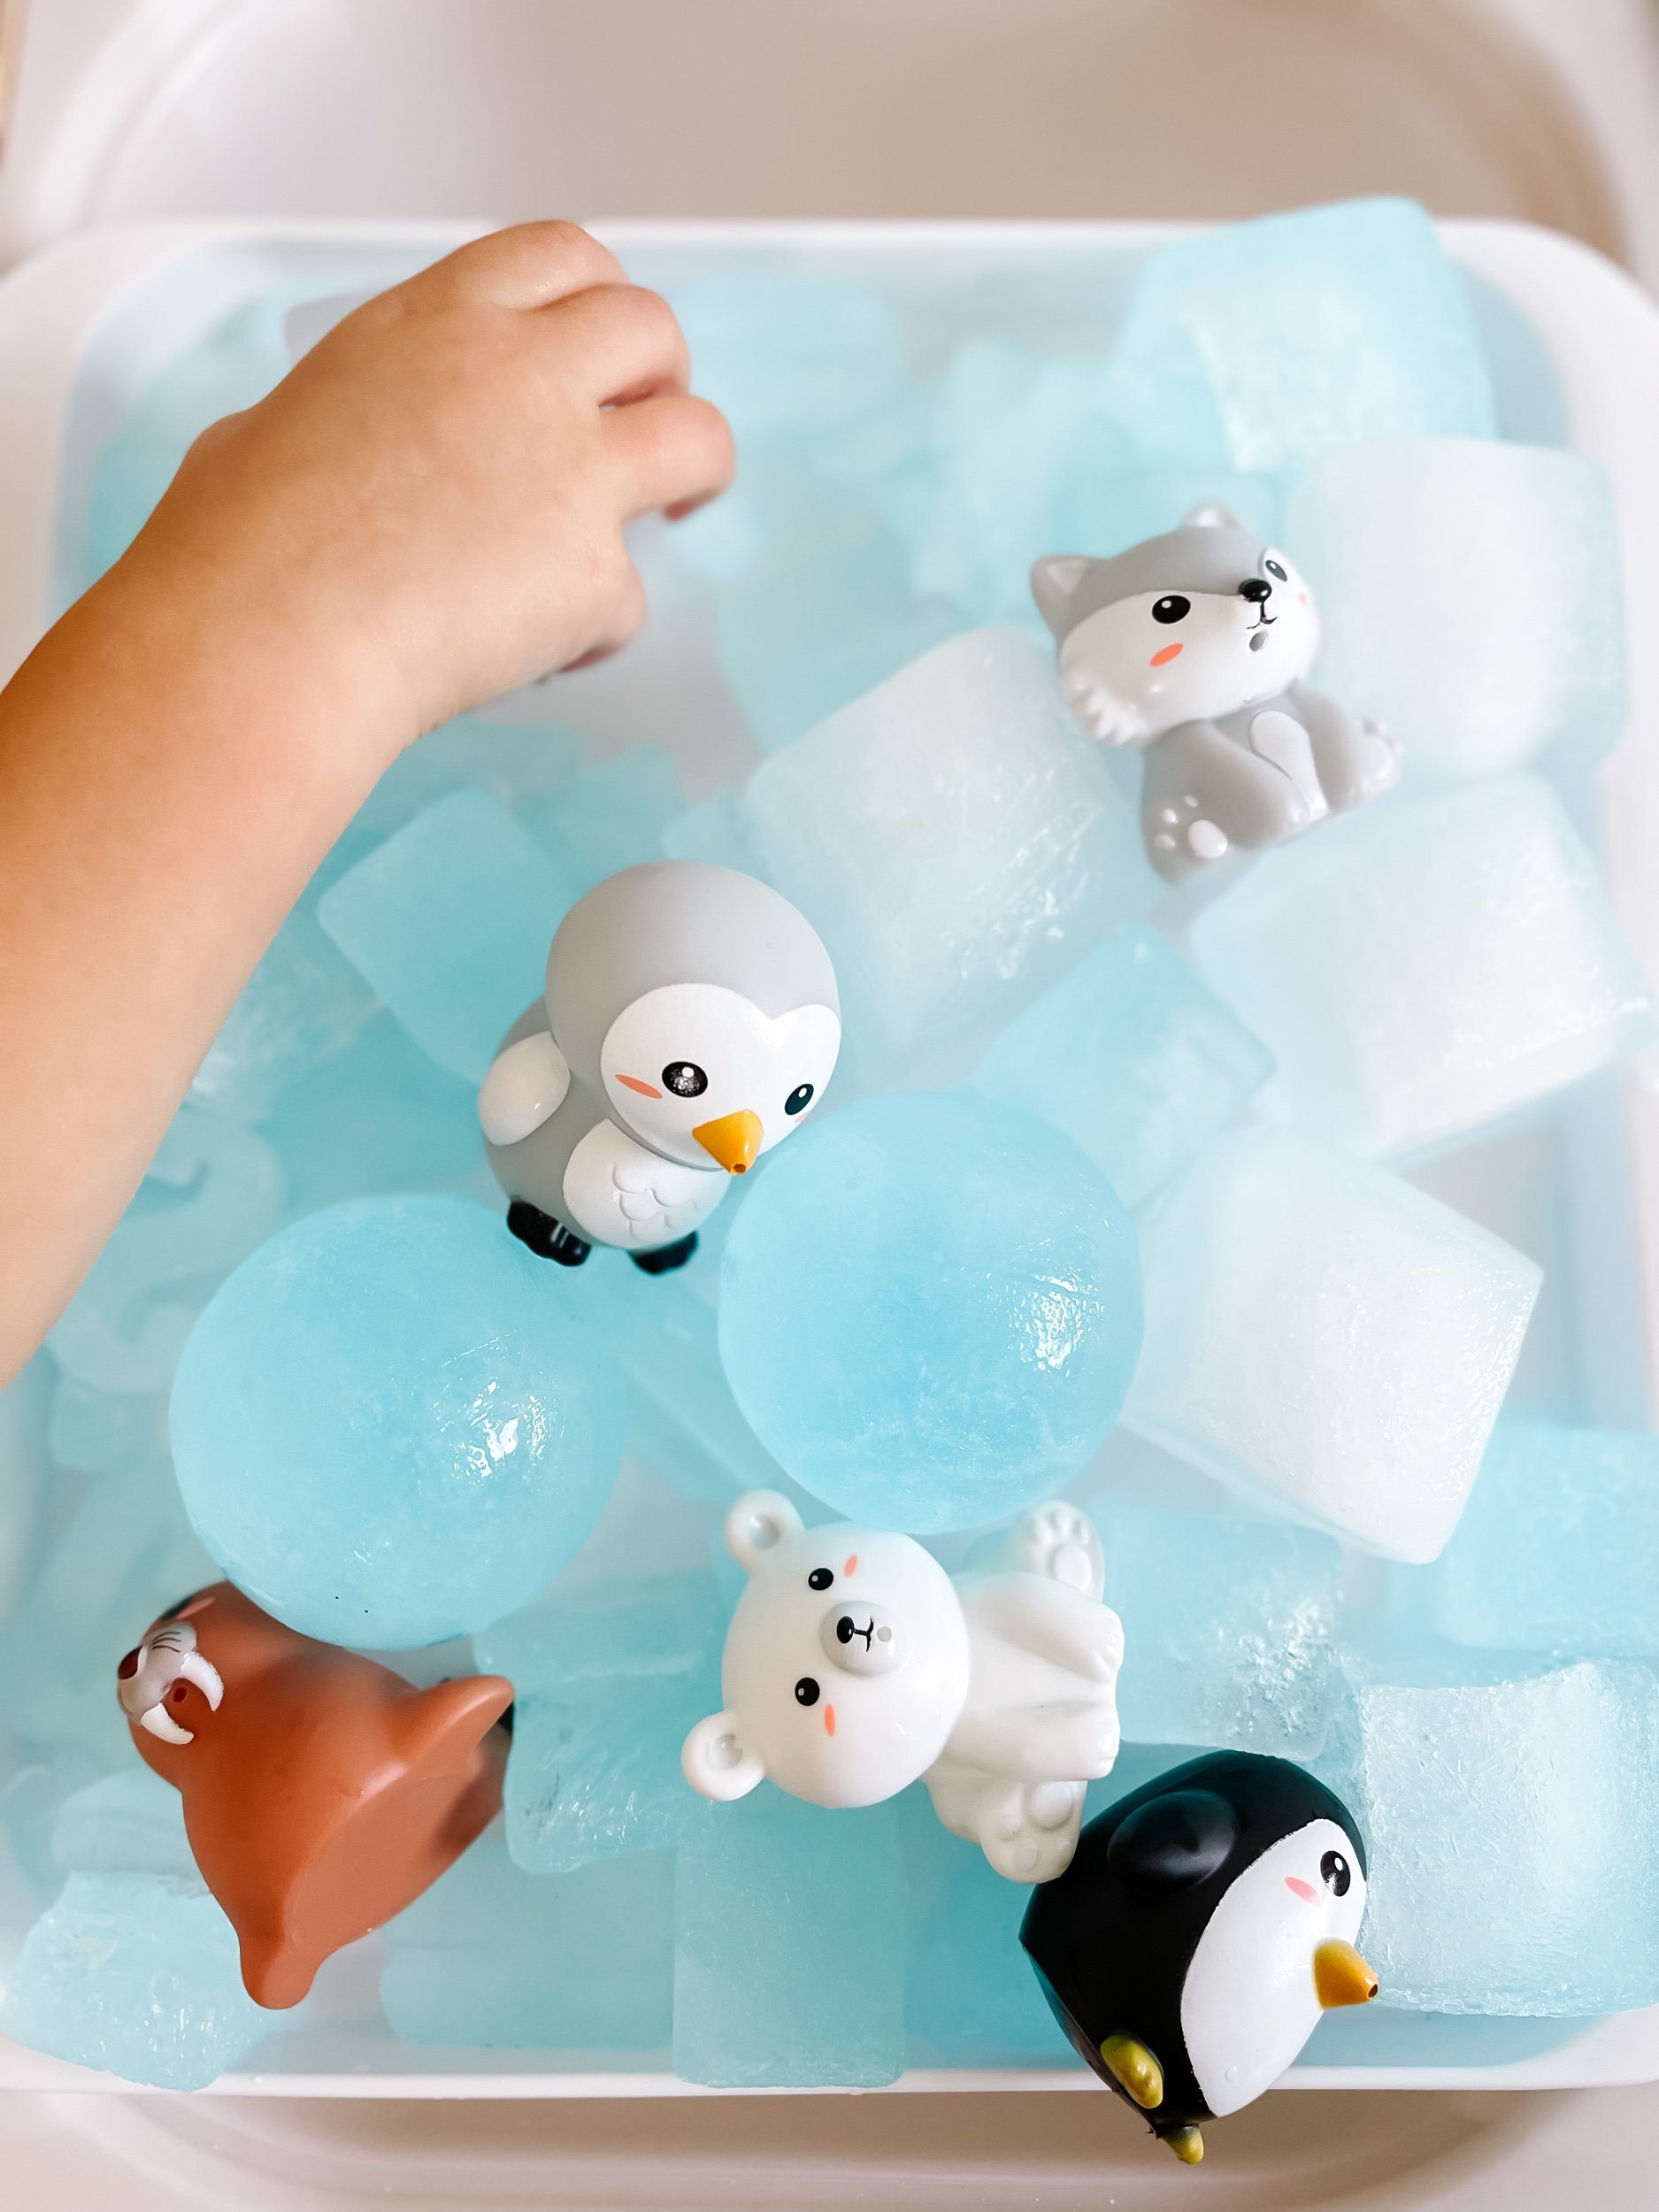
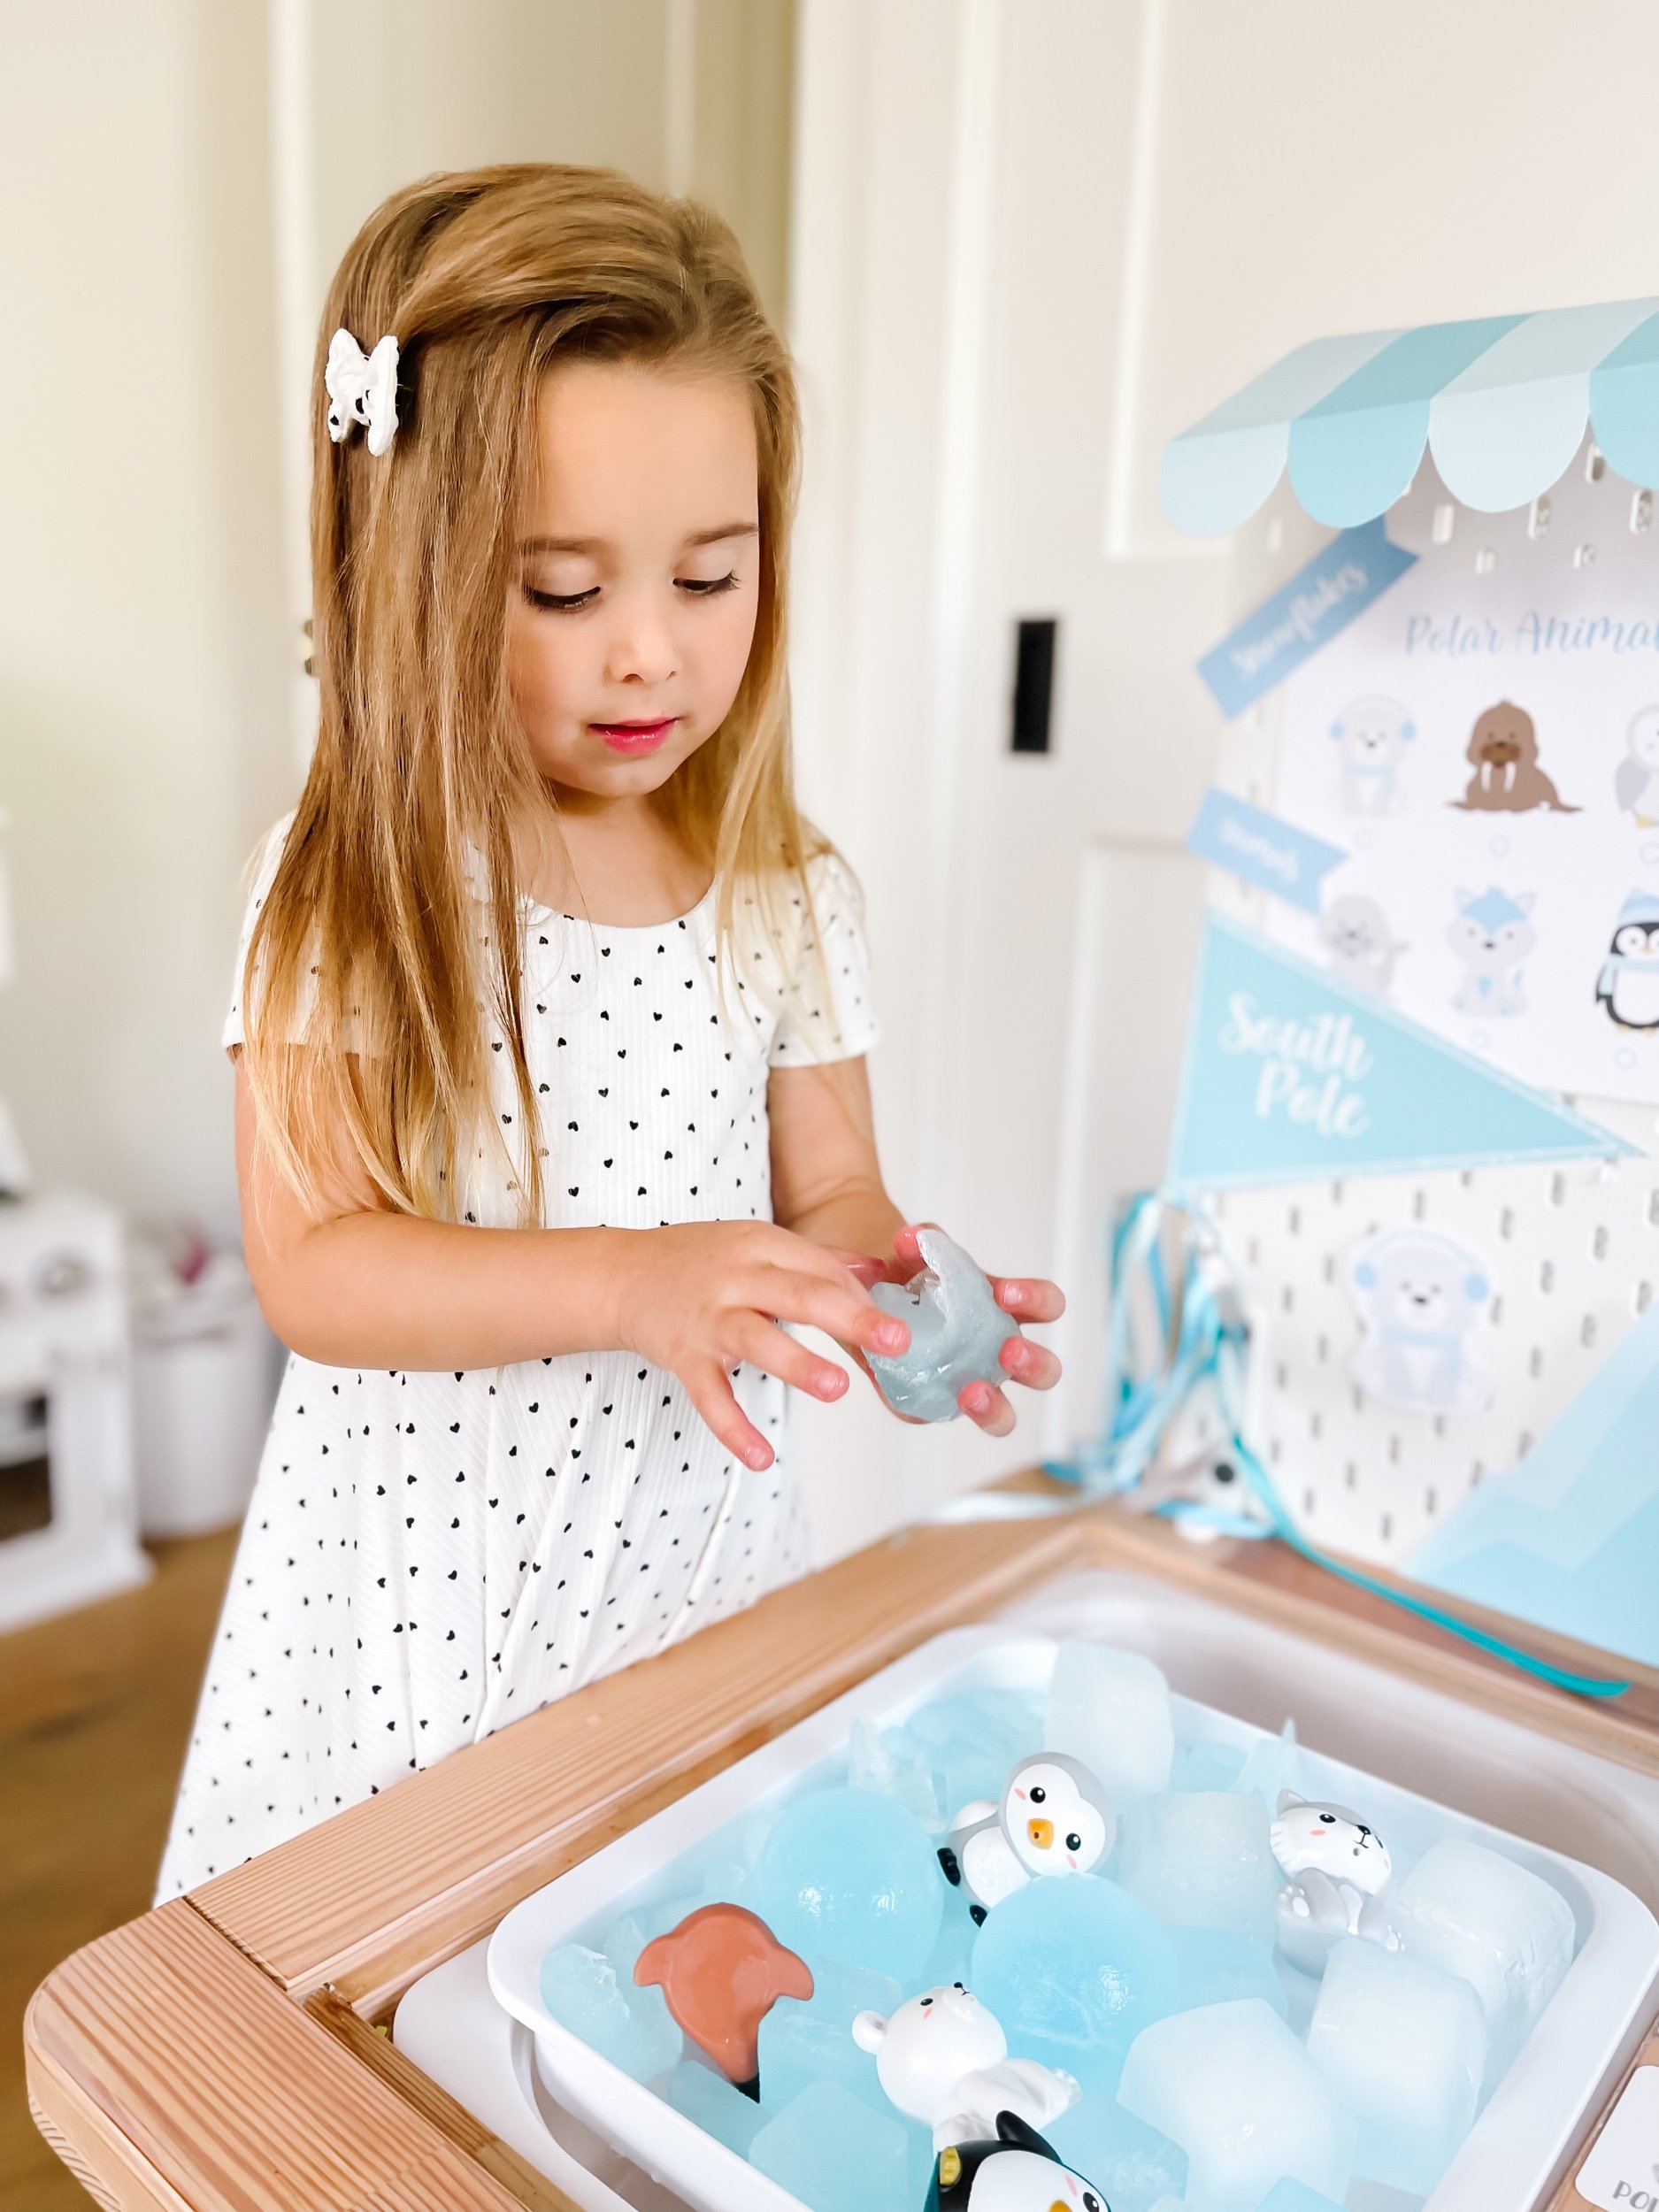
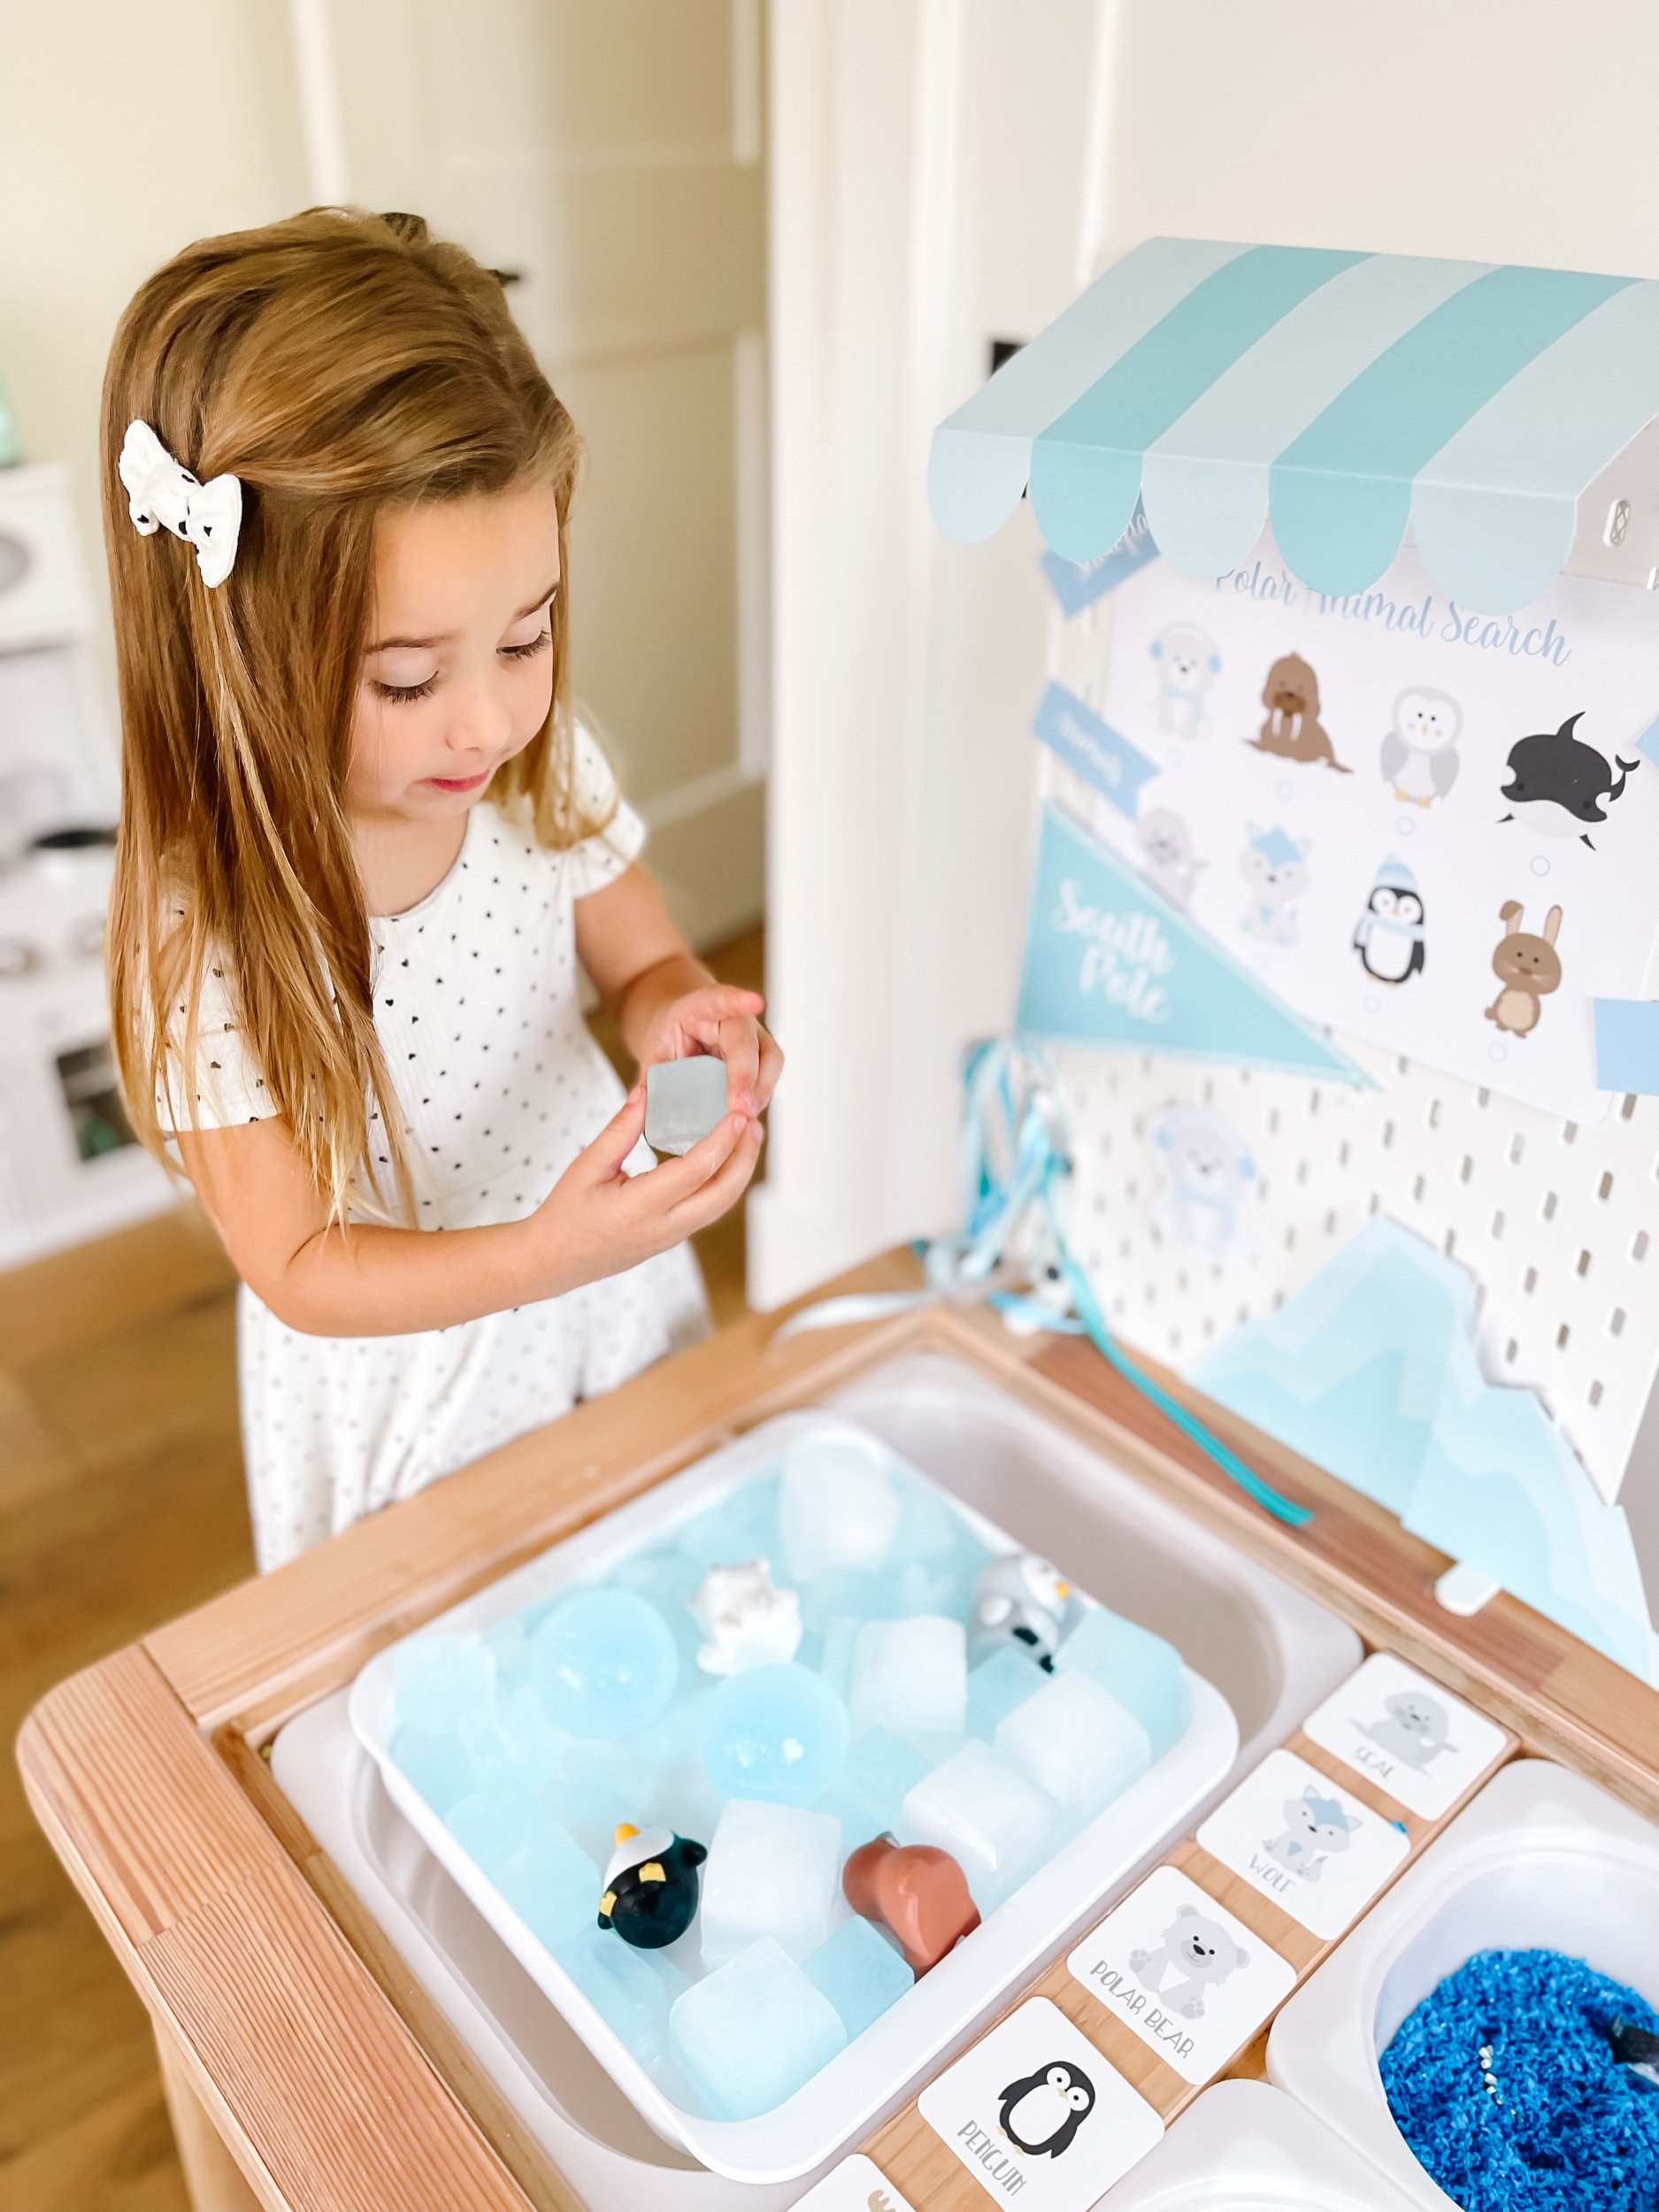
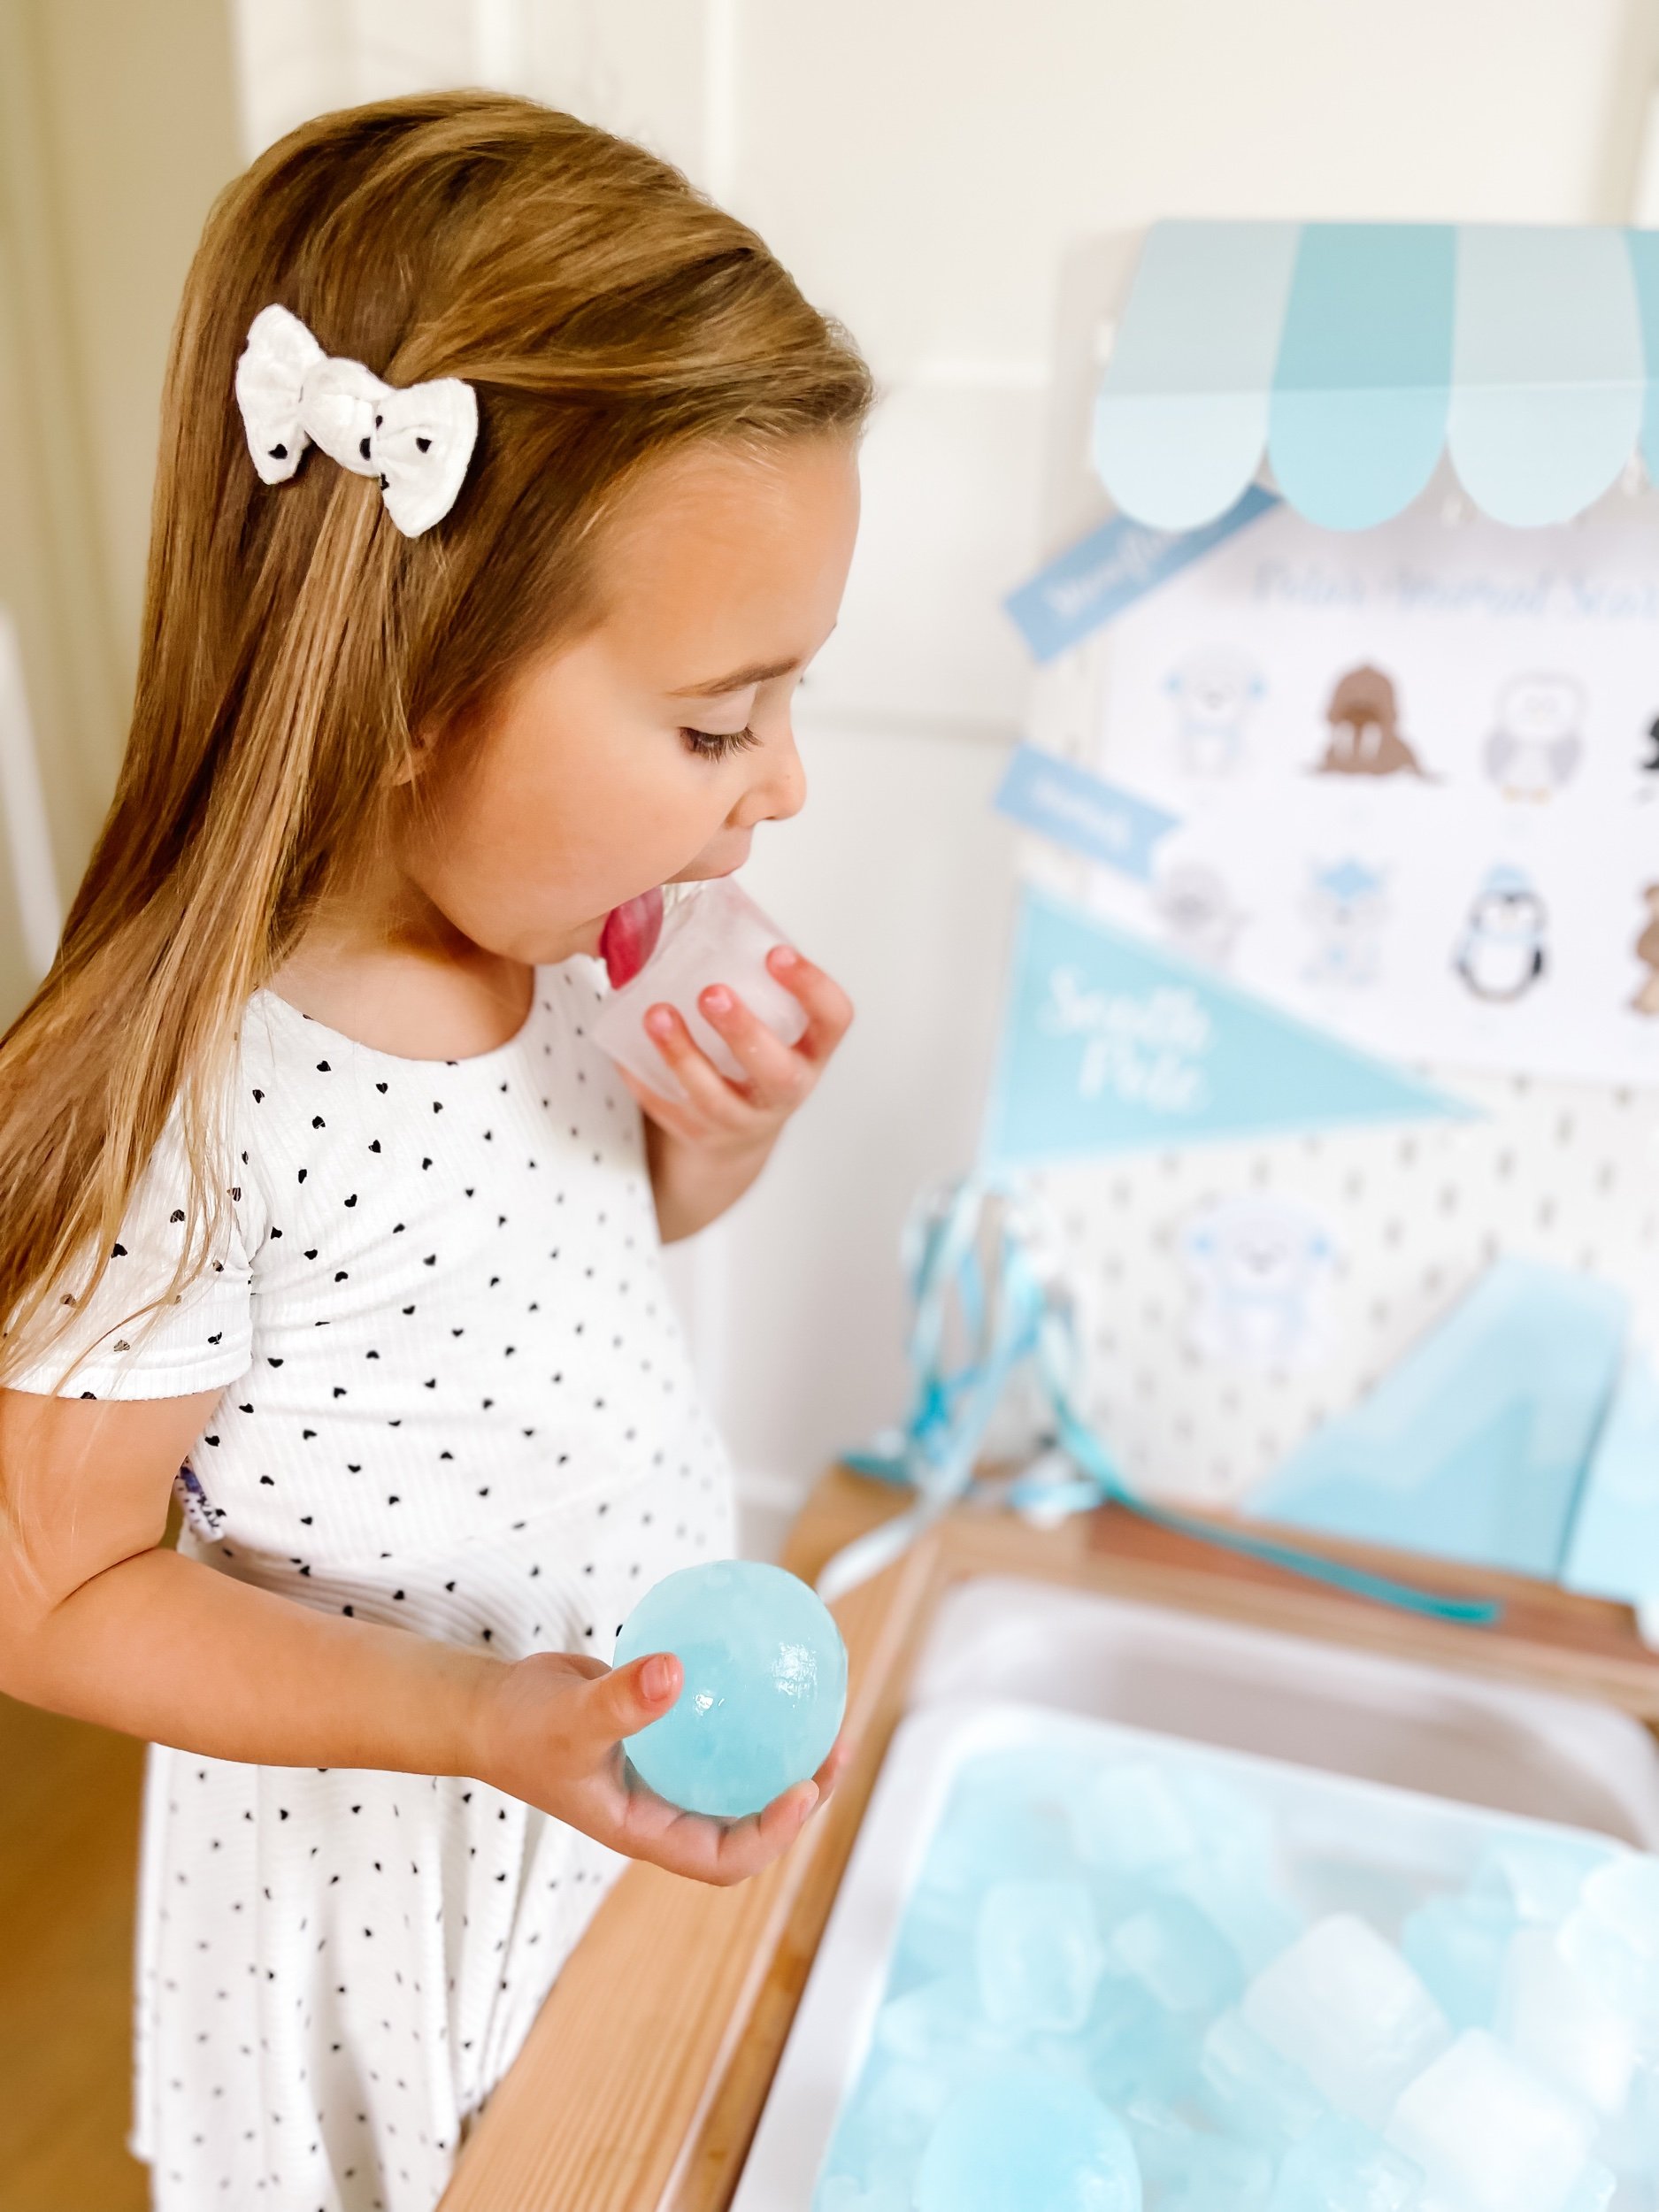
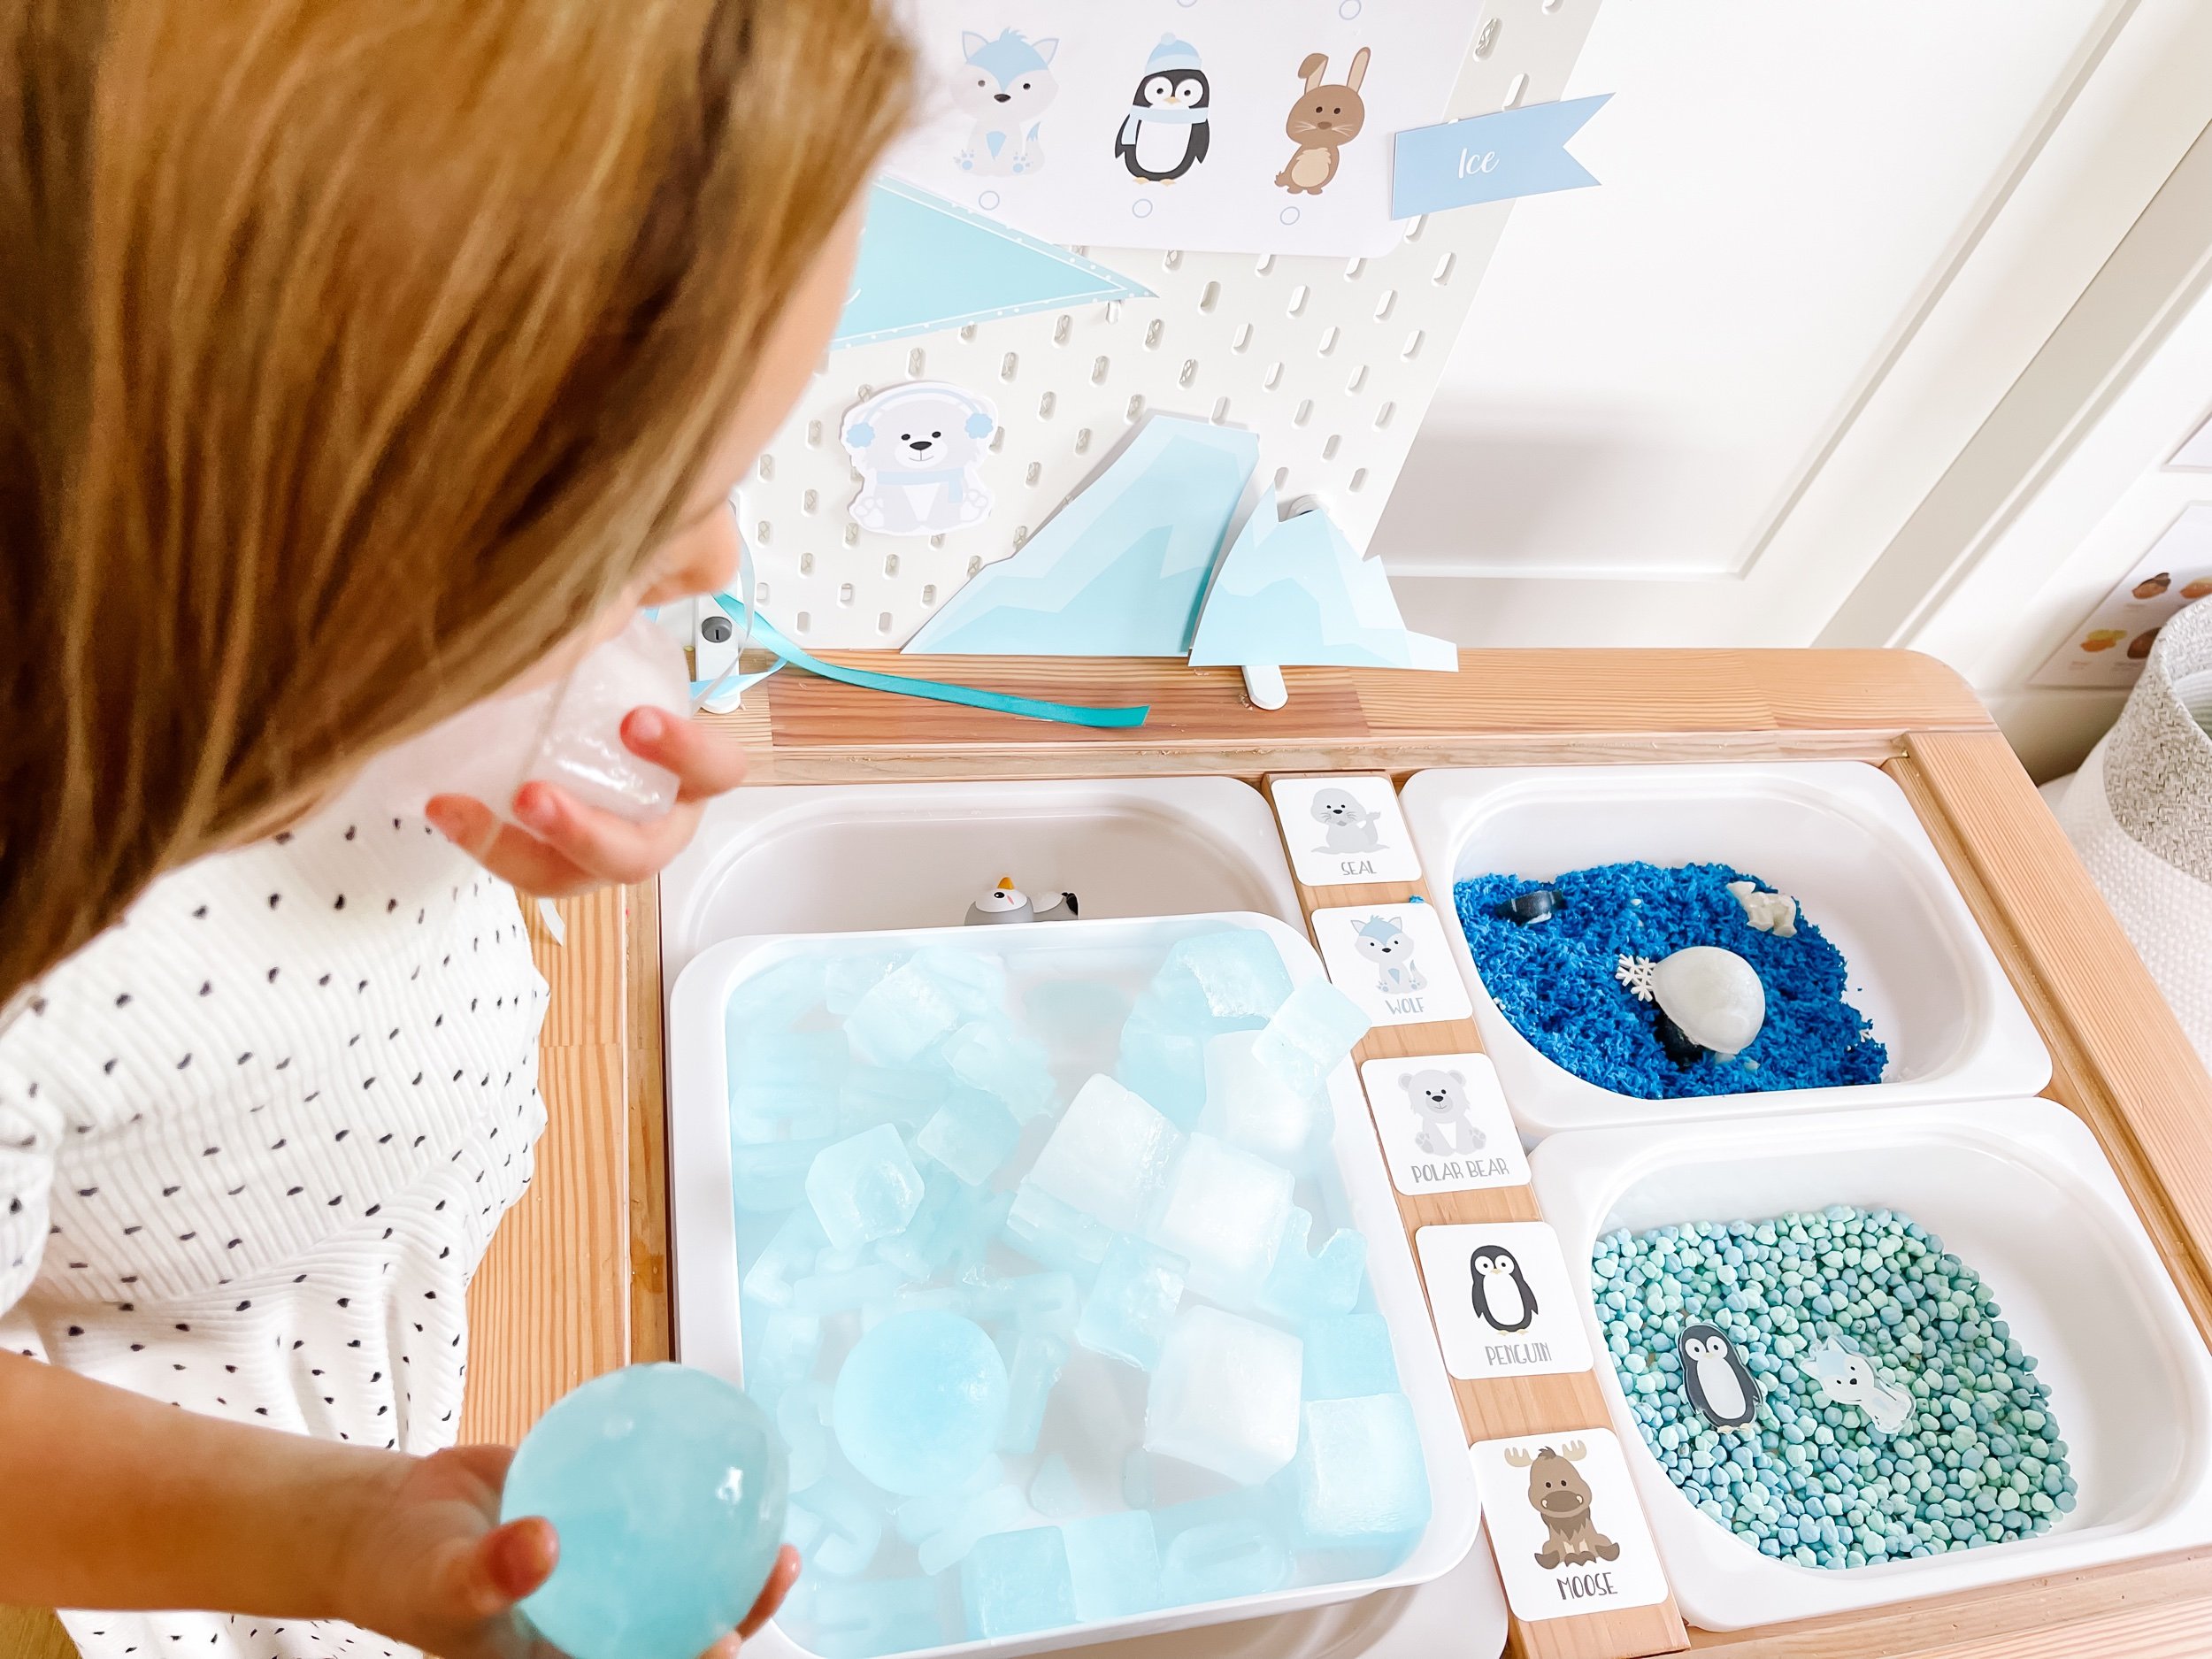
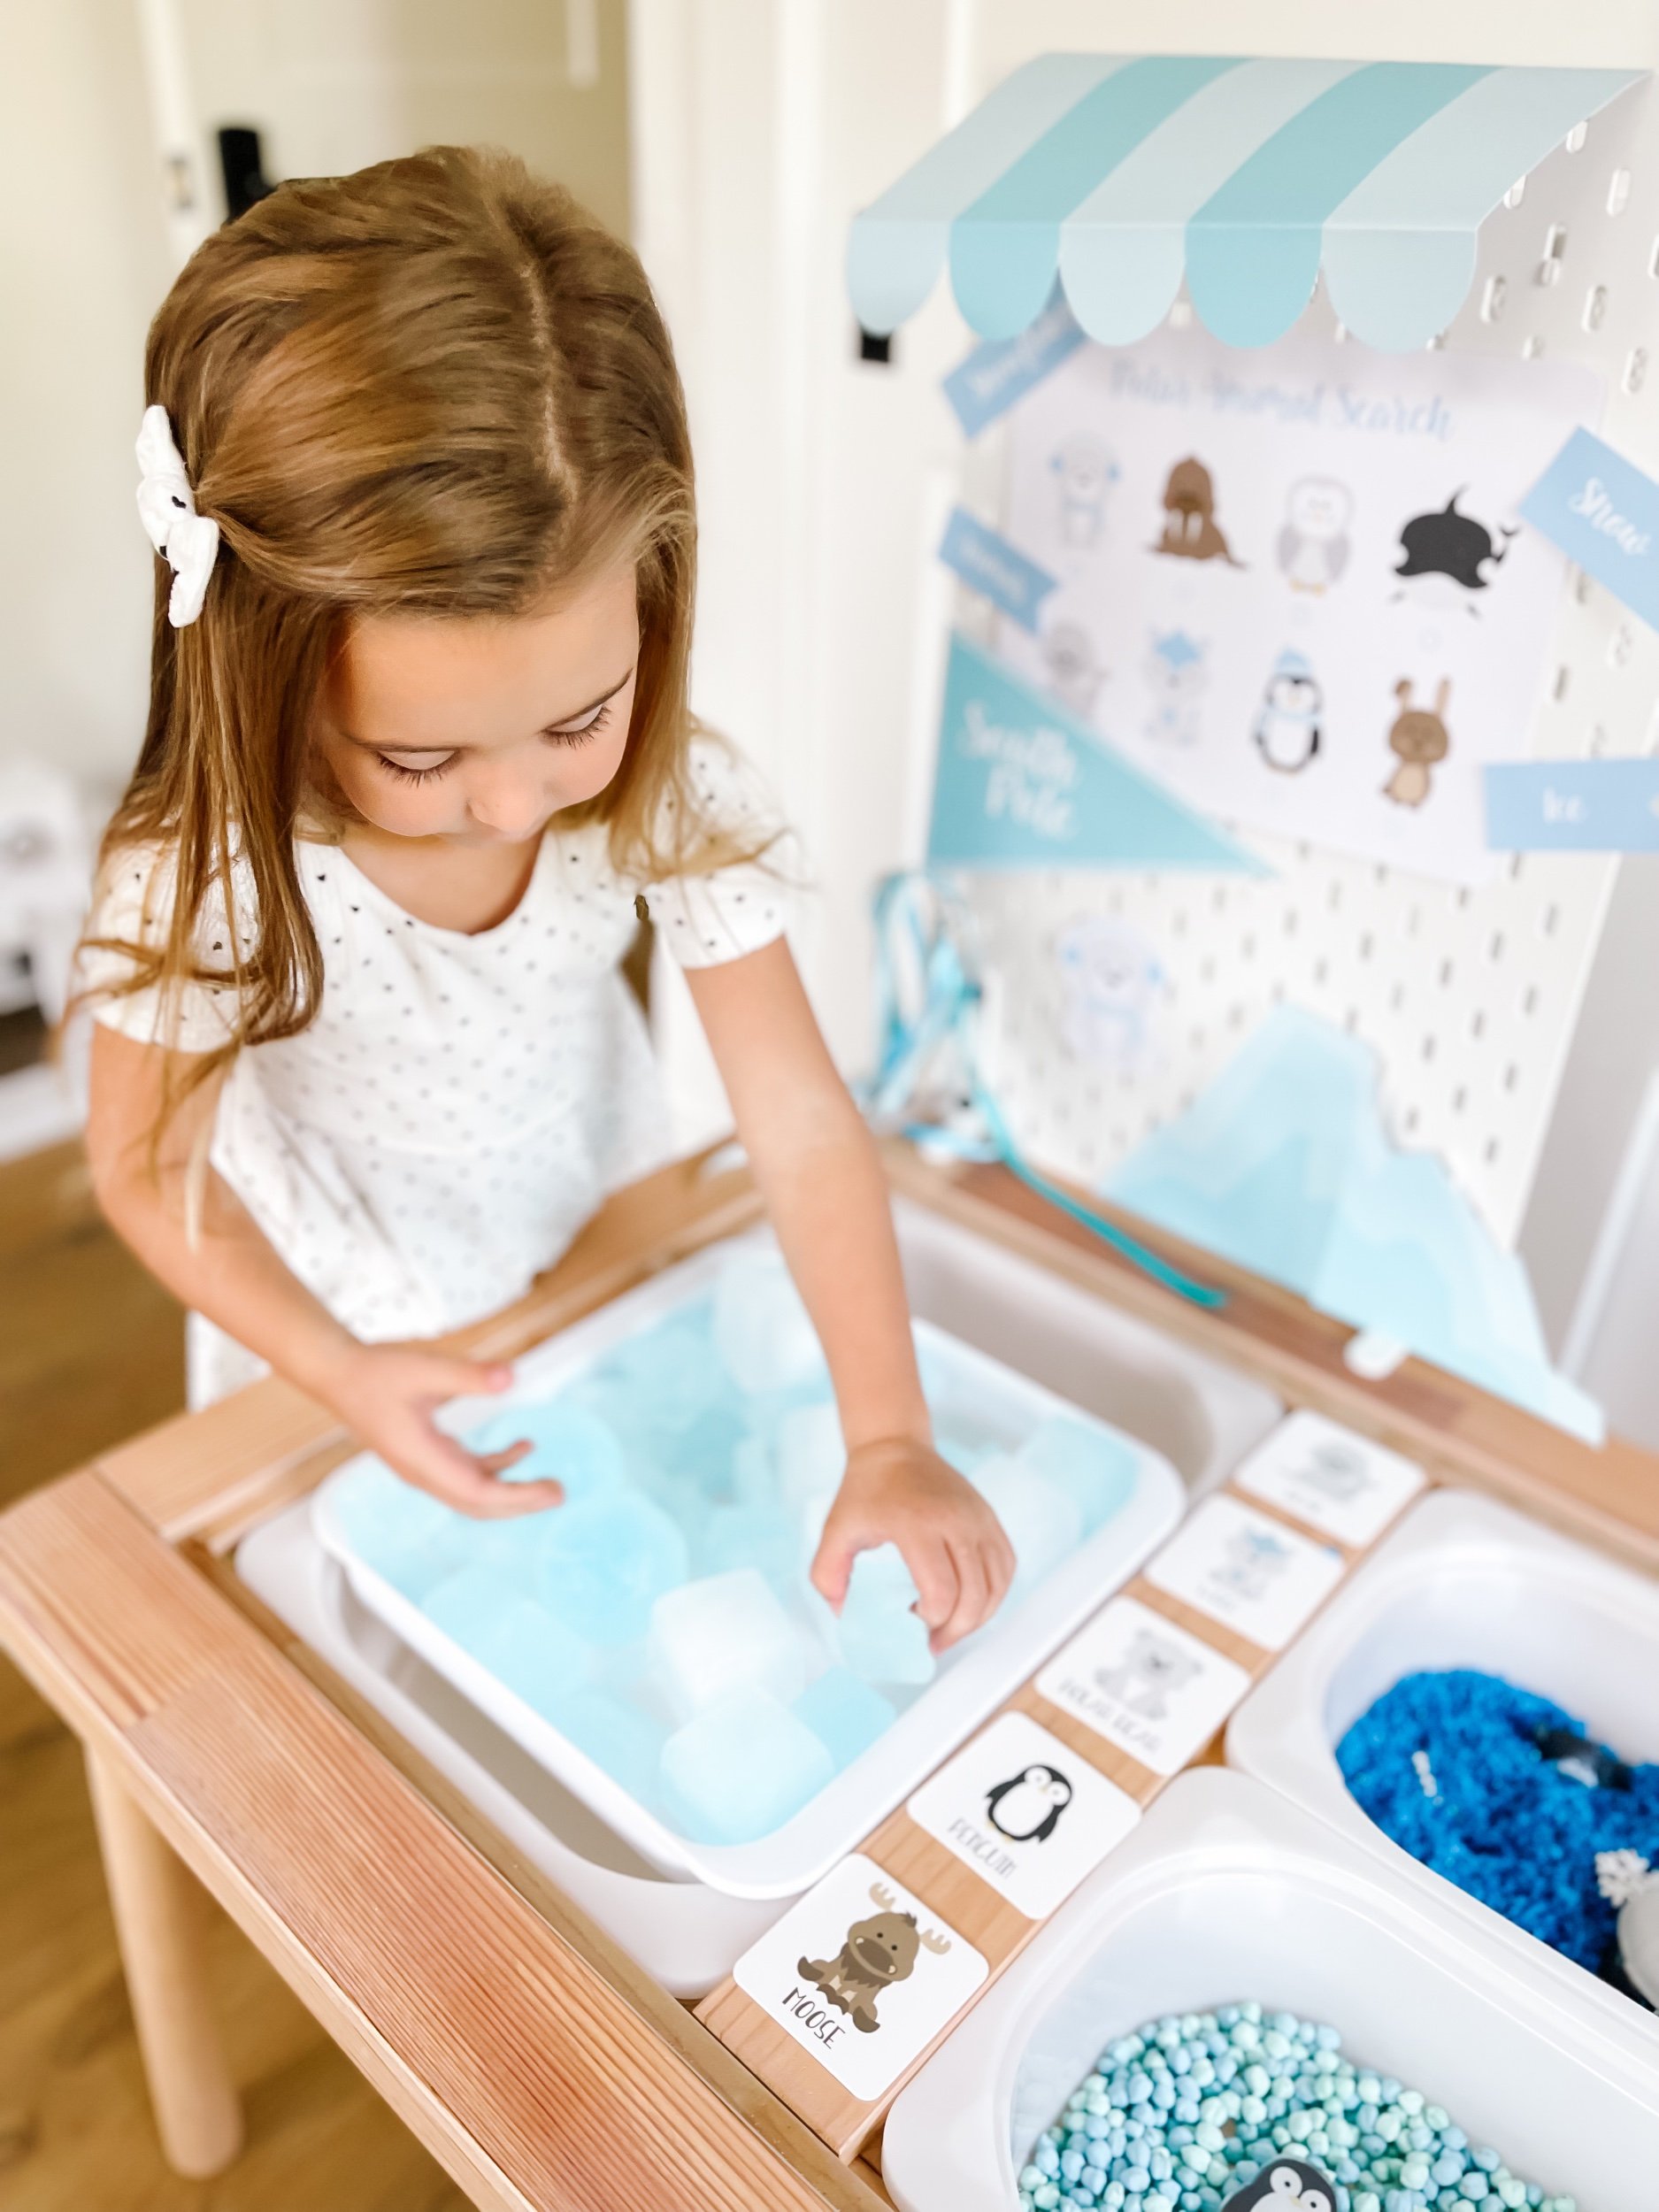
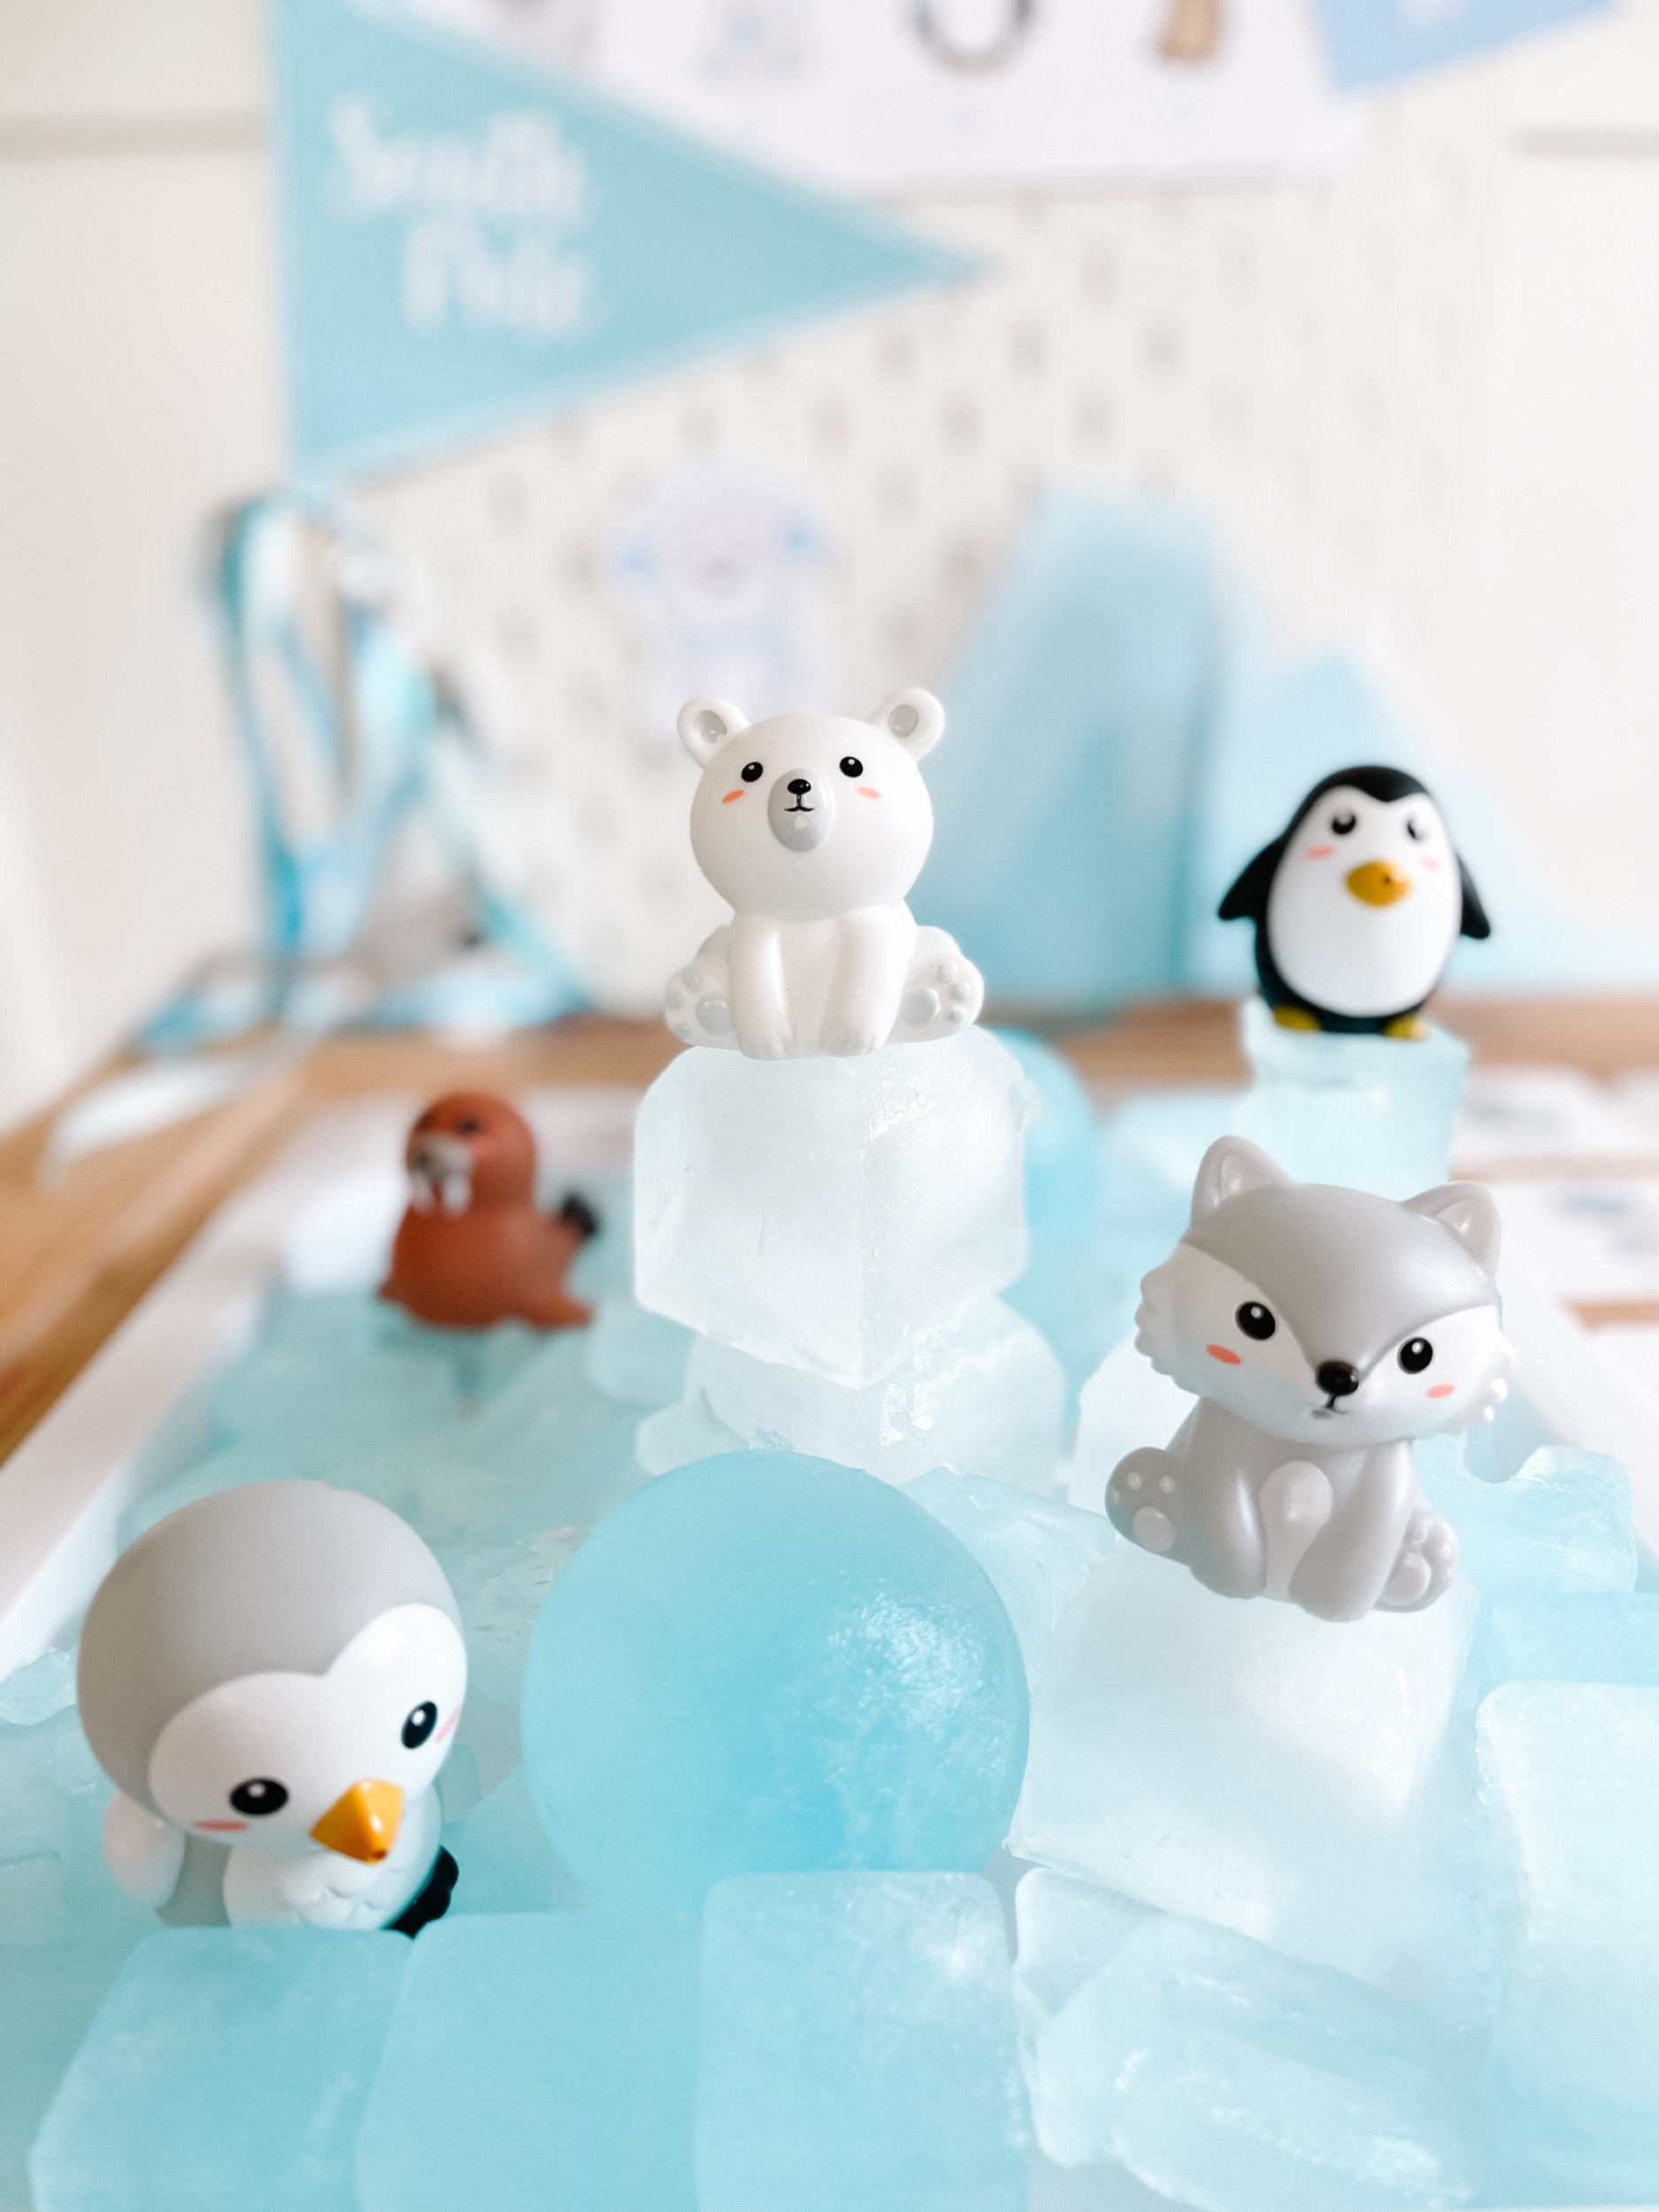
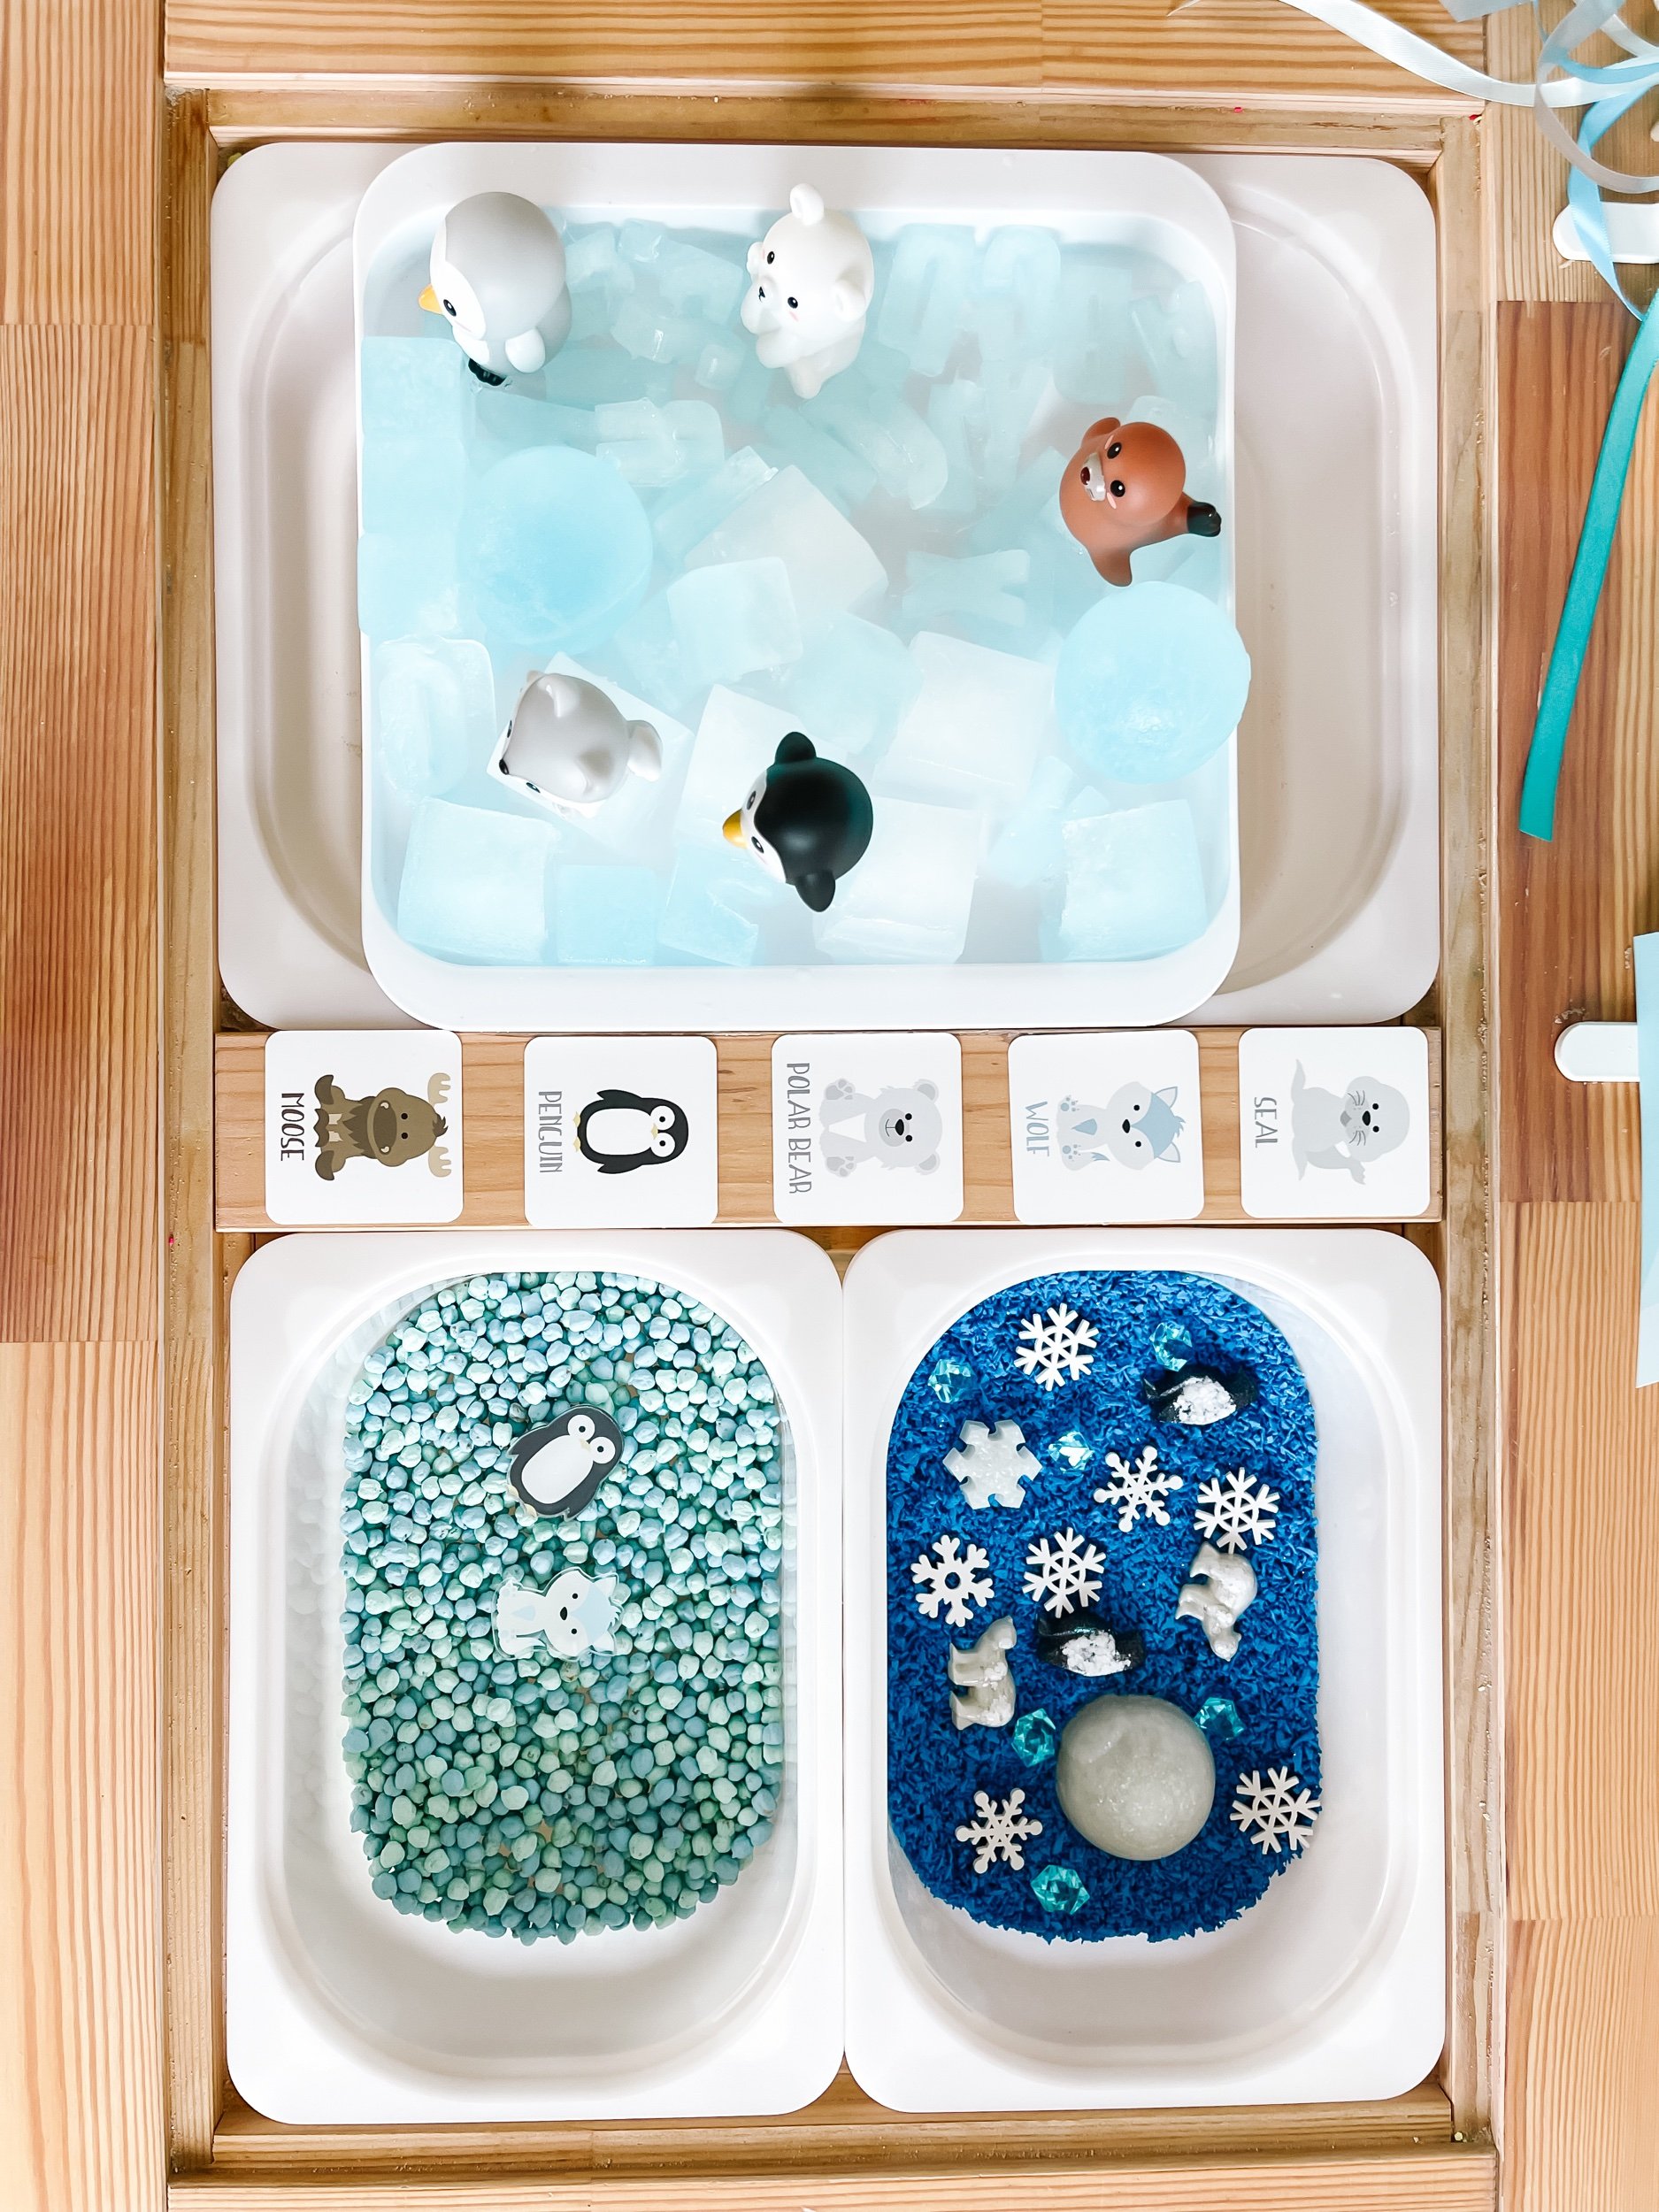
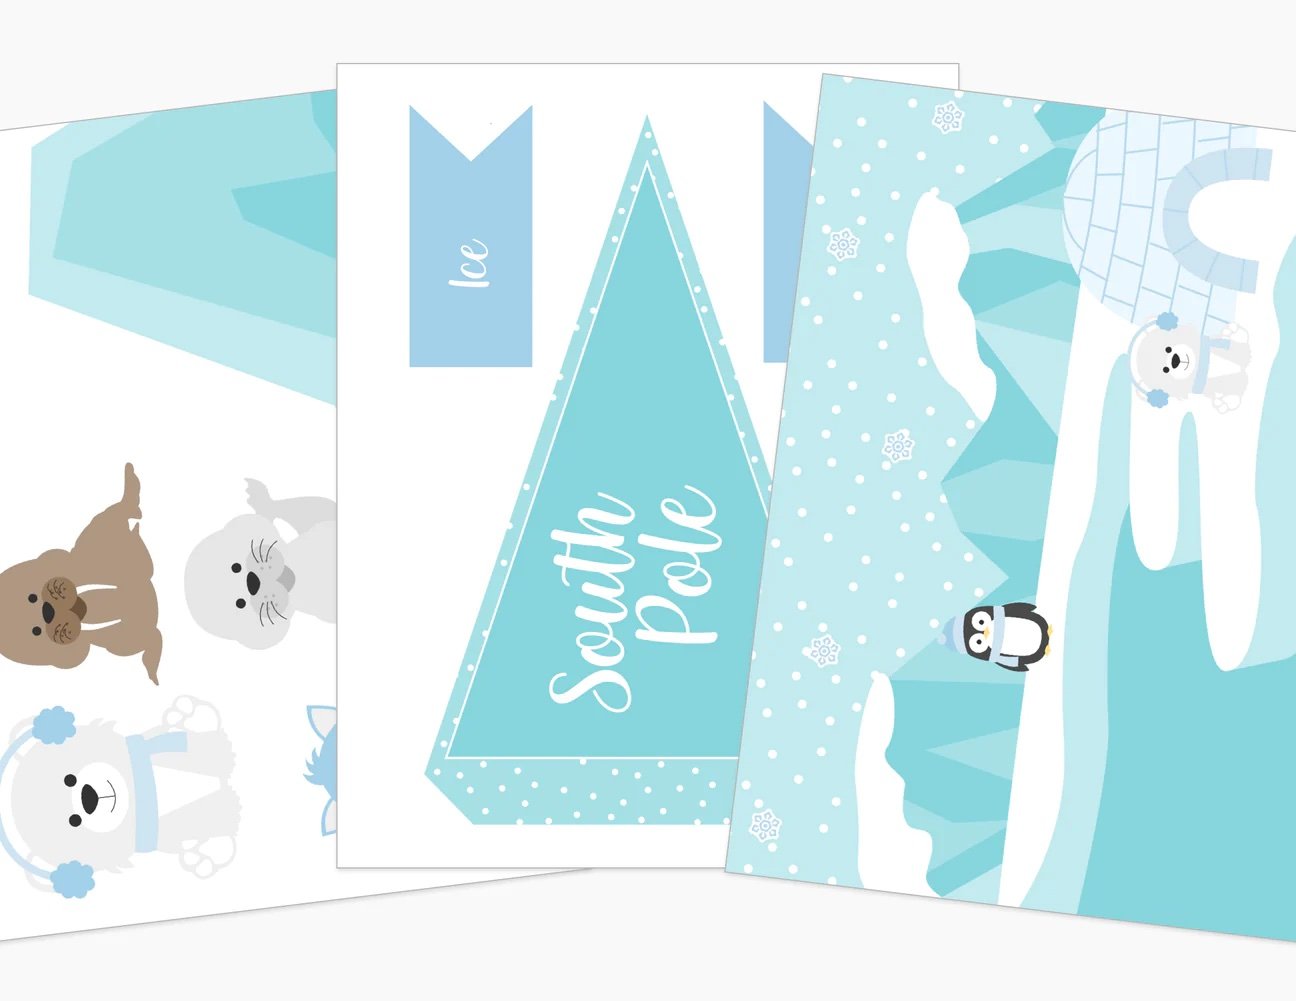
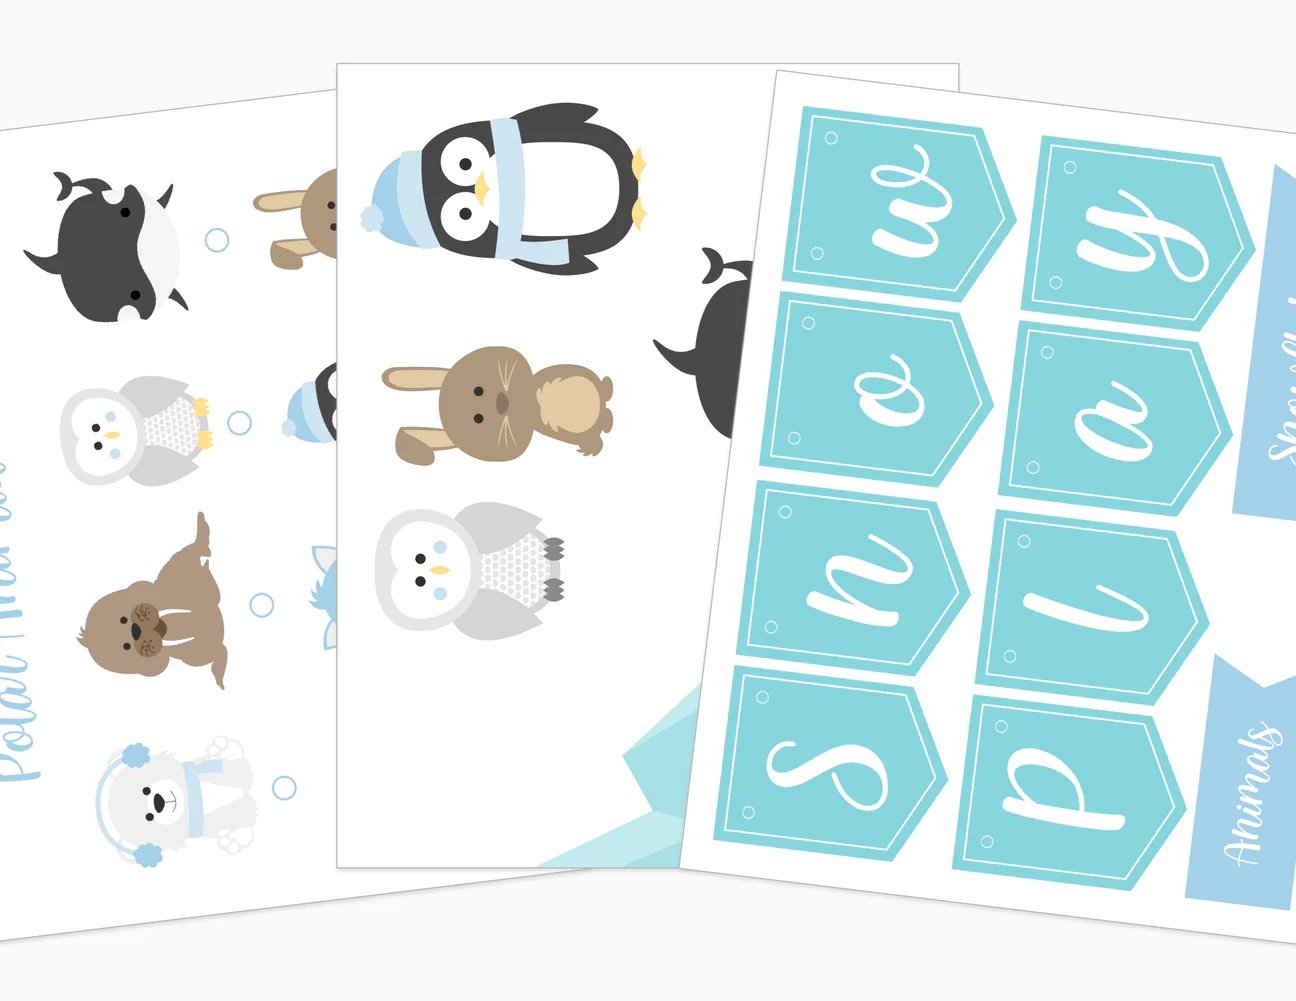
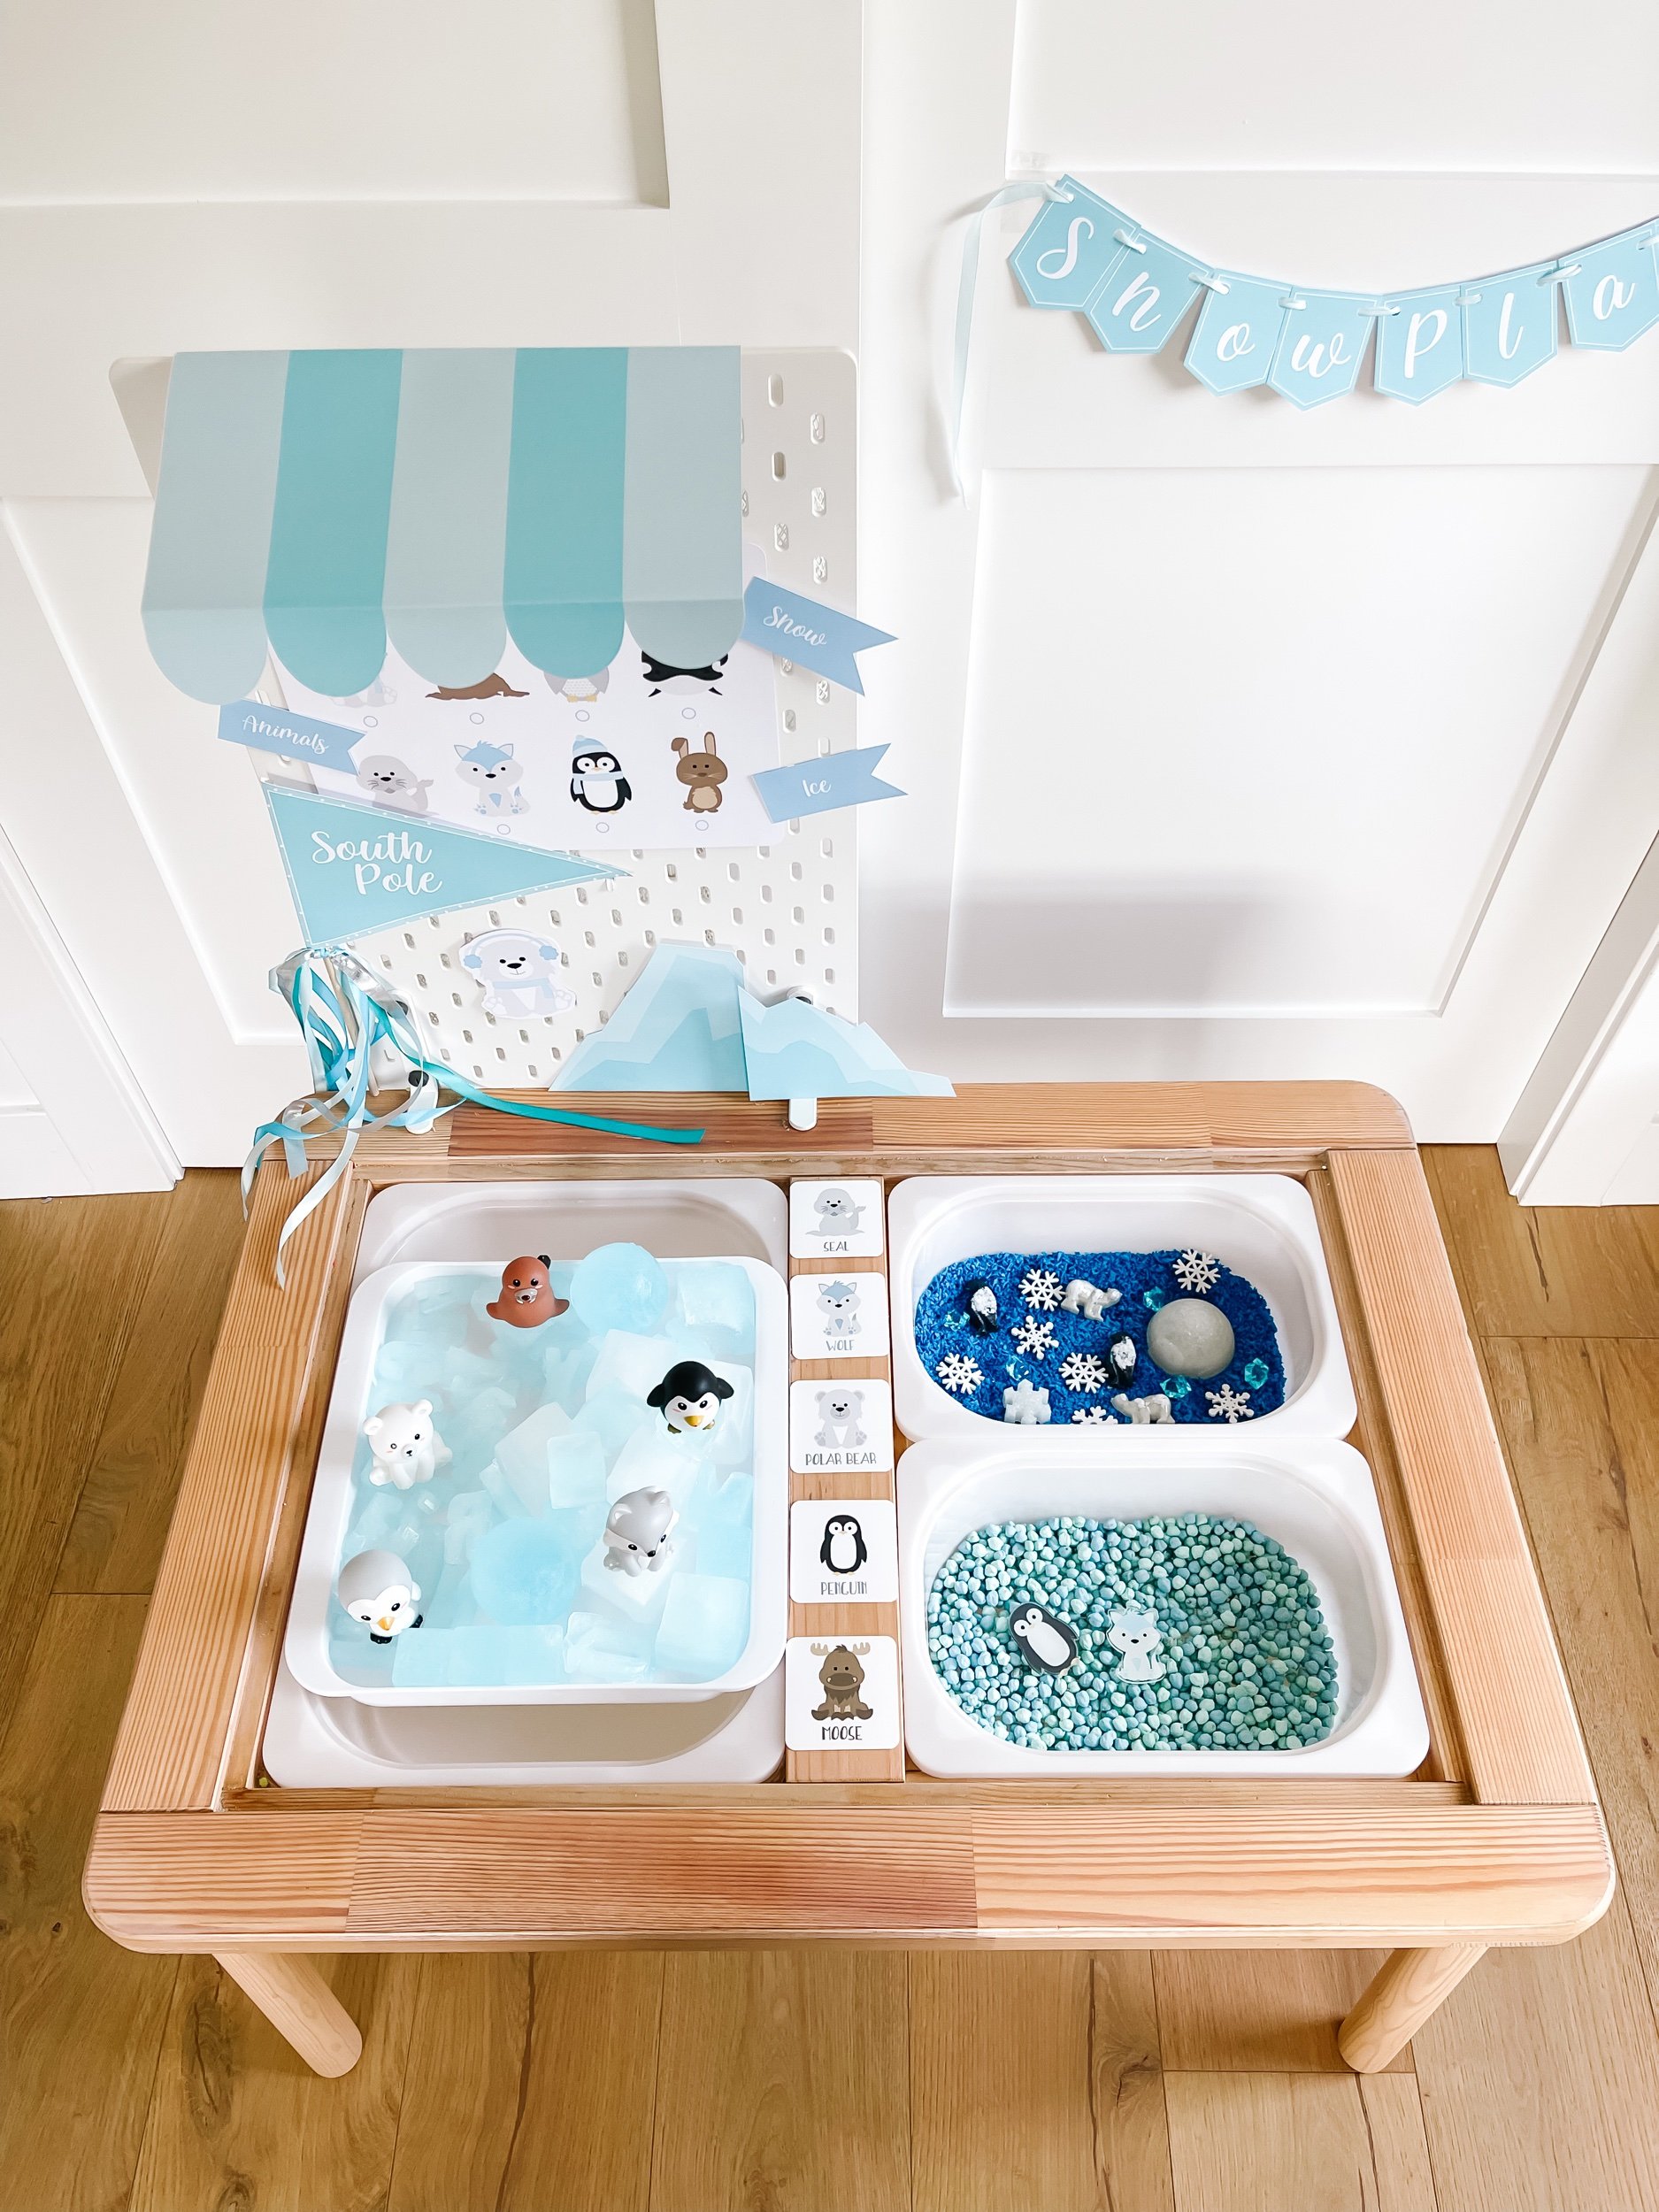
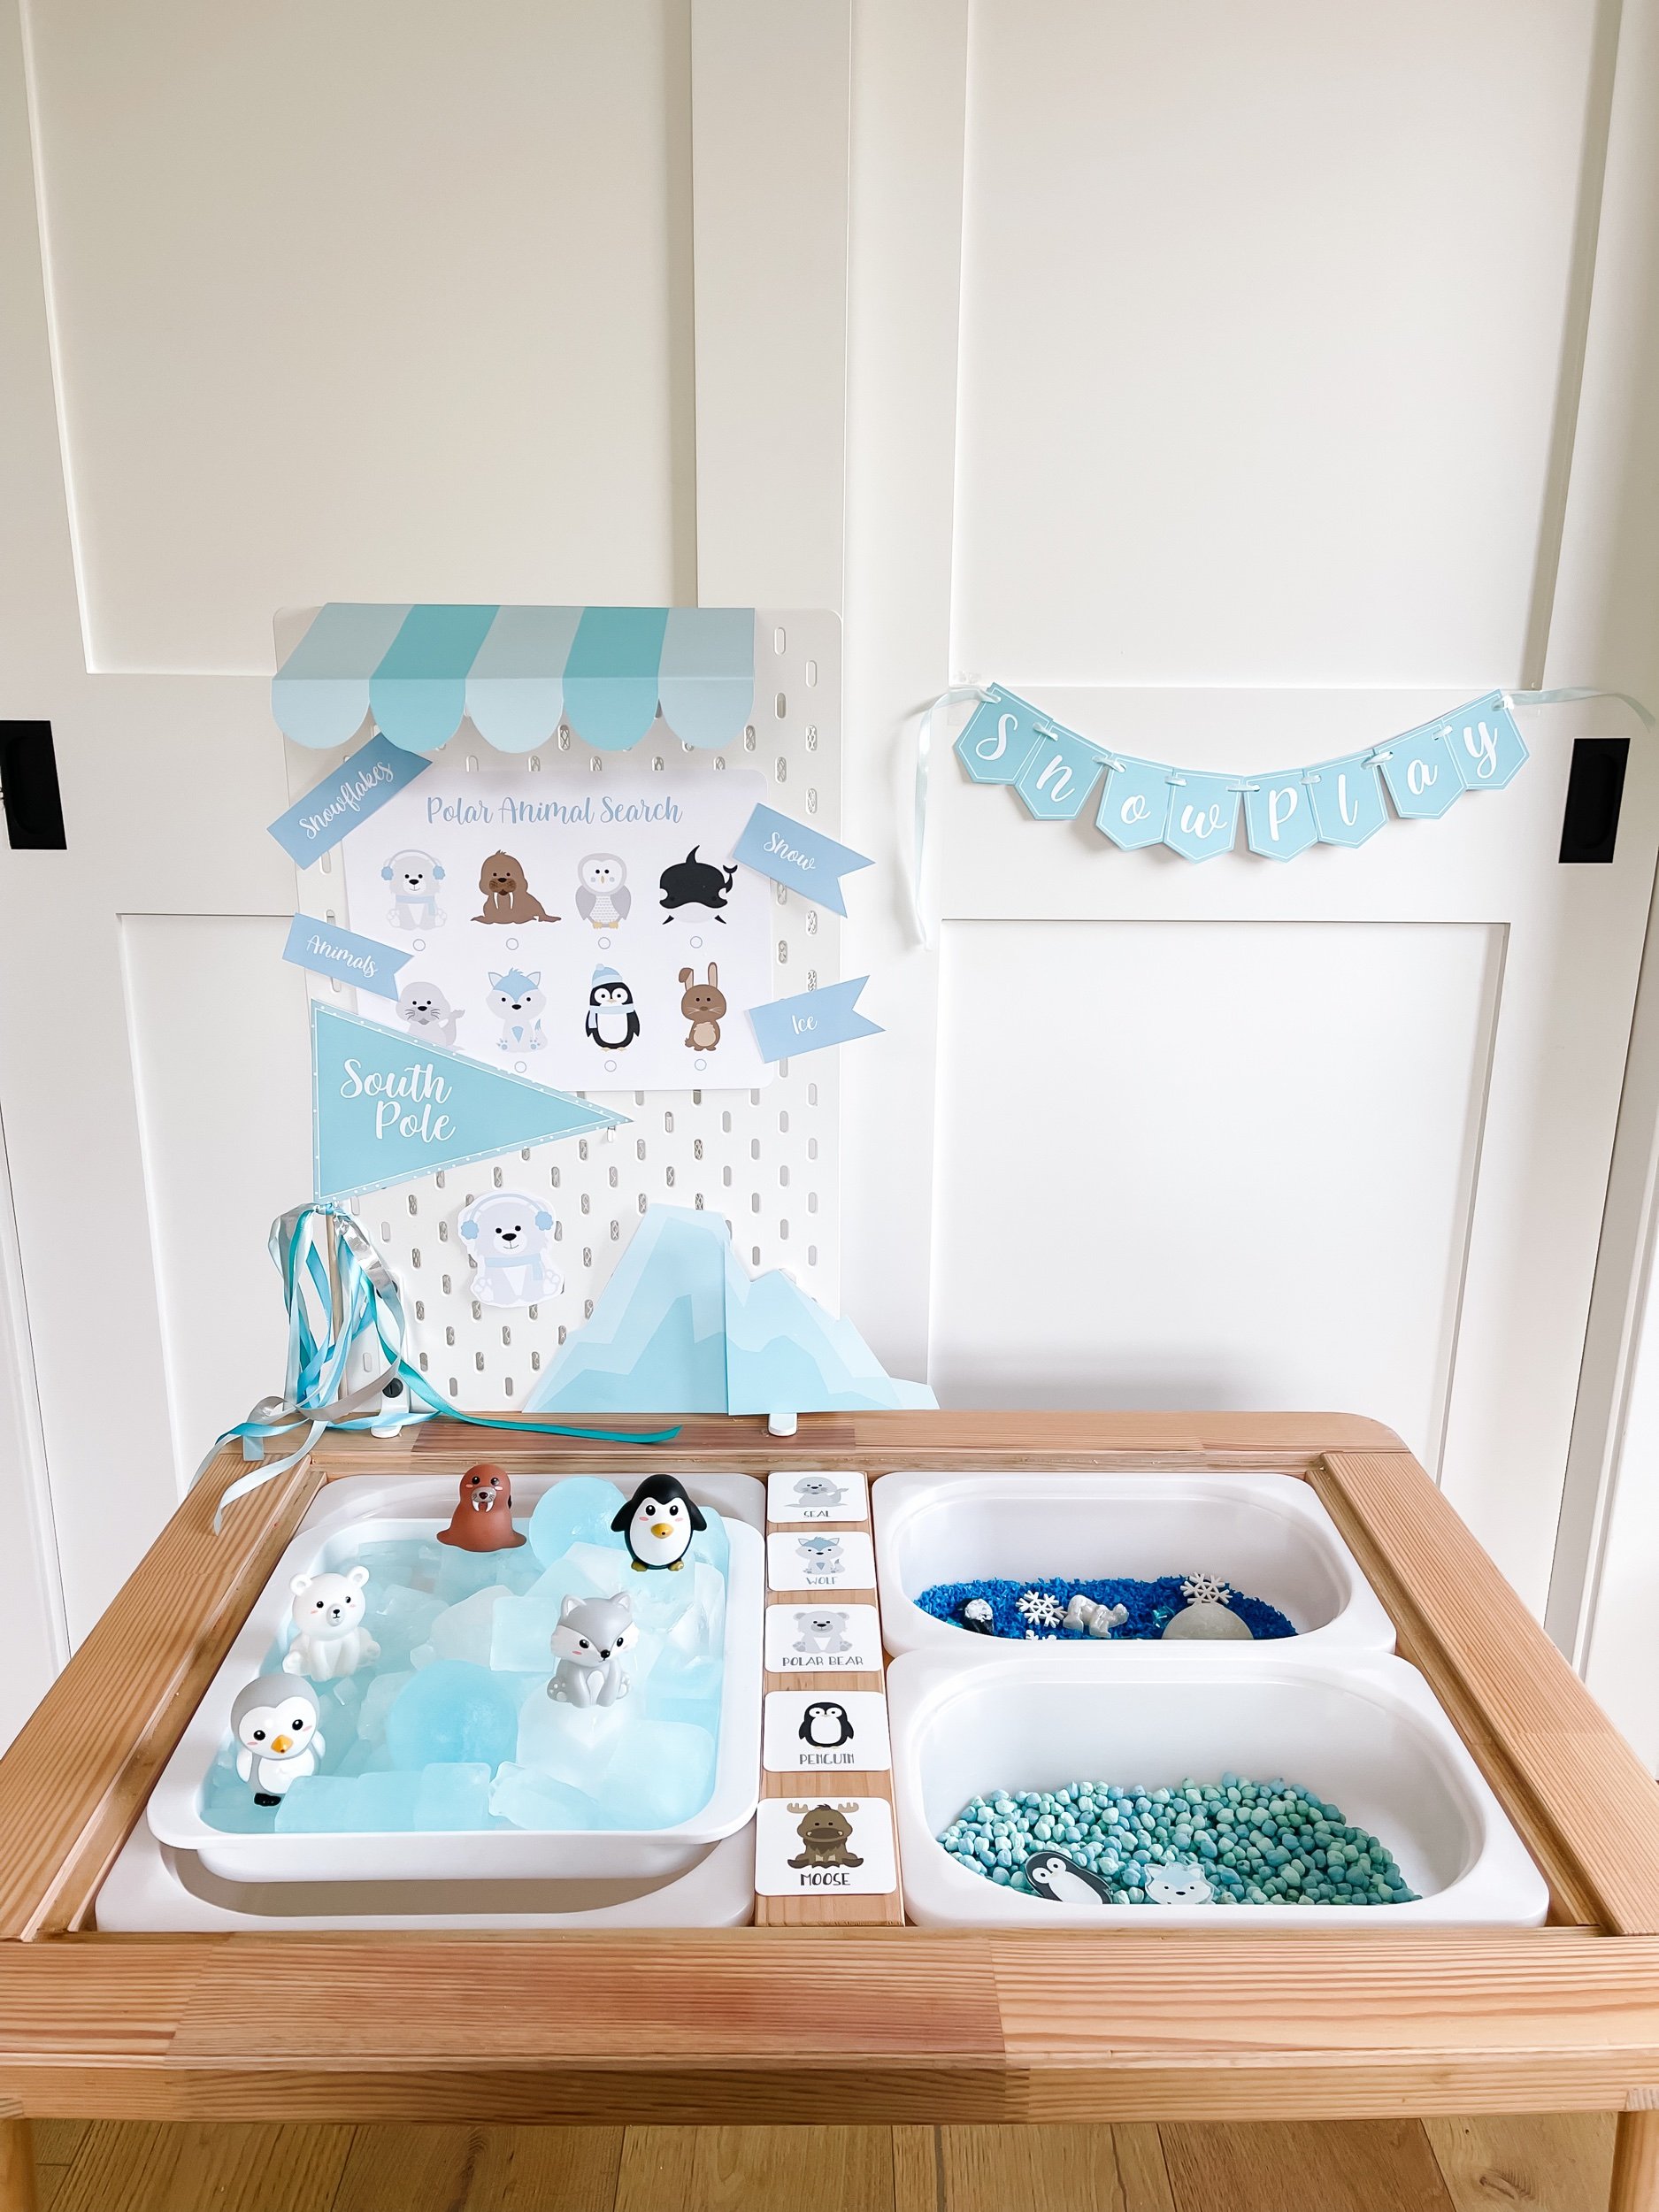
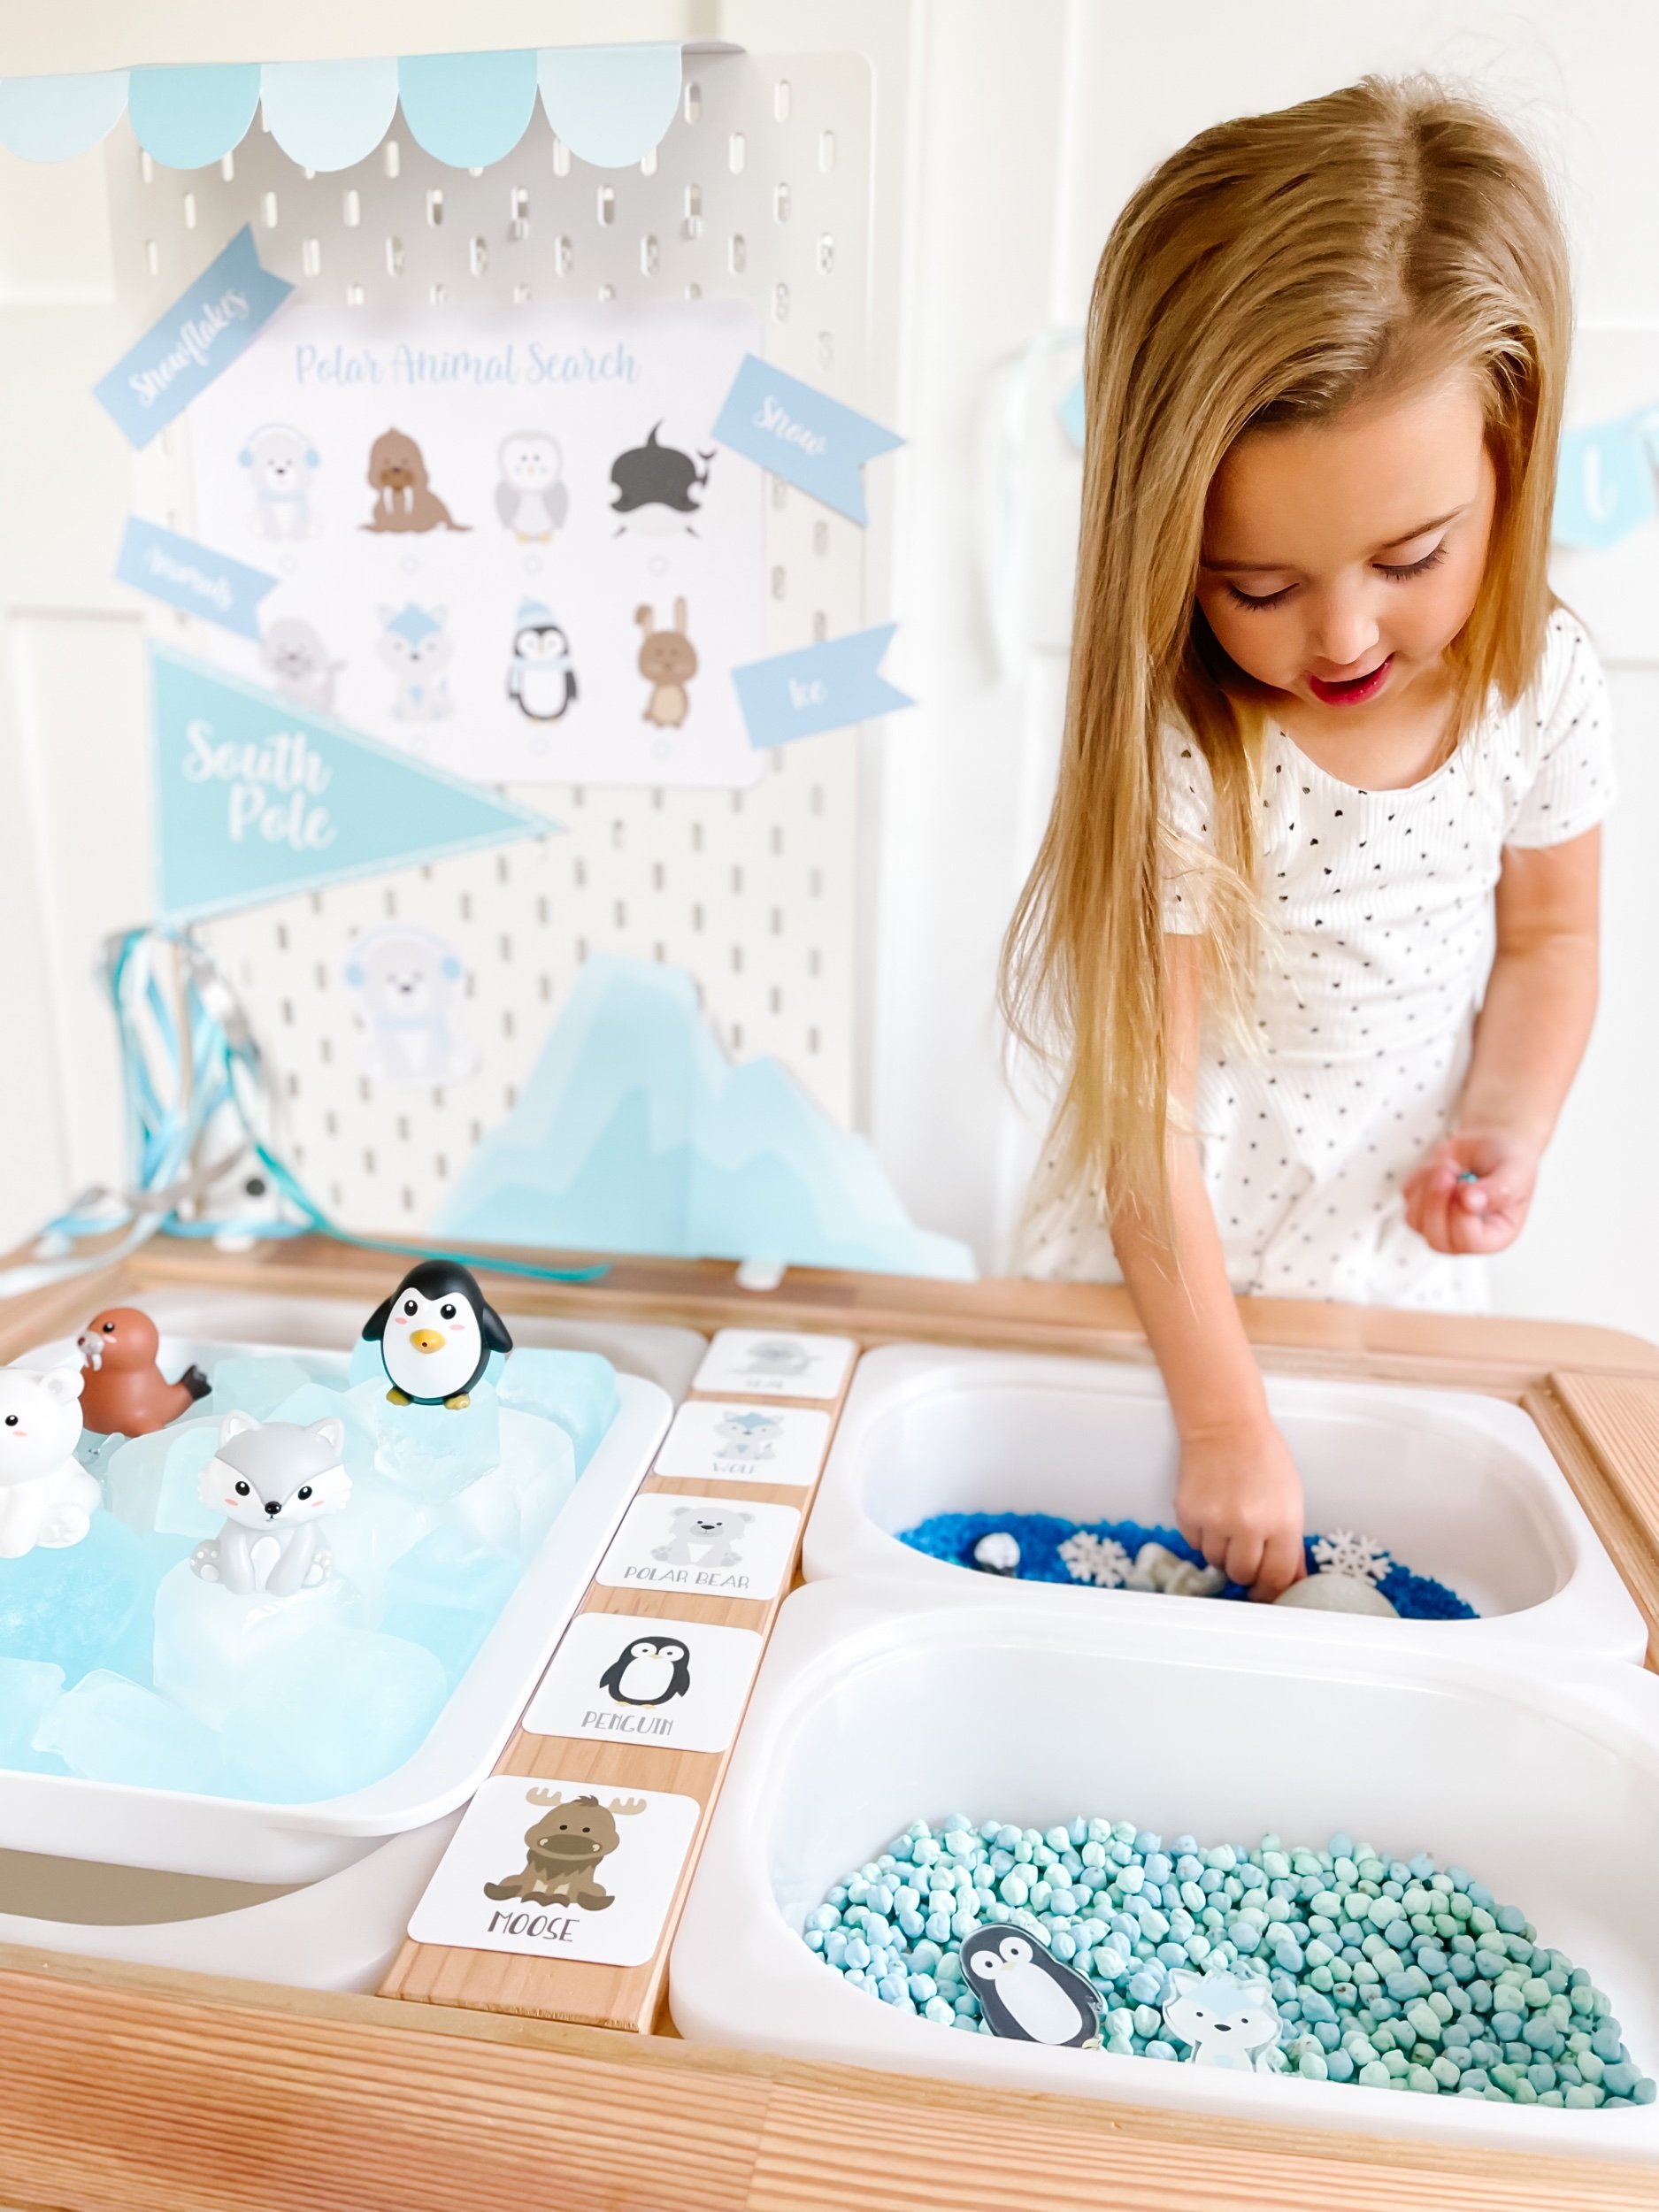
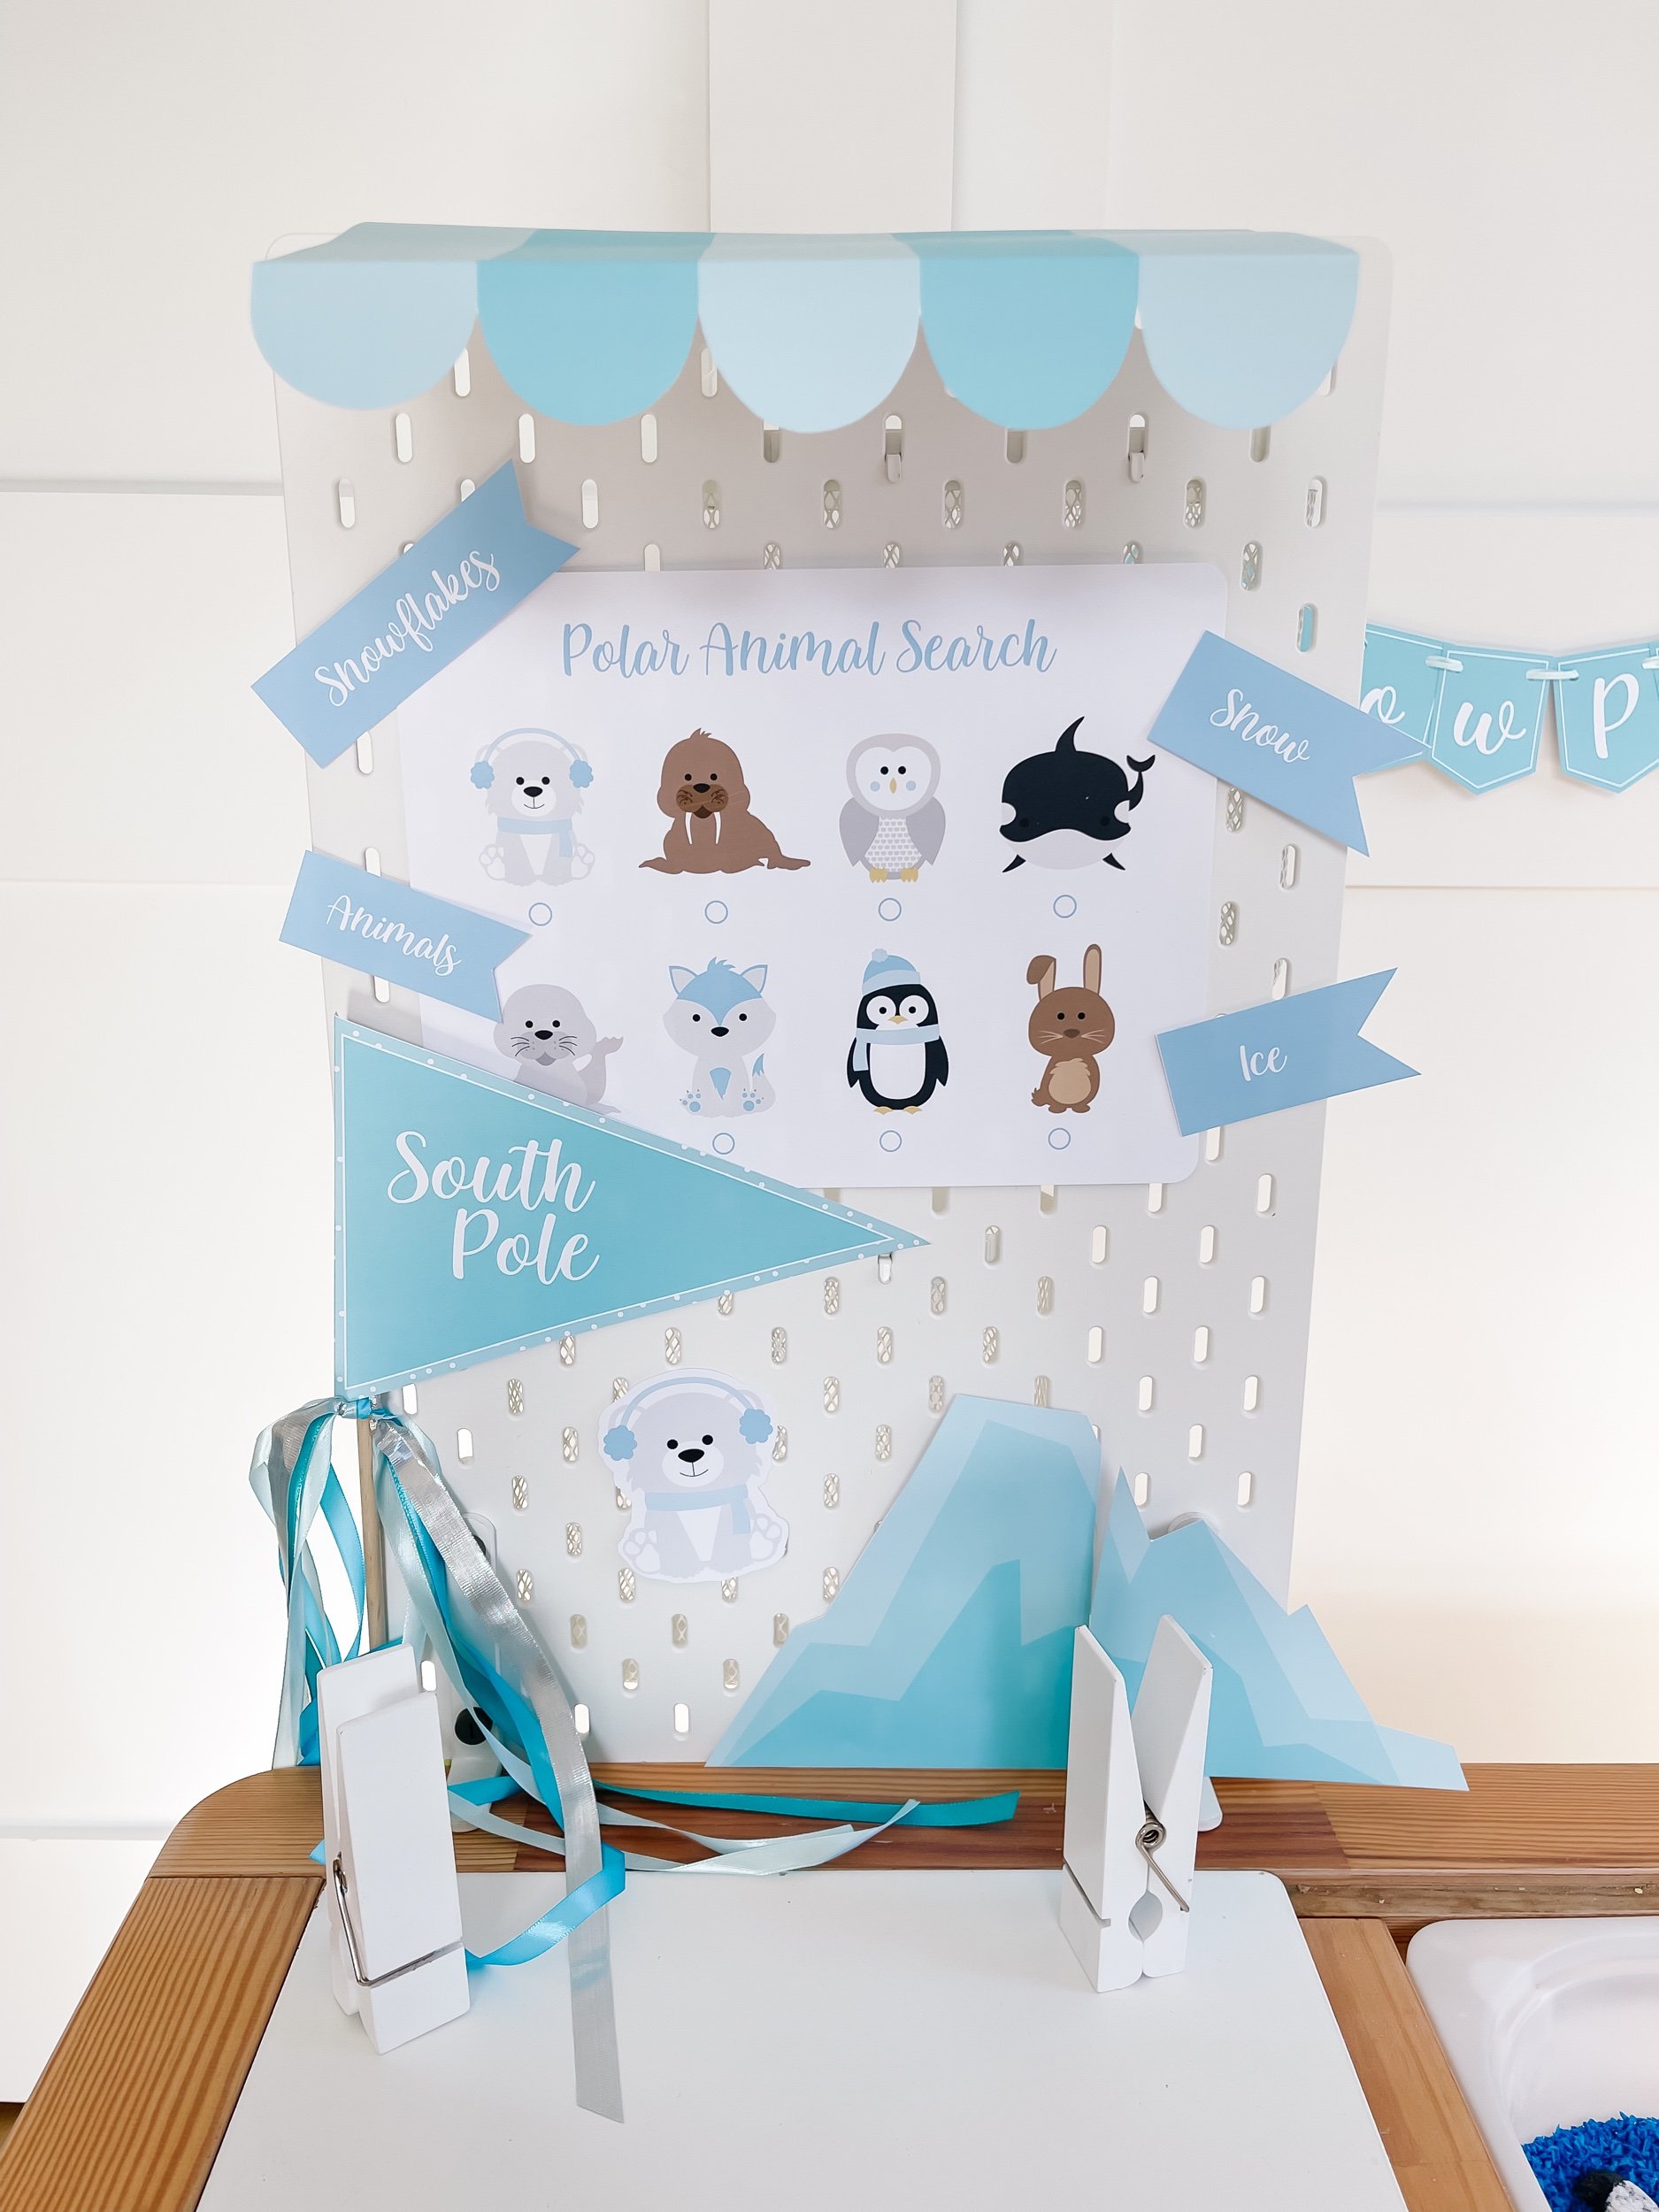
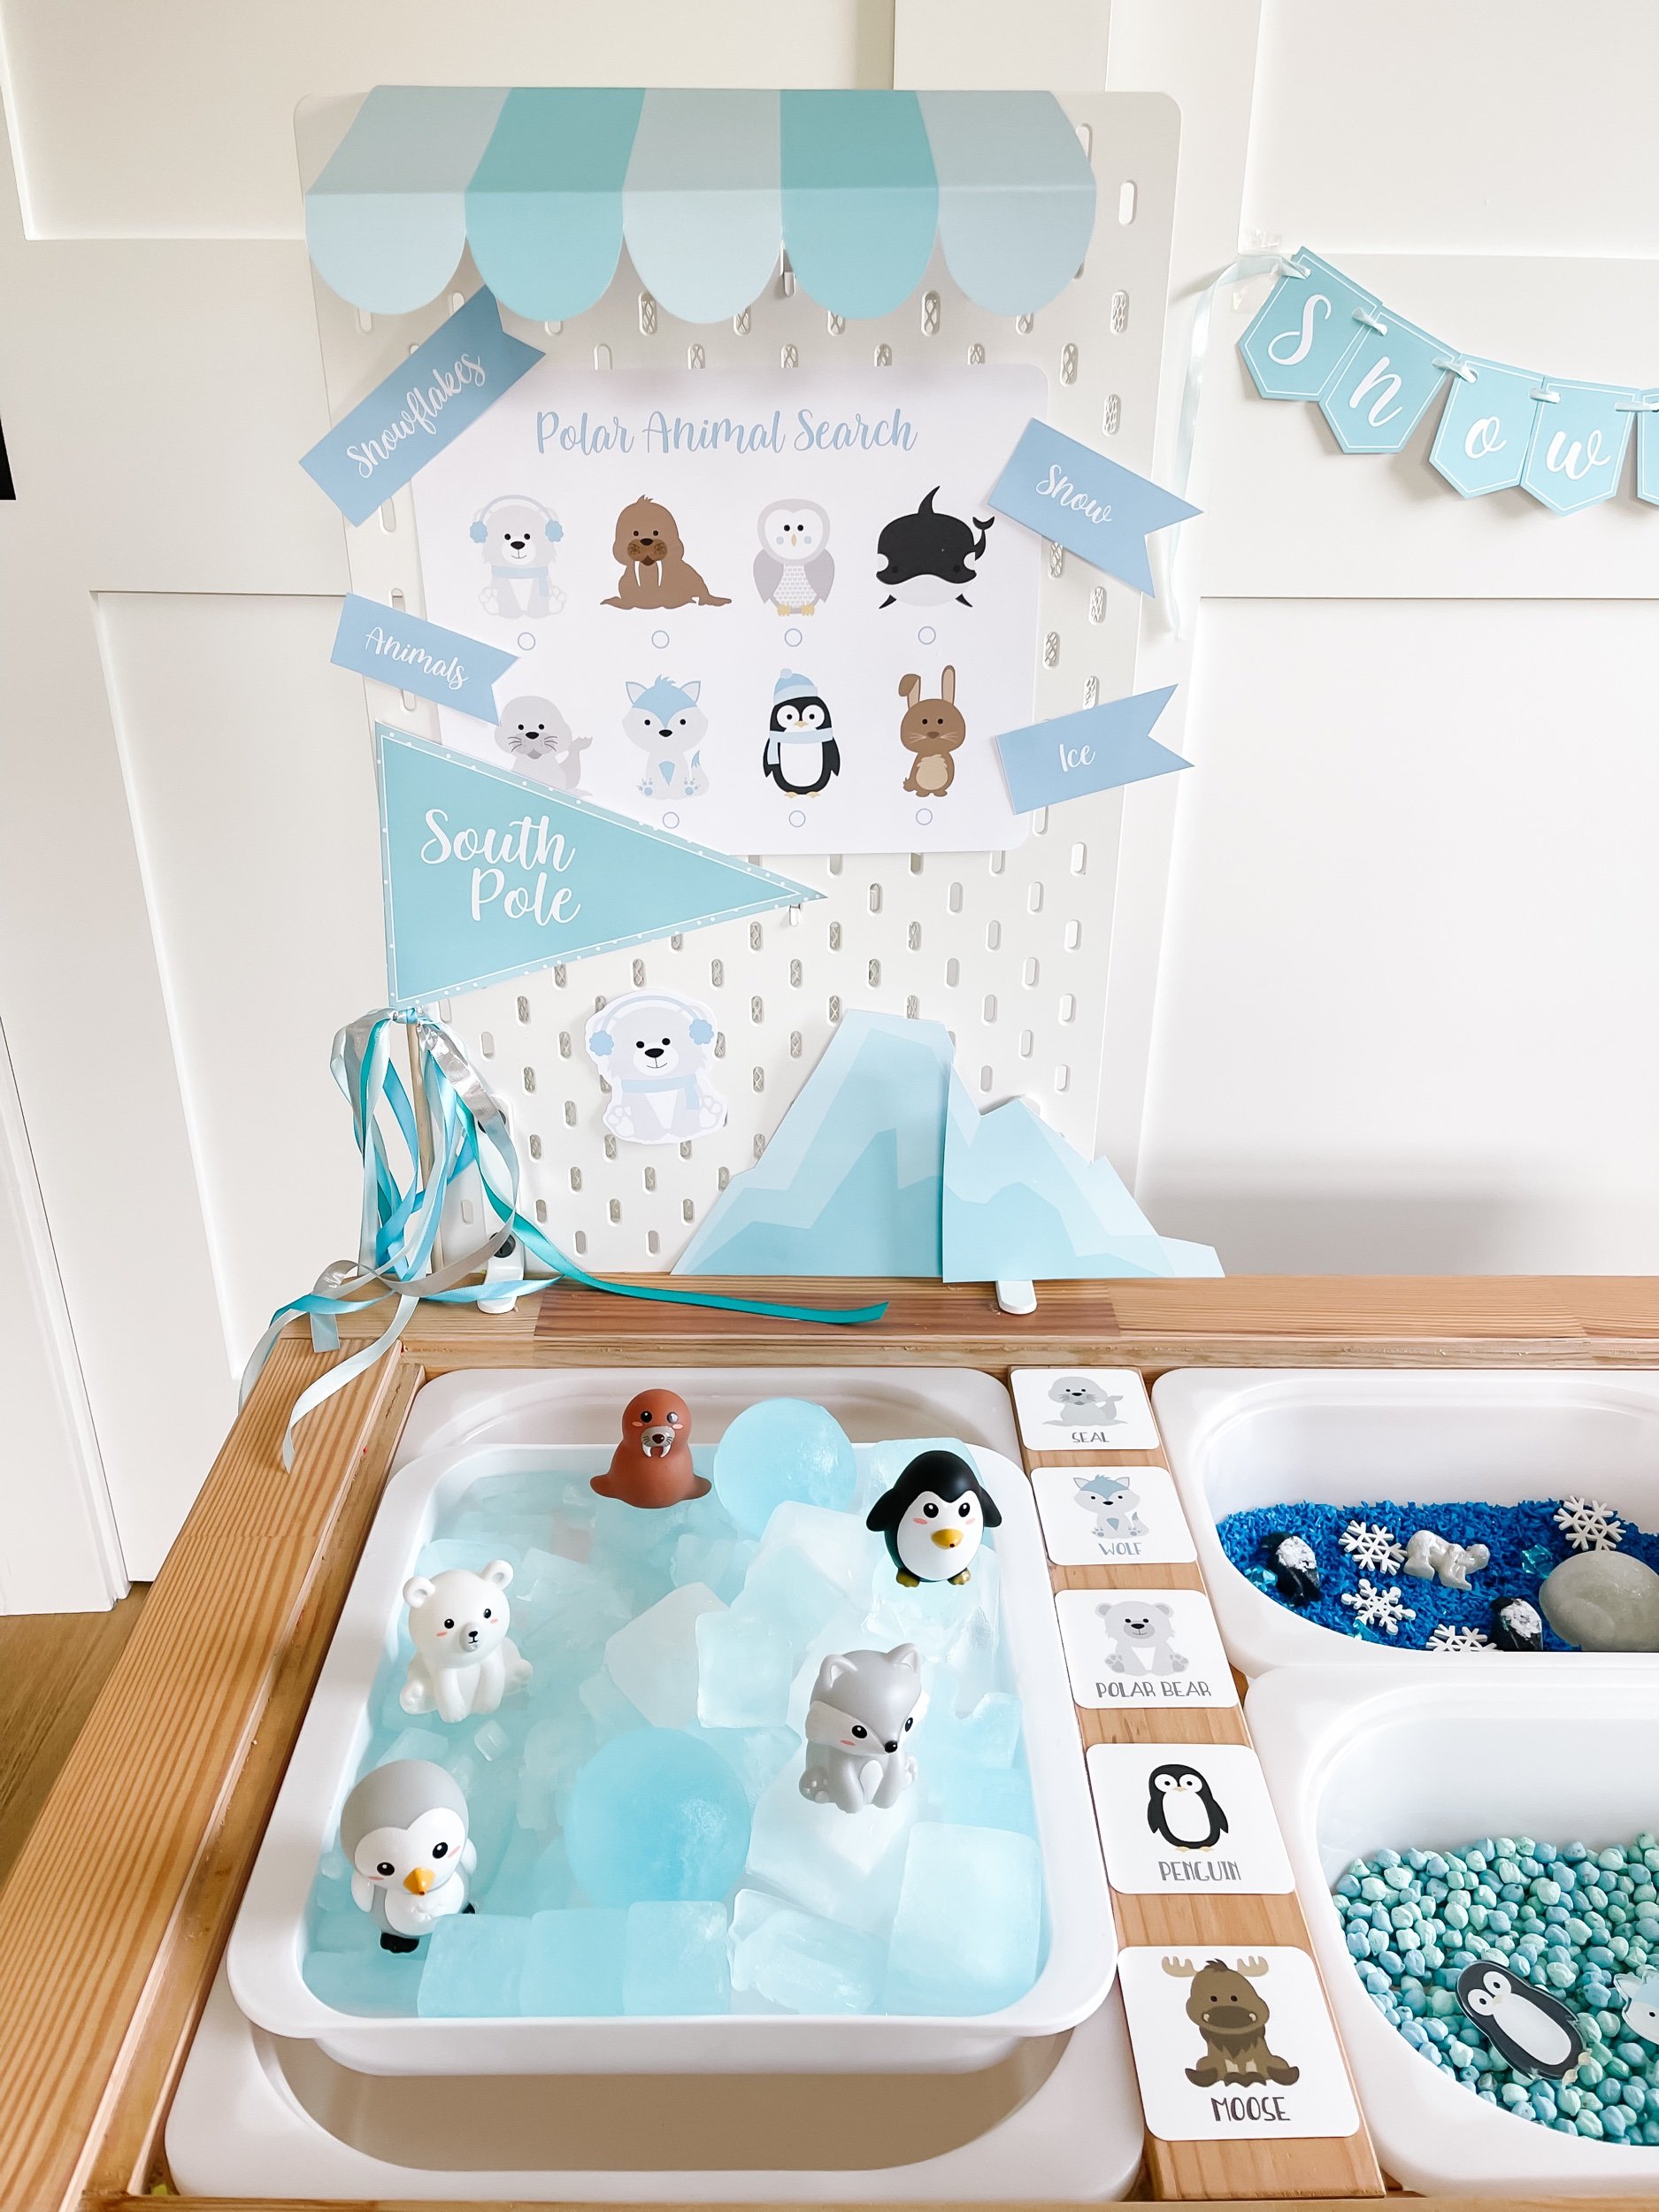
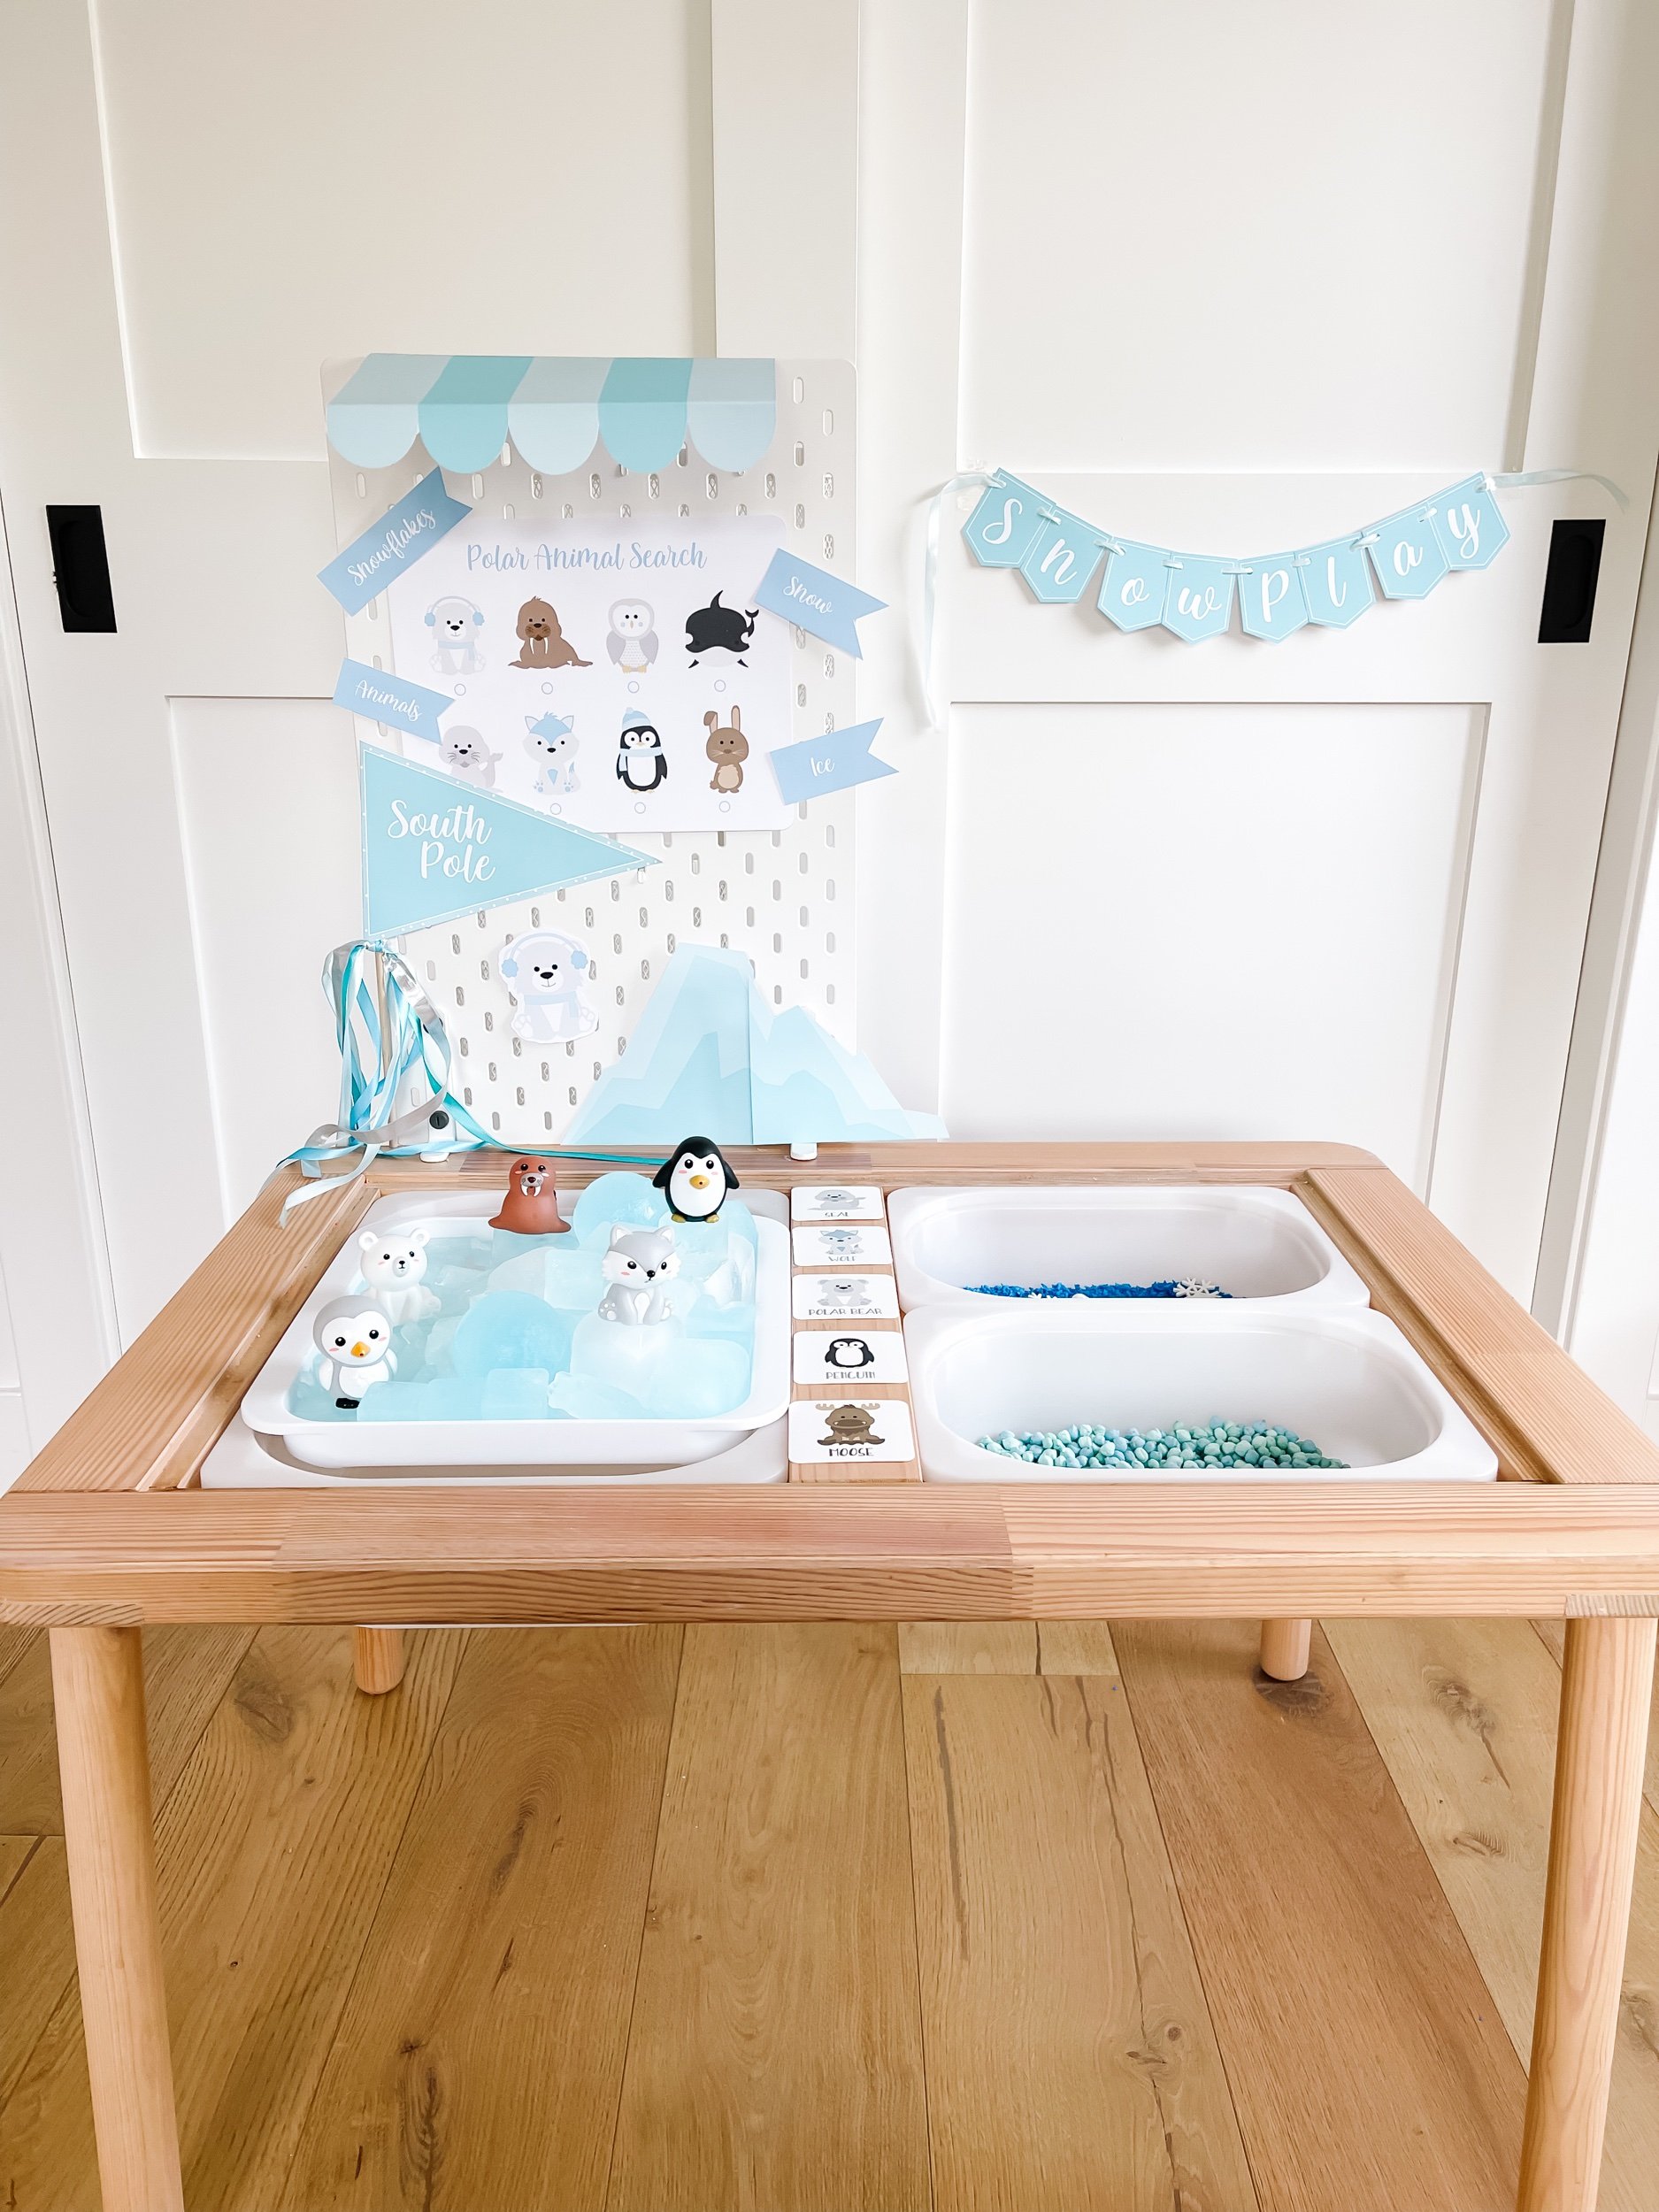
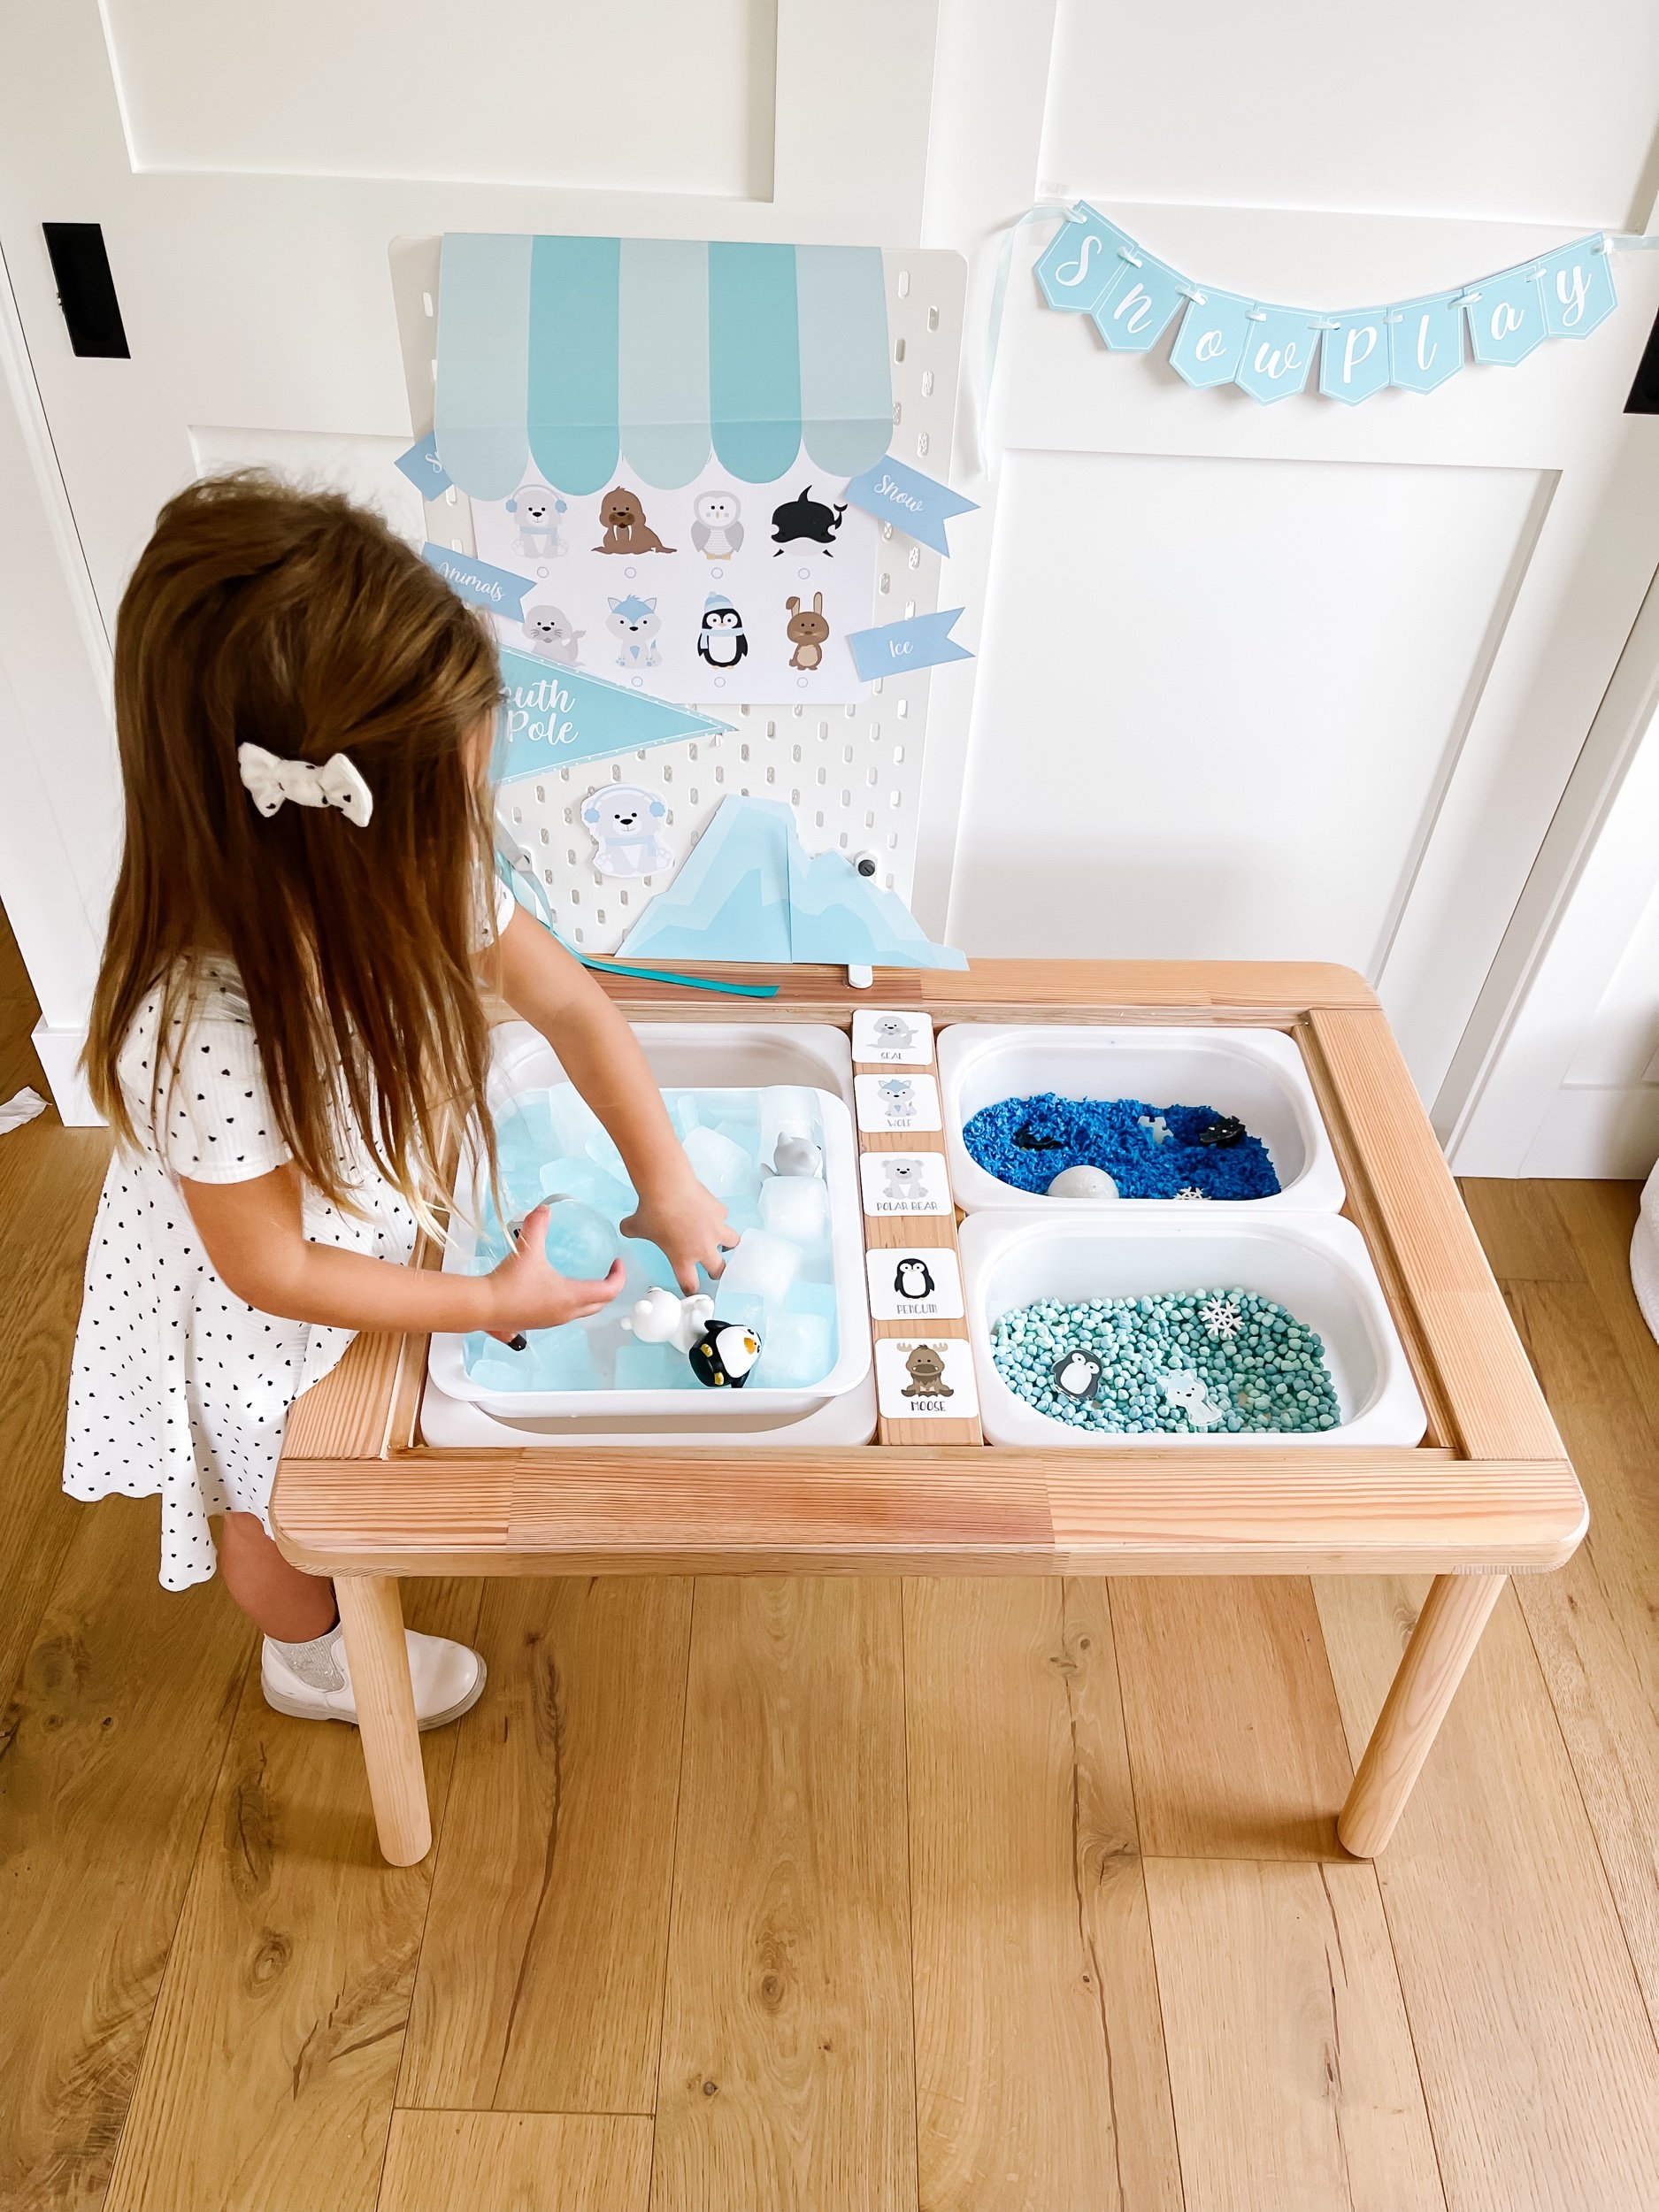
This year I’m so excited to be teaming up with the fabulous Little October House to bring you this amazing Arctic Polar Animal Winter Themed Sensory bin. Check out all of the amazing possibilities with these polar animal goodies:


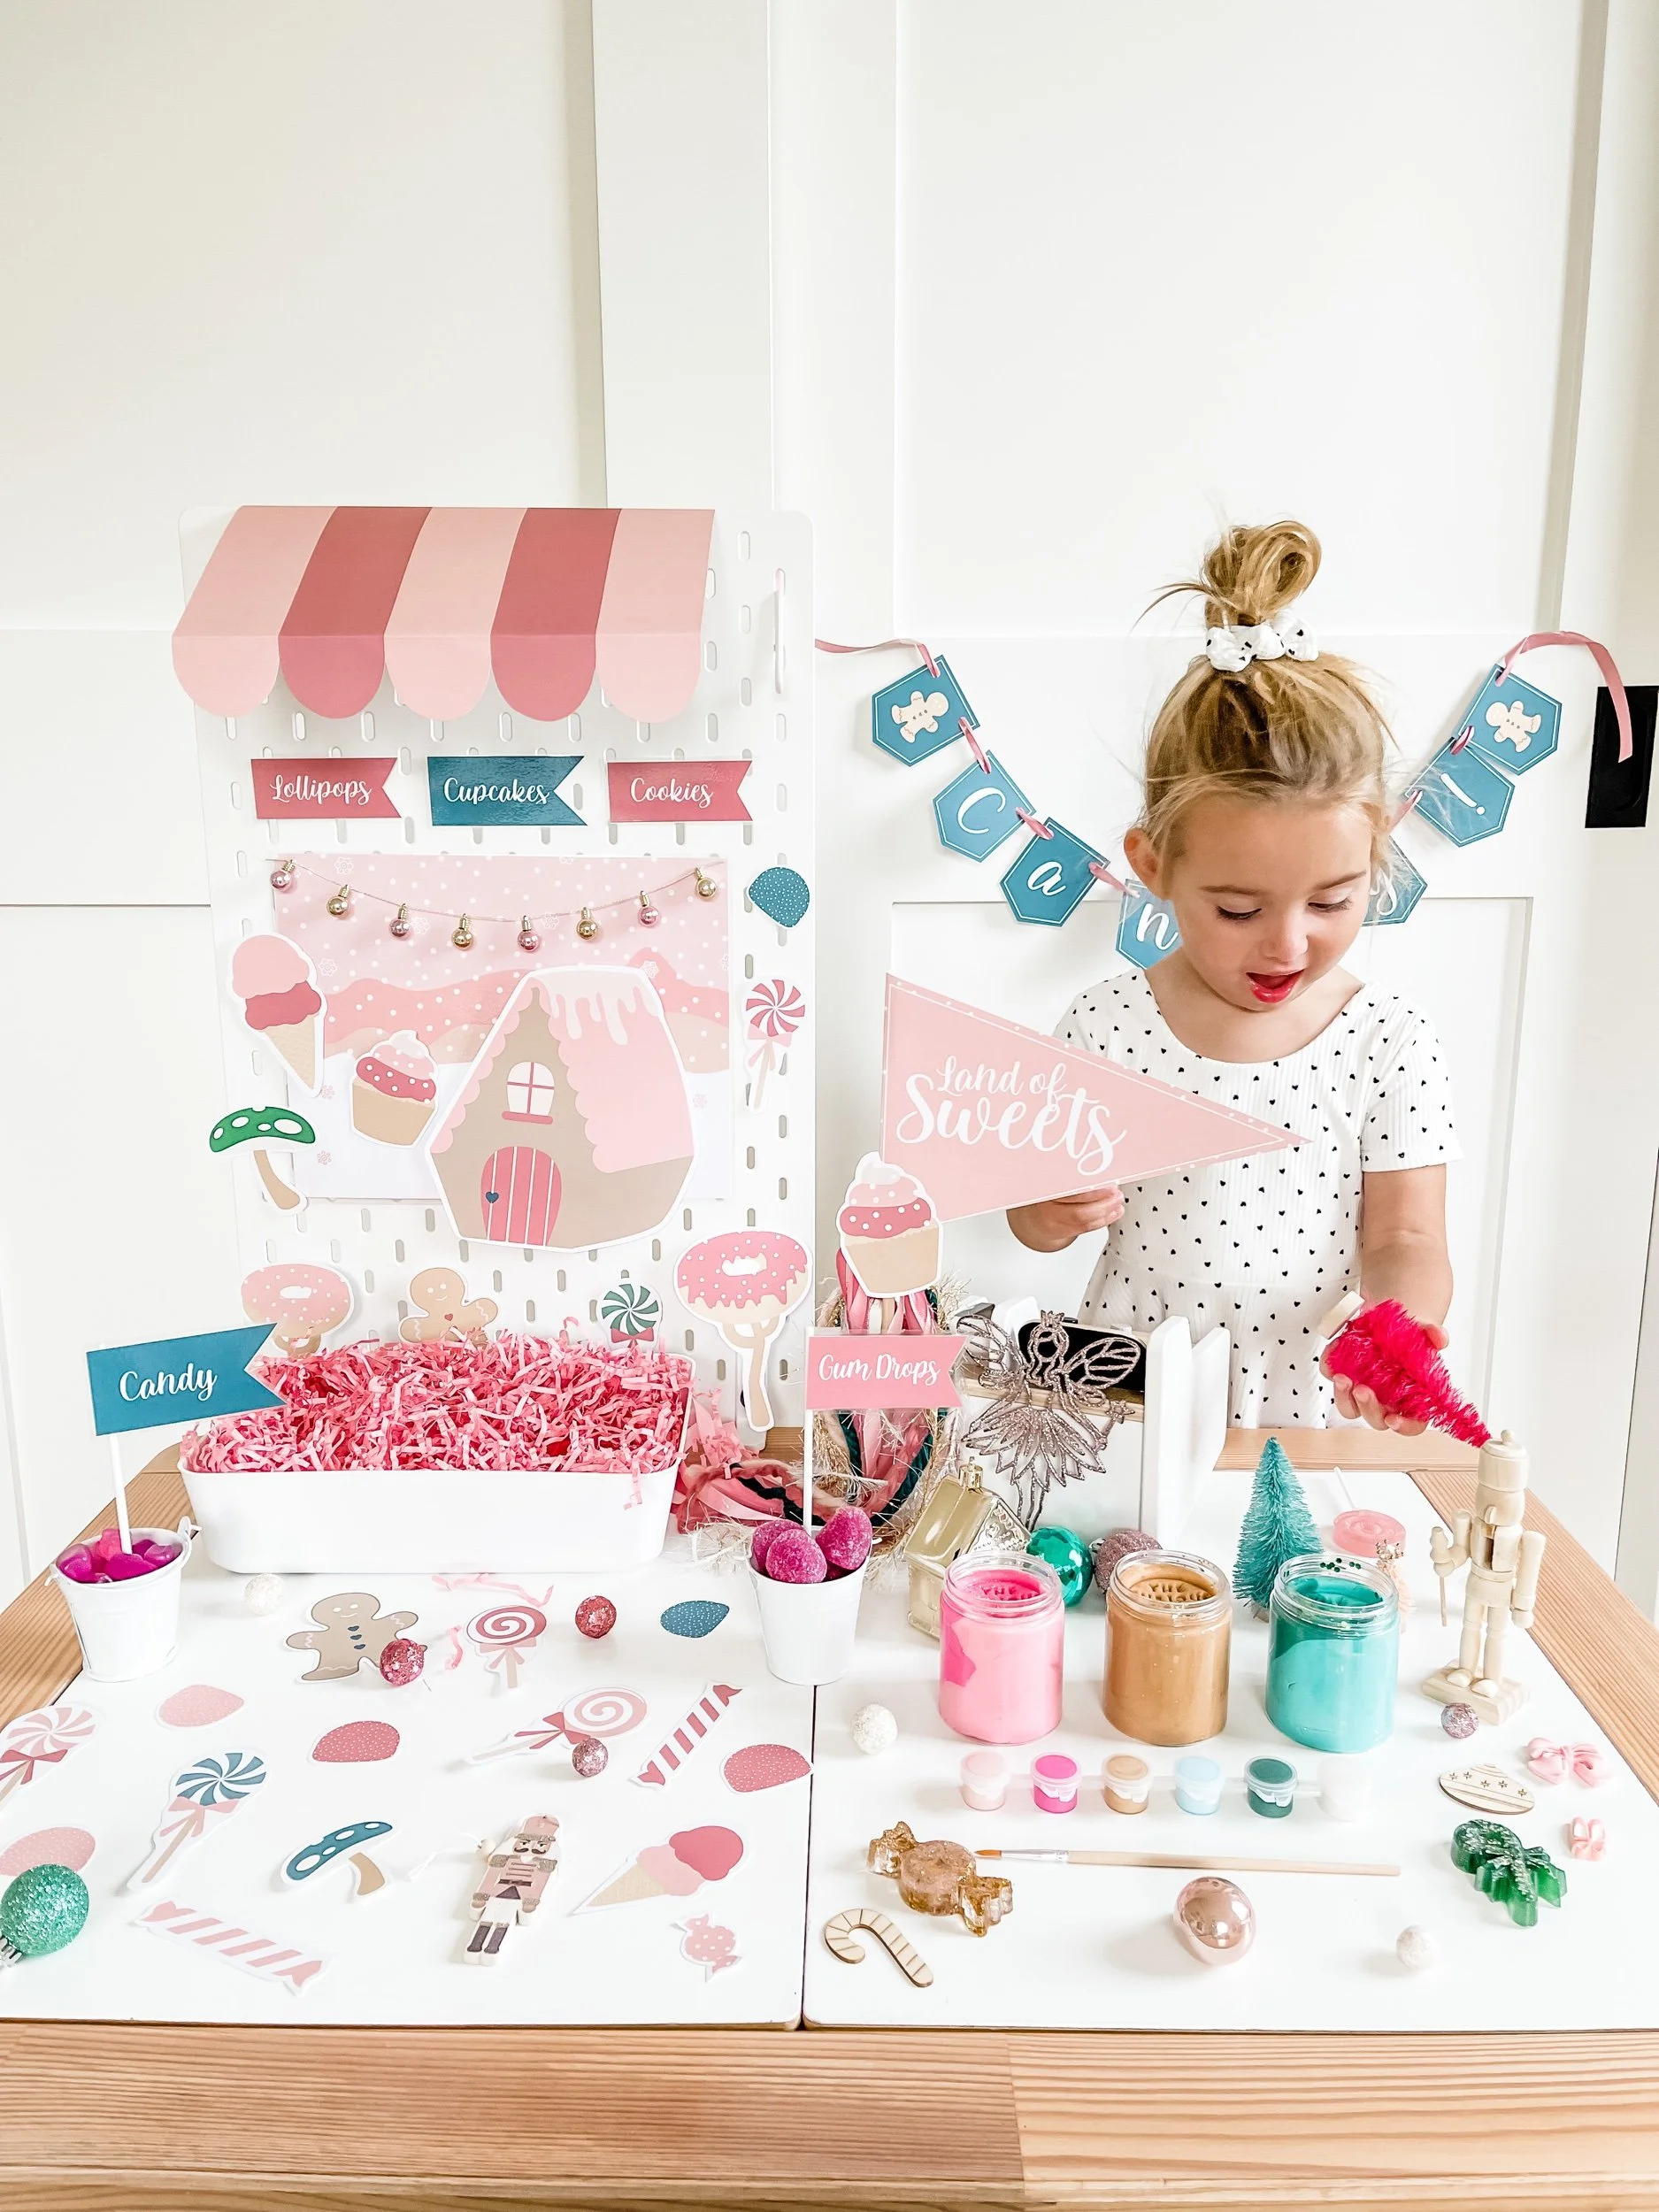
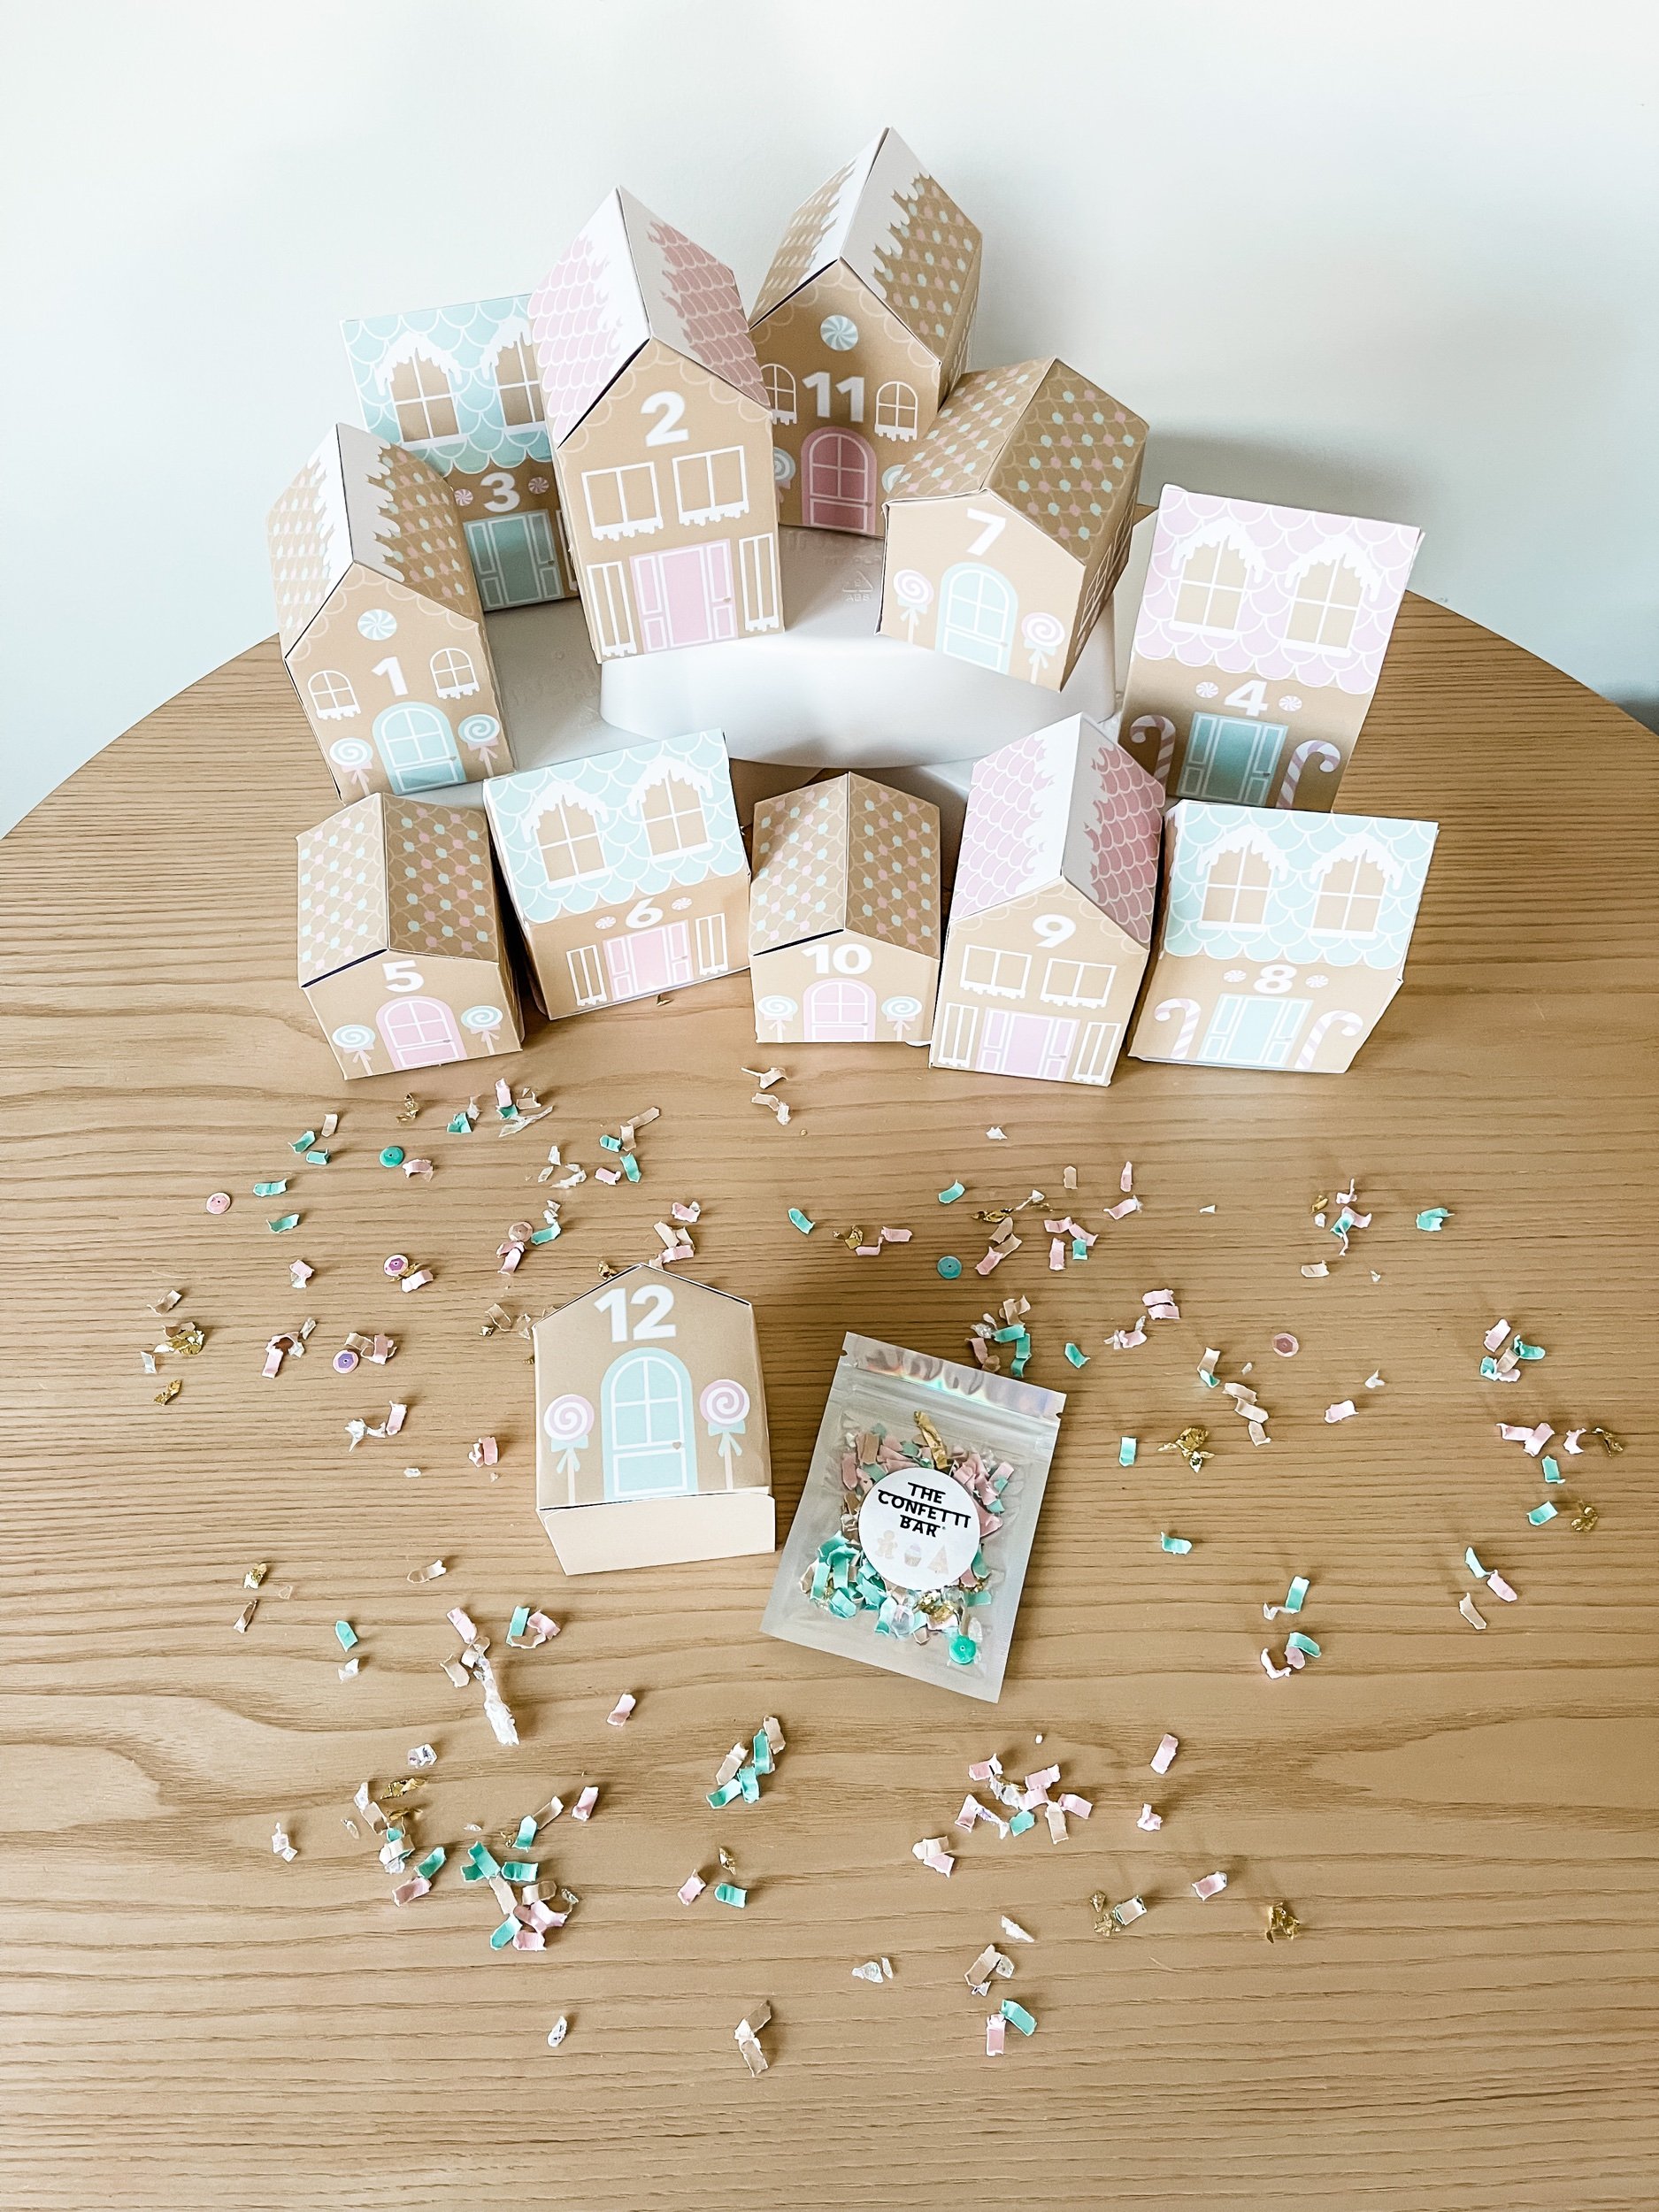
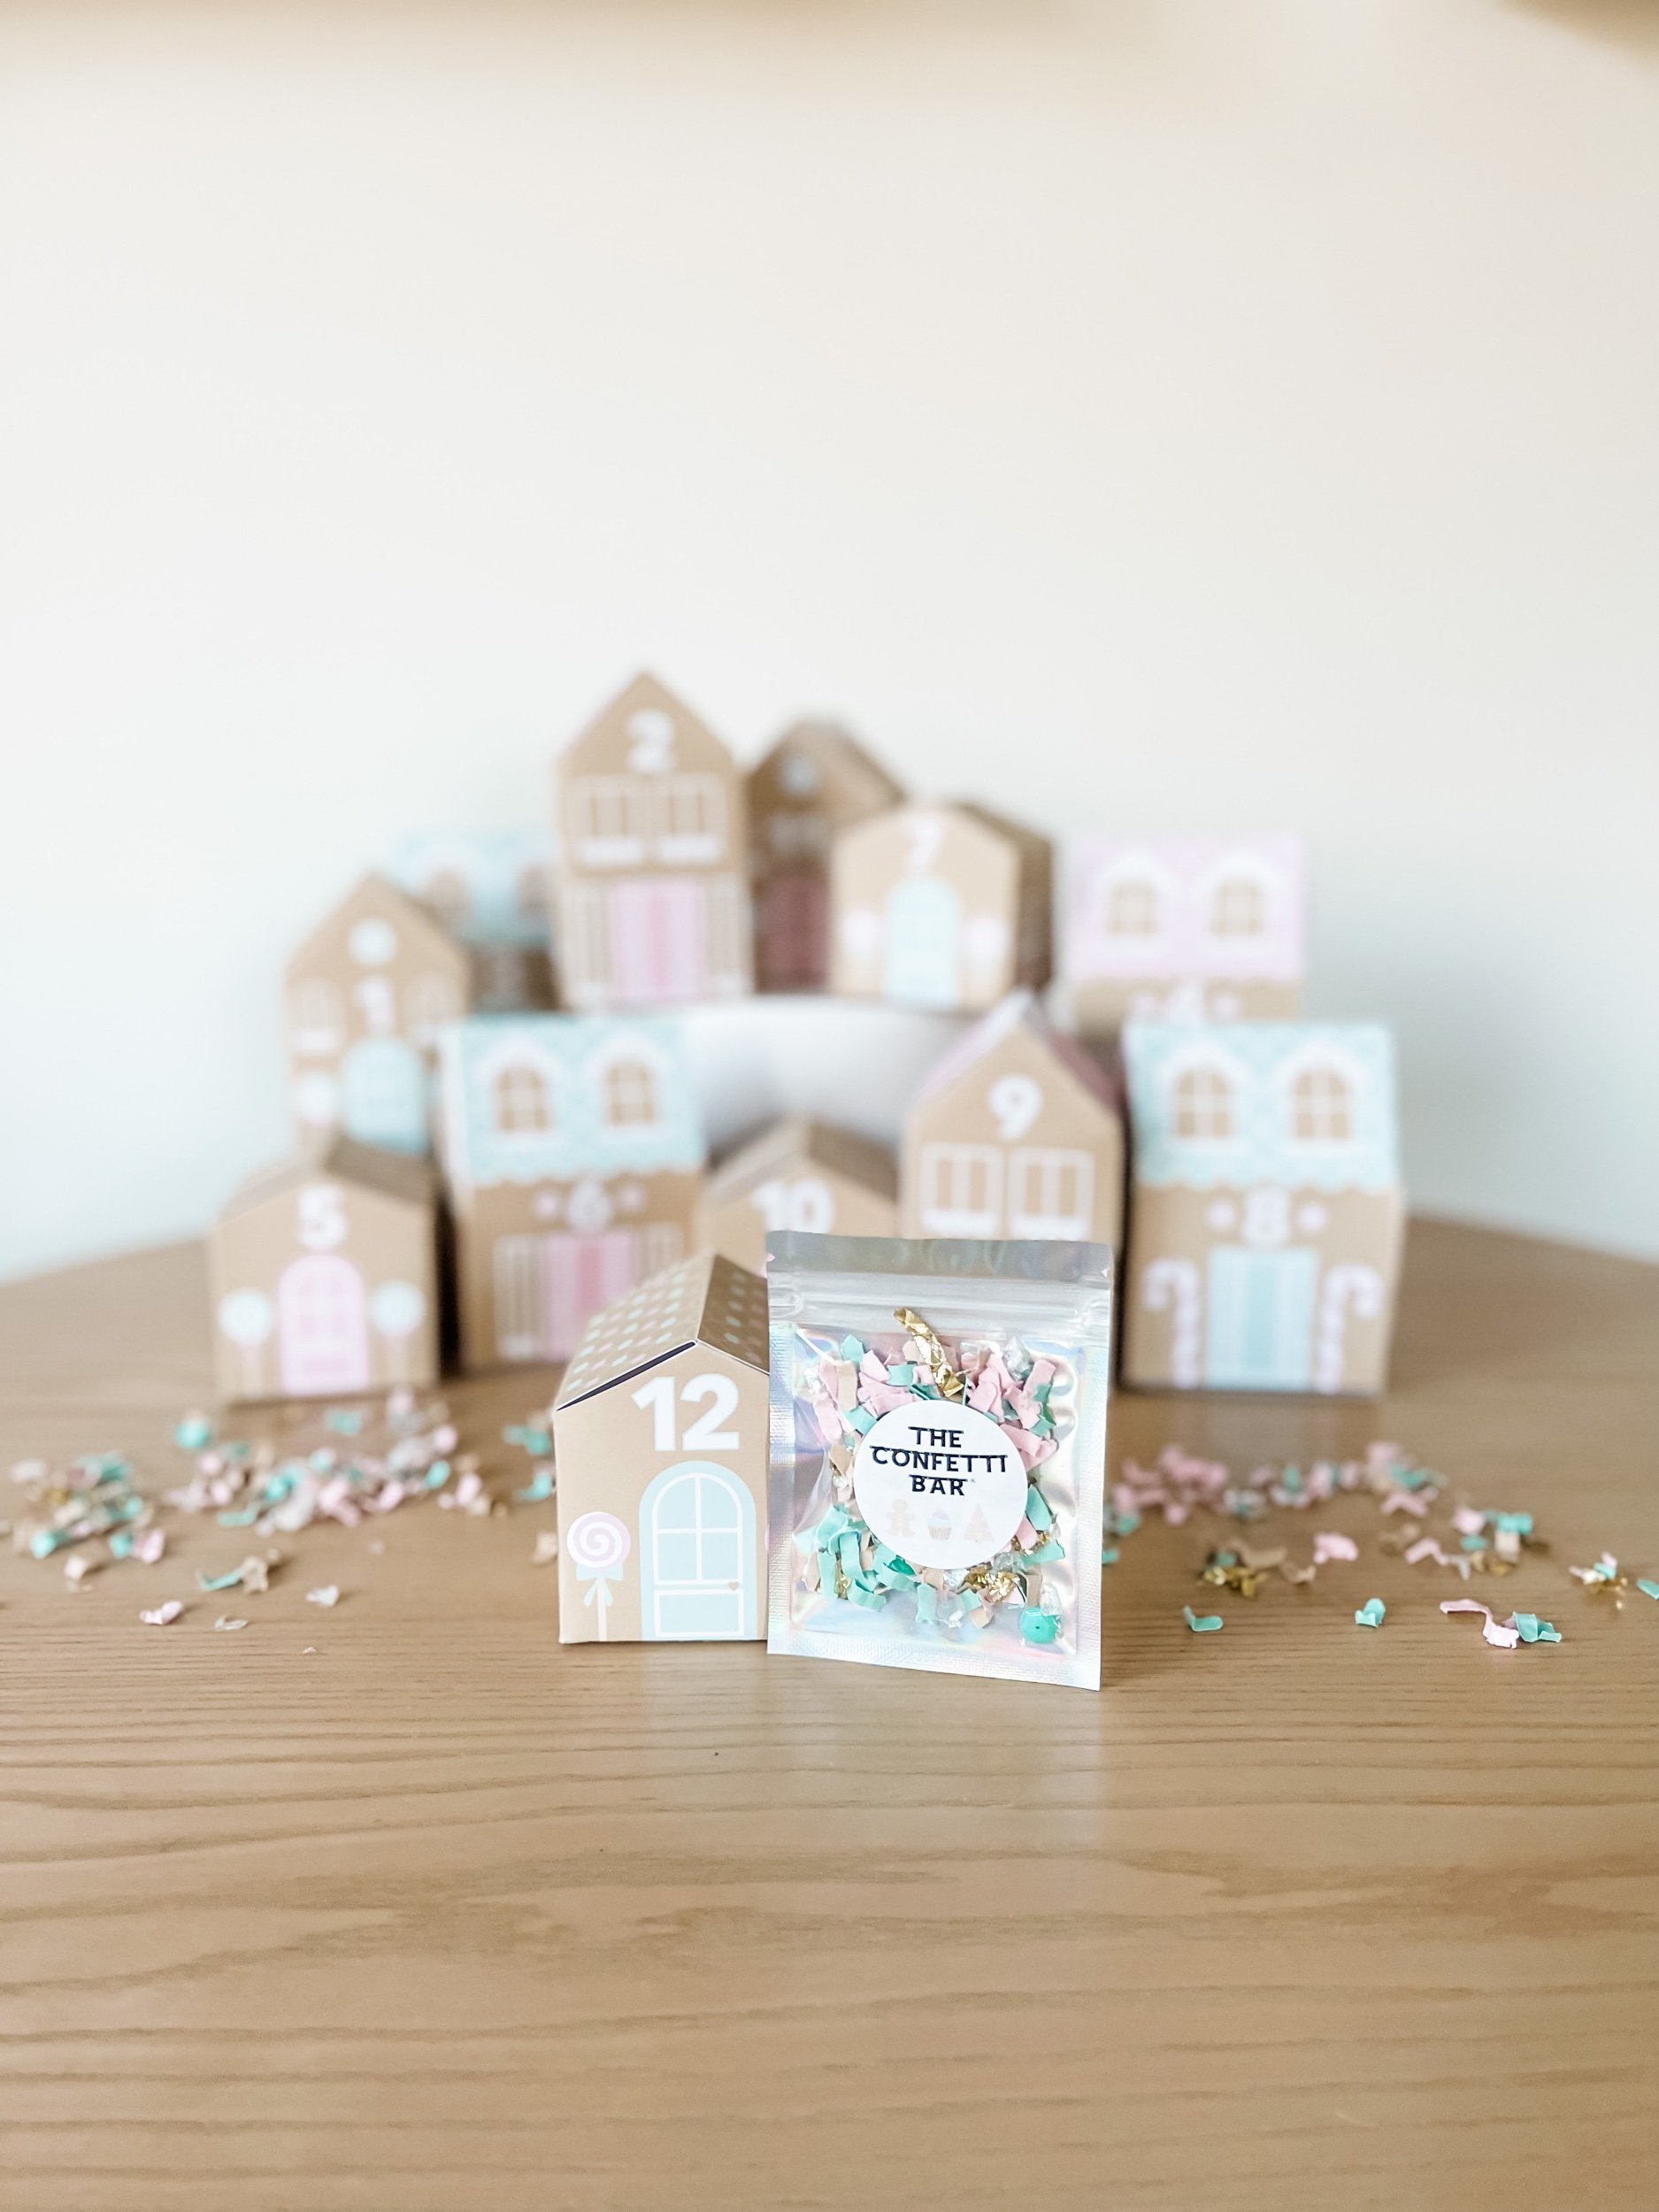
Are you ready to add some extra magic and wonder to your Christmas countdown? Look no further! In this blog post, we will show you how to create a delightful and distinctive DIY advent calendar using printable gingerbread row houses. With their charming pink and mint accents, falling snow, and mouth-watering decorations like lollipops, mints, and gumdrops, these gingerbread houses are sure to bring joy to your holiday season.
To get started, you will need to print the gingerbread row house kit. We recommend using 80lb cardstock for sturdy and more durable boxes that will withstand the anticipation of little hands. Load your printer with the cardstock, making sure it is aligned properly, and hit print. Once the printing is complete, let the ink dry for a few minutes to prevent any smudging during the assembly process.

Now that you have the printed kit in your hands, it's time to unleash your creative spirit! Start by carefully cutting out each gingerbread house design along the edges. Take your time to ensure clean and precise cuts.
Next, fold along the designated lines to create the base of each box. The fold lines are conveniently indicated on the template, making assembly a breeze. Once the base is formed, secure the edges using a gentle adhesive or strong double-sided tape.
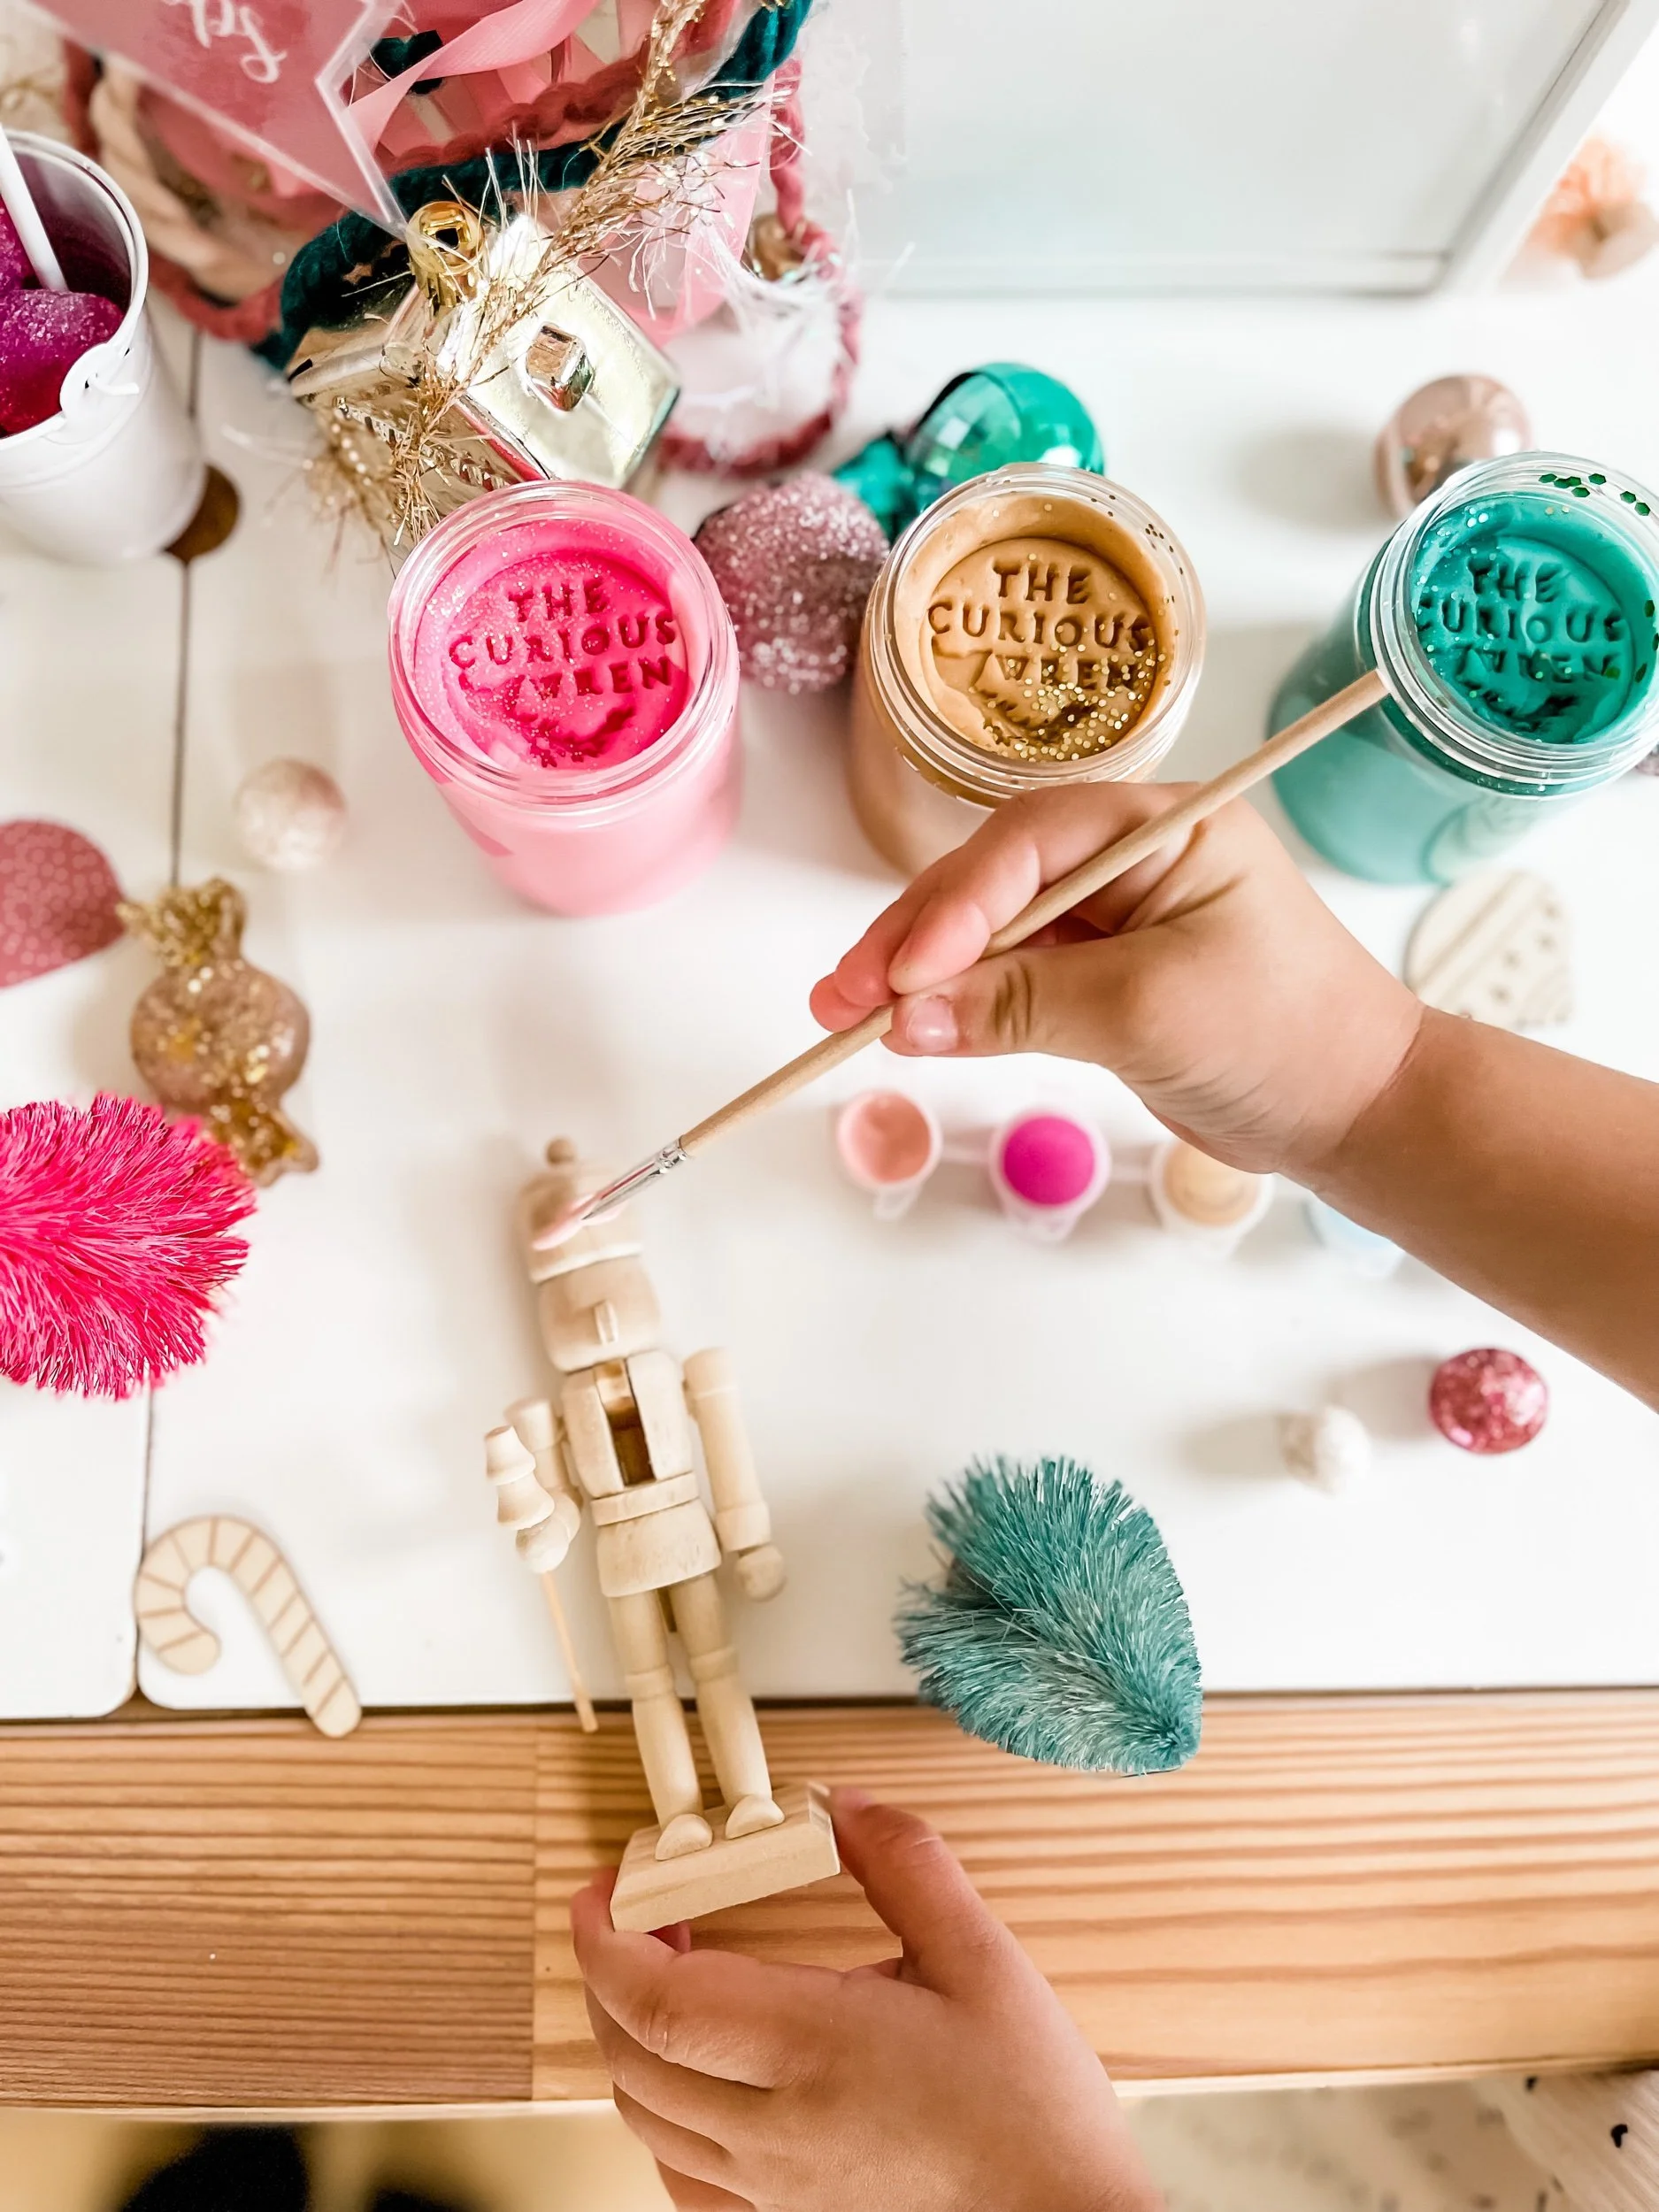
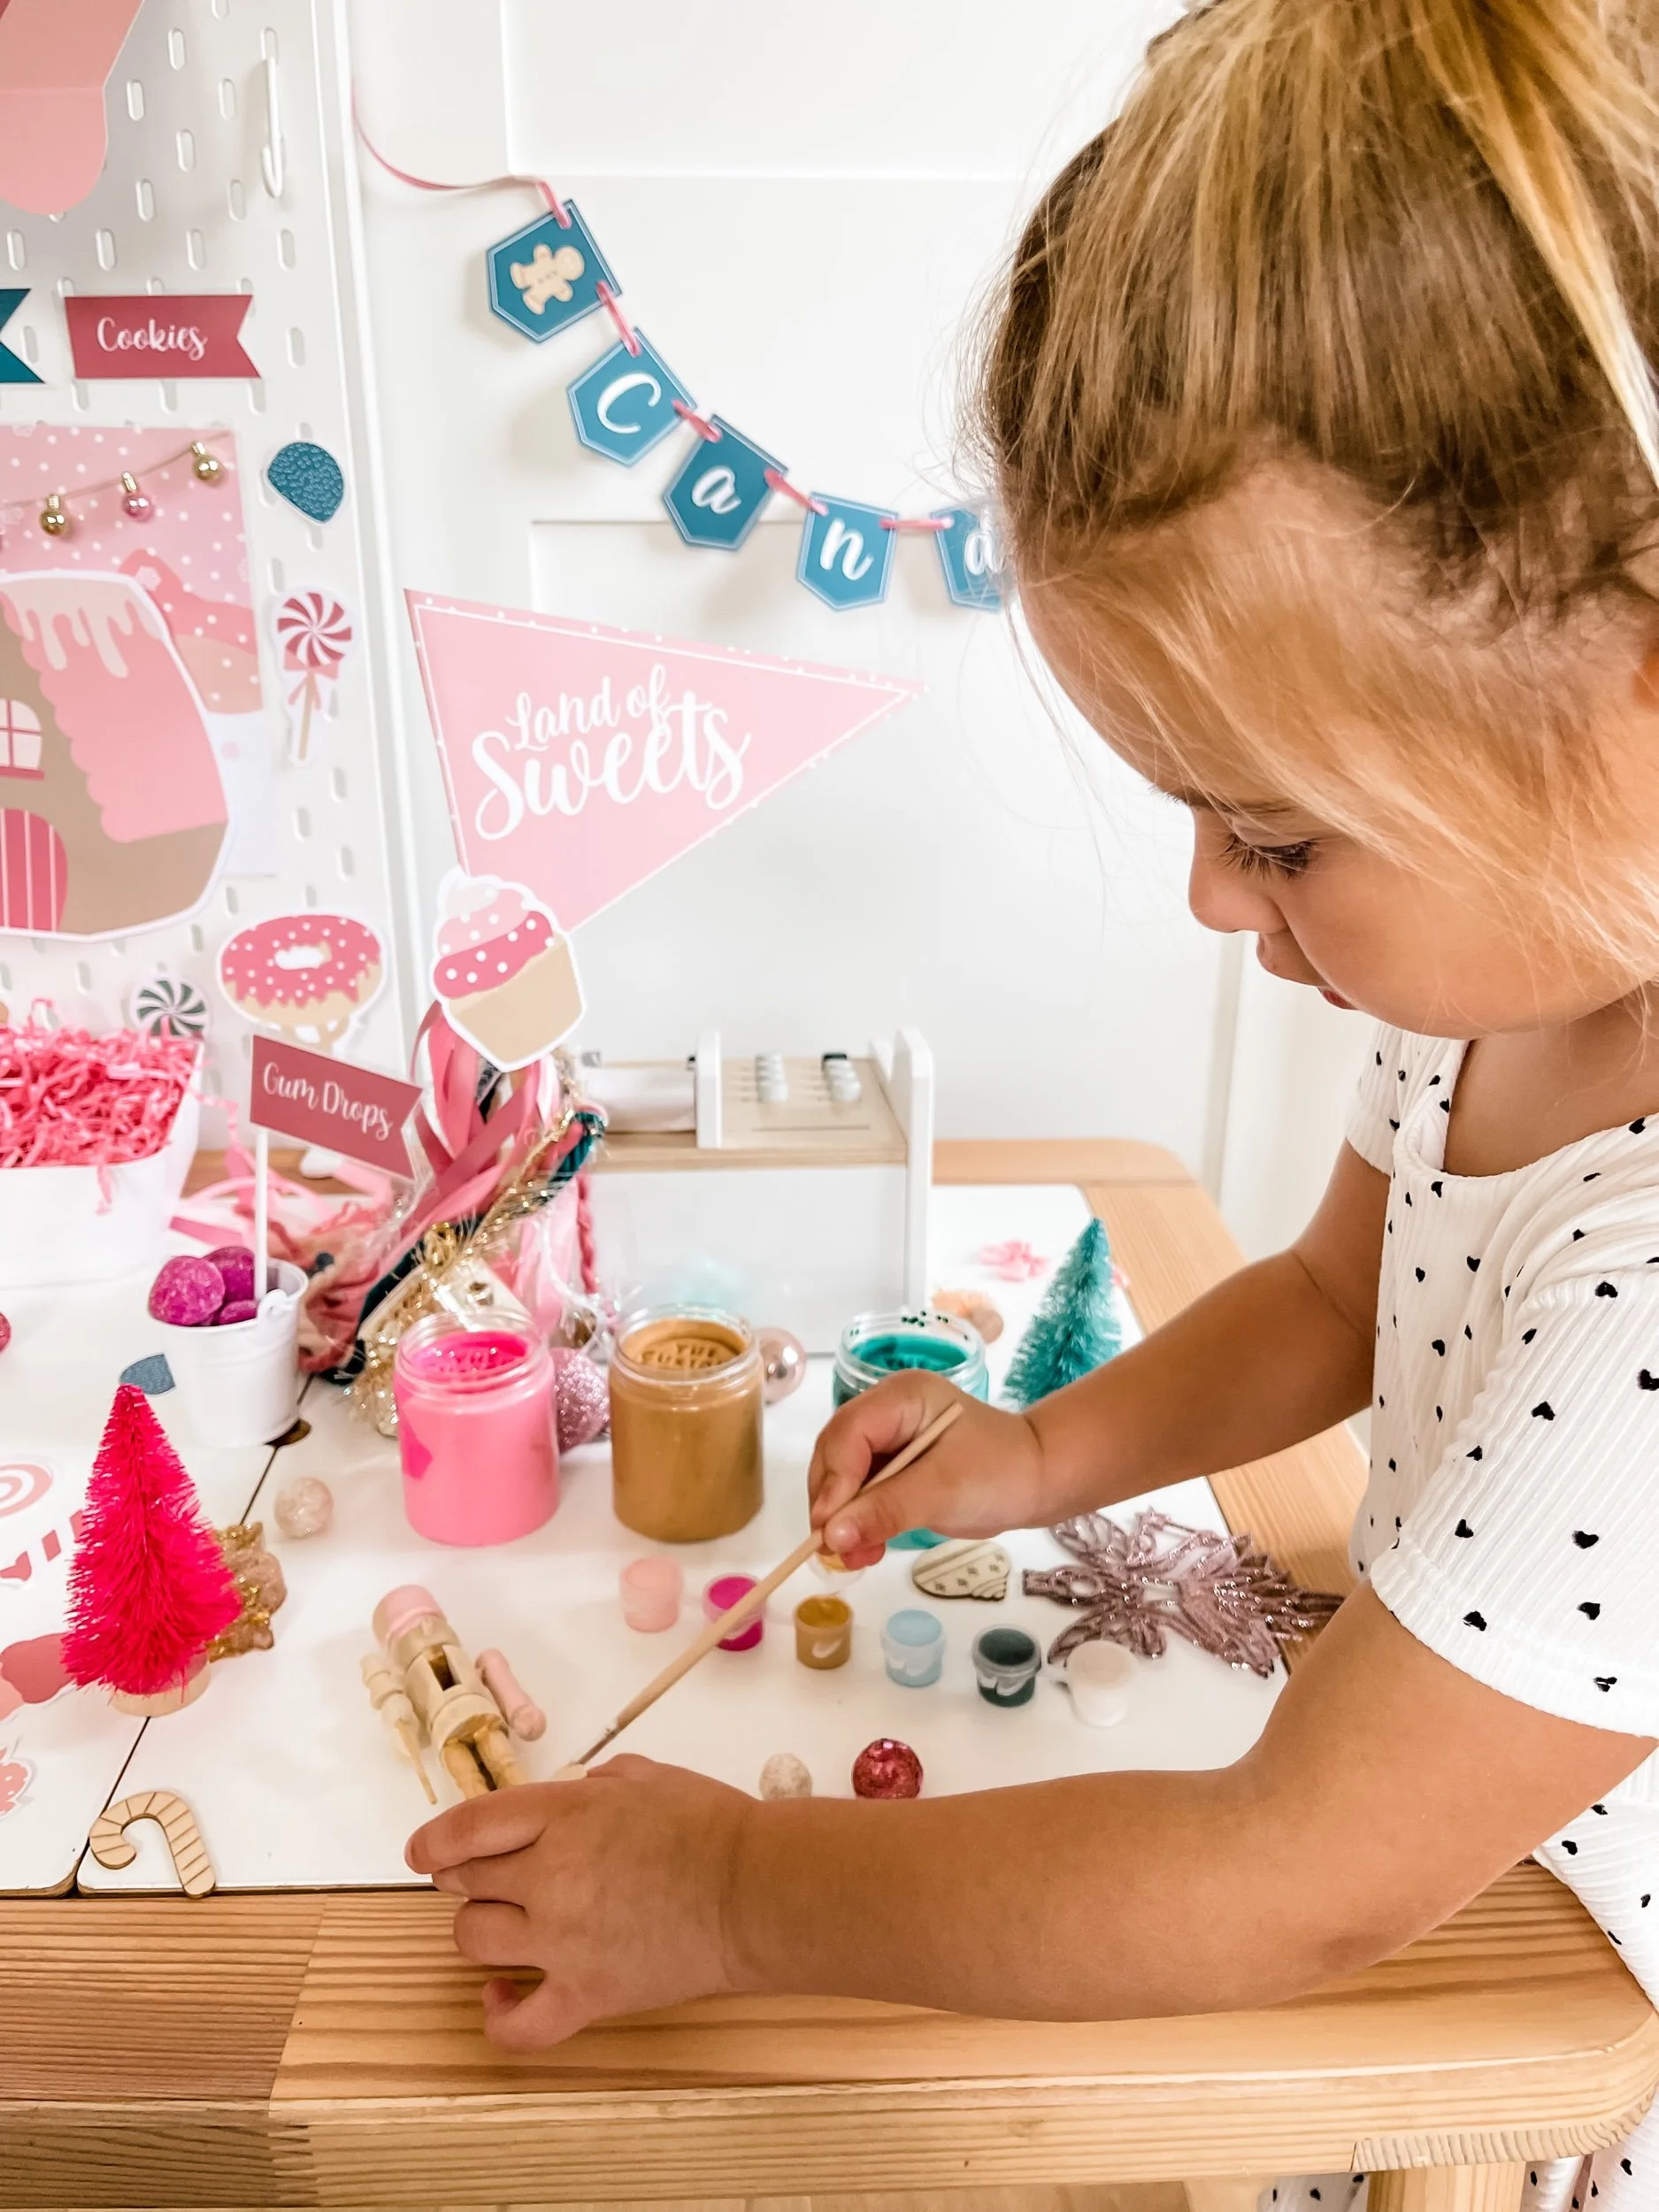
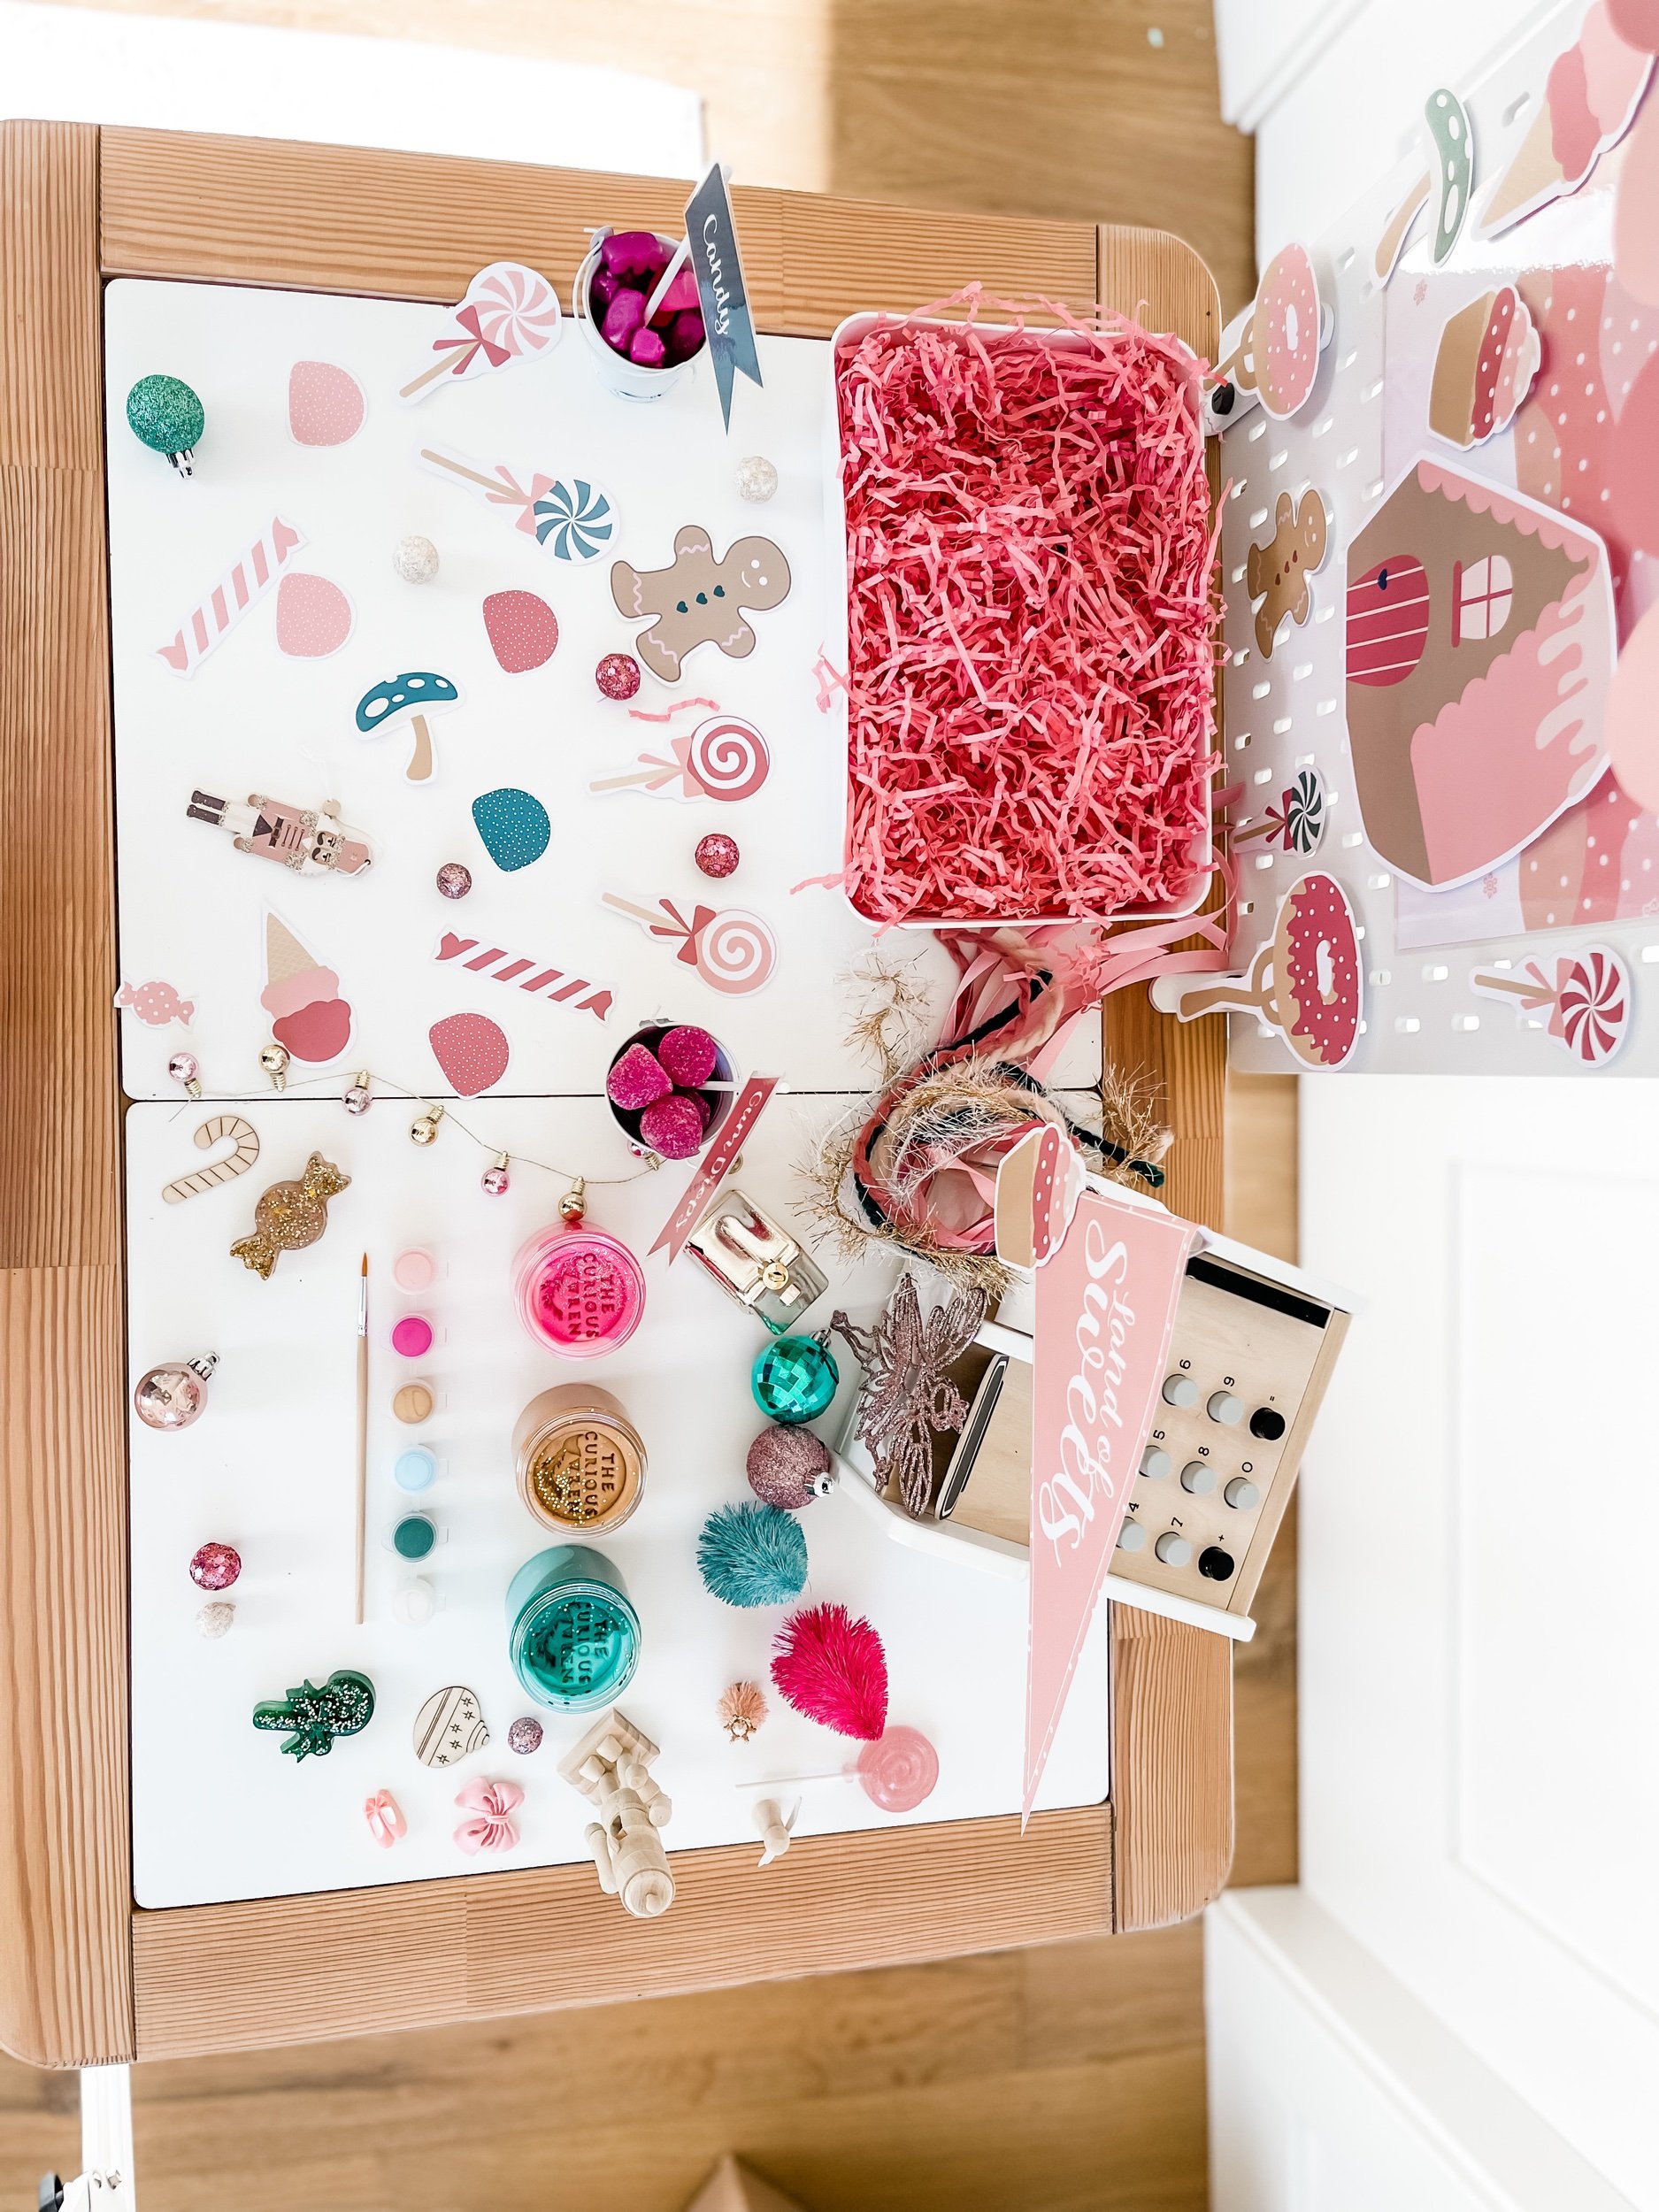
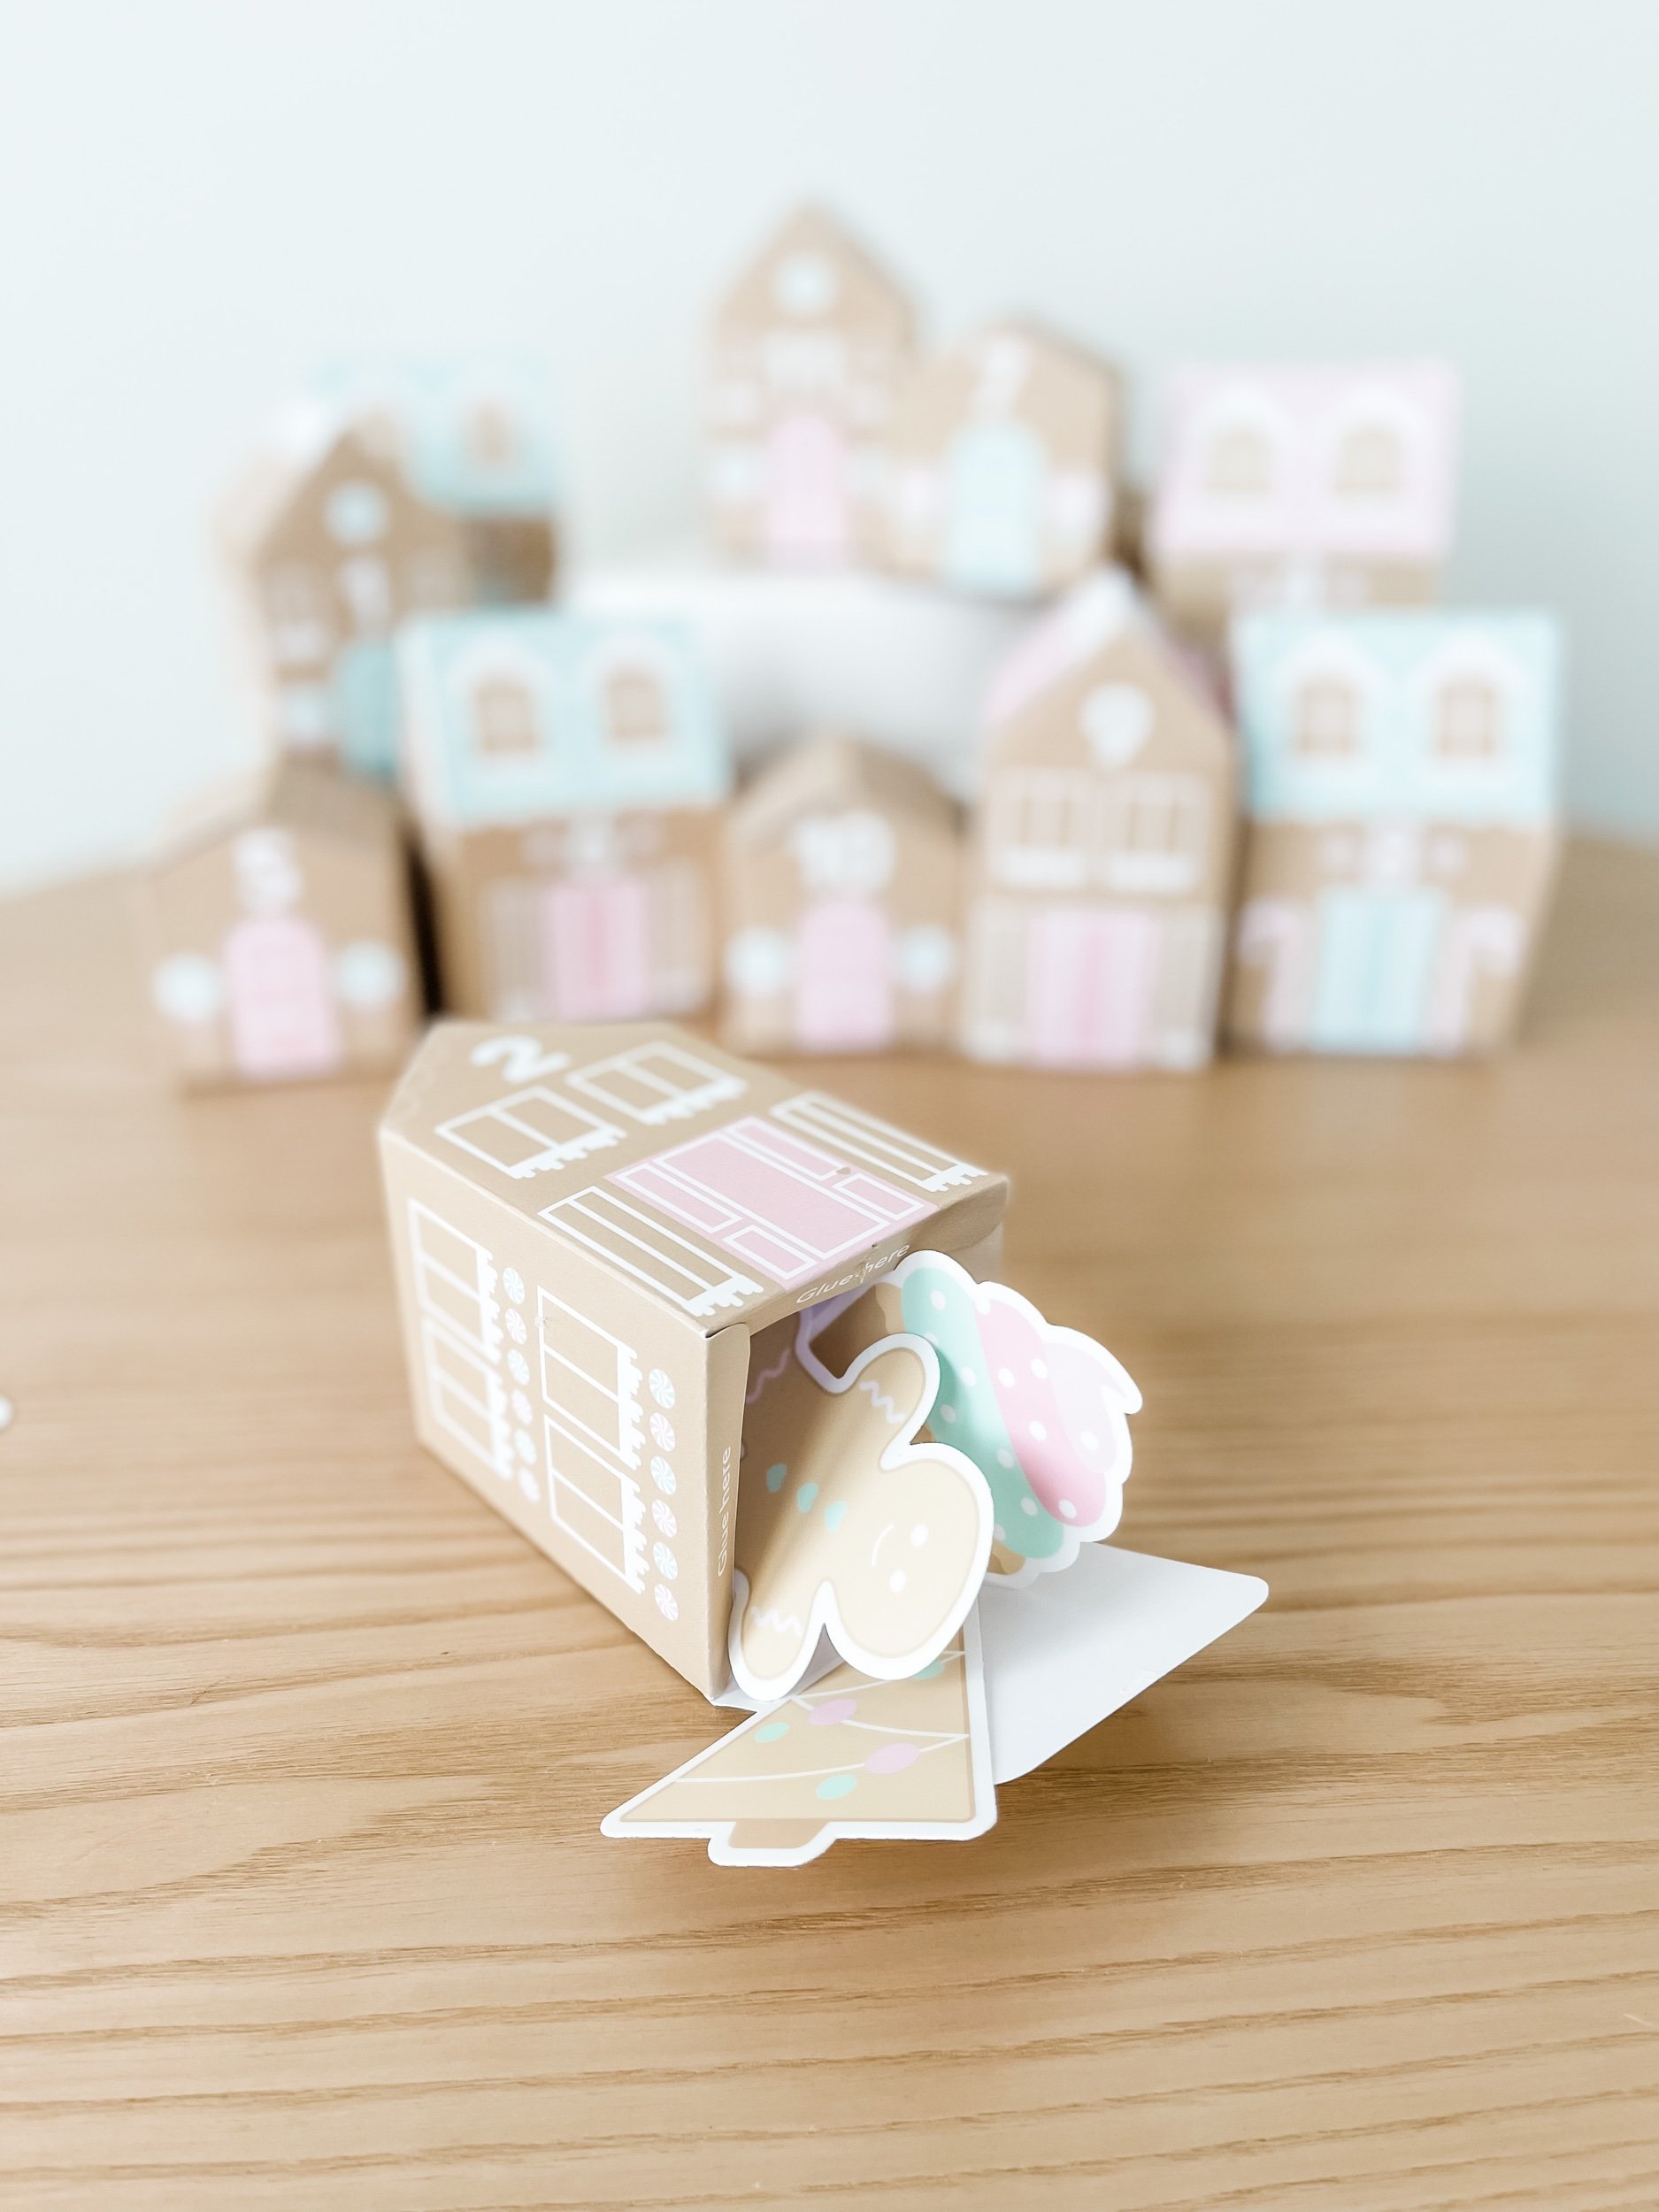
After you've constructed all 24 boxes, you can begin the fun part - decorating each one! Let your imagination run wild as you adorn the houses with falling snow, vibrant lollipops, tempting mints, and delightful gumdrops. Get creative with your designs and make each box uniquely enchanting.

No advent calendar is complete without a beautiful hanging tree to showcase the gingerbread row houses. For this, you will need wooden dowel rods of various lengths, which can be found at your local craft store. Start by arranging the dowel rods in a cluster, ensuring they are of different heights to create an eye-catching display. Once you are satisfied with the arrangement, secure the rods together by wrapping yarn or ribbon around the ends several times and tying off at the top. To add a whimsical touch, place a star on top of the hanging tree. Make sure it shines as brightly as the rest of your holiday decor. Additionally, consider adorning the dowel rods with gingerbread garland to match the festive theme.
Now it's time to attach the gingerbread row house boxes to the wooden dowel rods. Using a hole punch, create a hole at the top of each box. Be sure not to punch the holes too close to the edge to prevent any tearing.
Take colorful ribbons and thread them through the holes, tying each one securely around the dowel rods. Make sure that each box is evenly spaced and visually appealing. Adjust the length of the ribbon as necessary to achieve your desired arrangement.

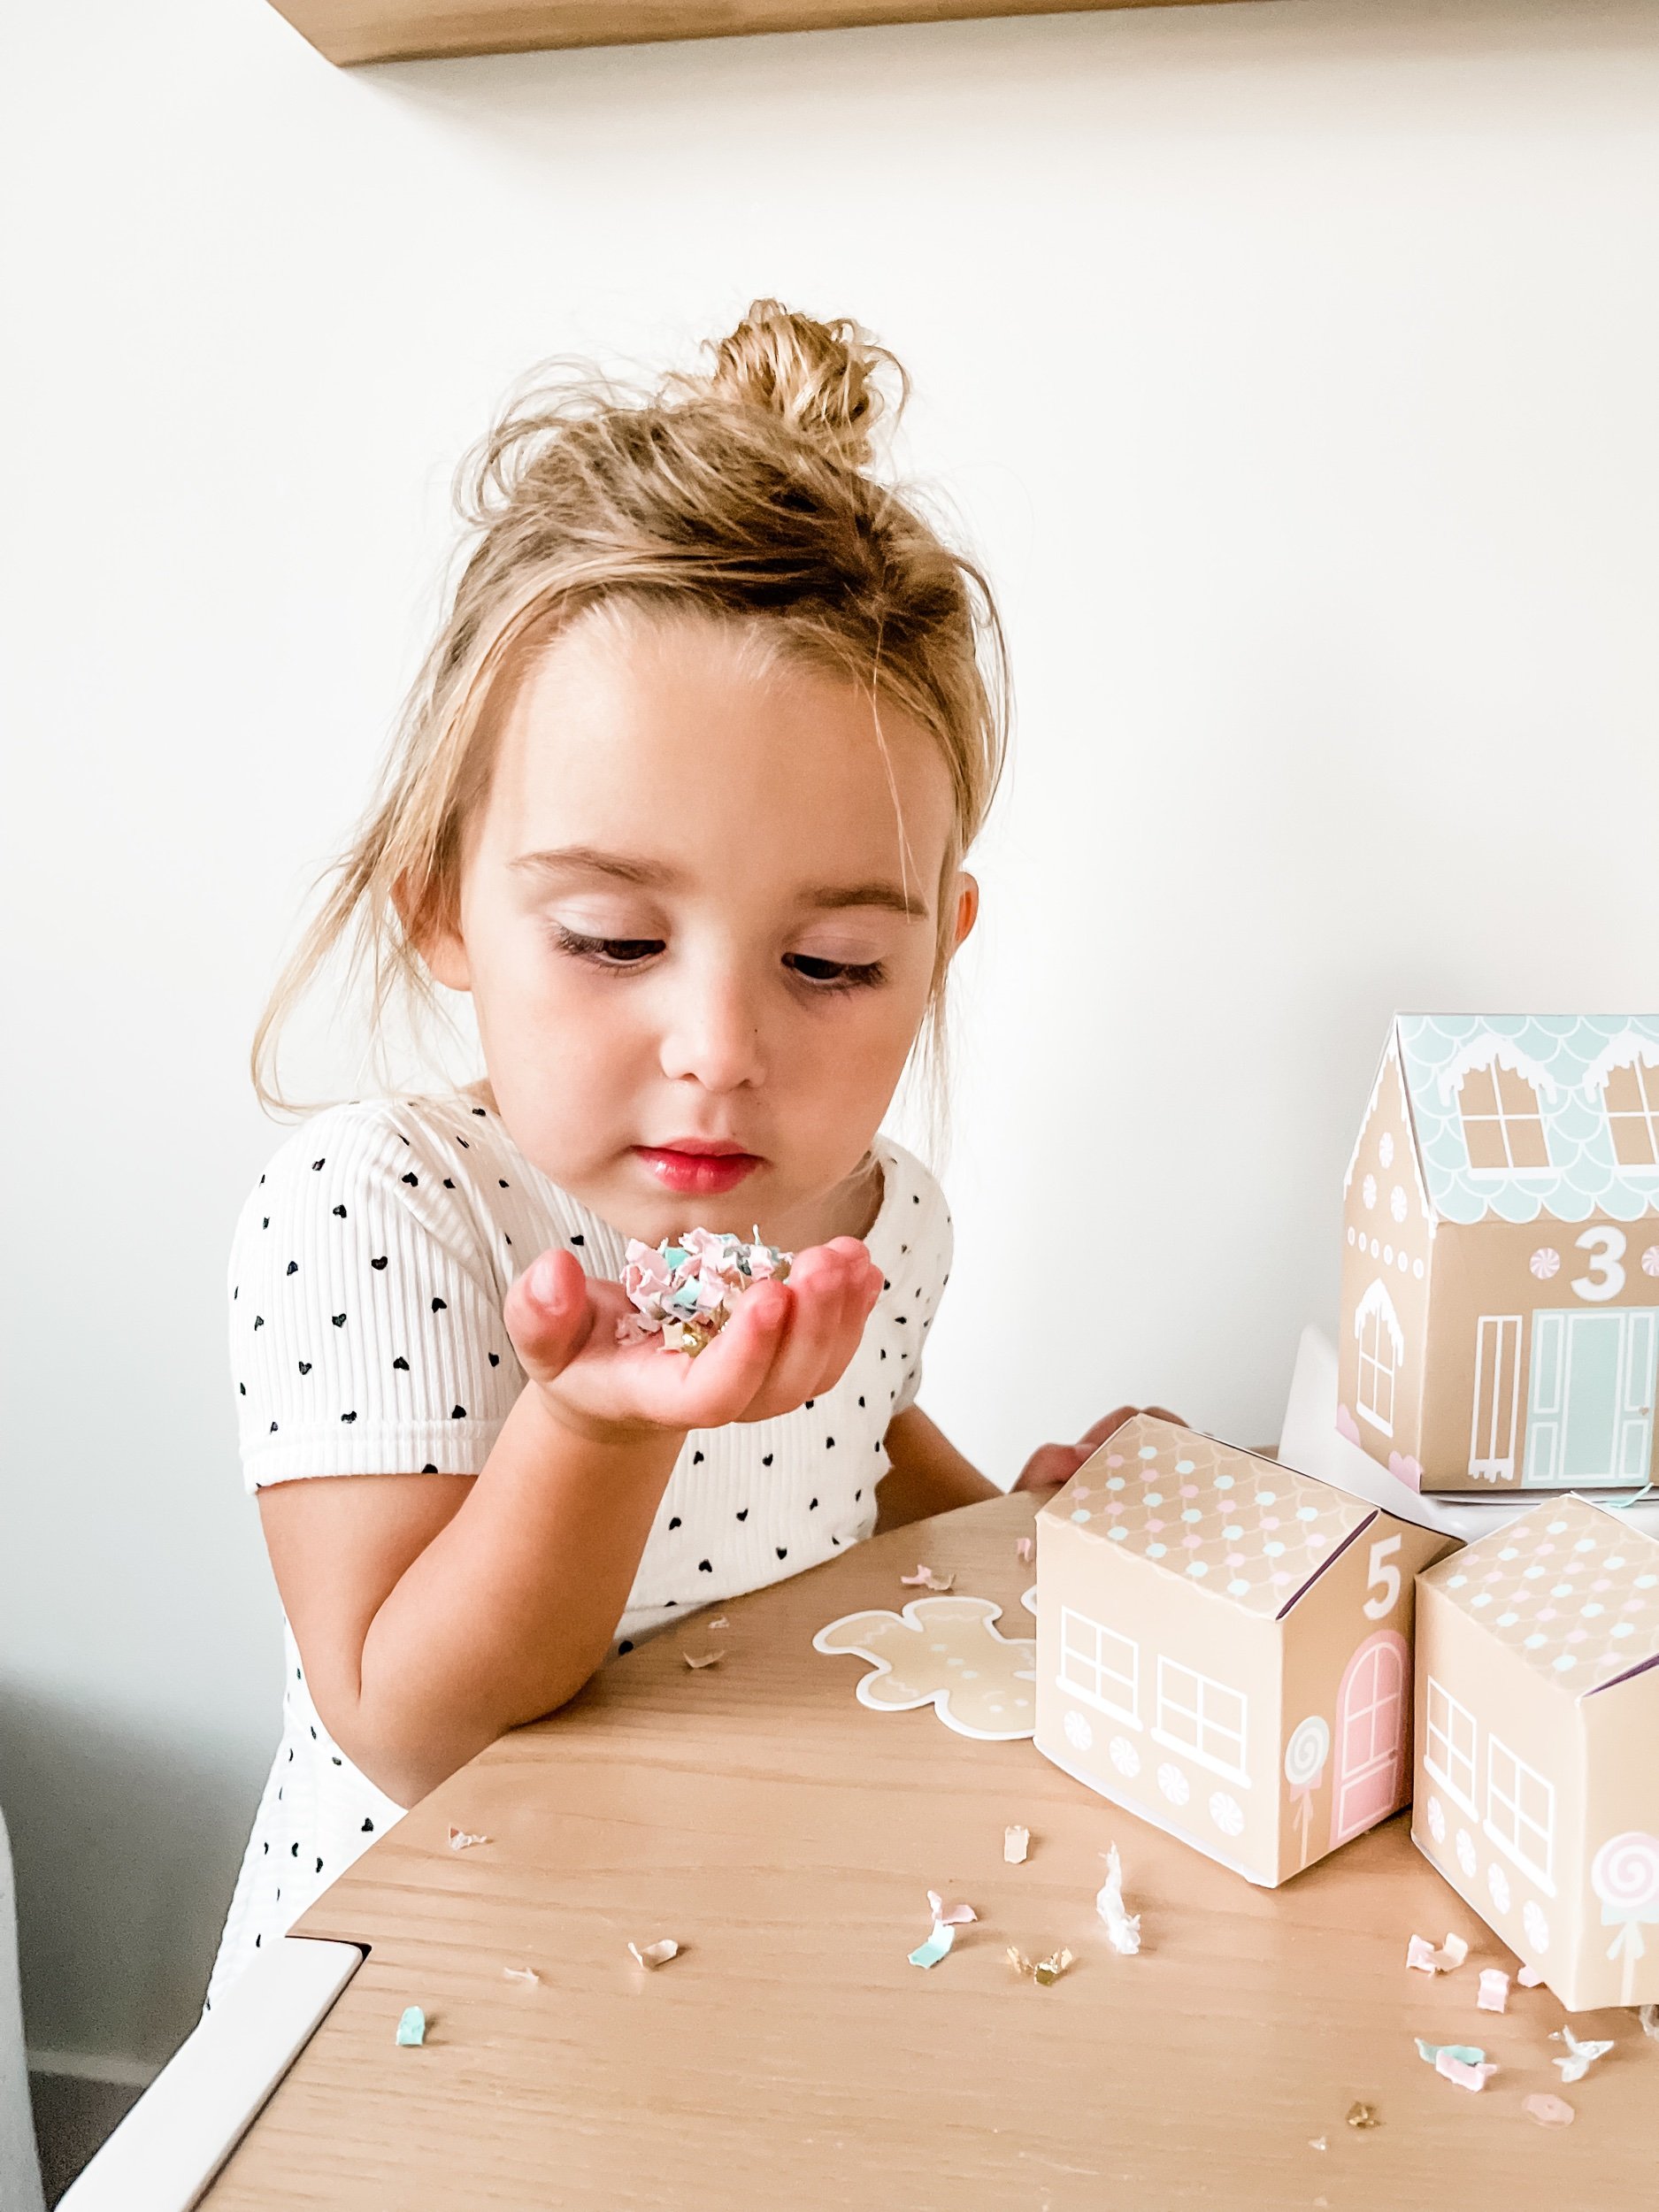
Filling the boxes with special goodies is the perfect way to celebrate the magic of the holidays. You can purchase a bundle of magnets, acrylics, stickers, or memory game cards from GoodnightFox and directly fill your boxes with treats. Or you can find great items from handmade shops like felt gingerbread, hair clips, toy cars, crayons and more to stuff each box.

And there you have it - your very own DIY advent calendar! The surprise box countdown offers a magical and exciting experience for kids and adults alike. Each day leading up to Christmas, they can open a box and discover a delightful surprise inside. It could be a sweet treat, a small toy, or a handwritten note filled with love and joy.
As the days pass, the anticipation builds, creating a memorable and cherished tradition within your household. With its charming gingerbread row houses, this DIY advent calendar is not only a beautiful decoration, but also a source of excitement and wonder for the entire family.
So, why wait? Start printing, folding, decorating, and assembling to bring the spirit of Christmas into your home with this delightful DIY advent calendar. Watch as the magic unfolds, creating lasting memories for years to come. Have a joyful countdown to Christmas with this enchanting surprise box calendar, and embrace the holiday spirit in true gingerbread style!


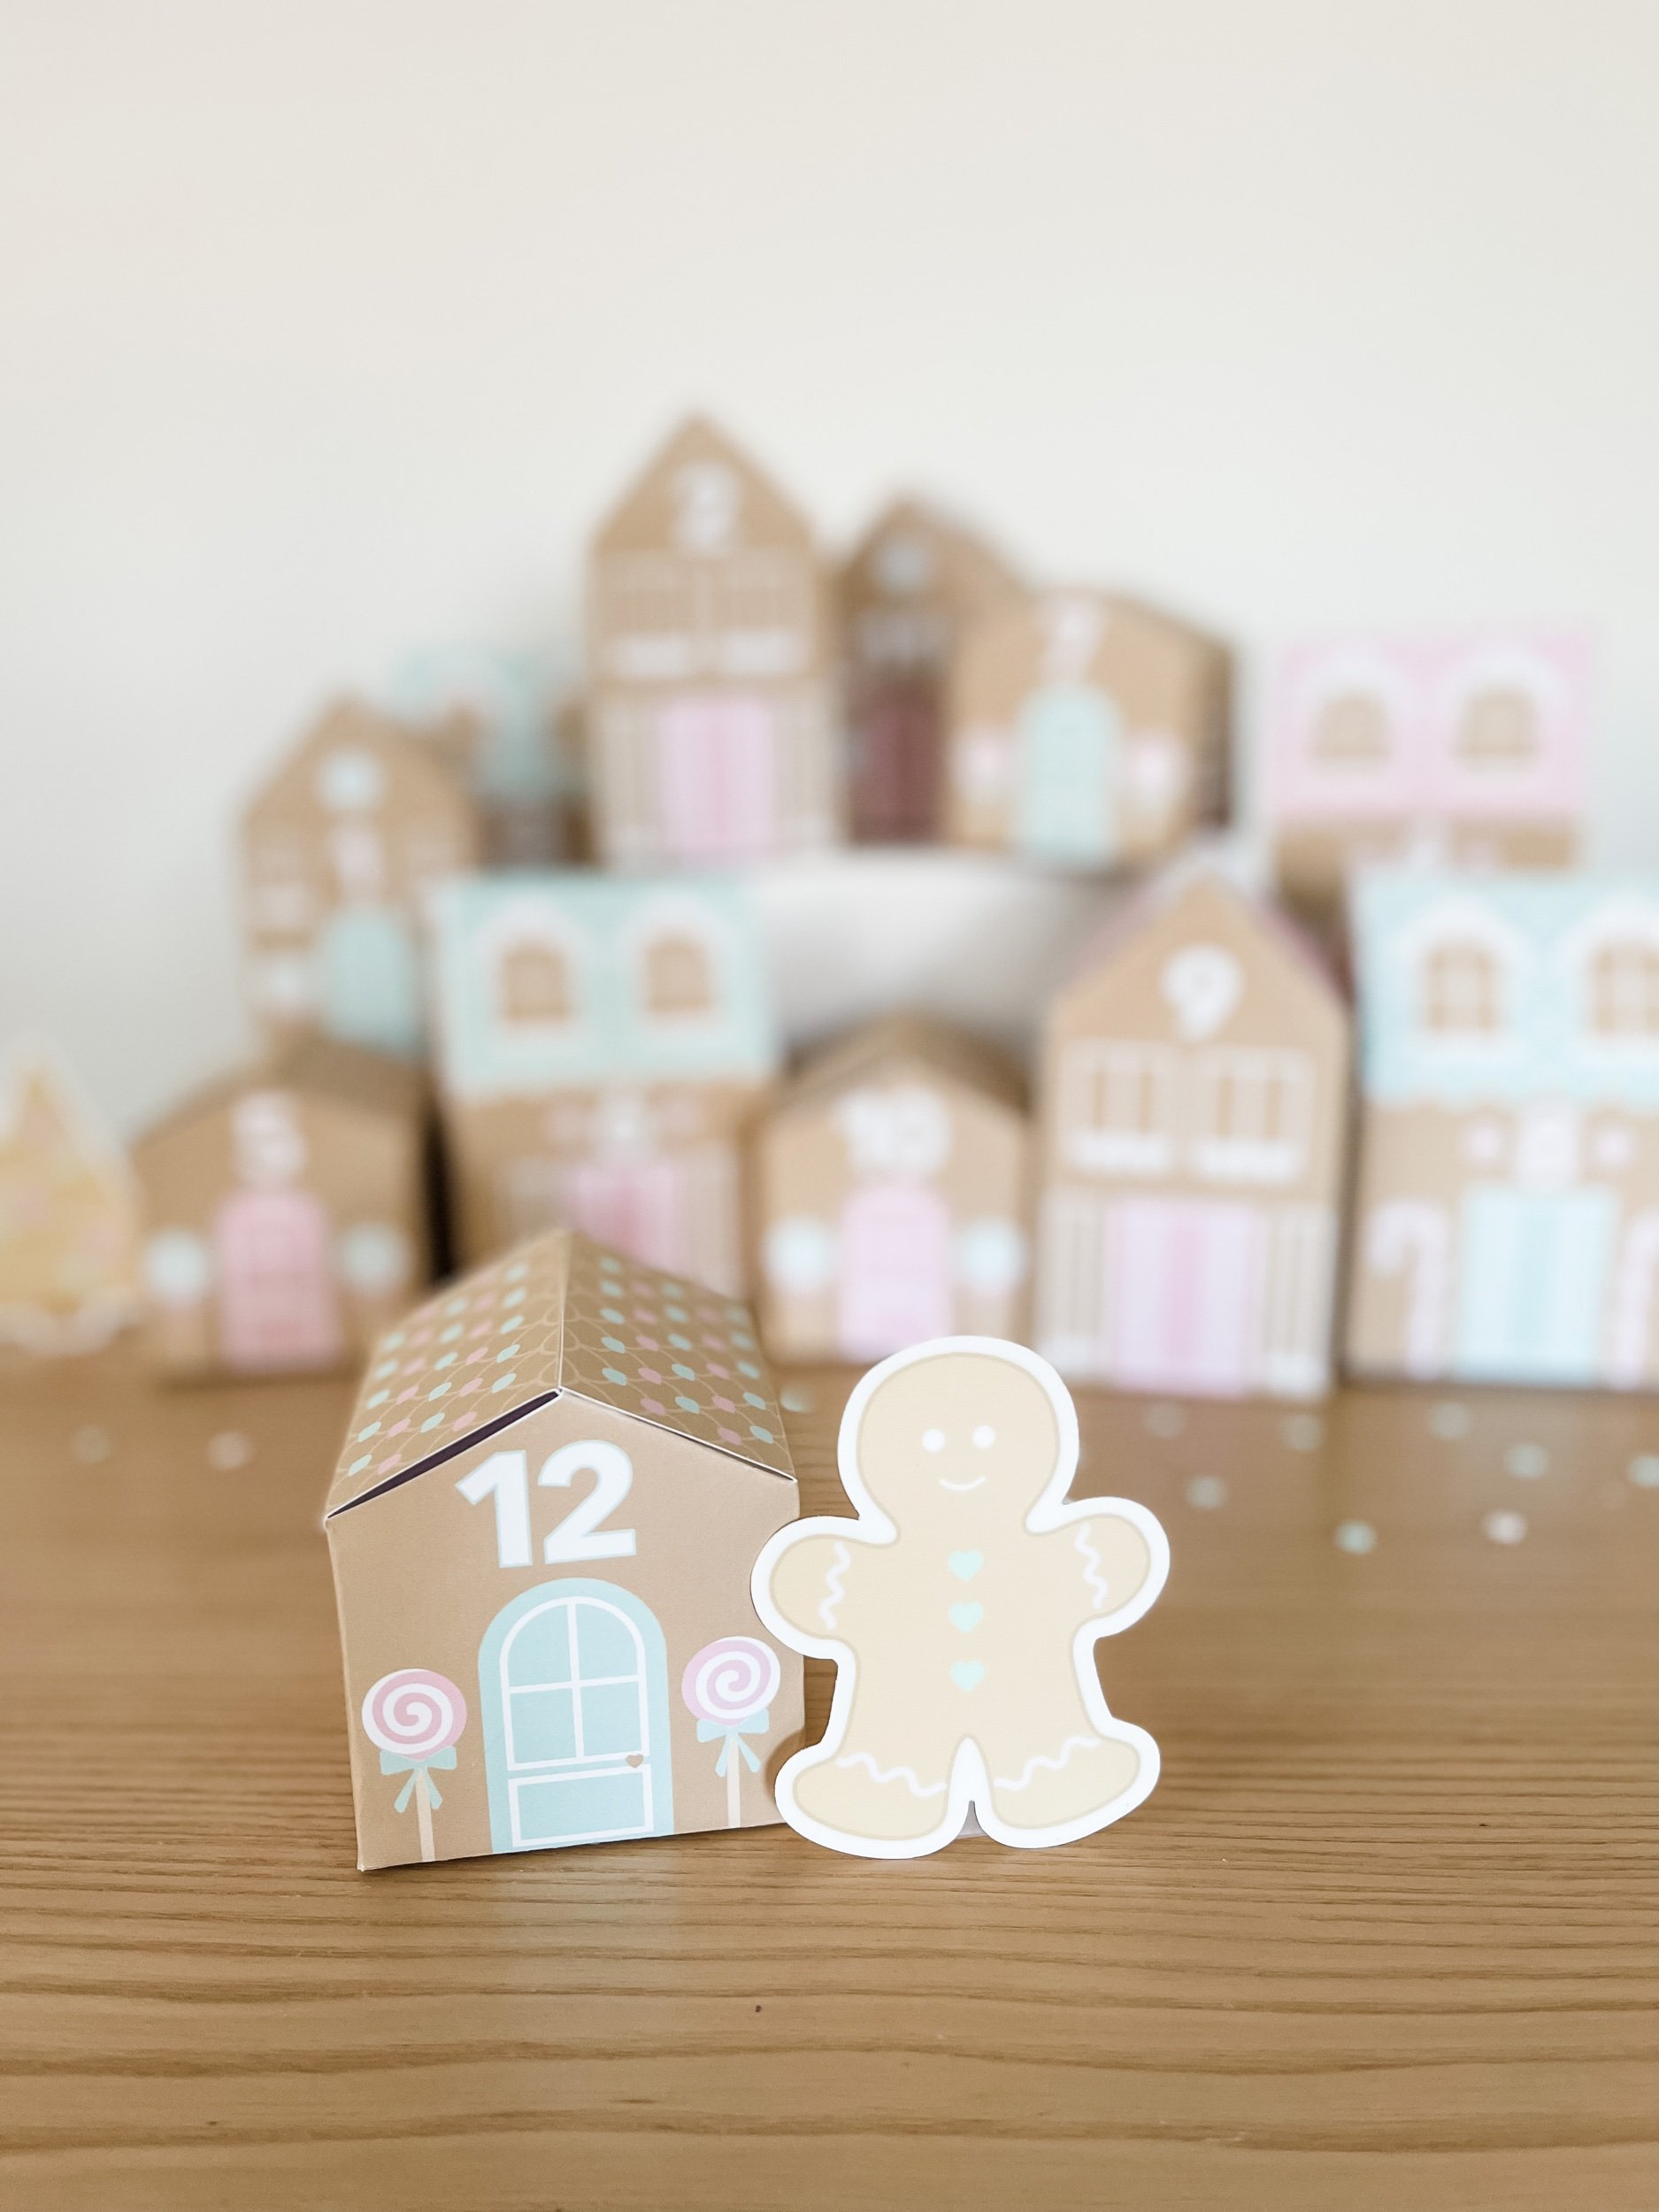
For my advent calendar, I used amazing goodies from these small shops!
1 - Snap clips by @eviepearlhandmade
2 - Signs by @finding_foley
3 - Ornaments/tags by @frankieandbettyco
4 - Gingerbread felt cookies by @pockets.of.sweetness
5 - Resin pieces by @_thesensorybee_
6 - Doh cups by @capptivatingplay
7 - Stickers by @goodnightfox
8 - Santa Crayons by @creativecrayonsworkshop
9 - Bows by @elisaslittleblossoms
10 - Lollipops by @thelittlepinkpanda
11 - Flags by @bloomgrowco
12 - Confetti Packet by @theconfettibar


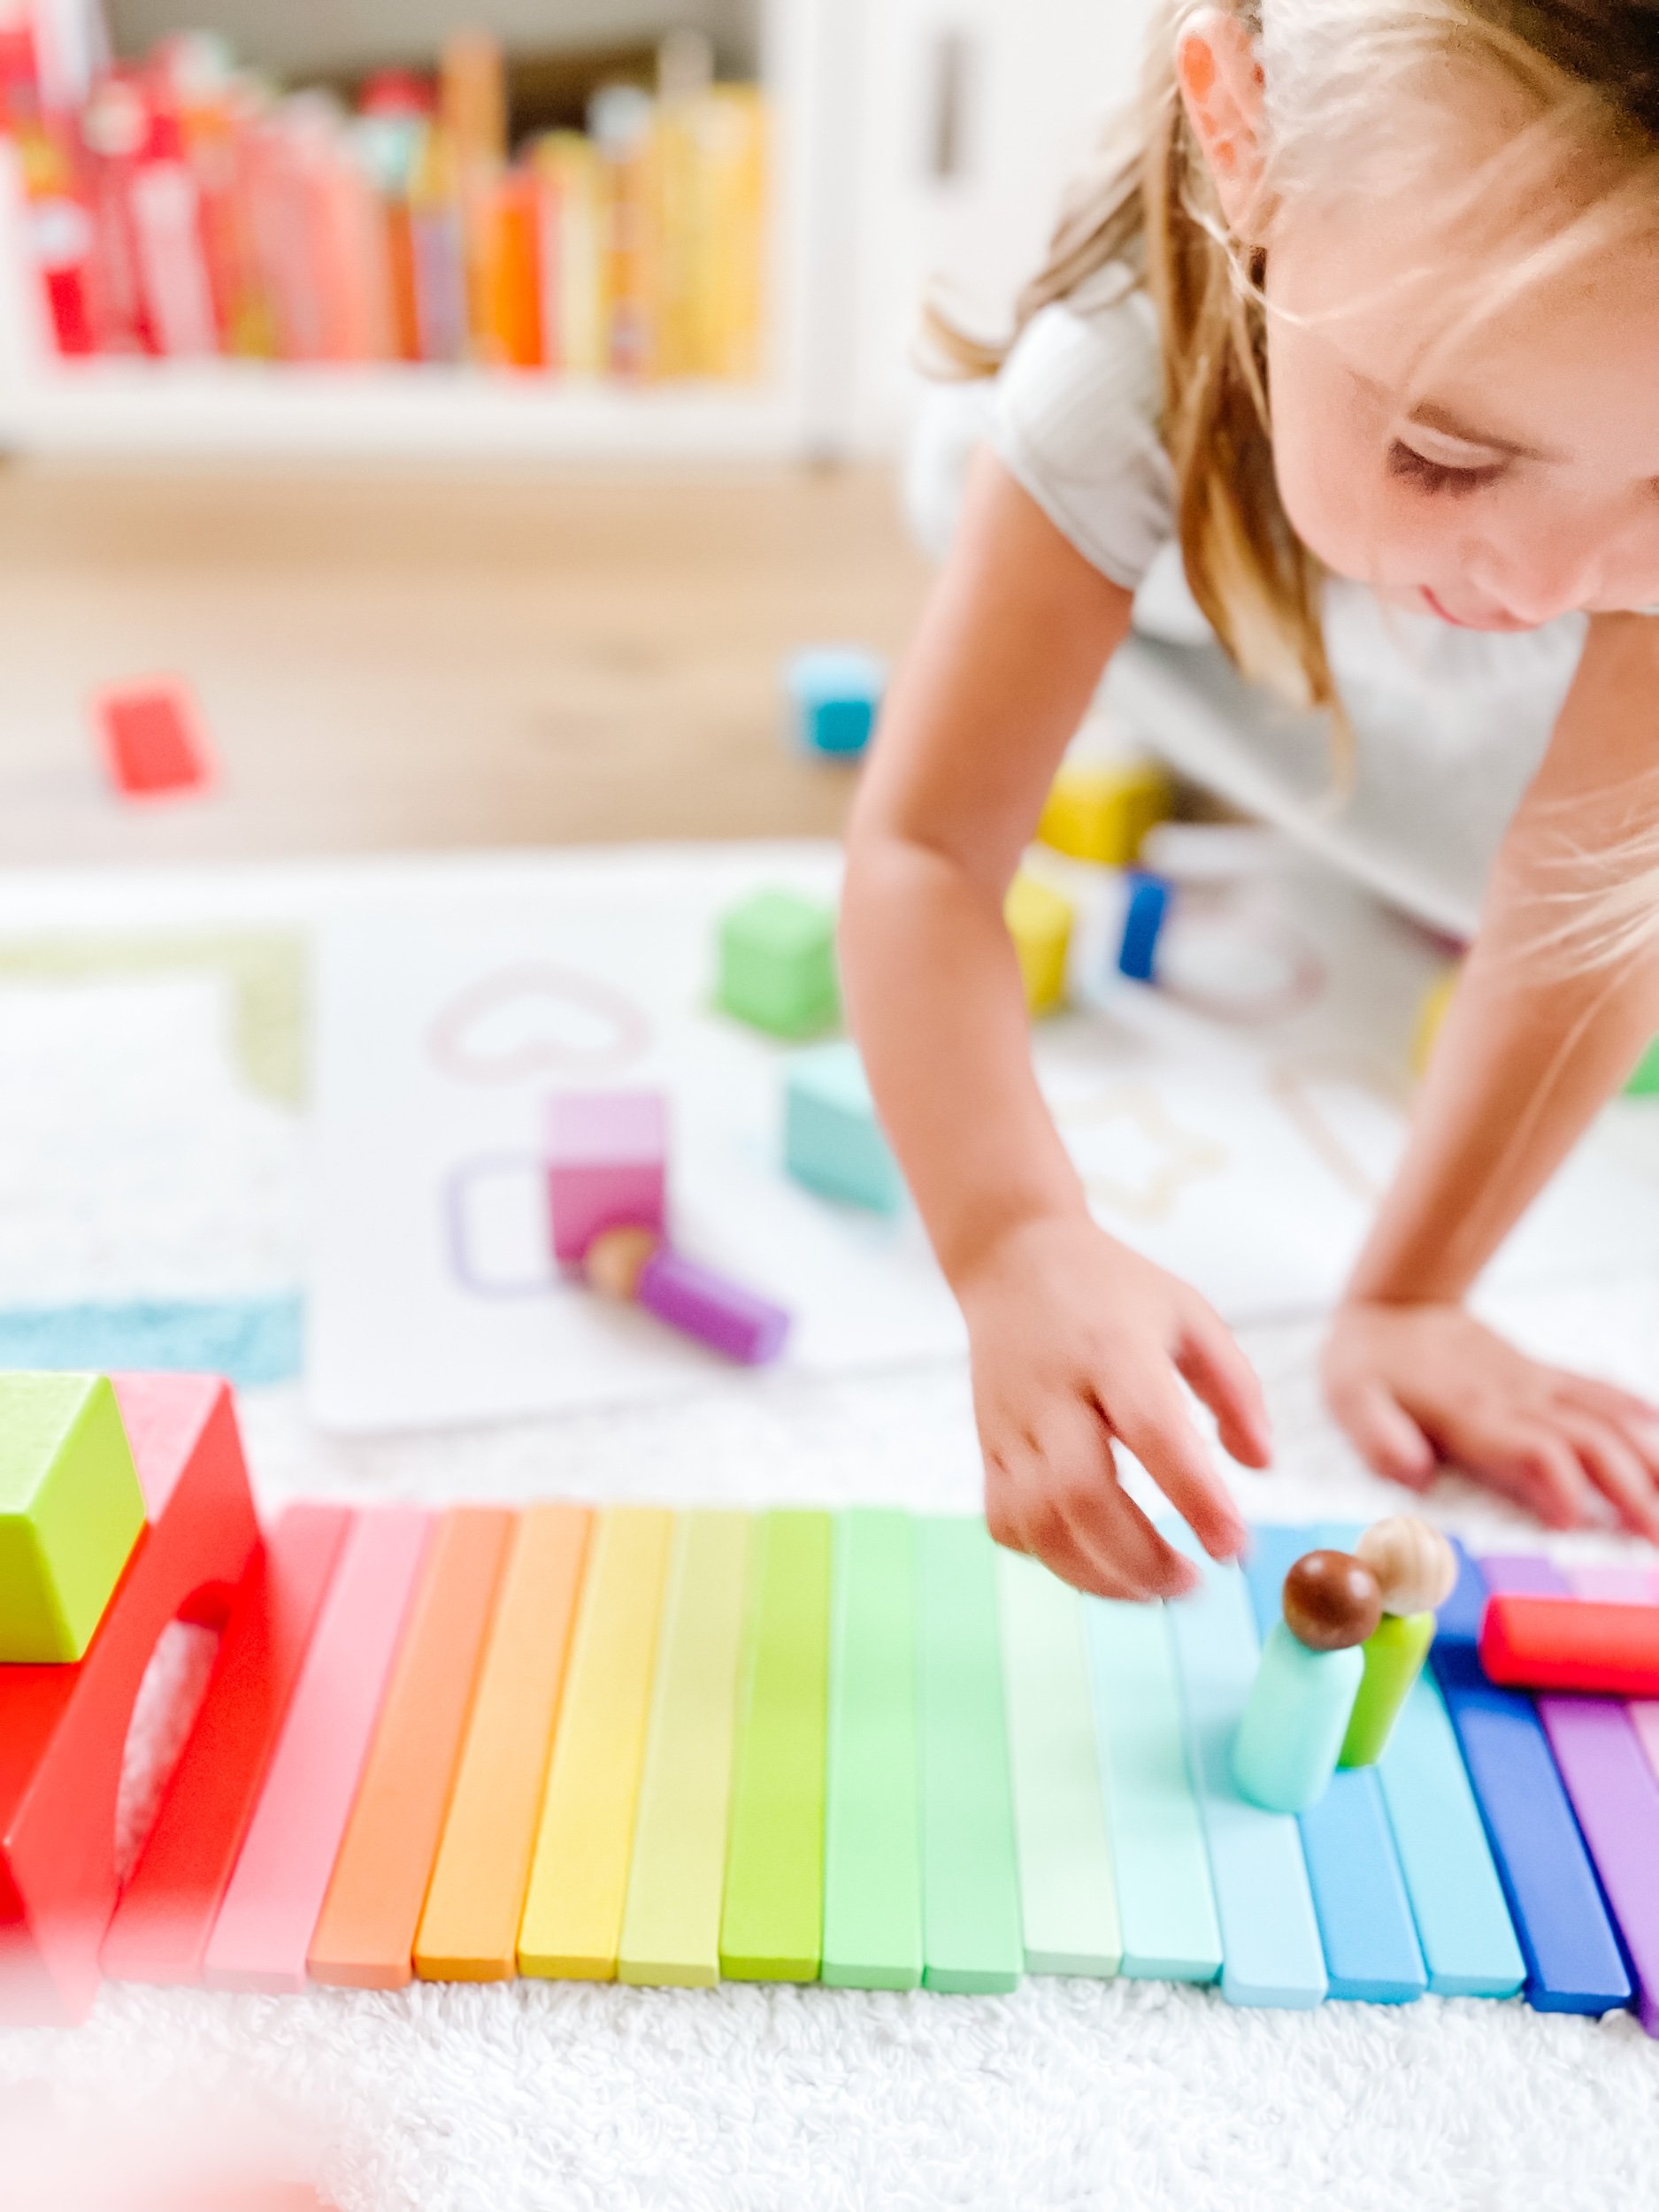
Sofie has been having a blast with her Rainbow Blocks by Lovevery and her sorting tray by Inspire My Play. Plus you can snag both of these on Amazon!
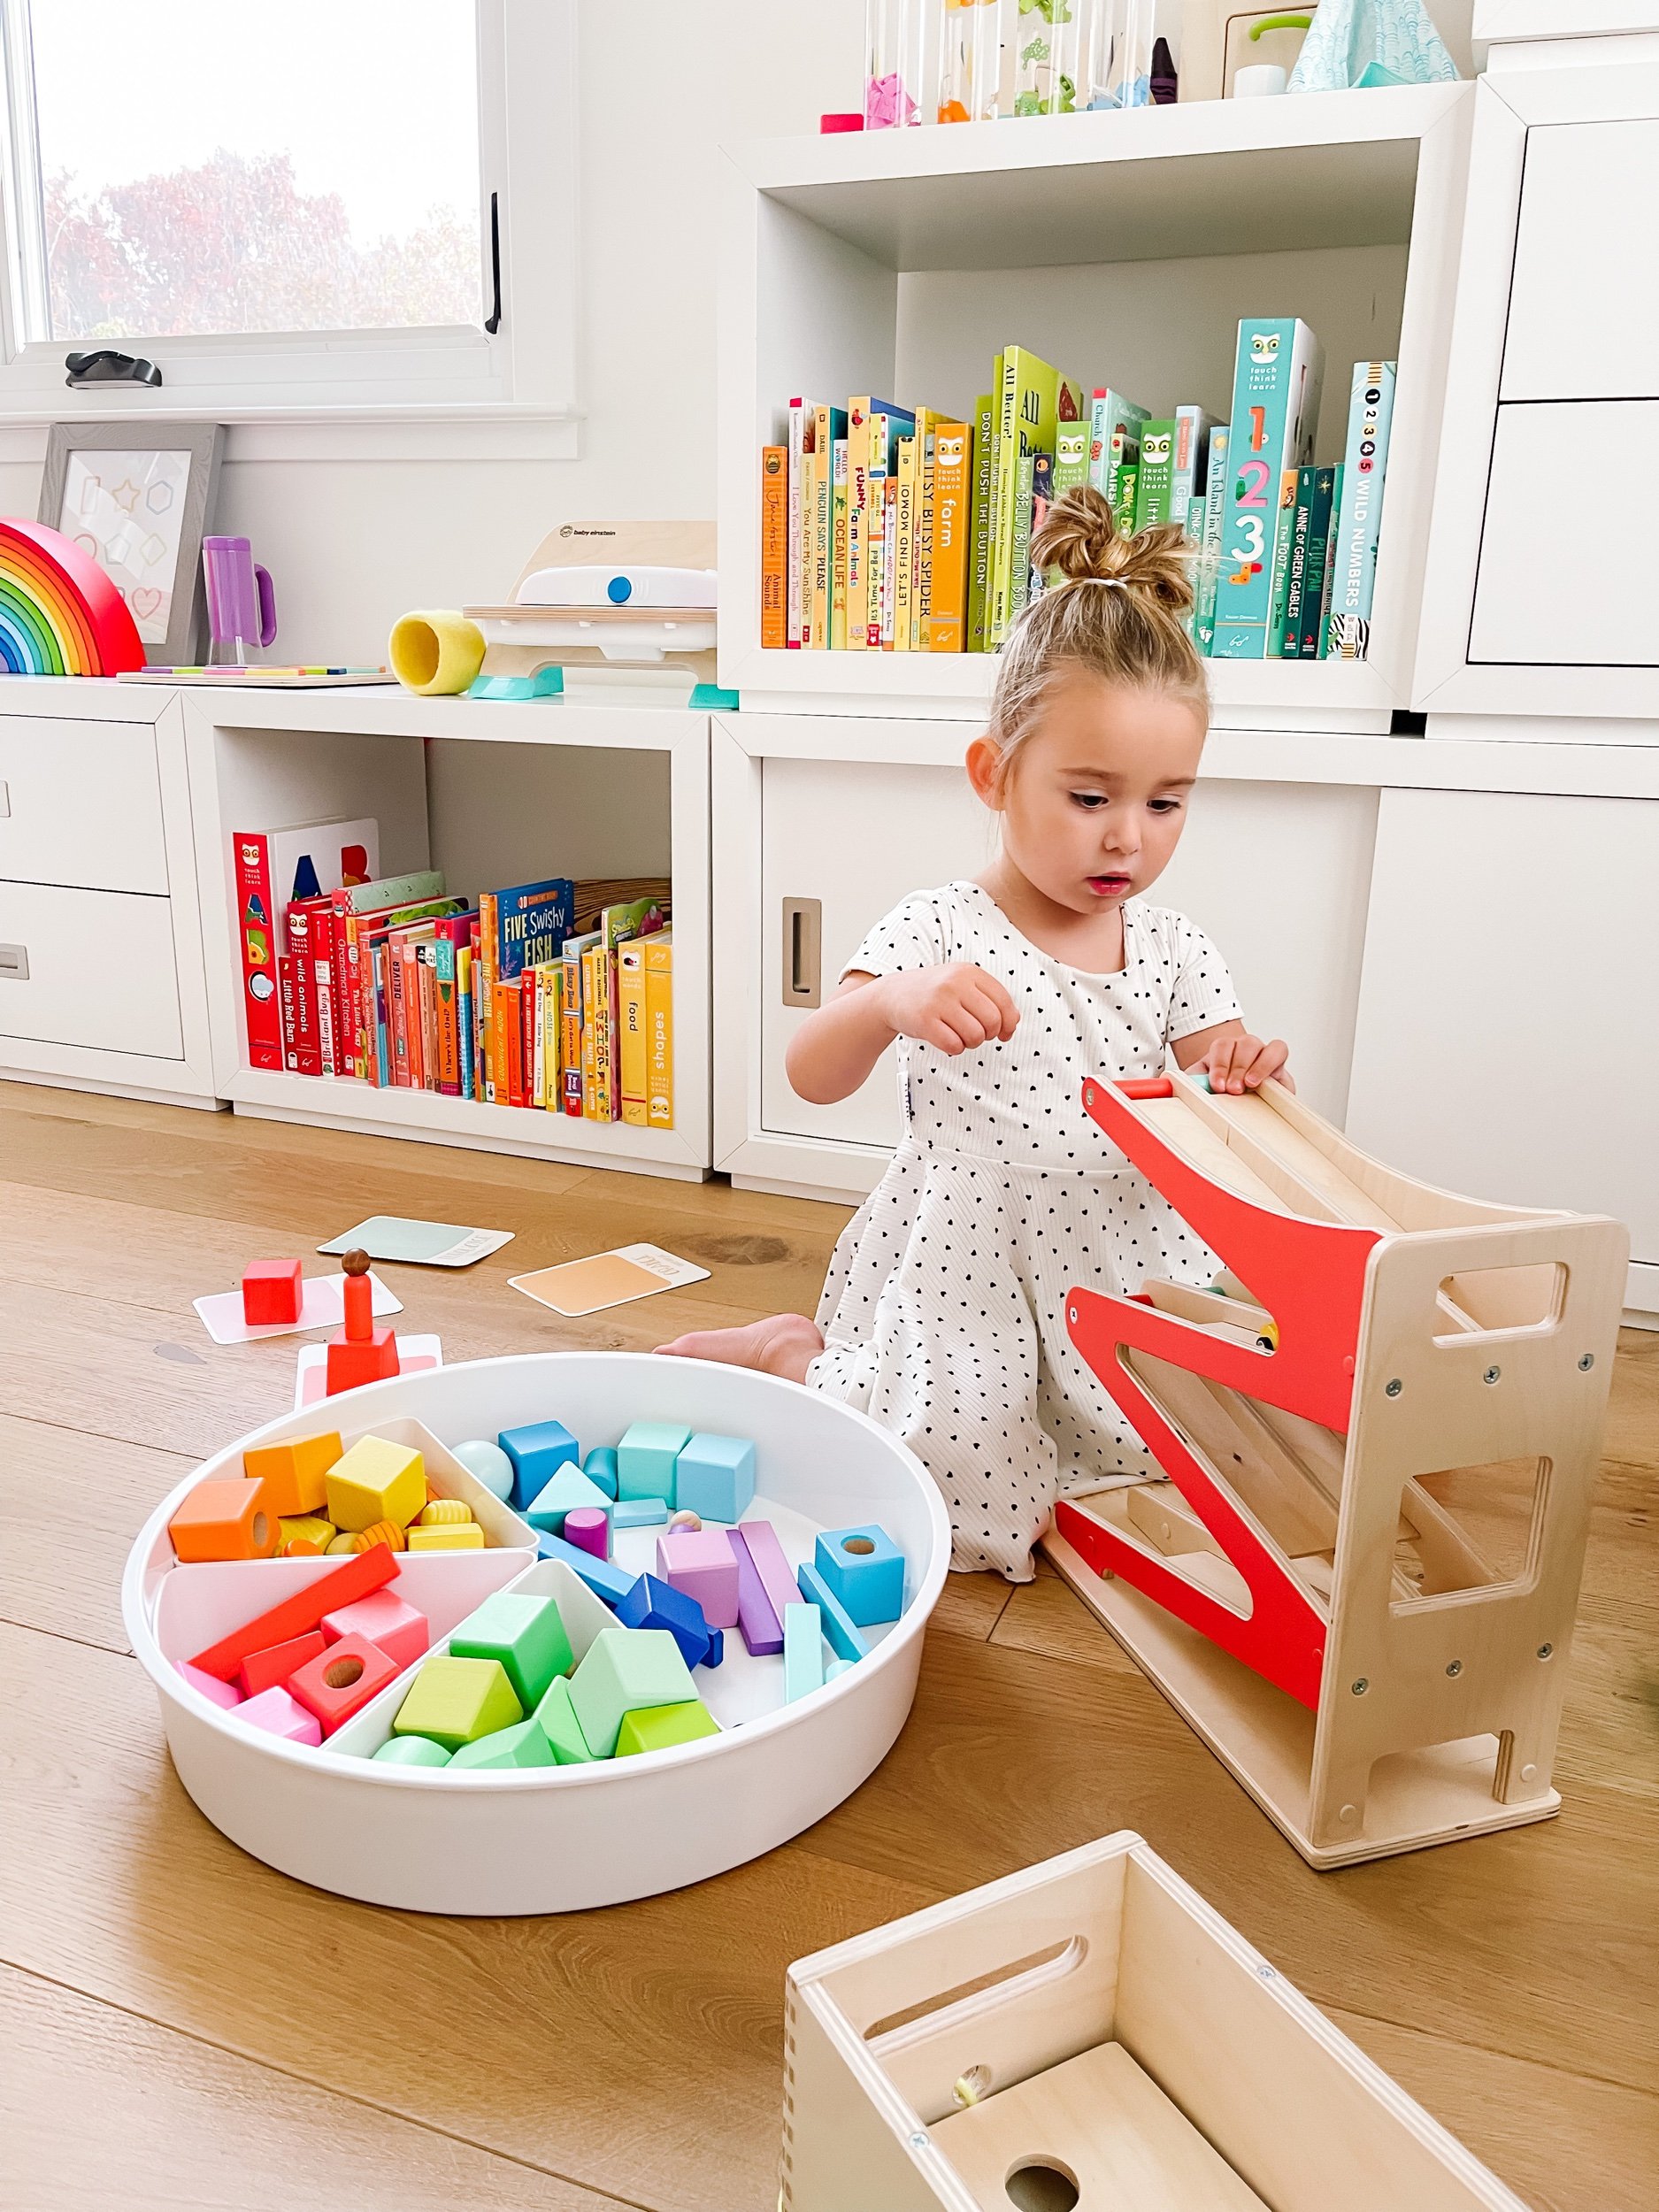
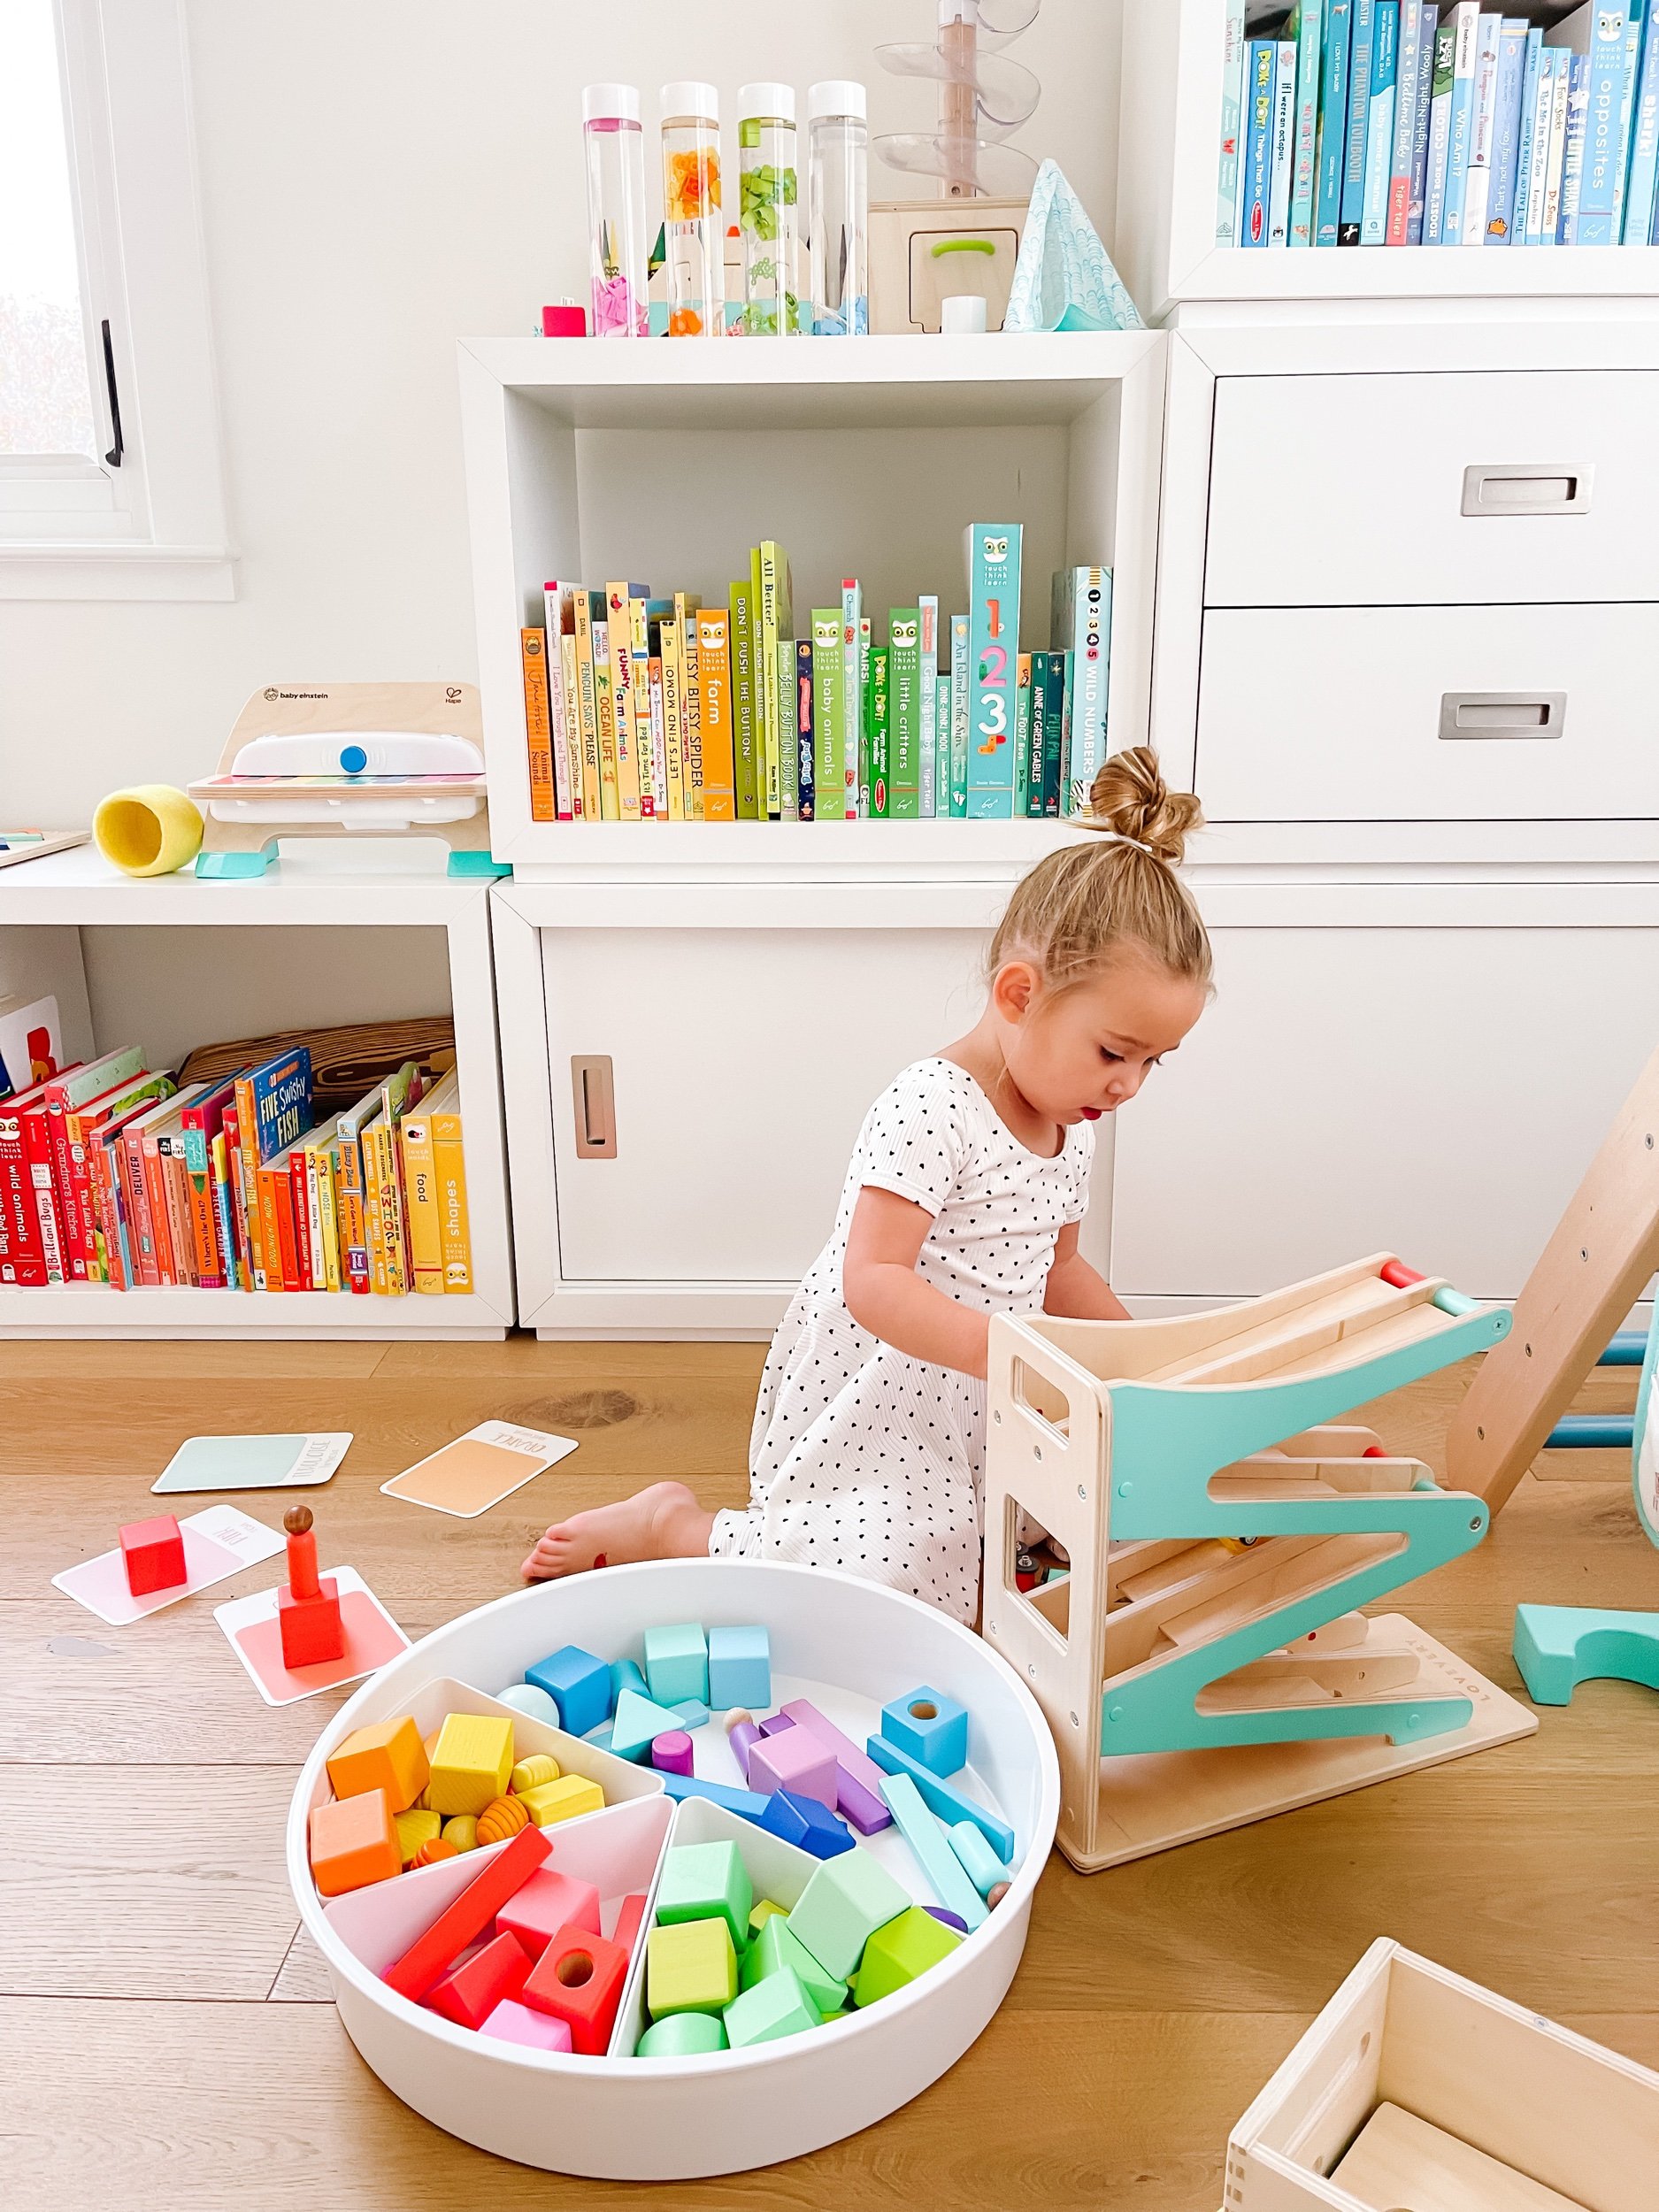
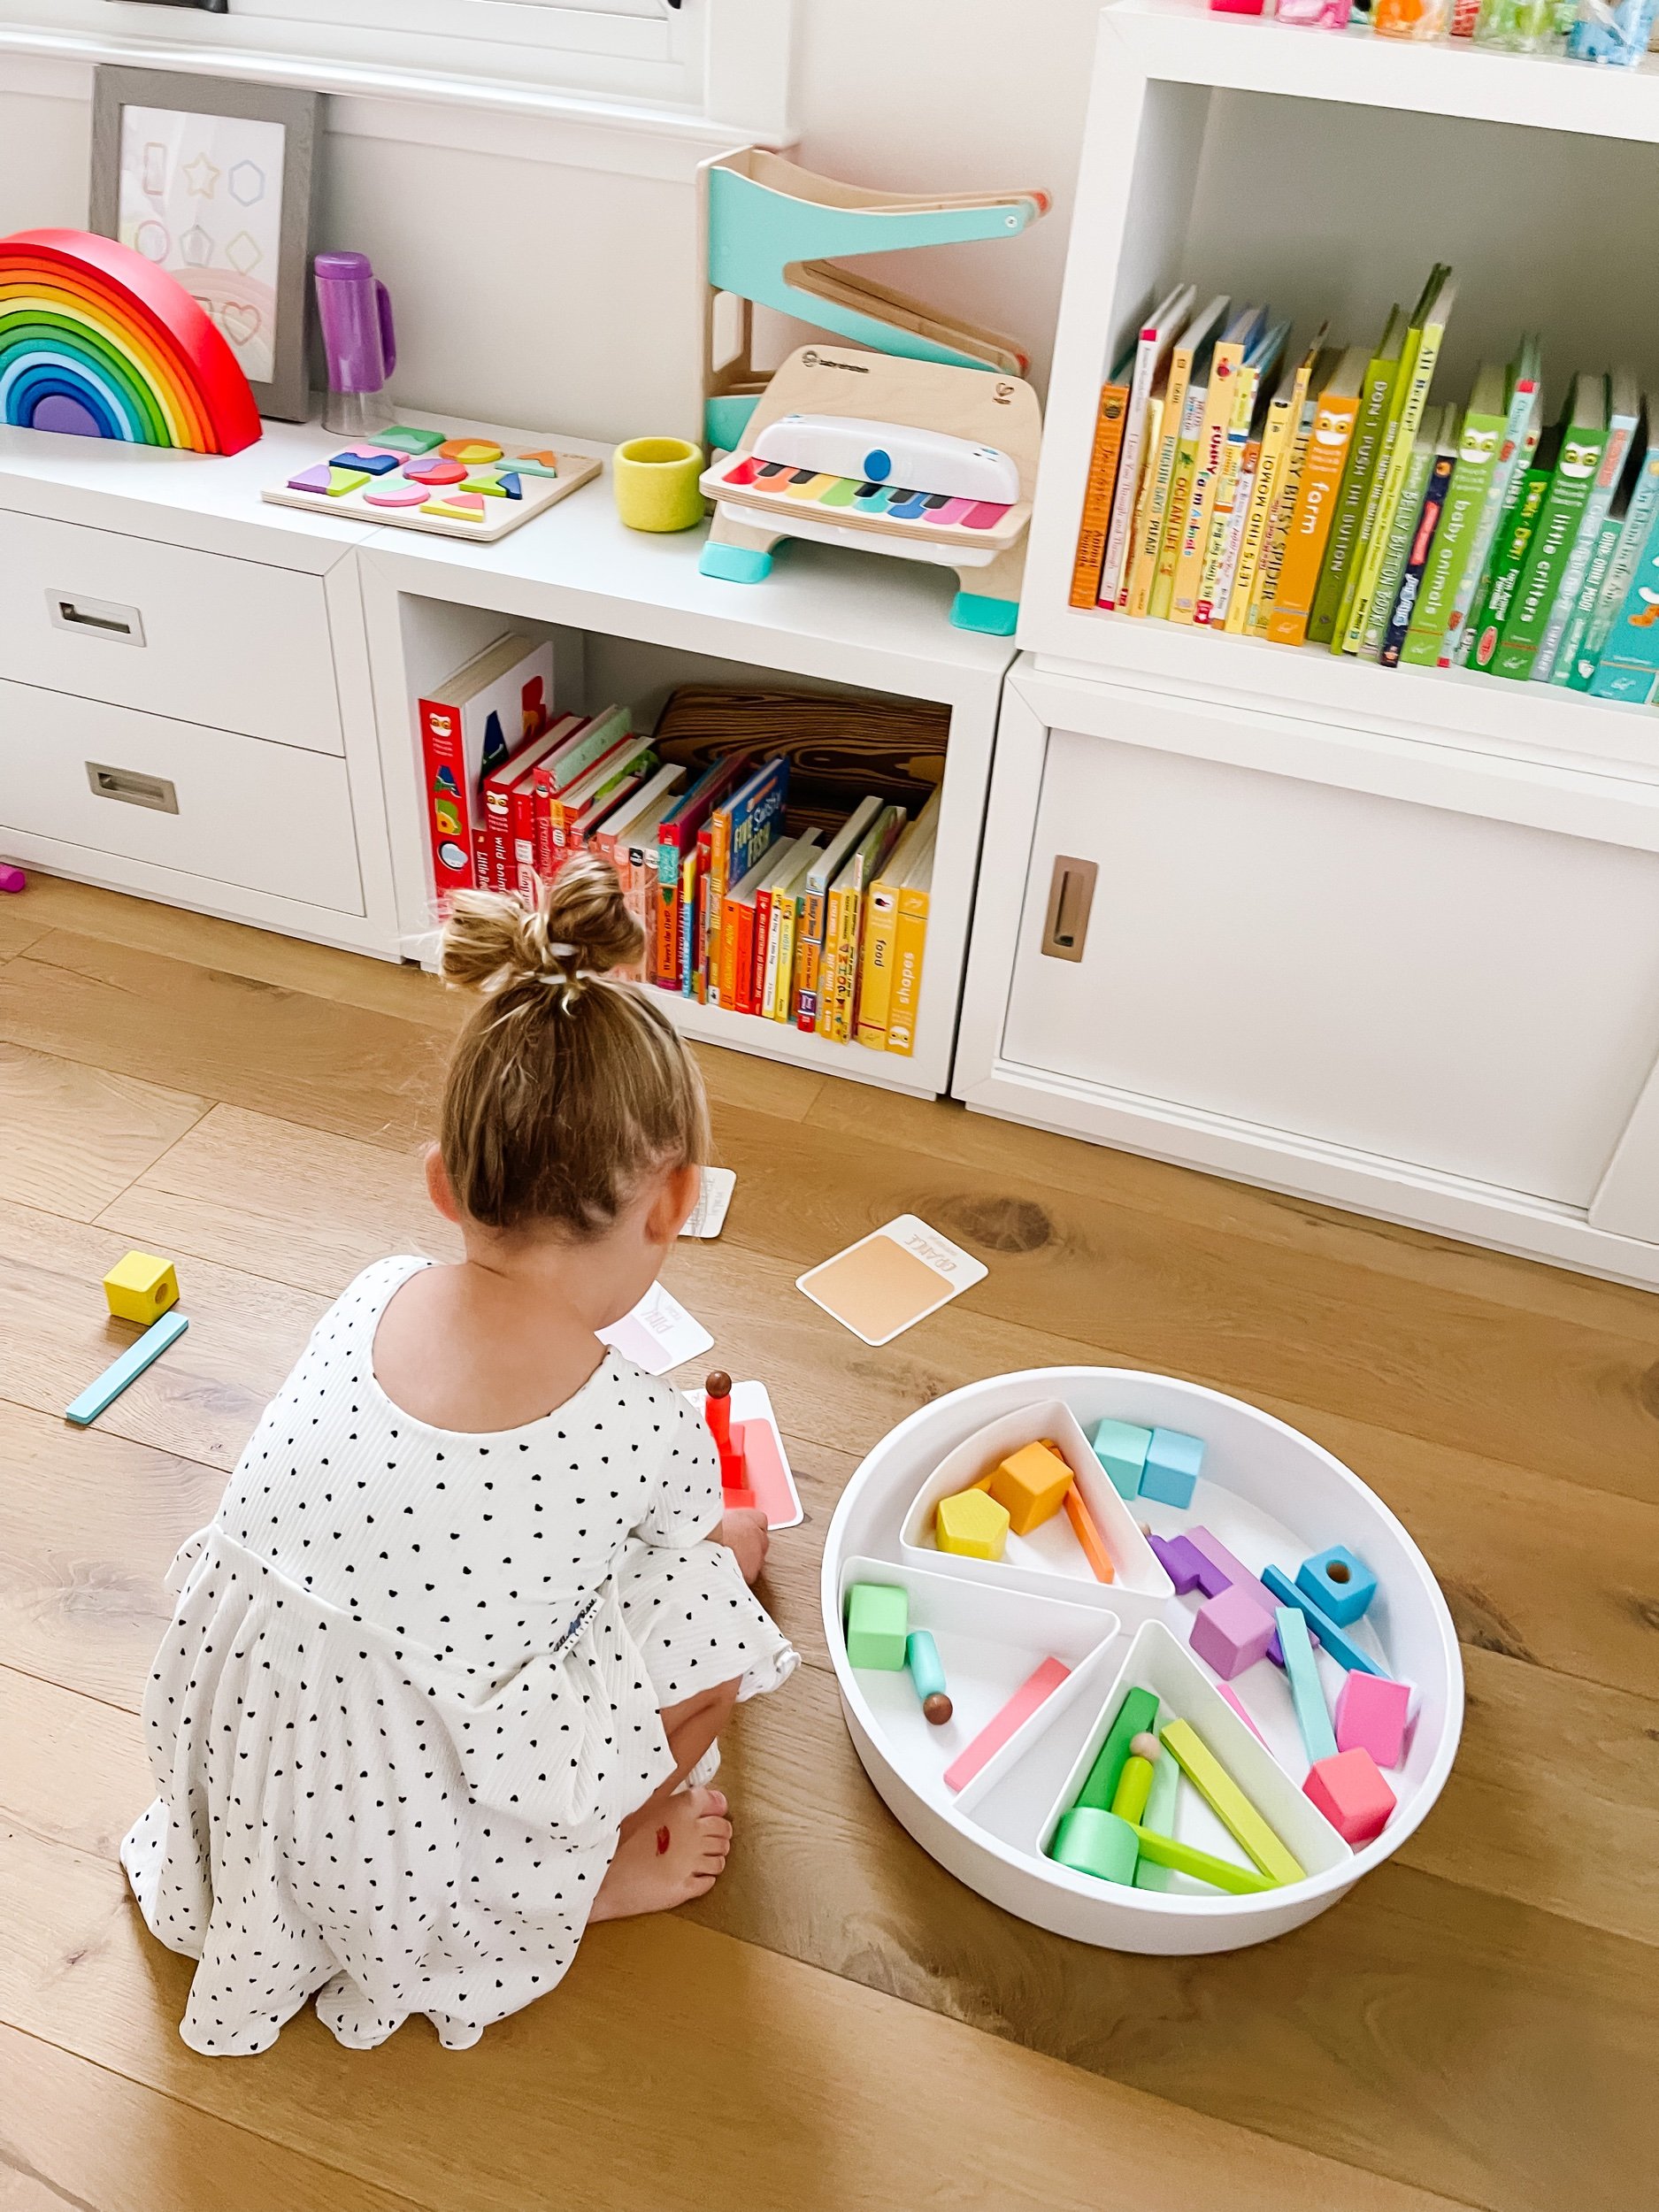

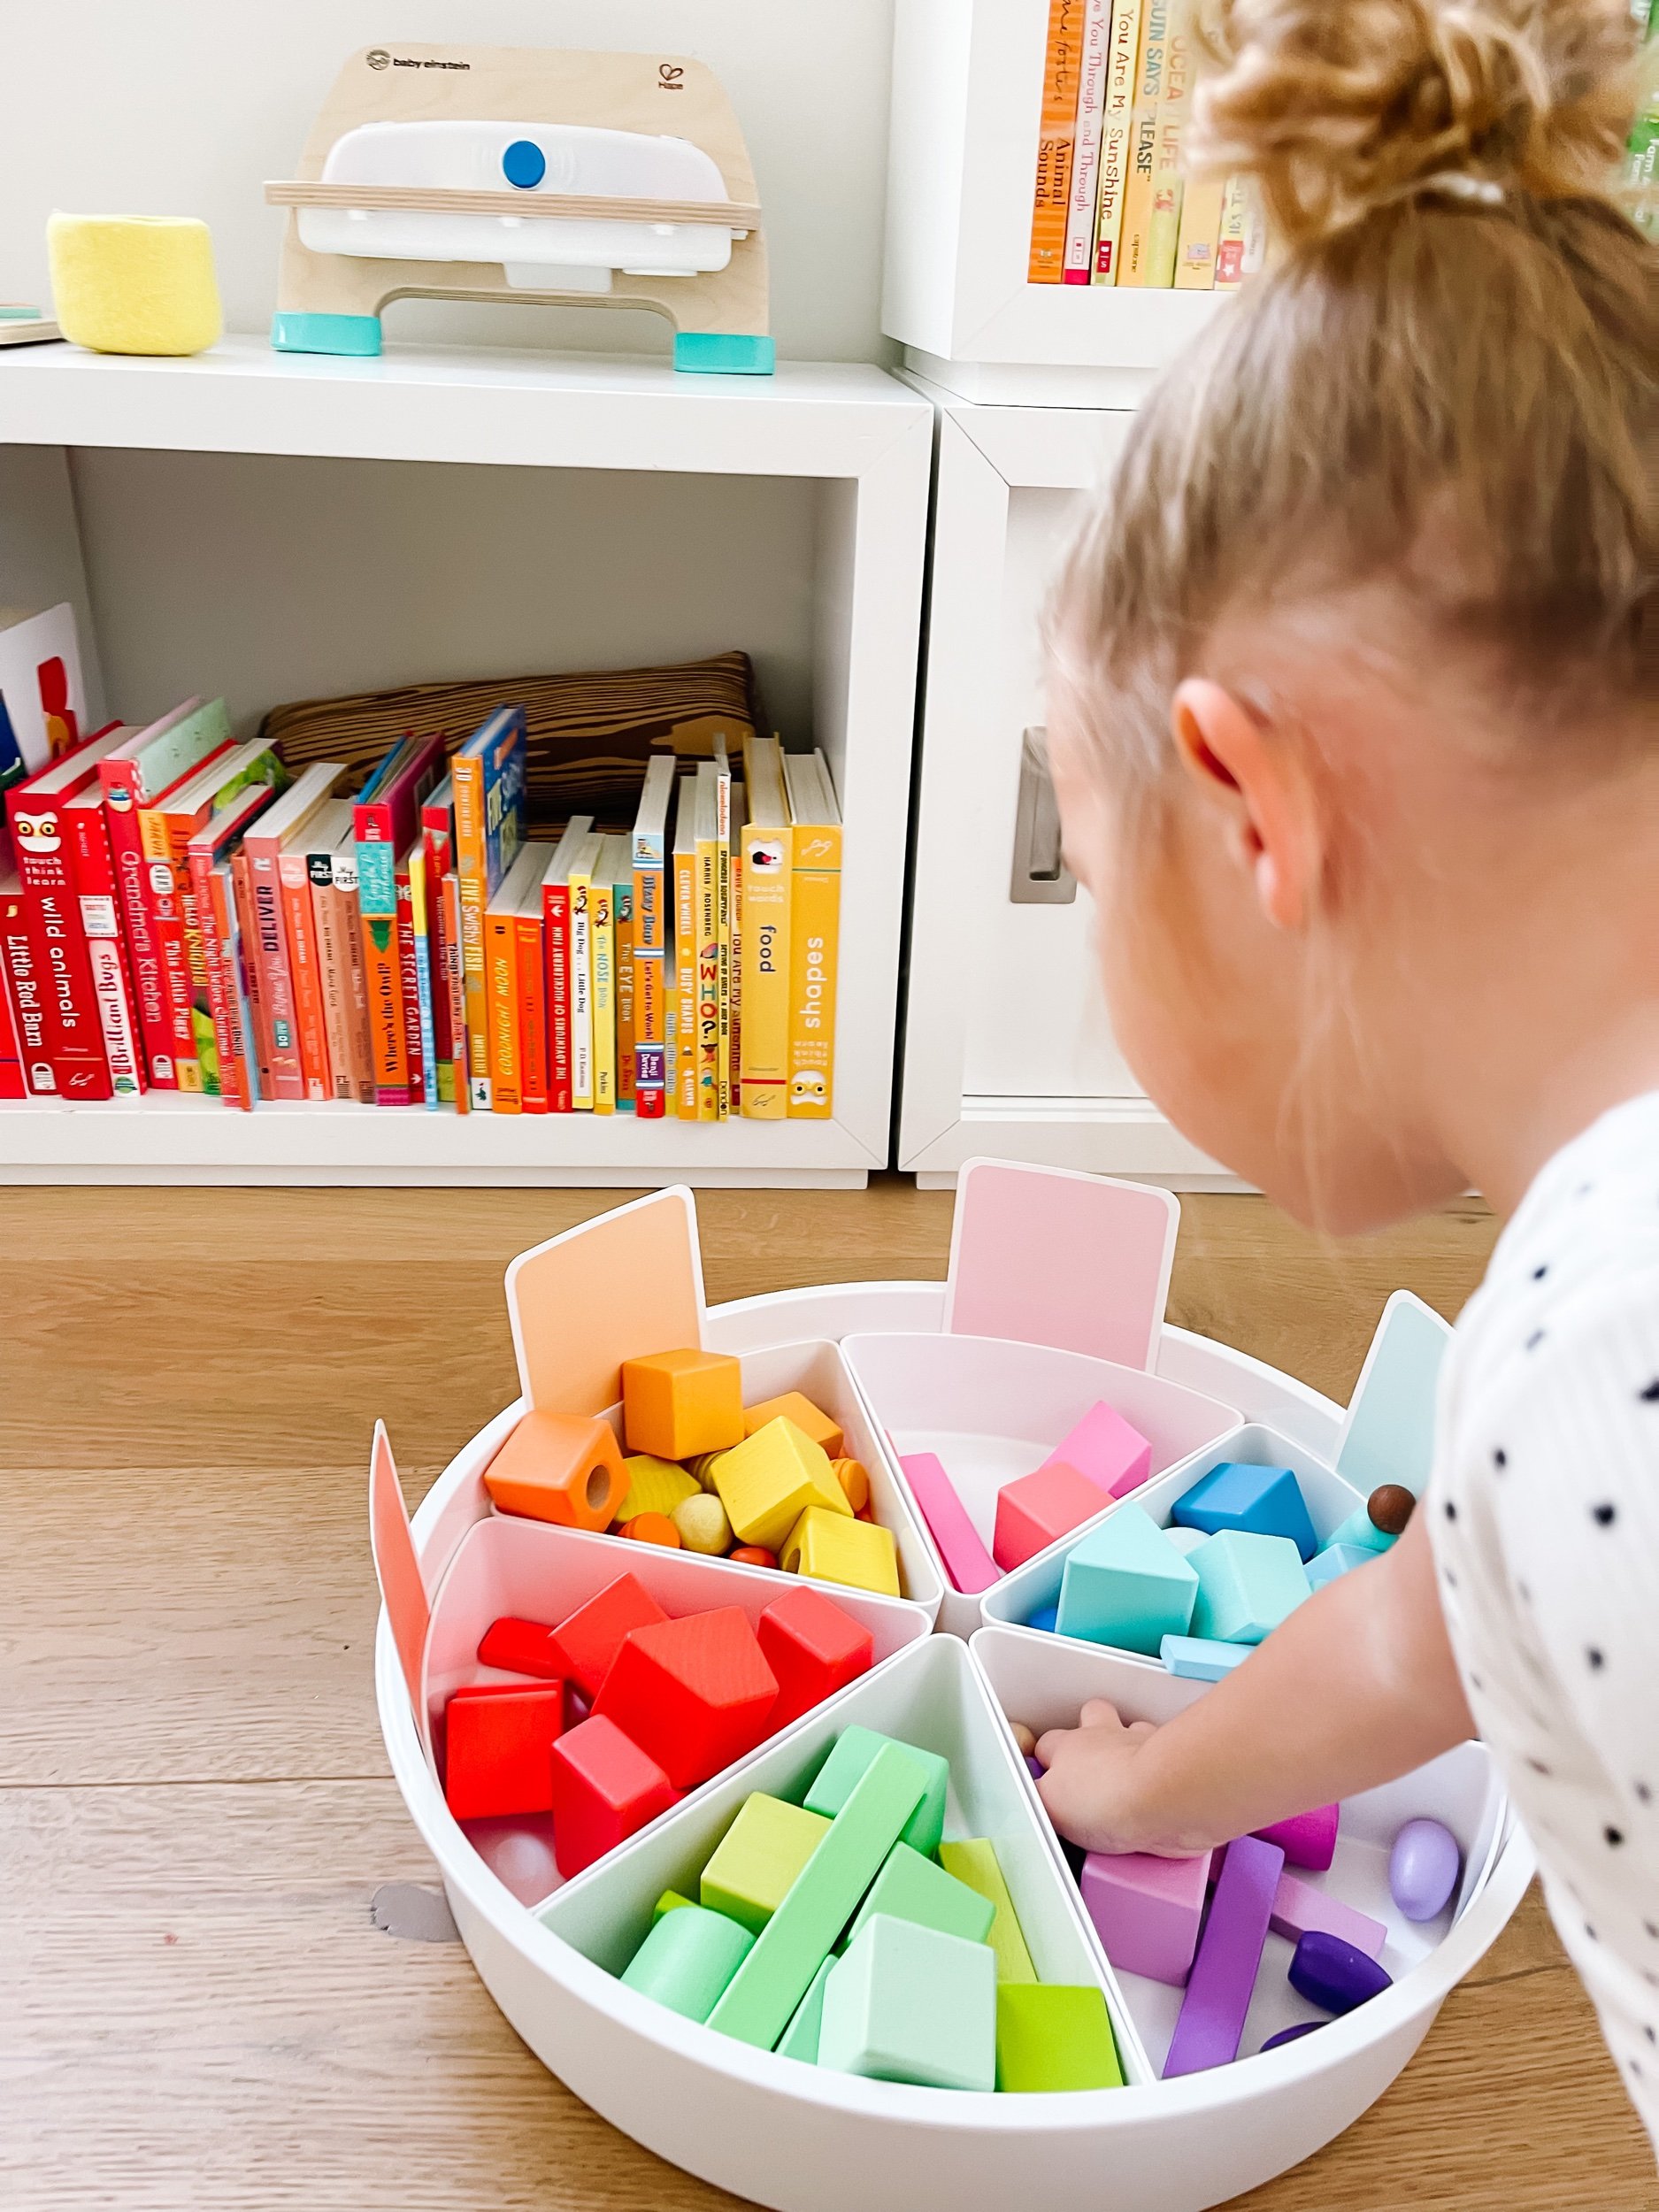

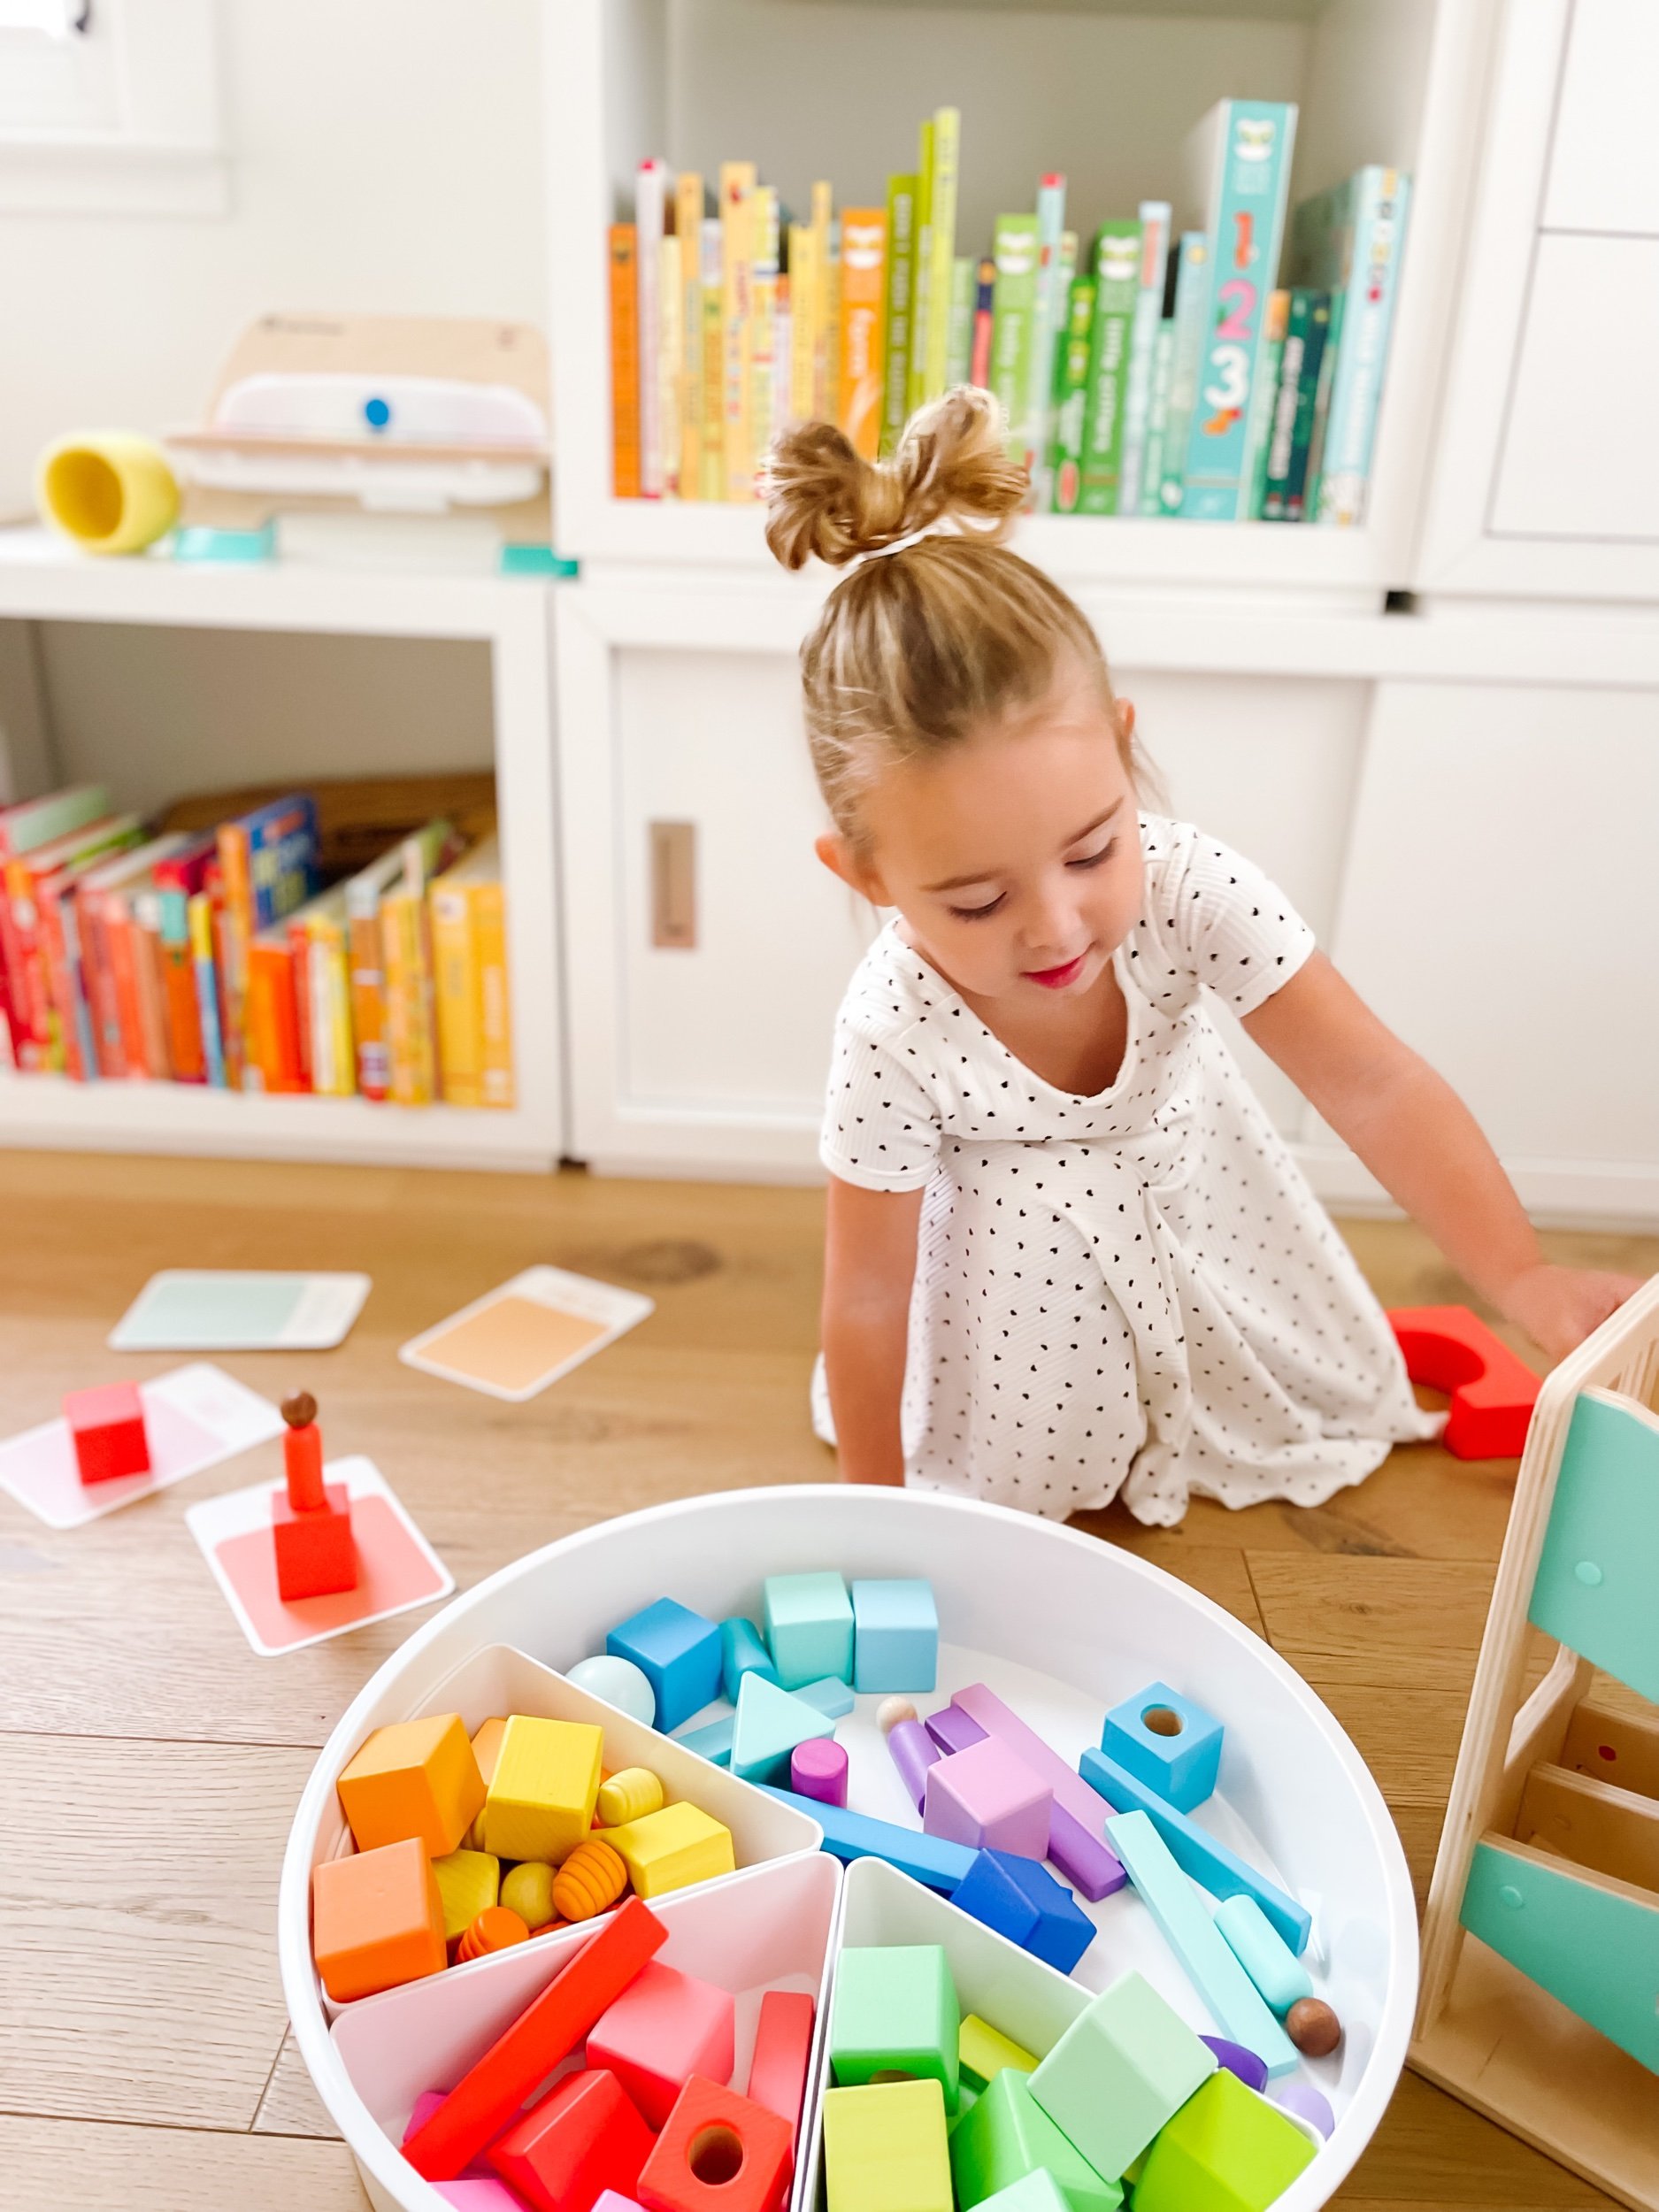
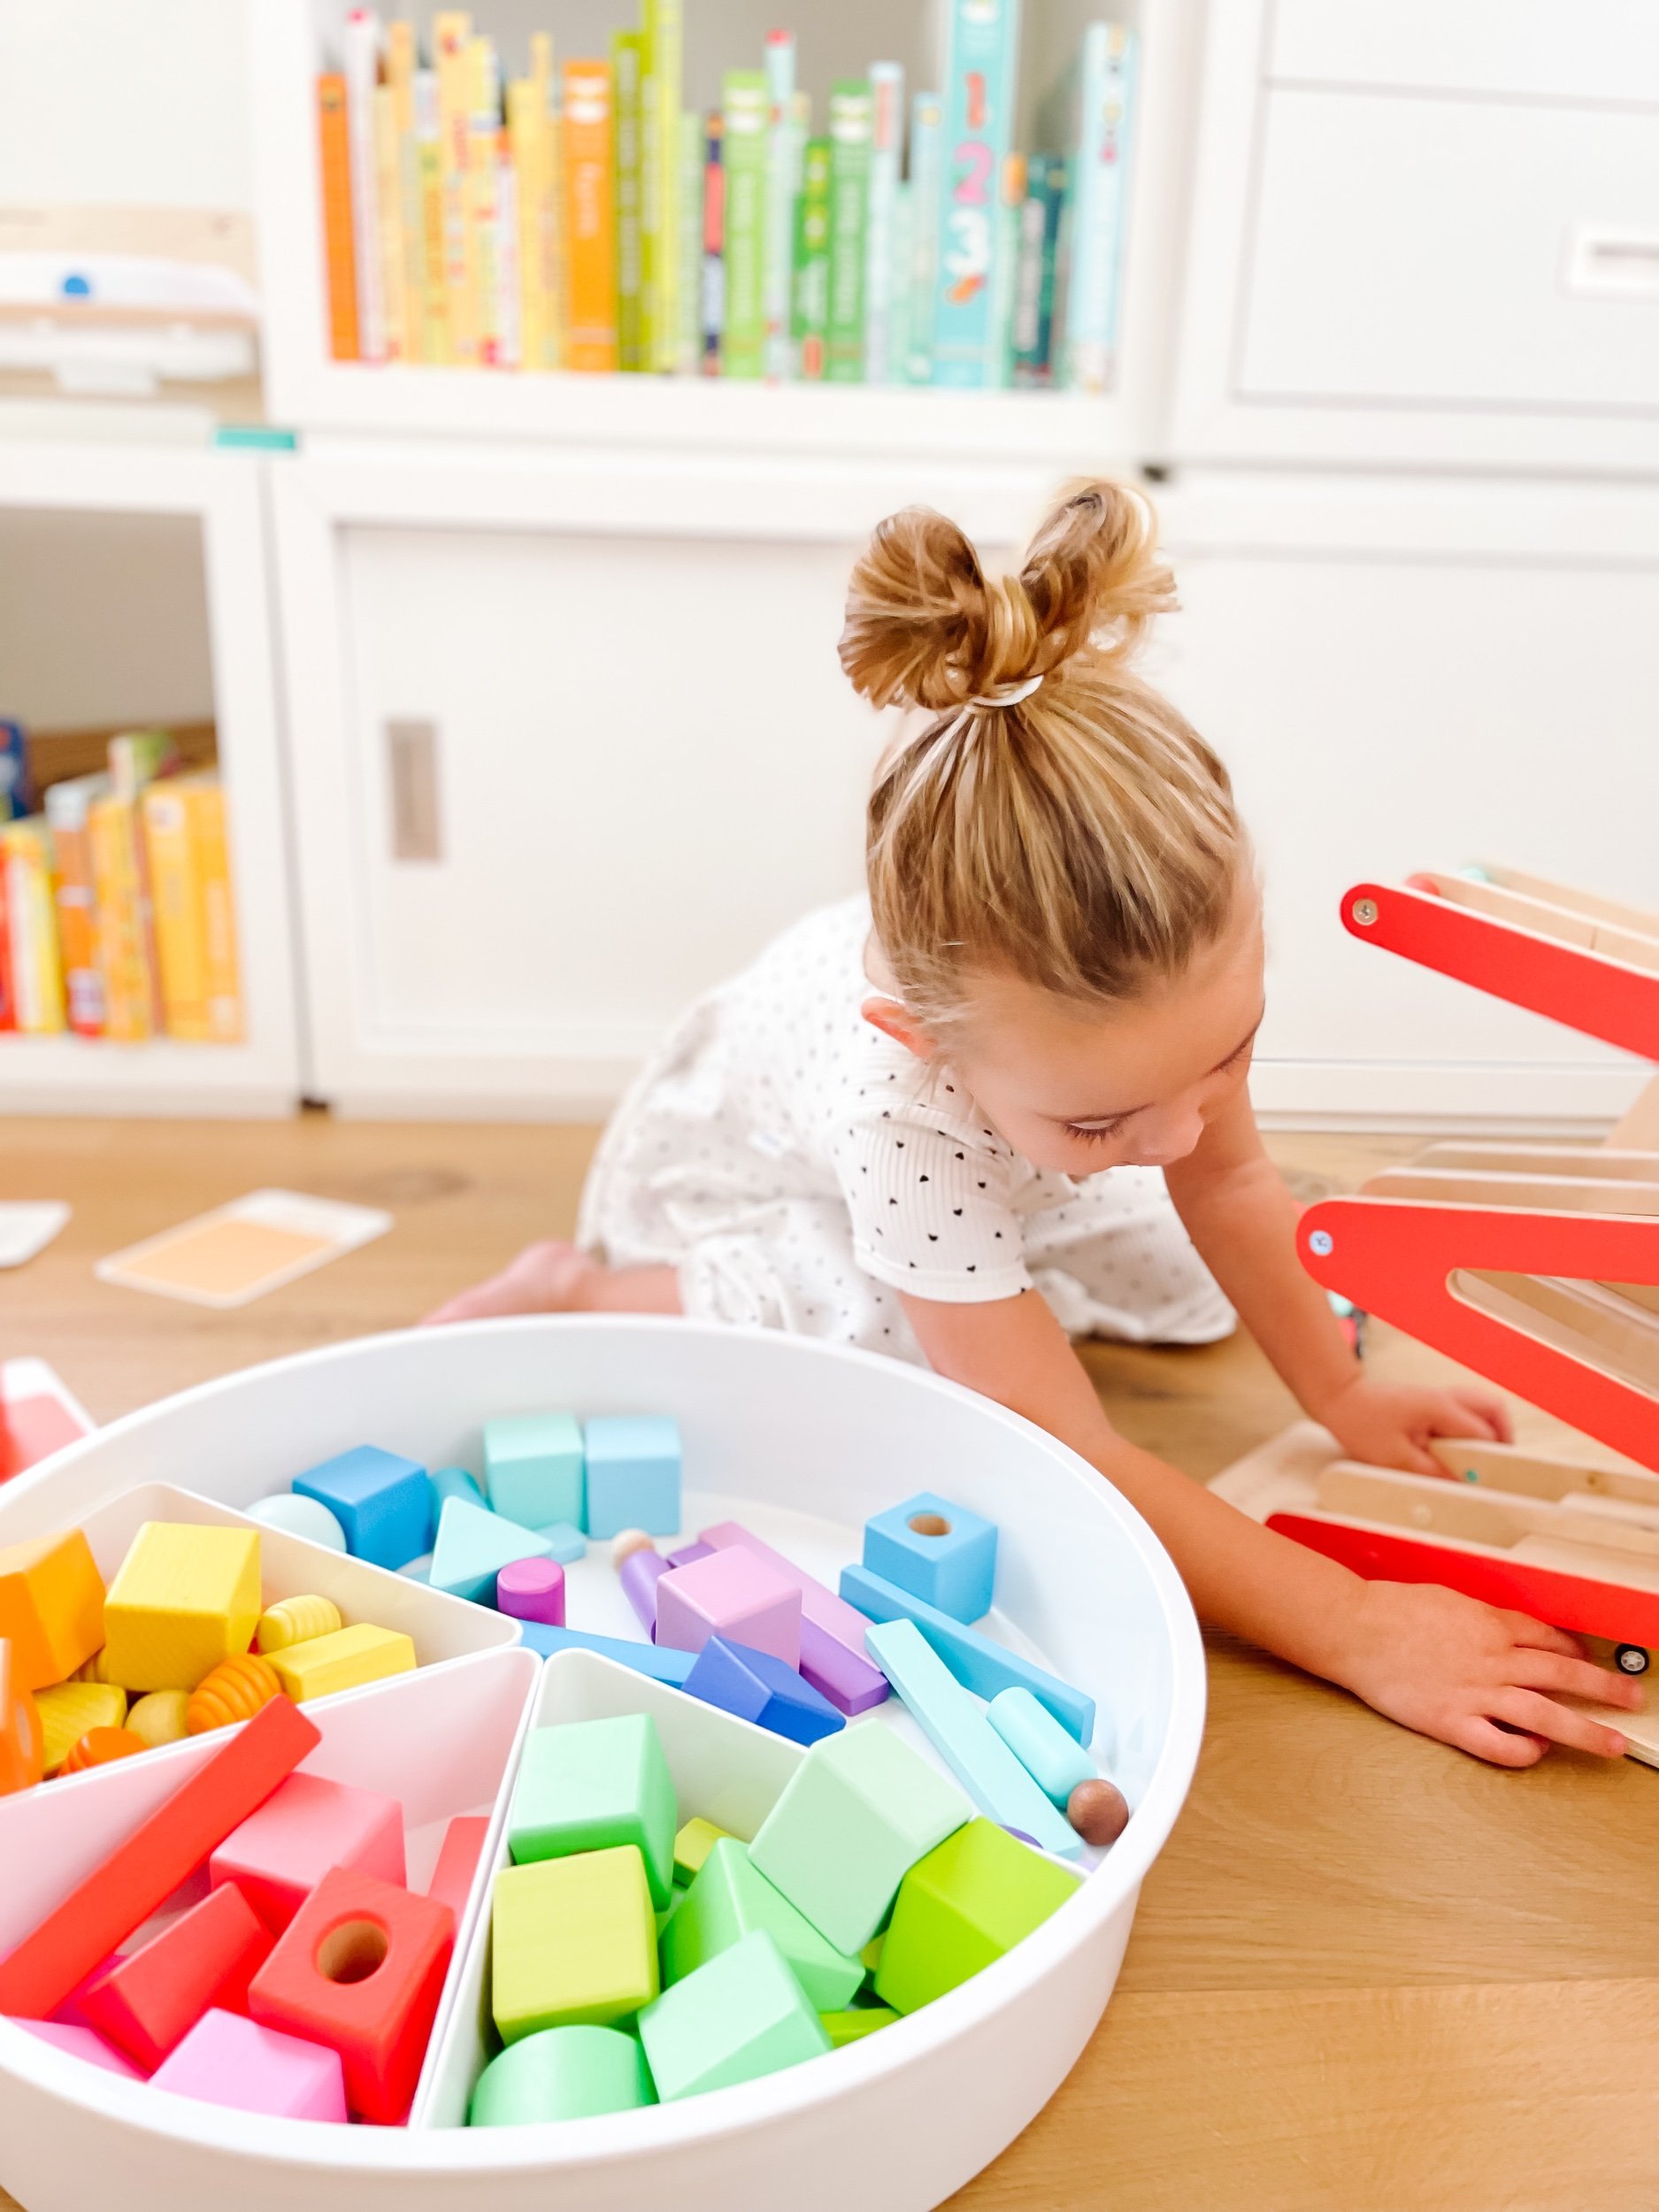
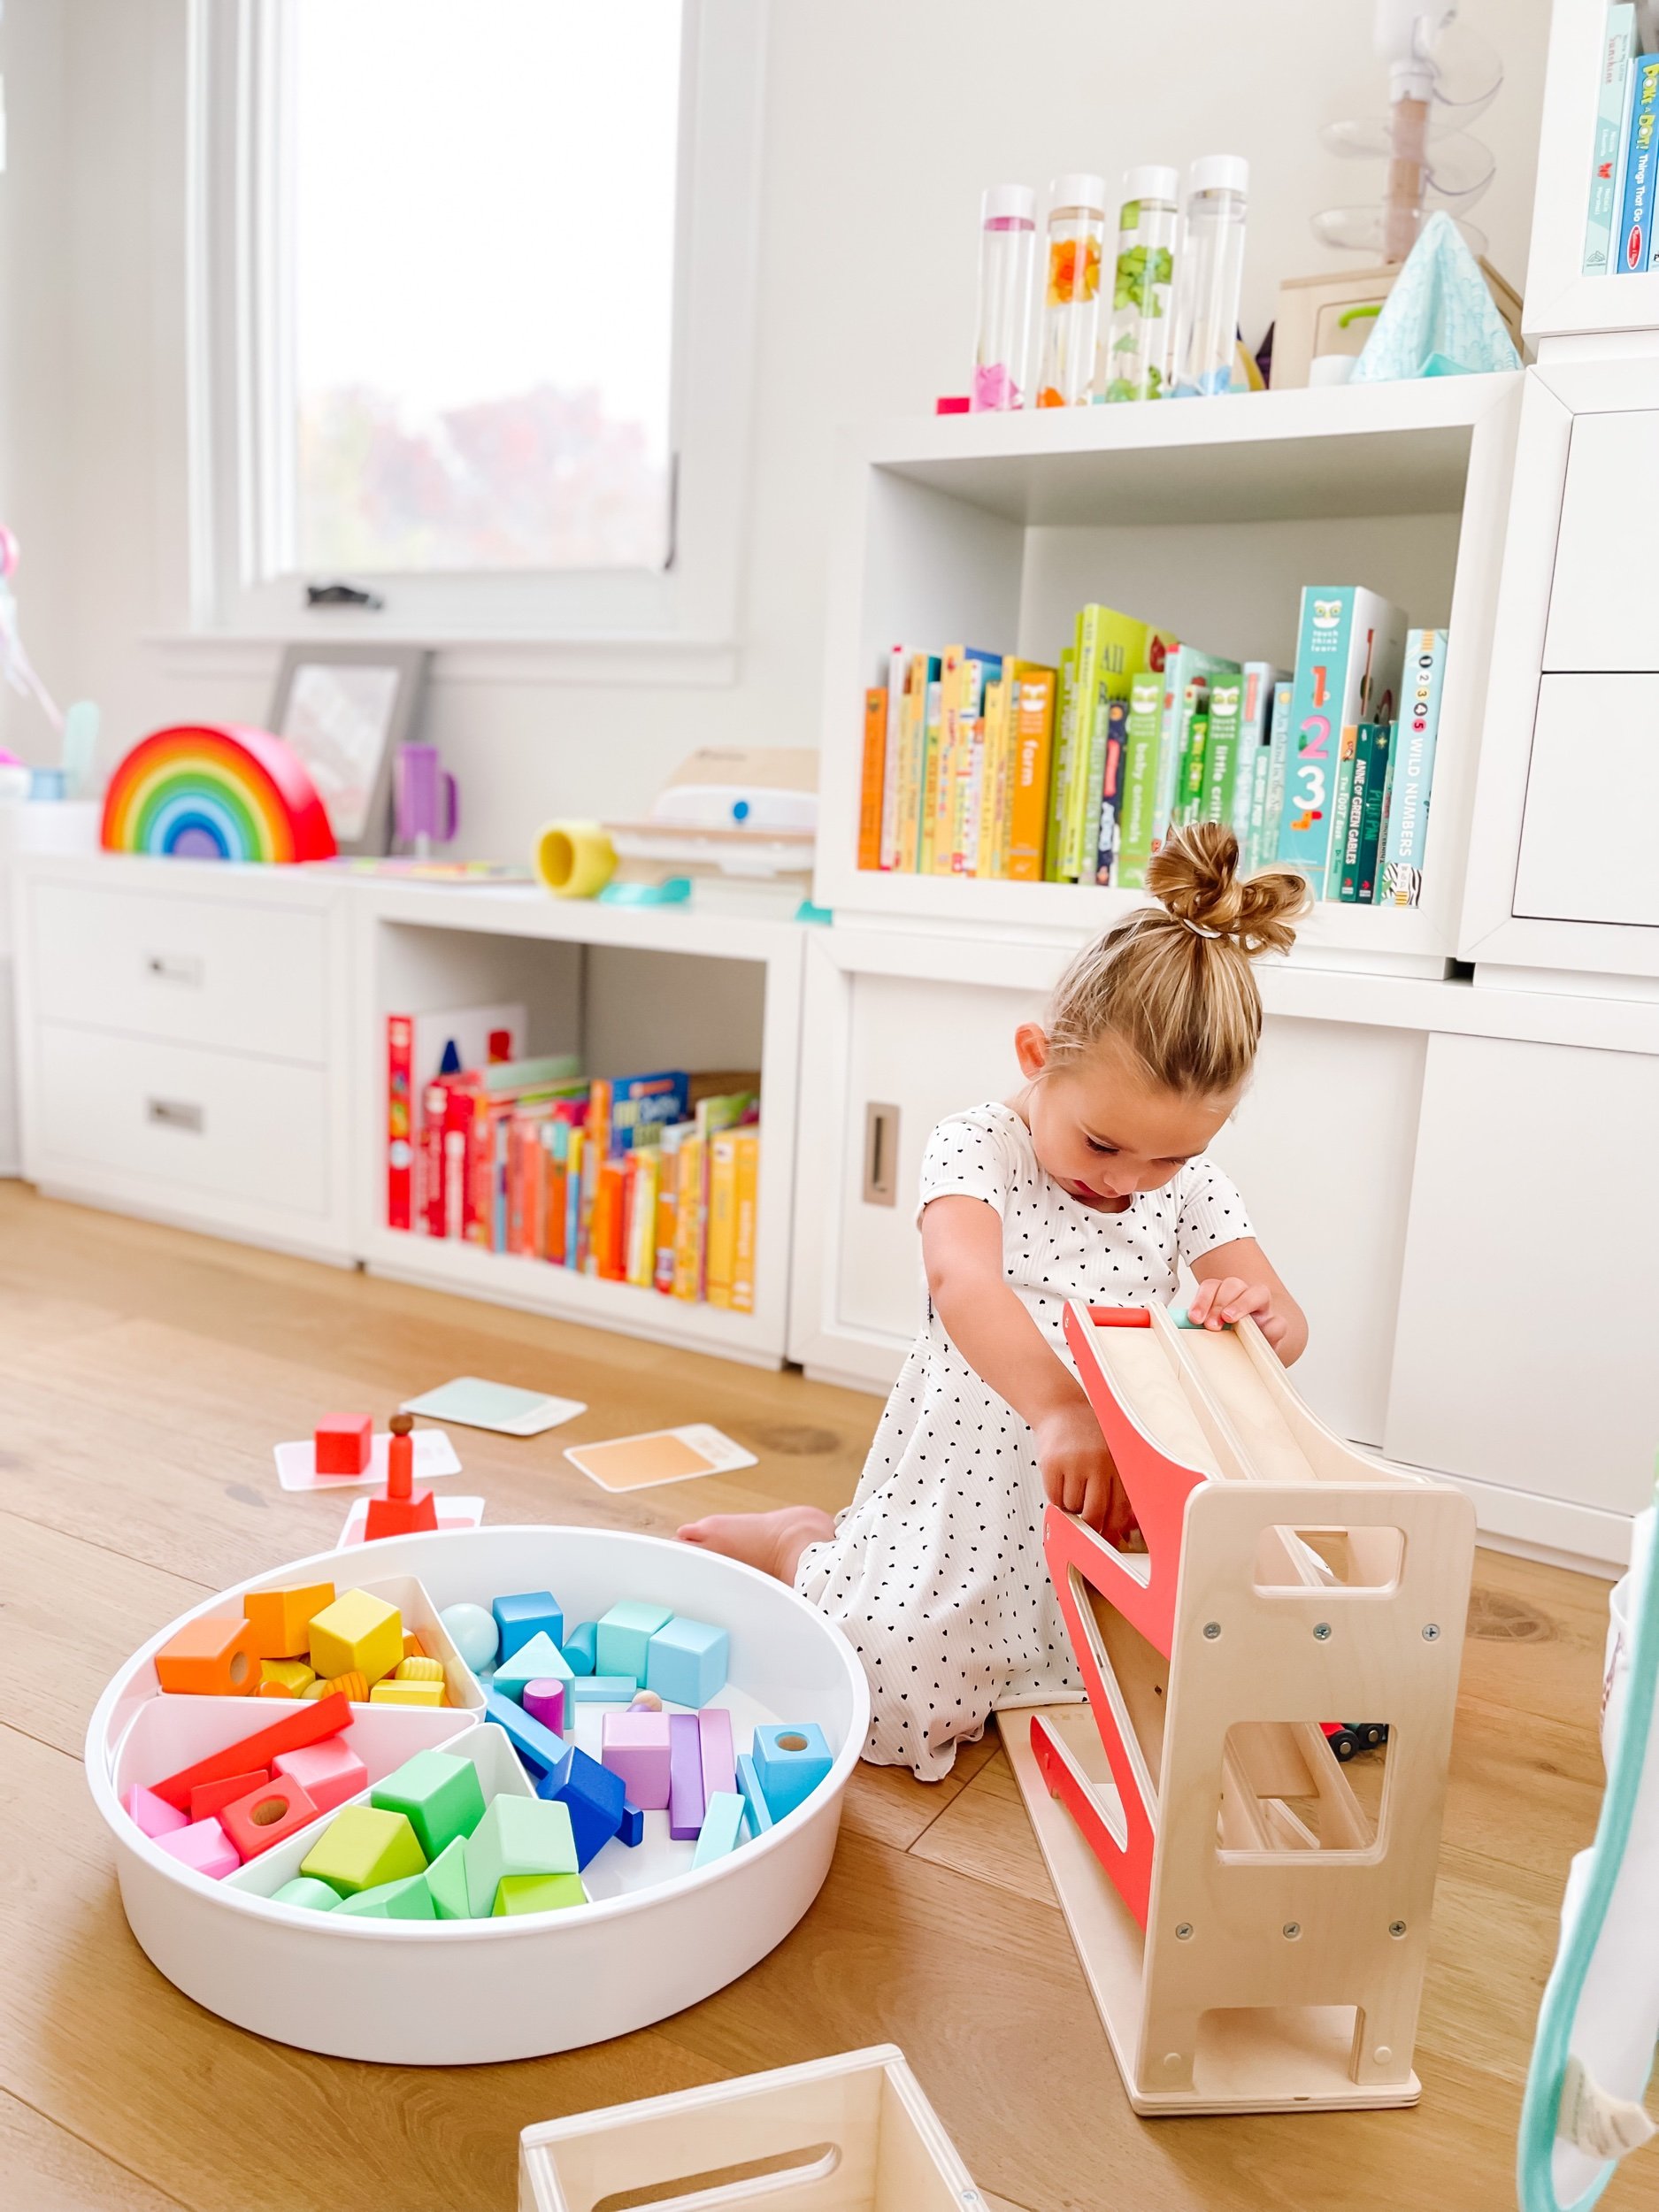

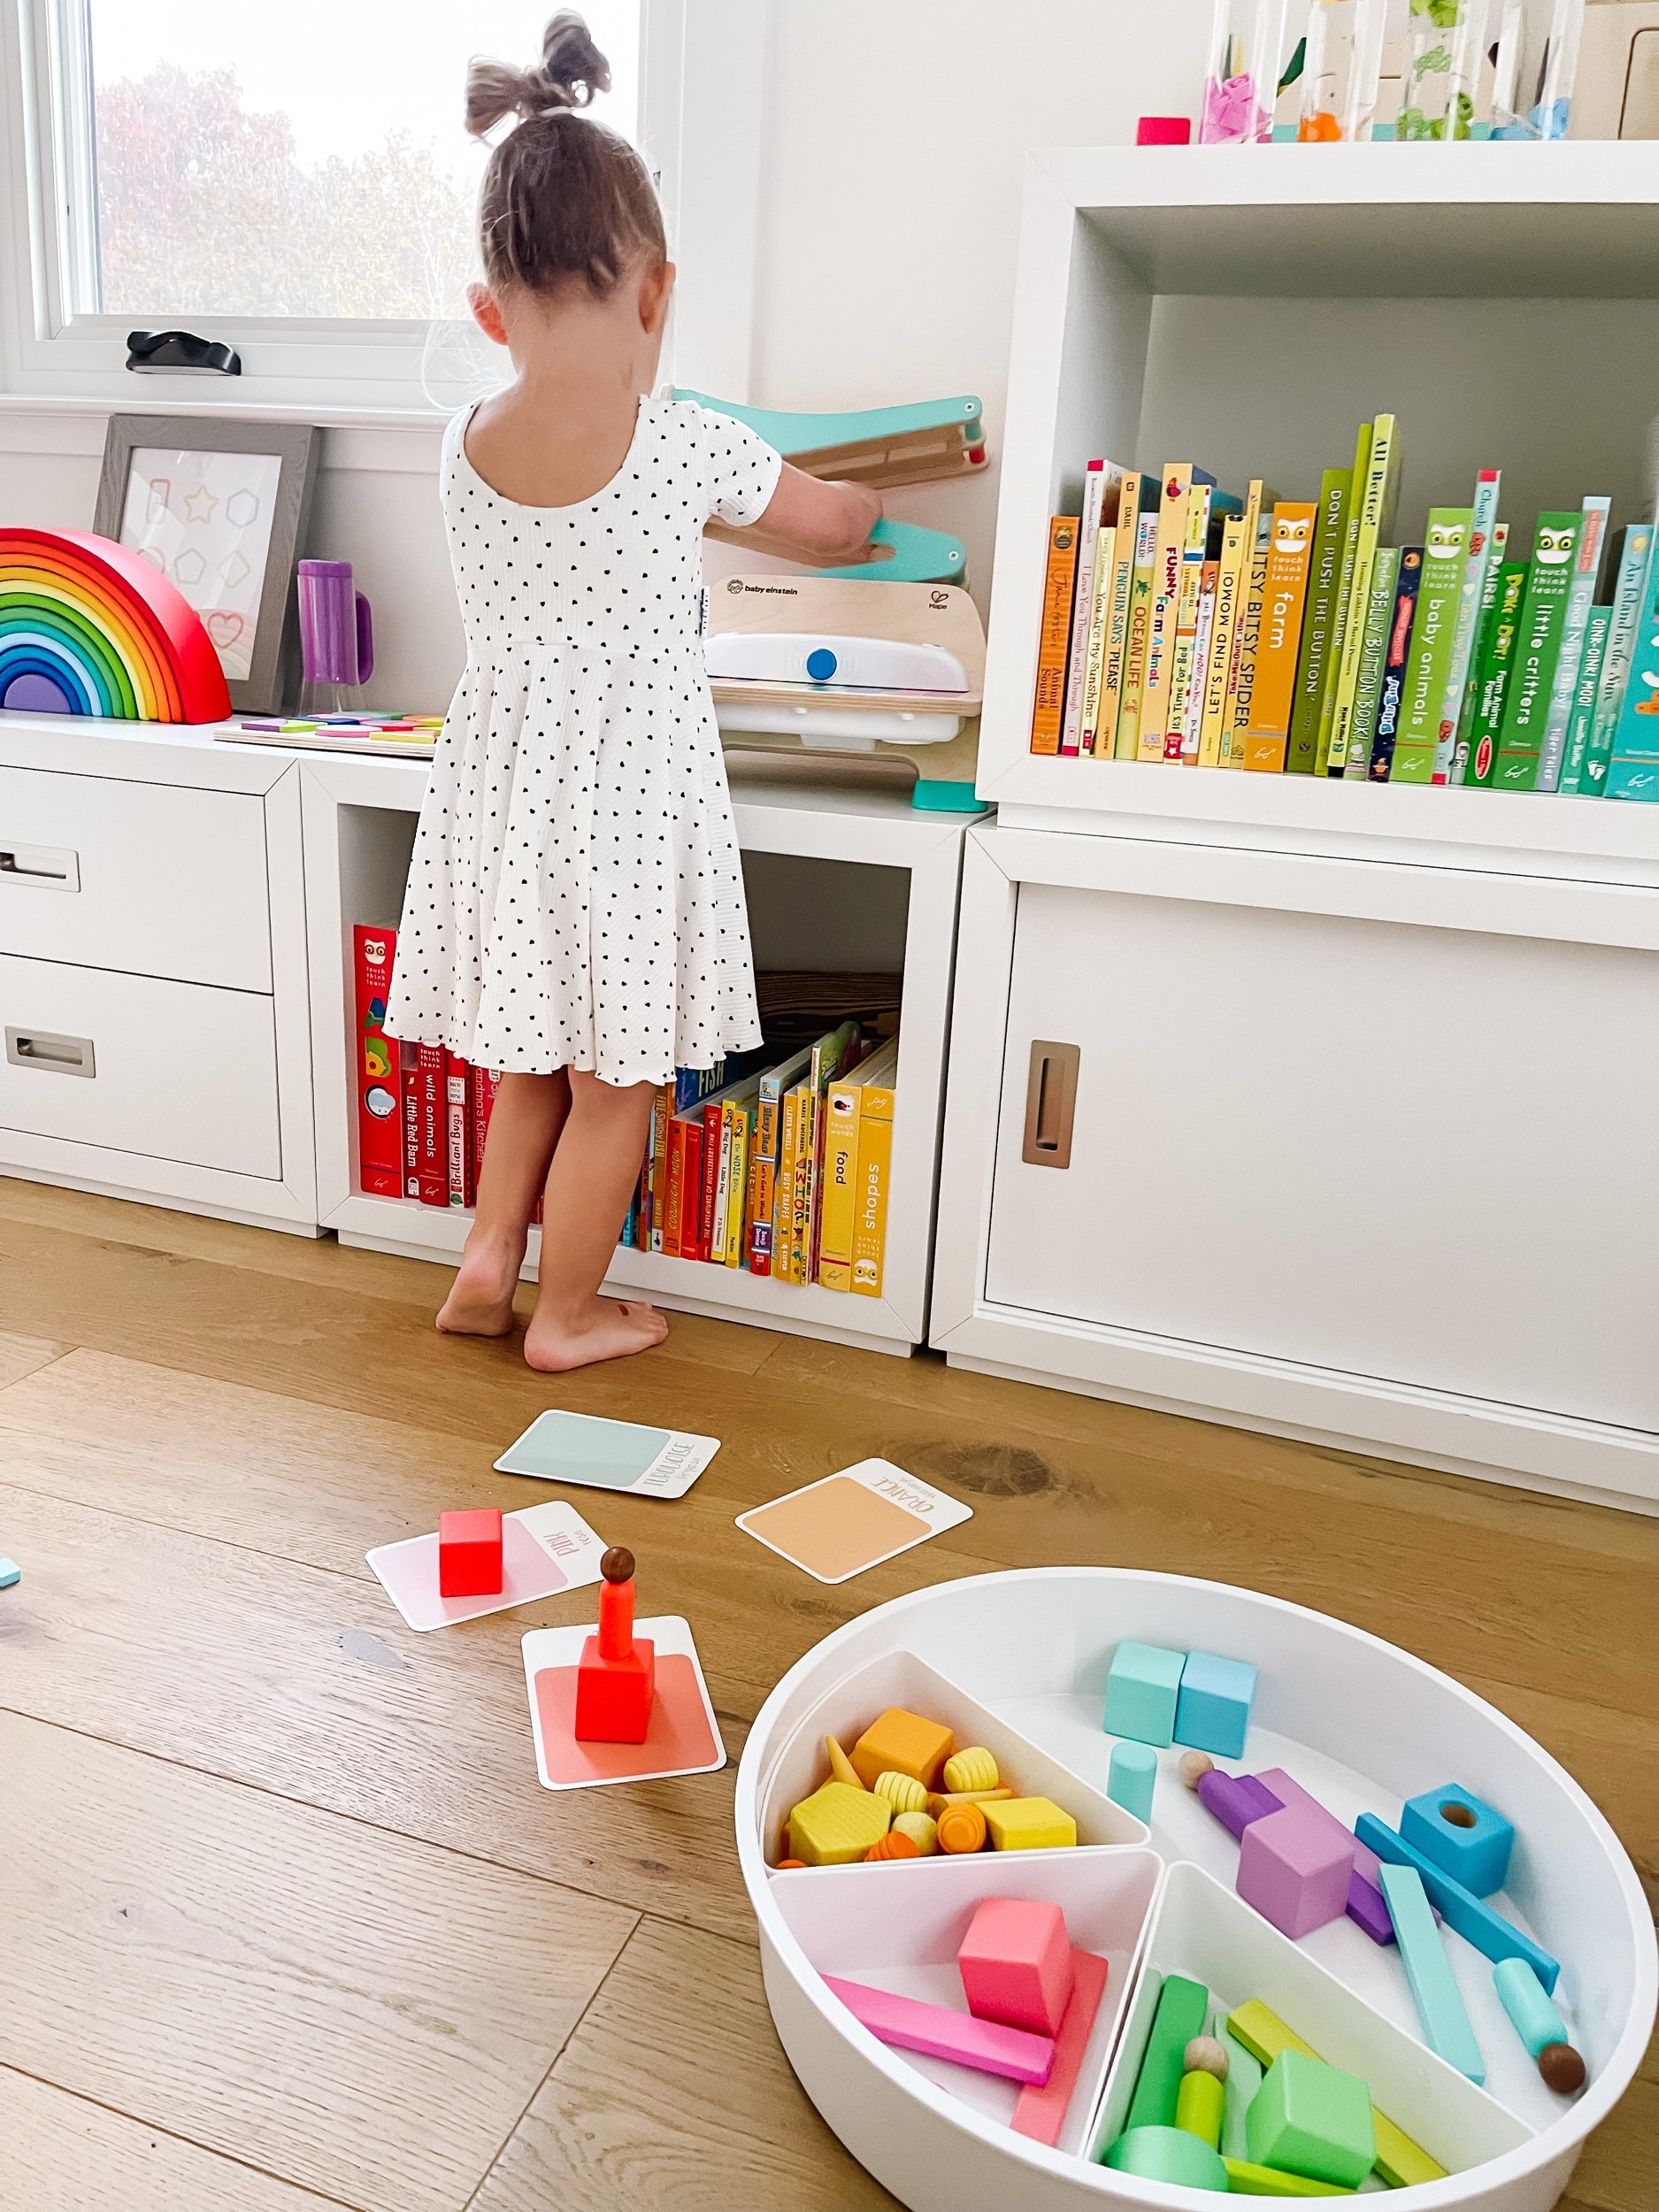


I was on the fence for the longest time about getting Sofie this Lovevery Blocks Set . I figured she already had all of the play subscription kits, what would she need these for?! But I’m so glad I pulled the trigger on these. I was able to get them on sale when Amazon was having a sale and they’ve been so awesome. Not only do they come with their own storage box so that we can practice cleaning up and putting them away, but it can be turned into a little car/cart for wheeling then around. It’s been so fun watching Sofie’s imagination come to life when we get these out. She’s built towers and towns, race tracks and bridges. I can’t wait to see what her little mind comes up with next!


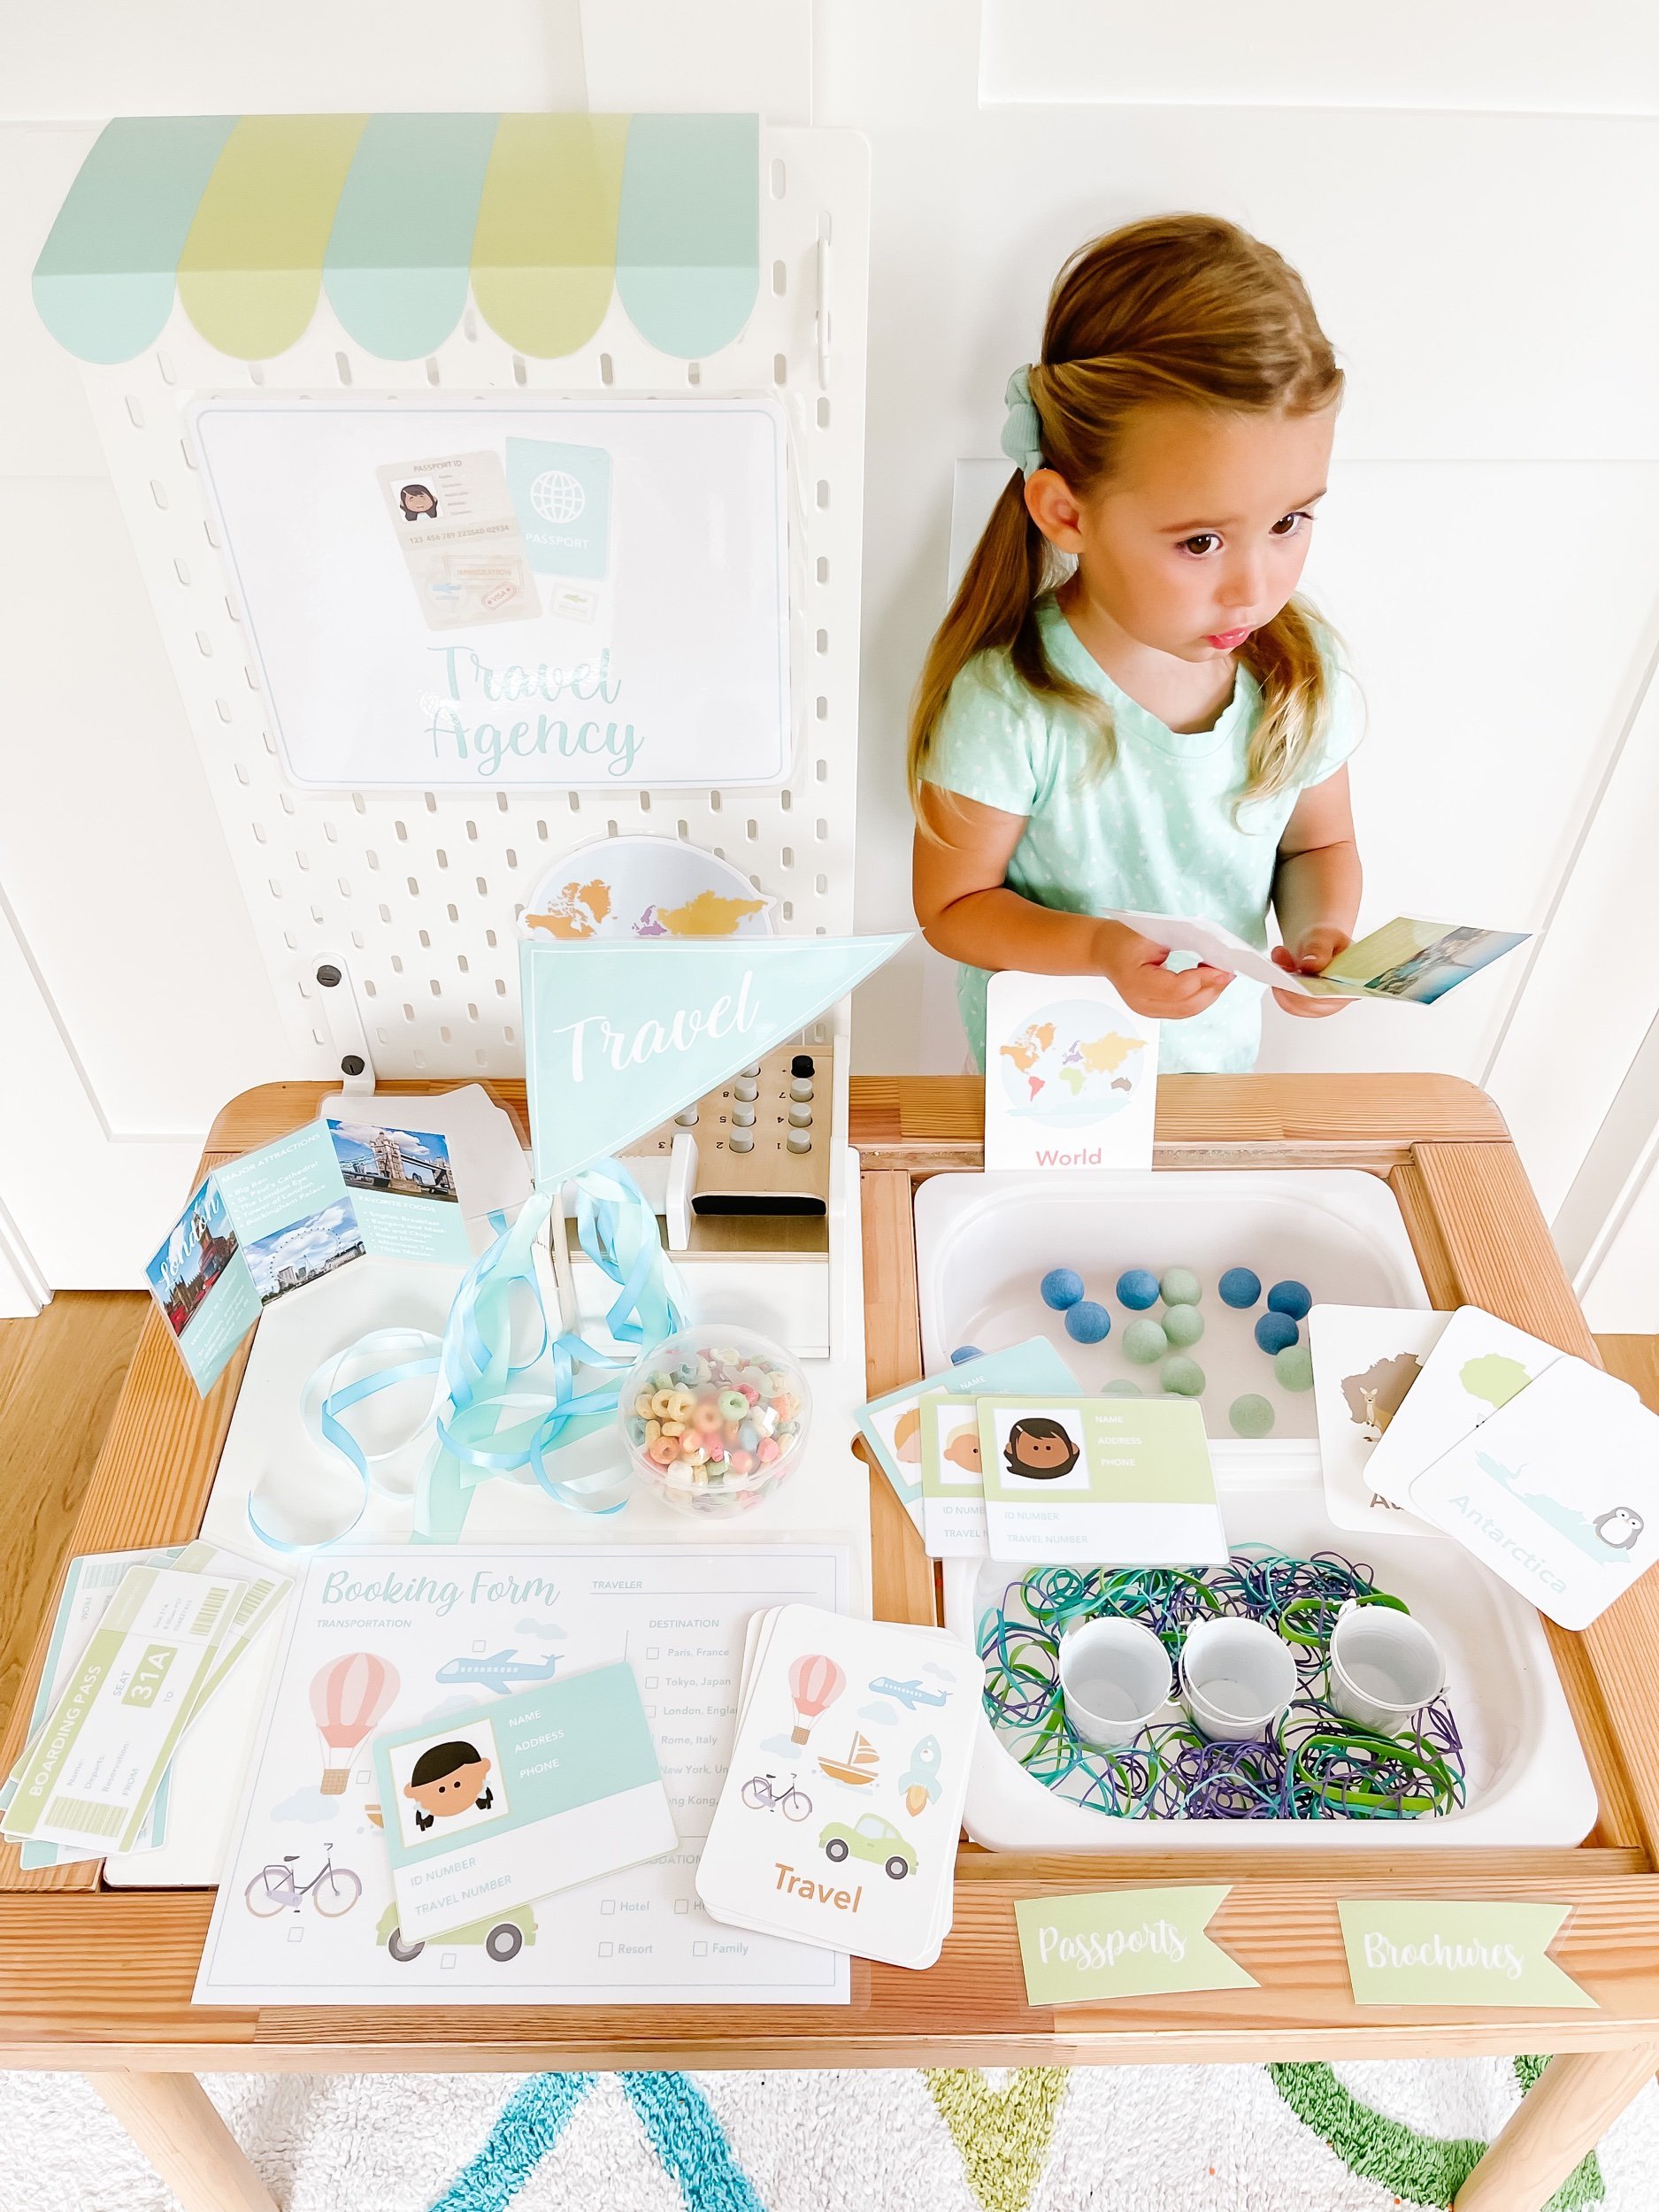
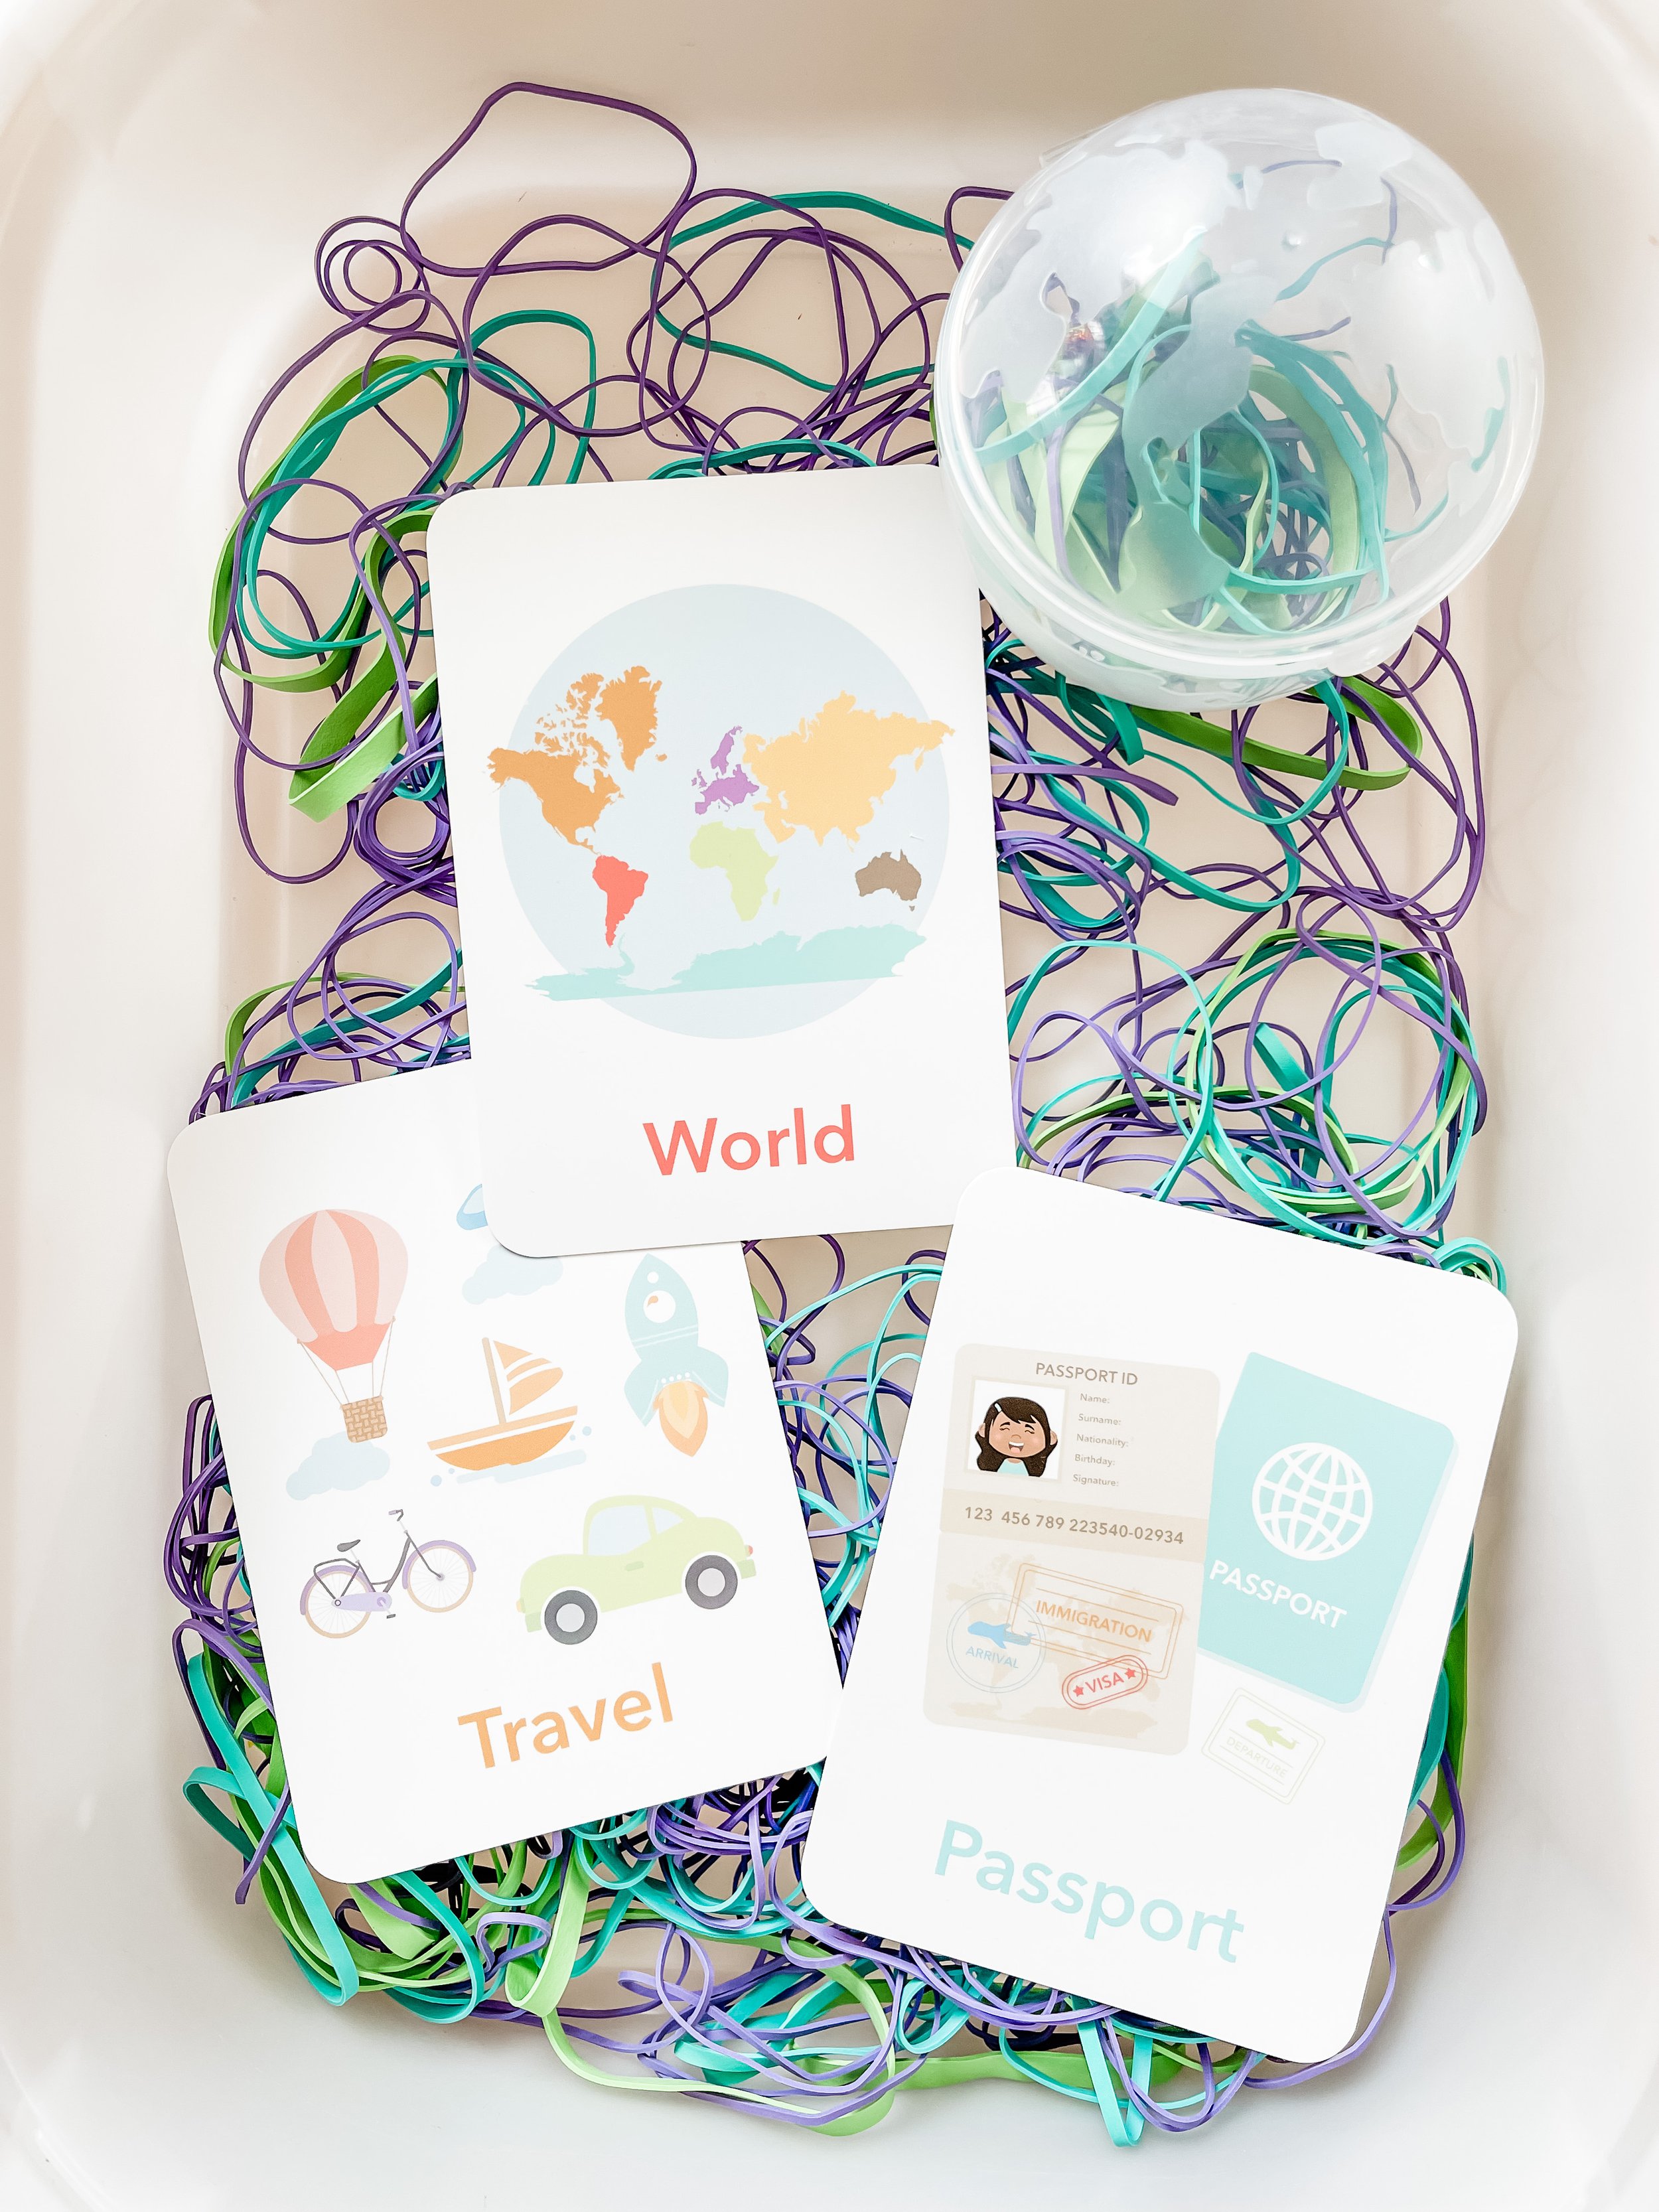
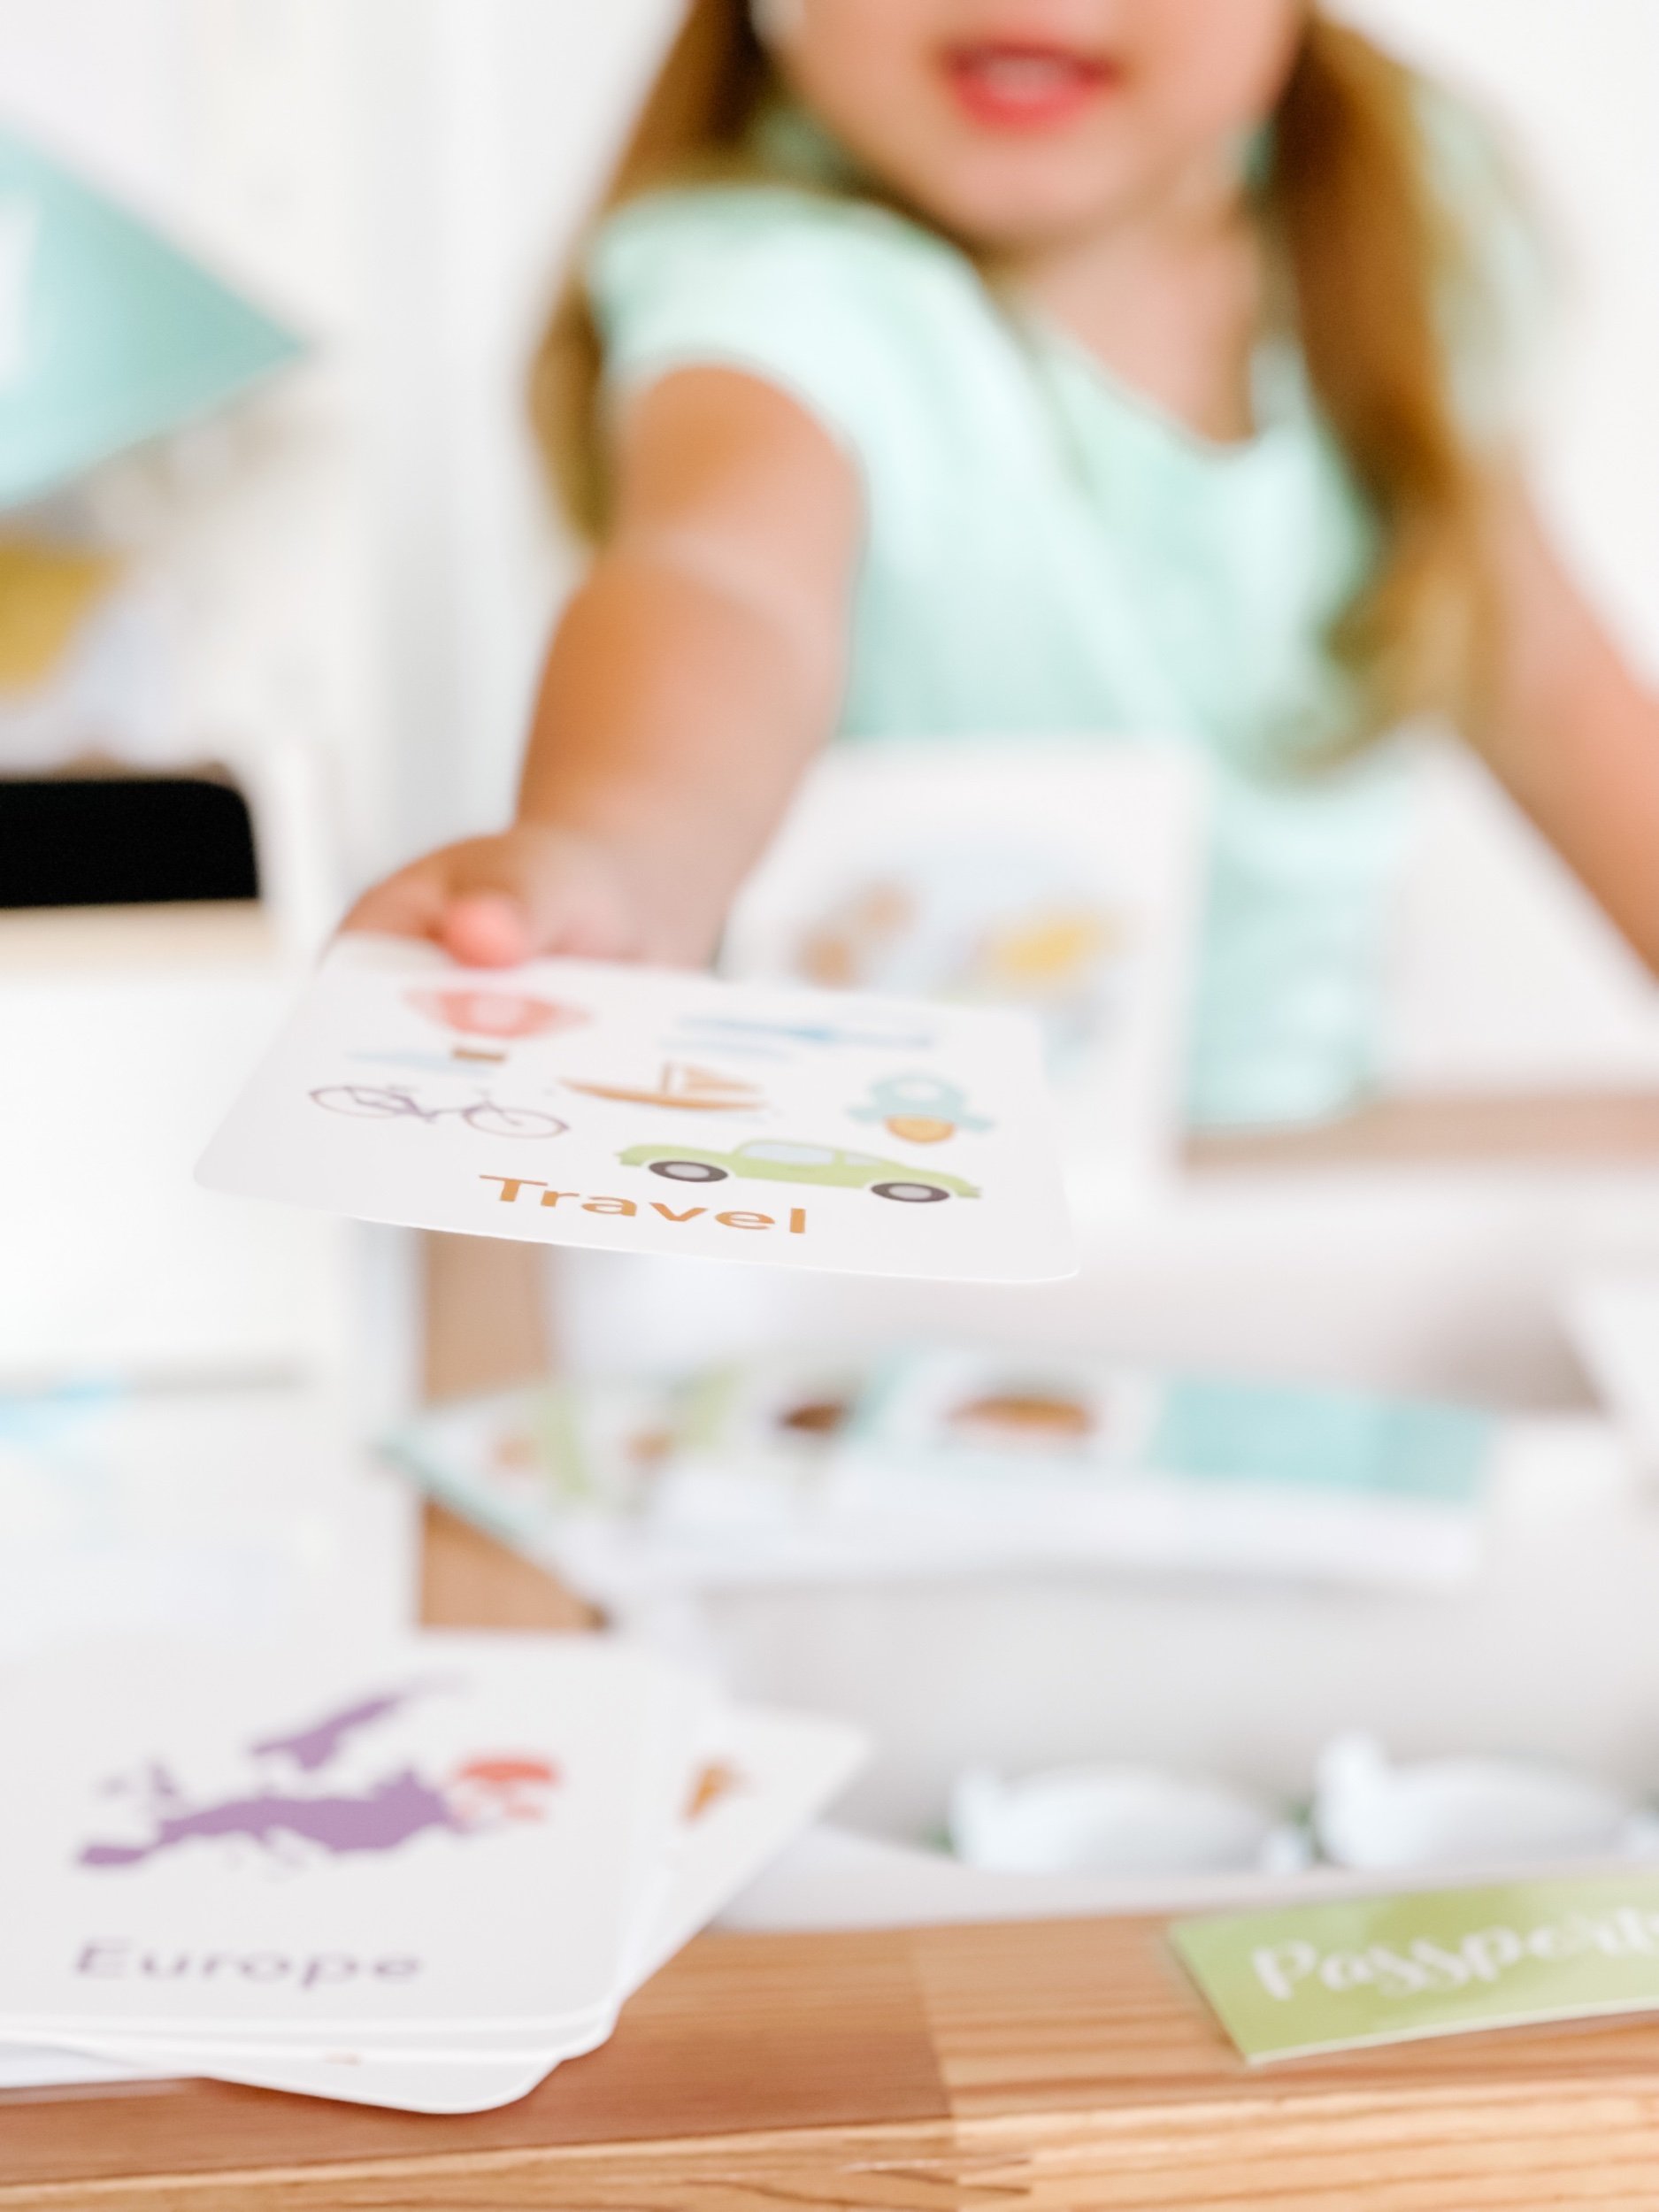
Are you looking for a fun and educational activity for your little ones that will spark their imagination and ignite their curiosity about the world? Look no further than our Travel Agency Dramatic and Sensory Play Kit! In this blog post, we will introduce you to the exciting printable decor in a delightful teal and lime green theme that includes an awning, travel agency sign, pennant flag, cut out globe, 2 brochures, and a sign-up form. Additionally, we will explore three sensory bin activities that perfectly complement this travel-inspired theme. Let's dive in!


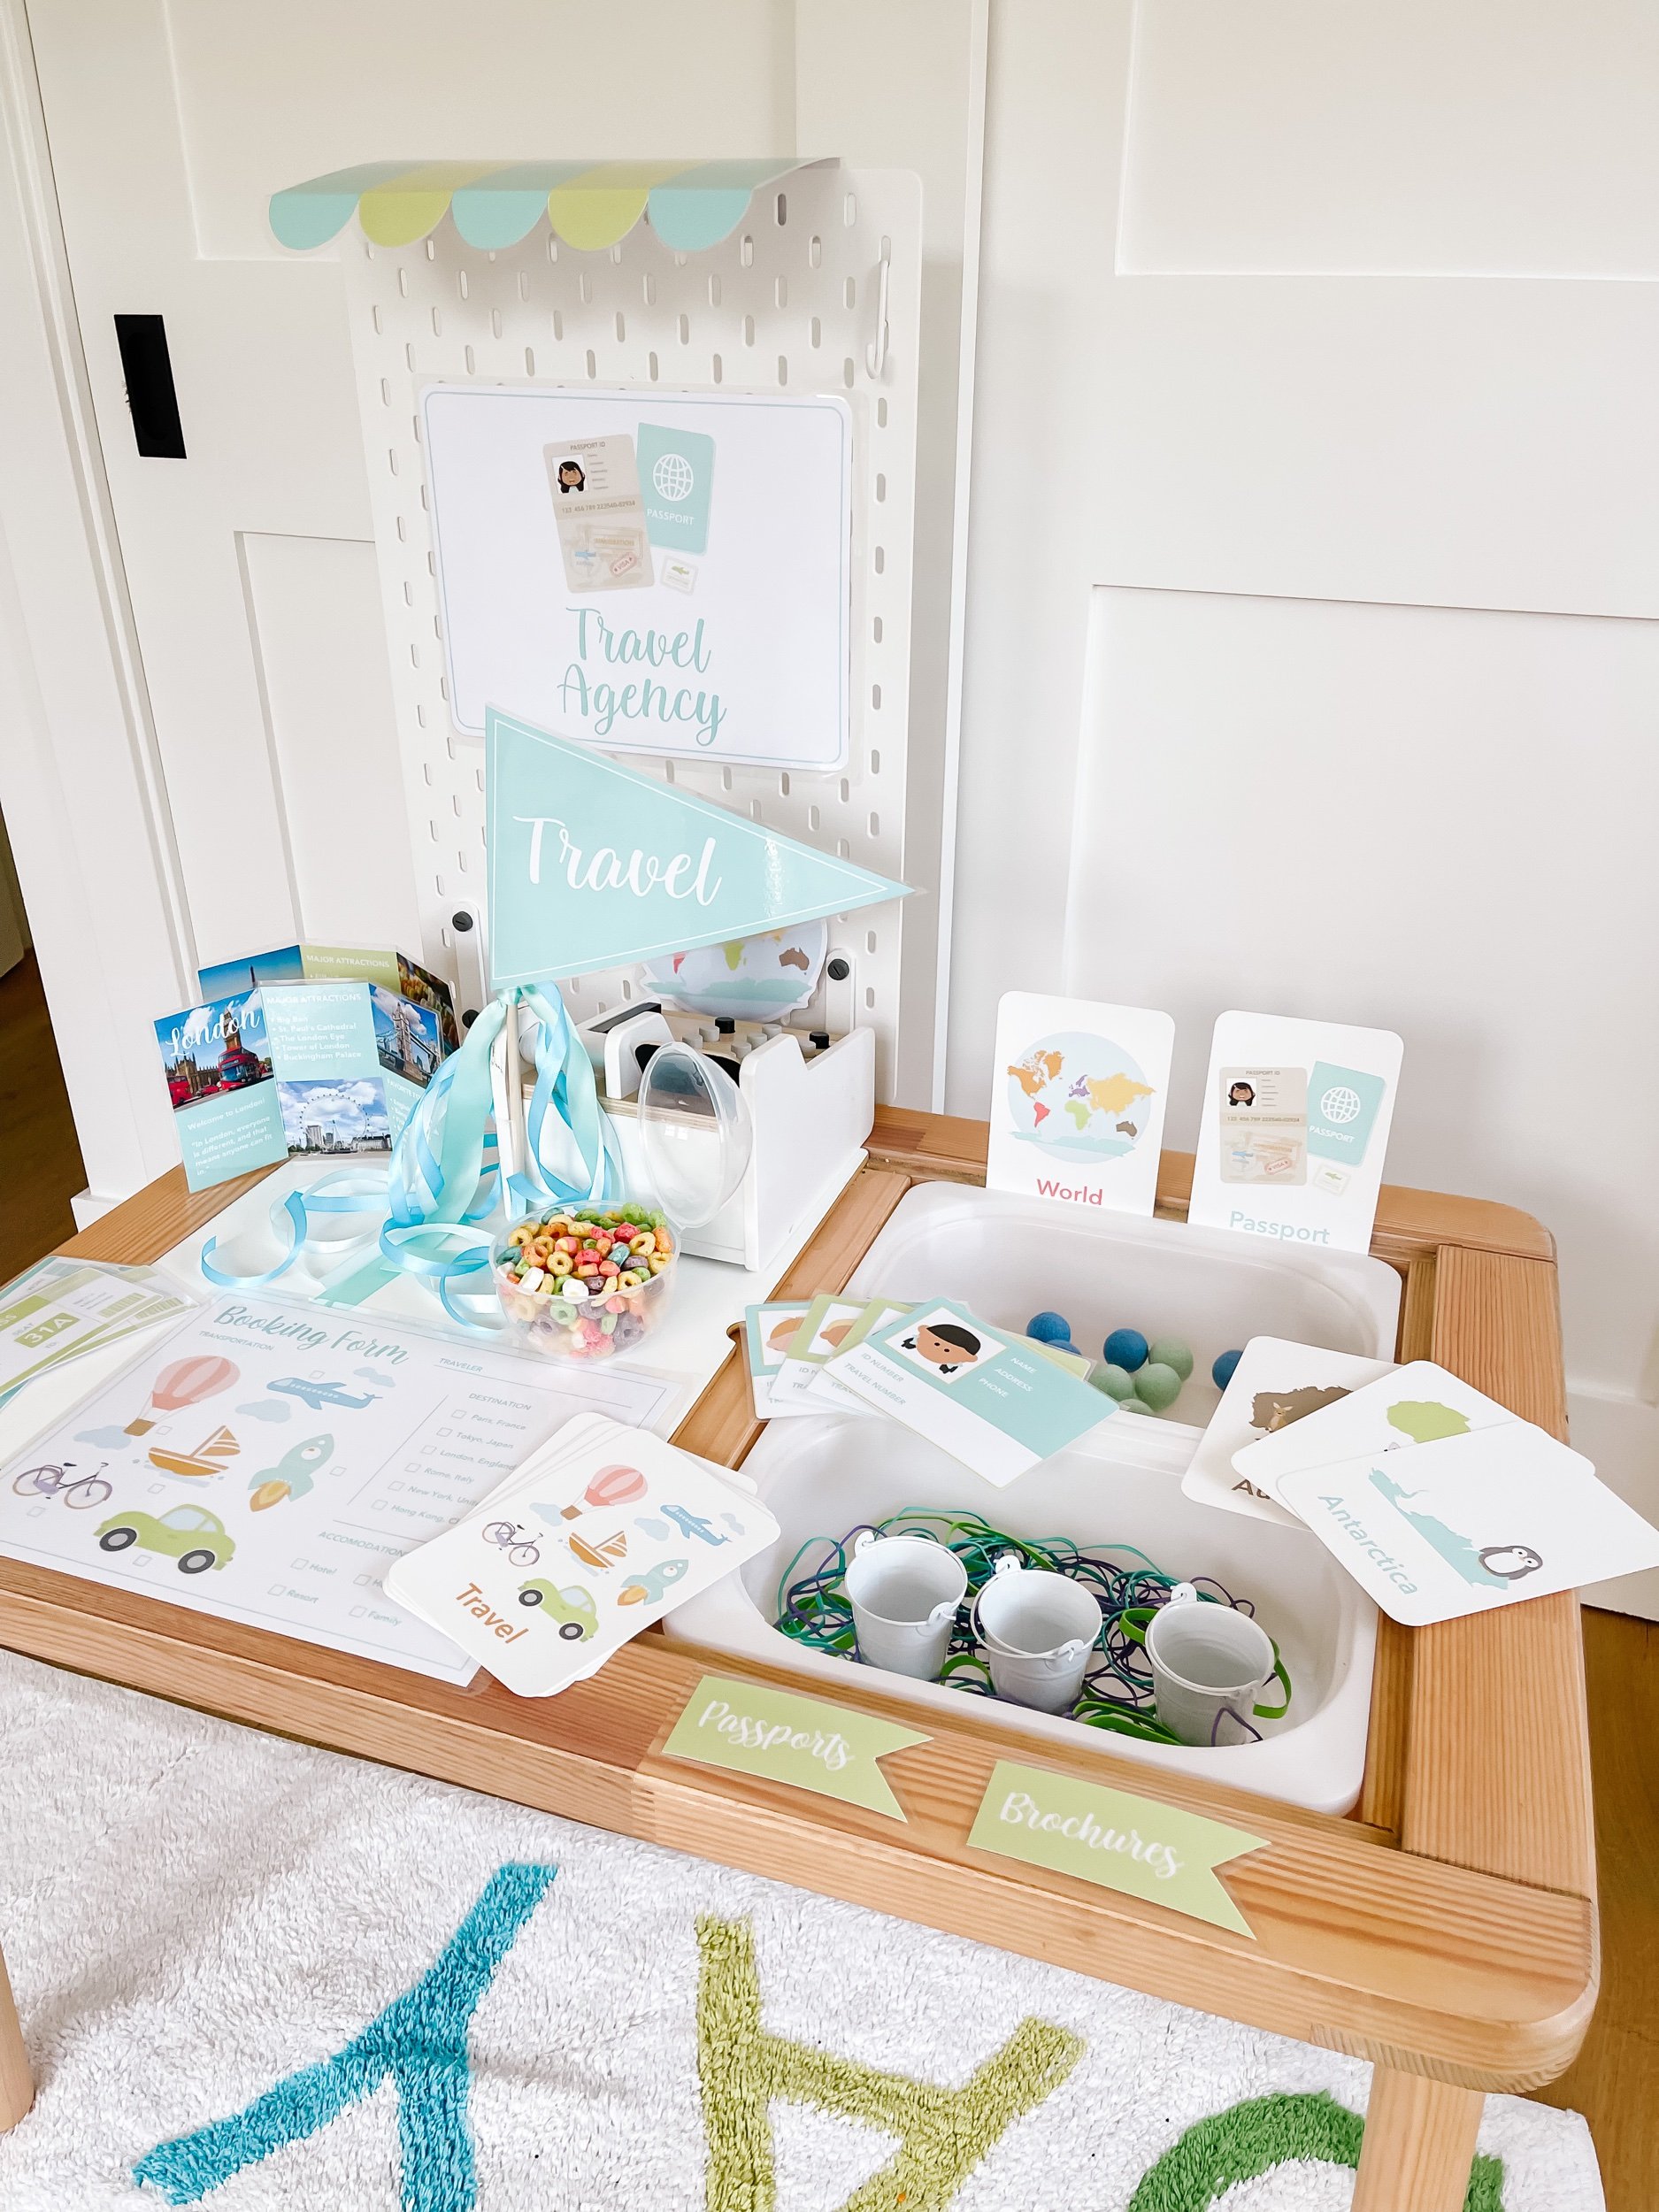

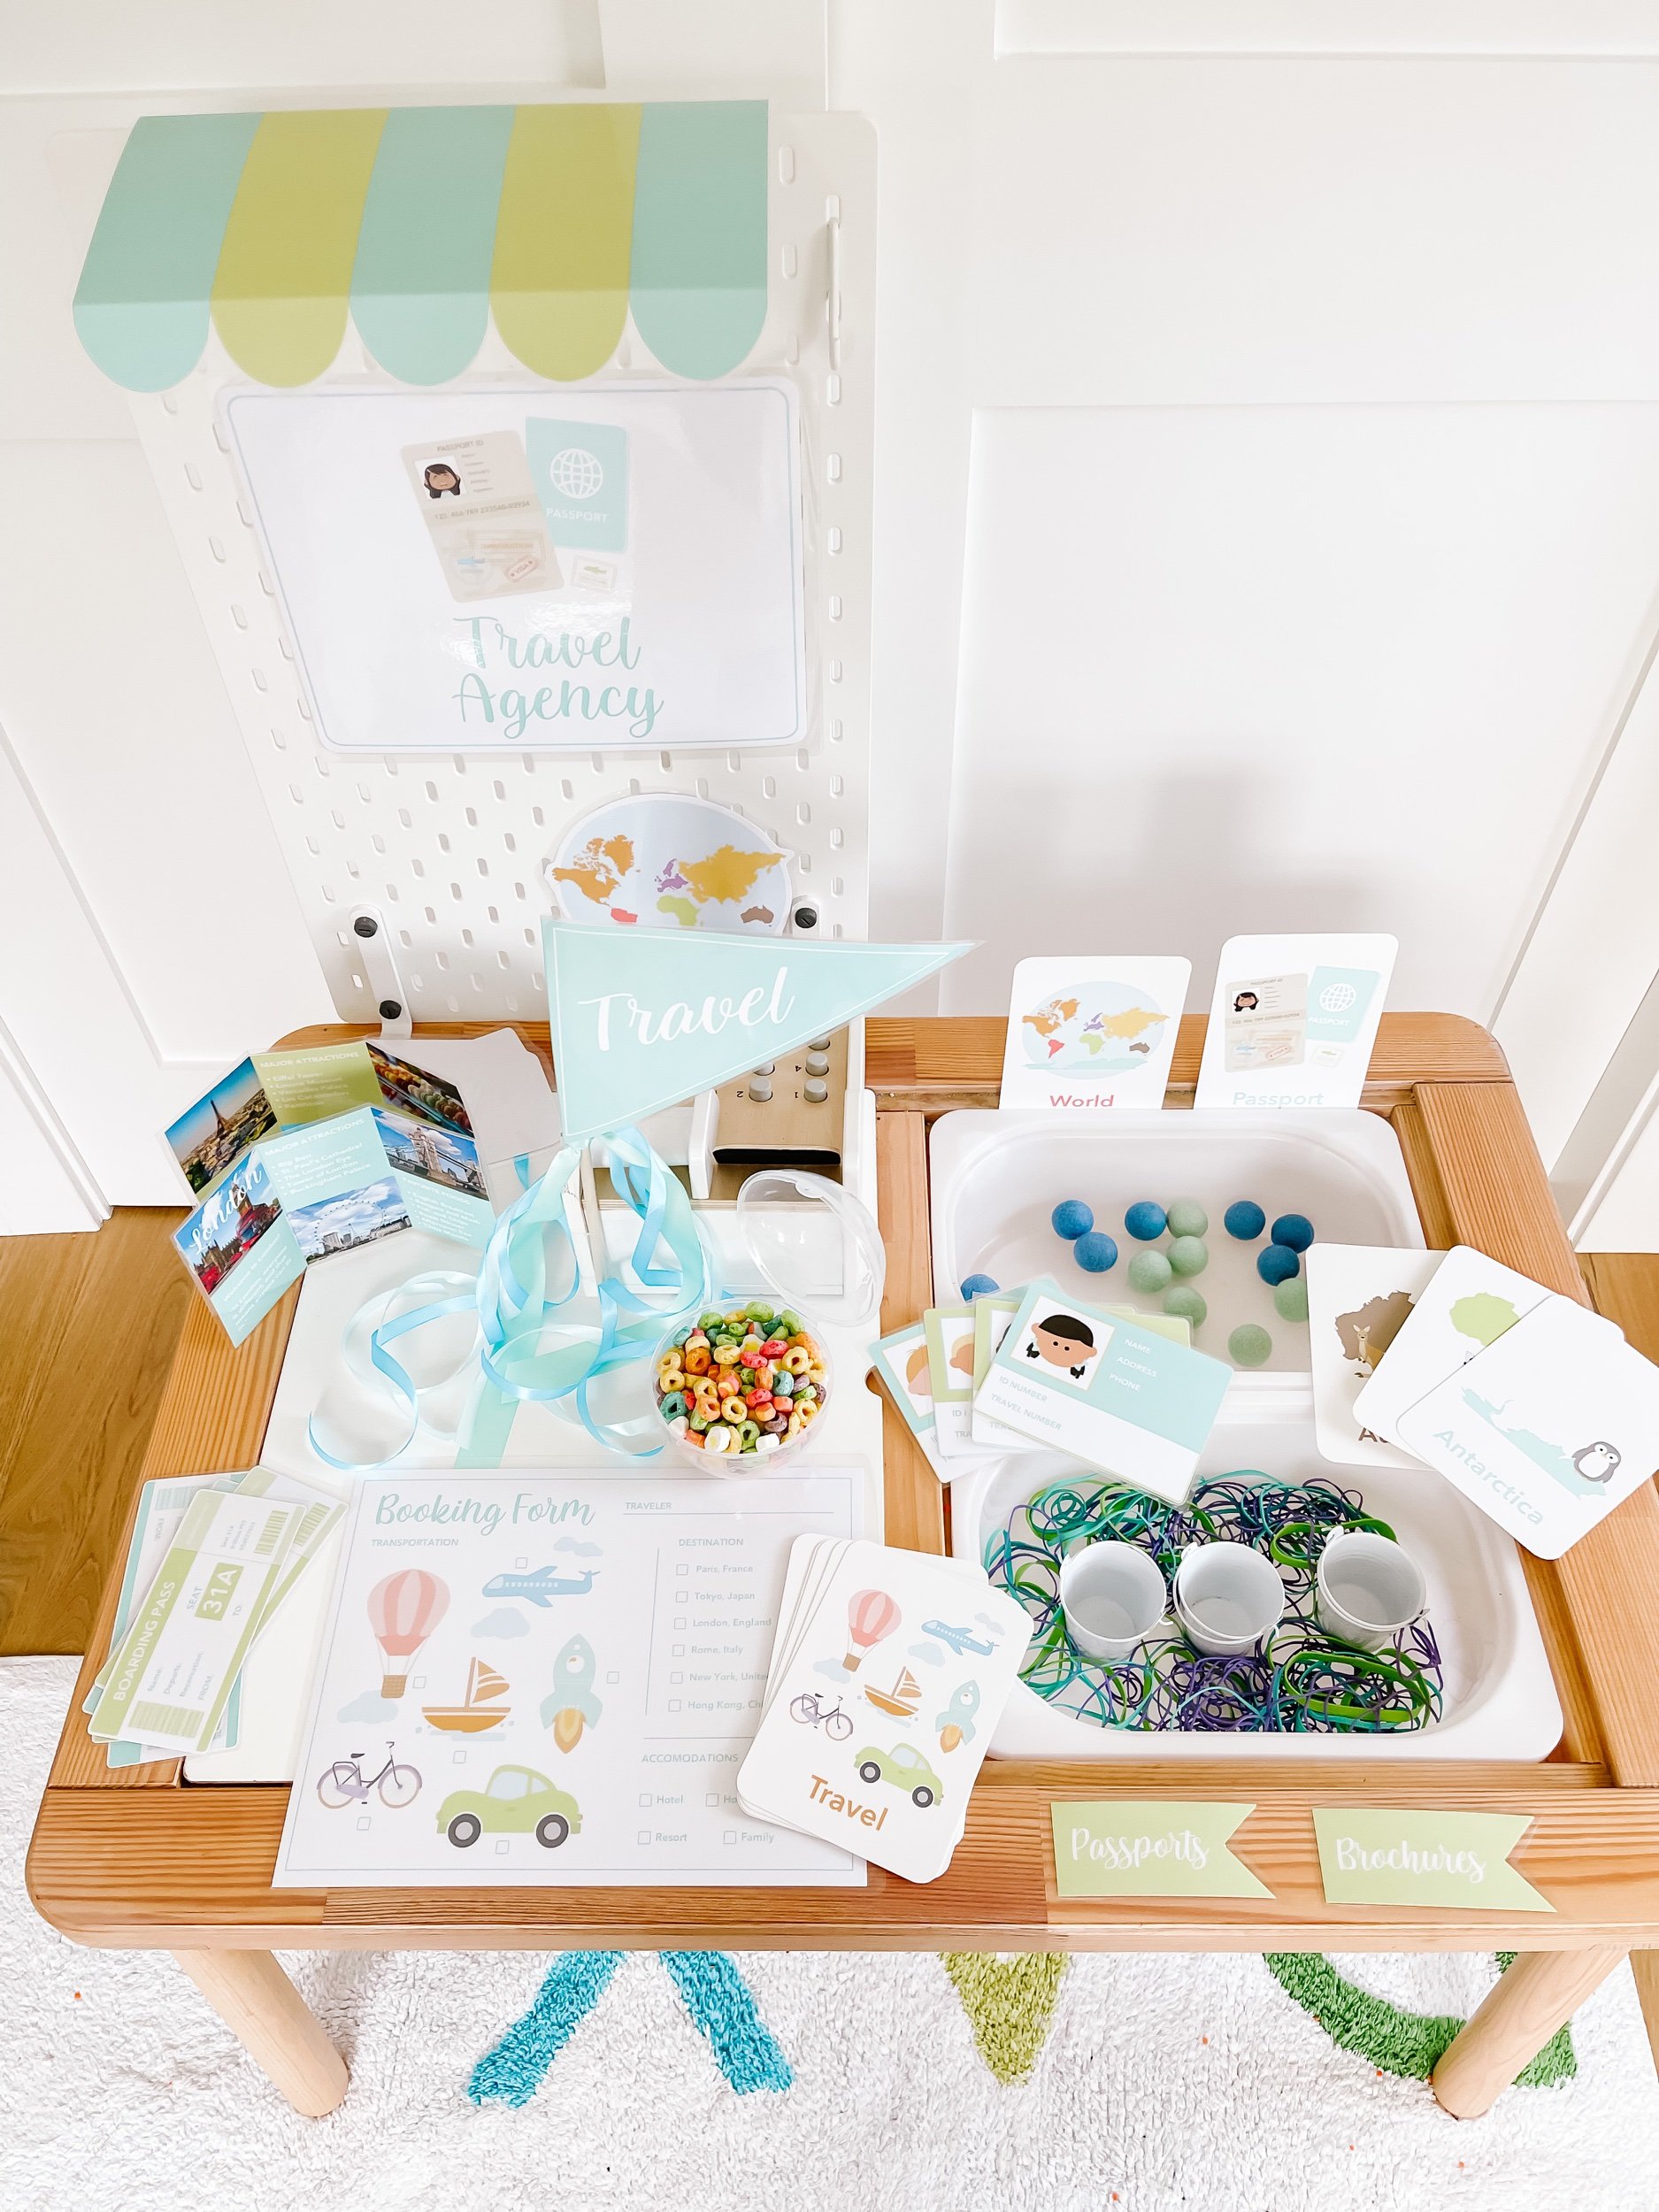
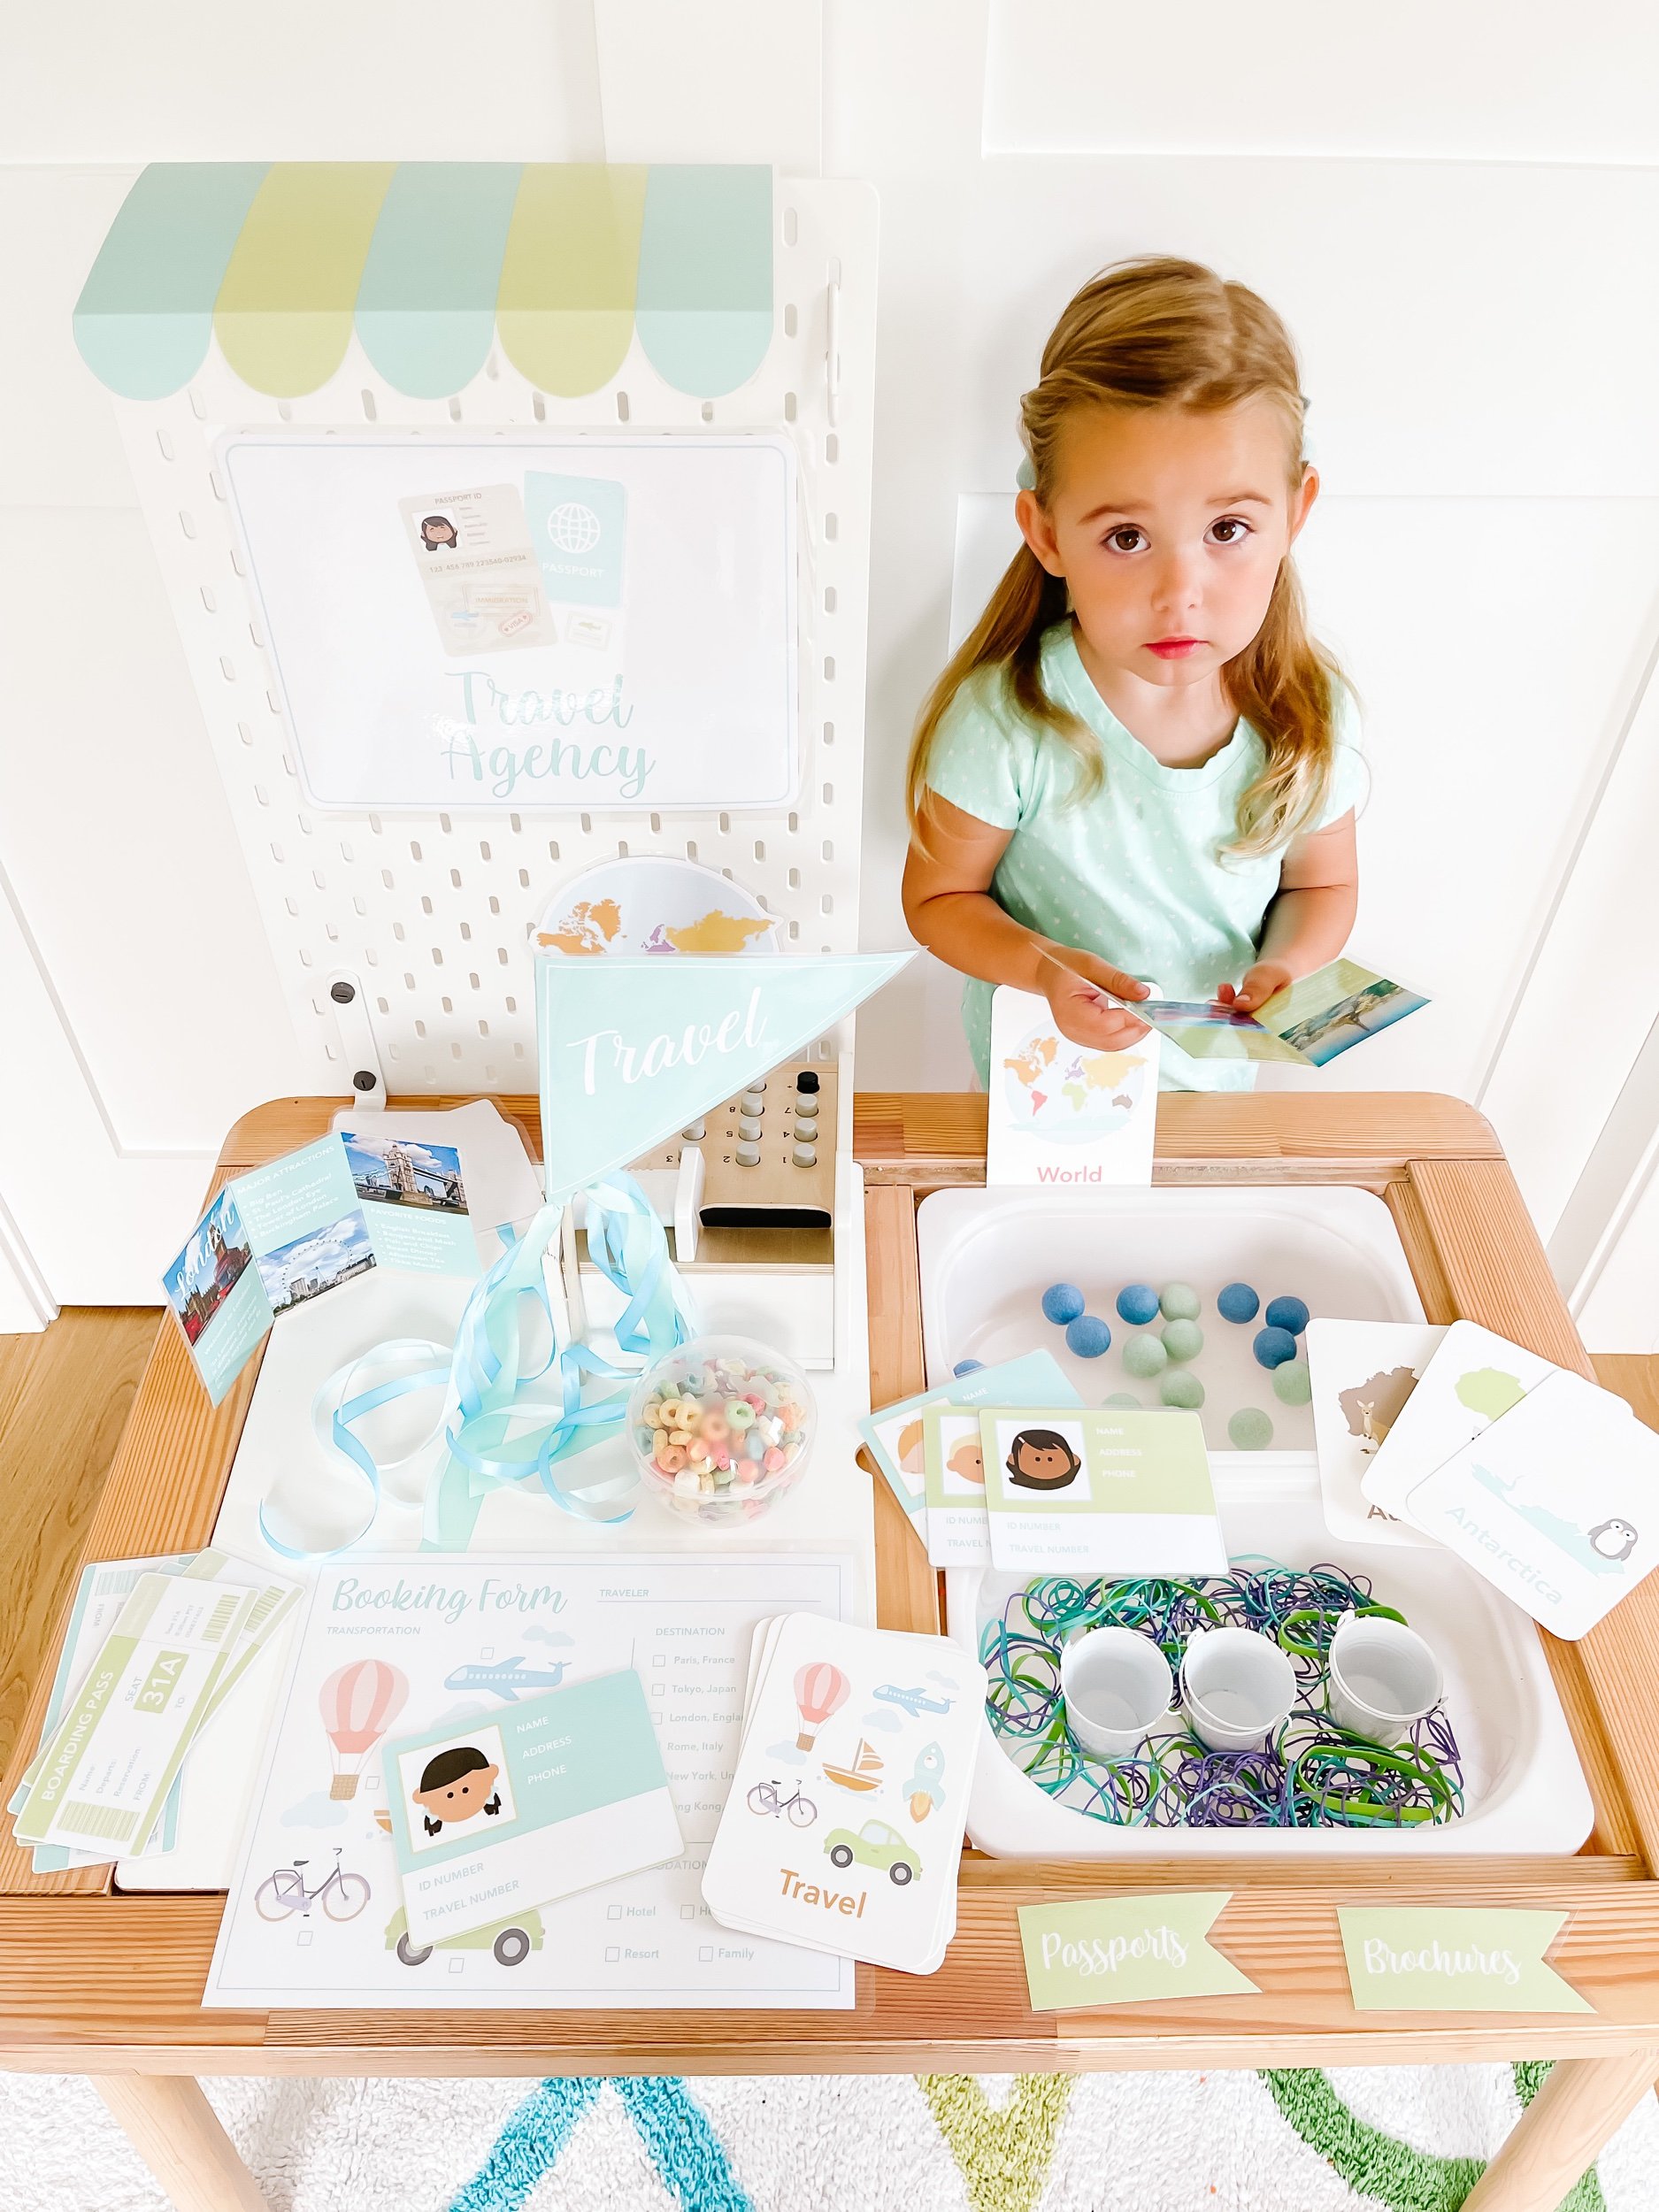
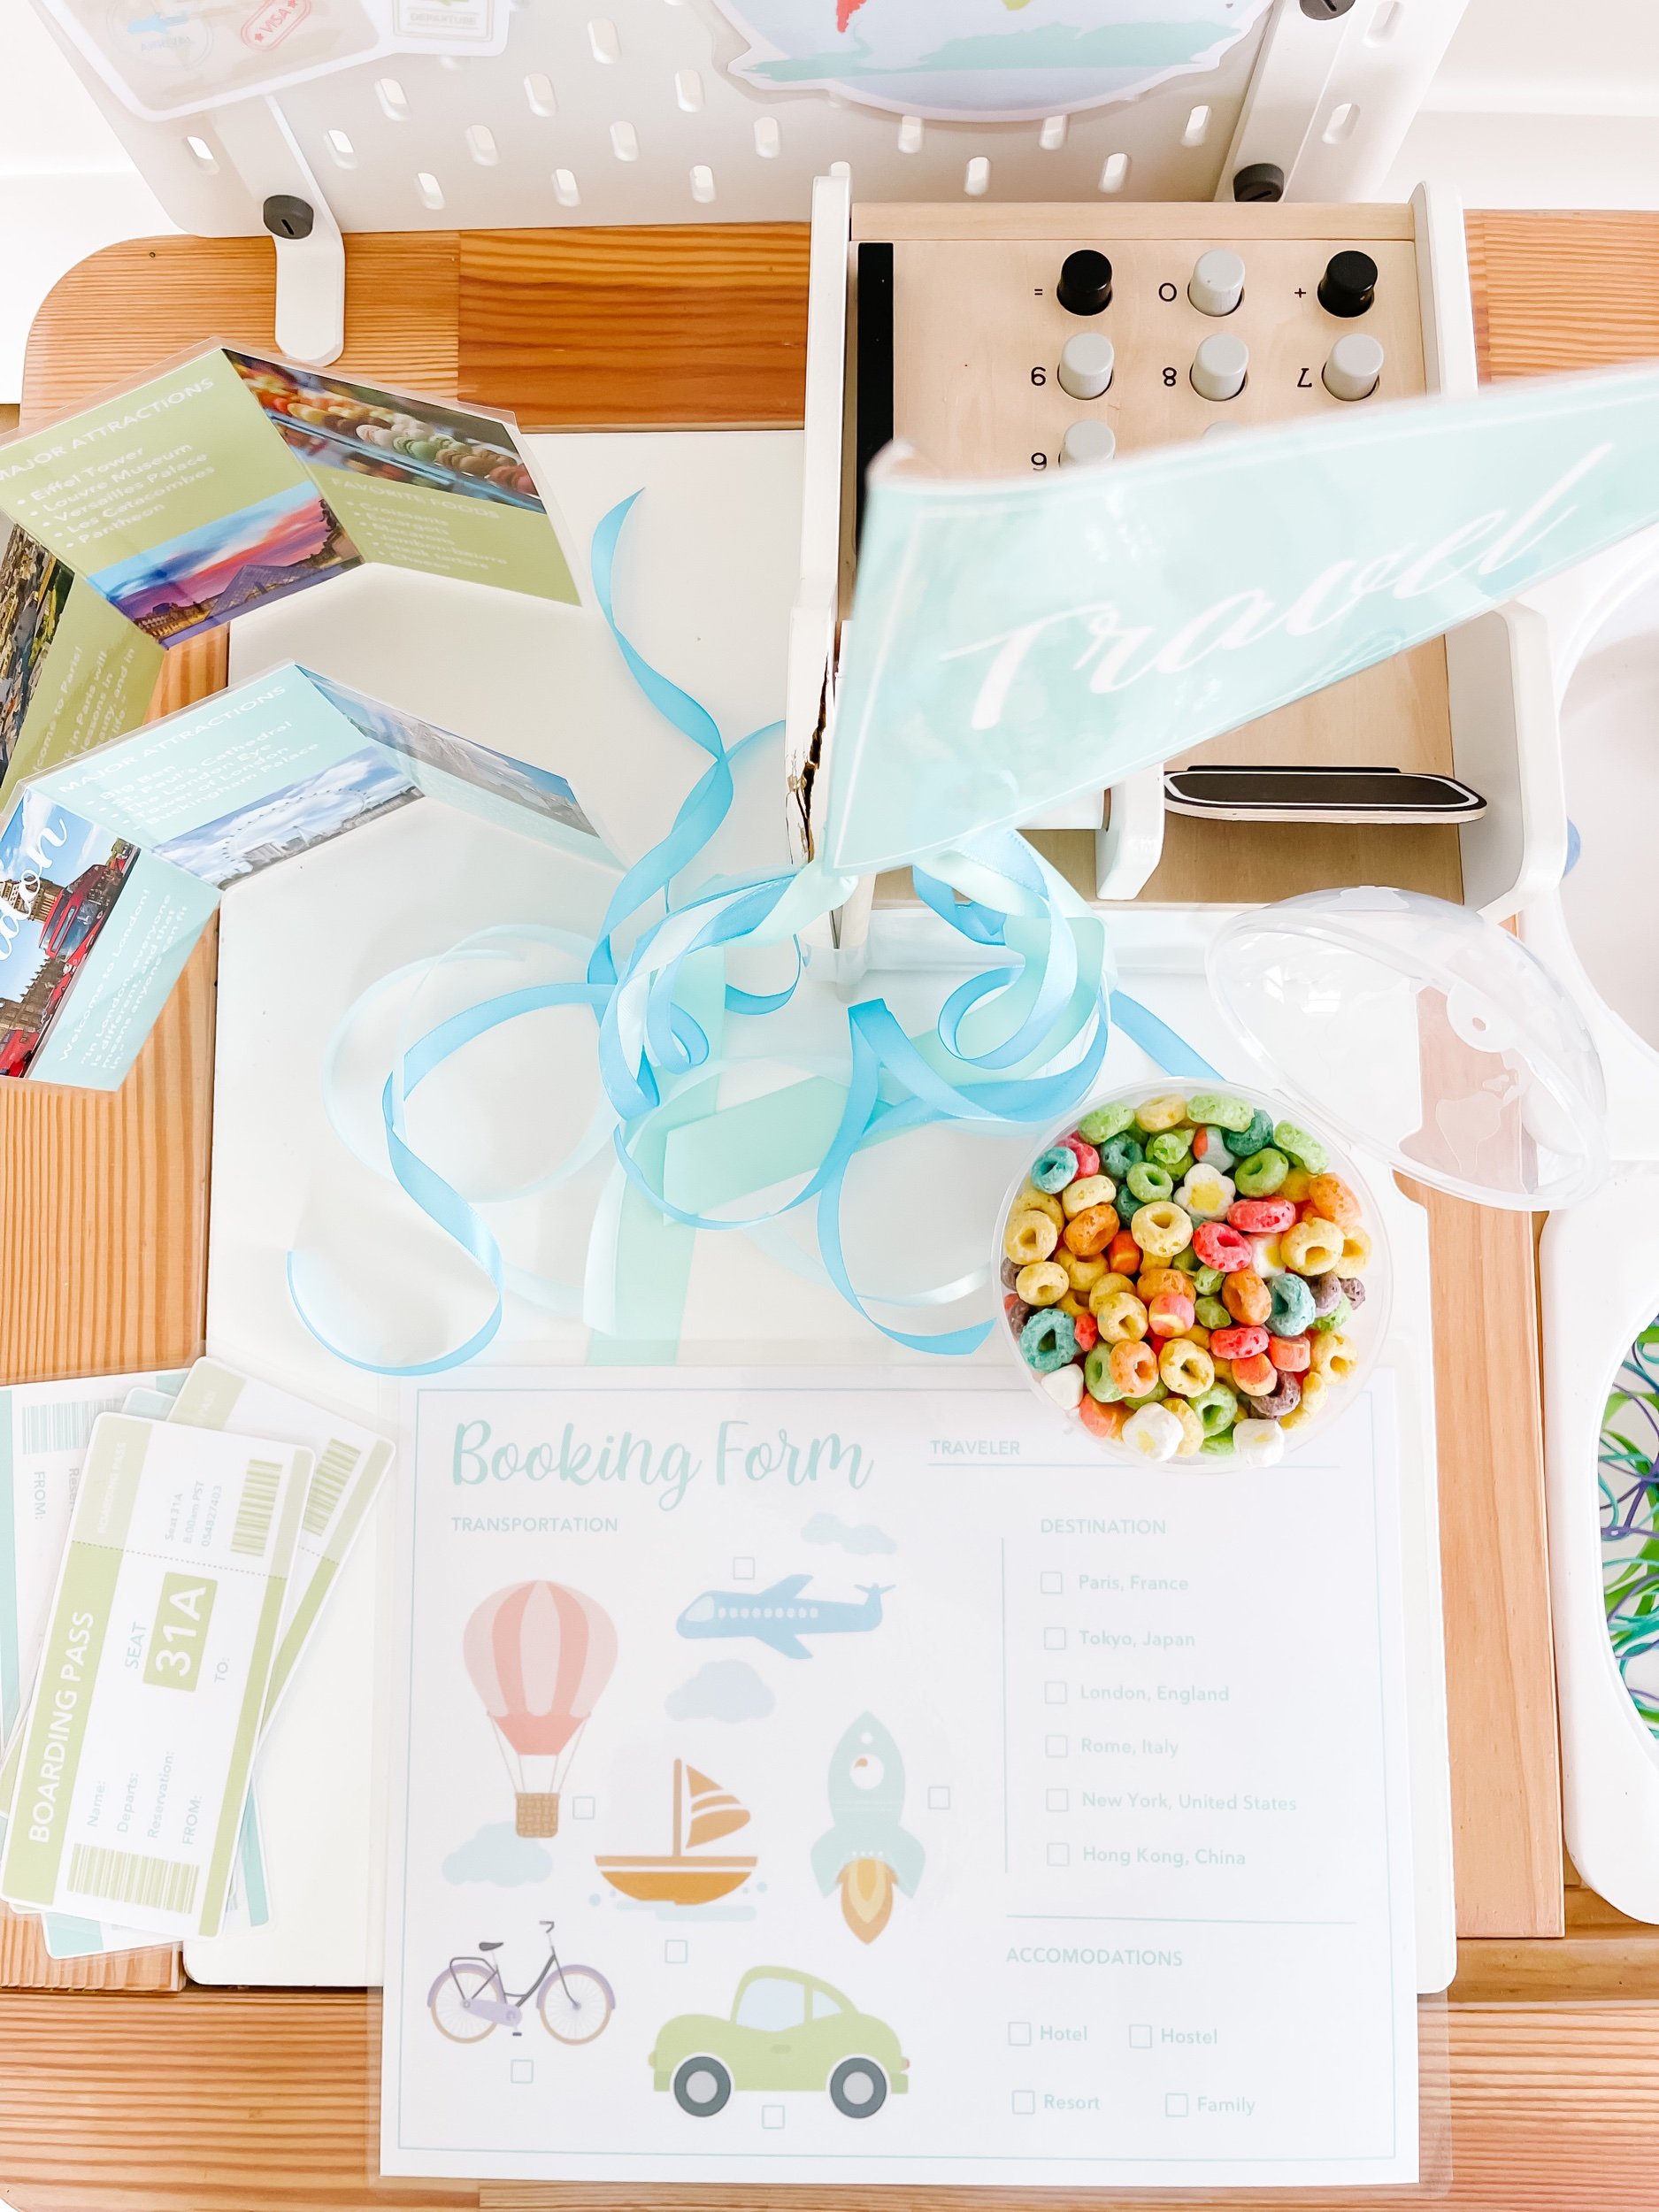
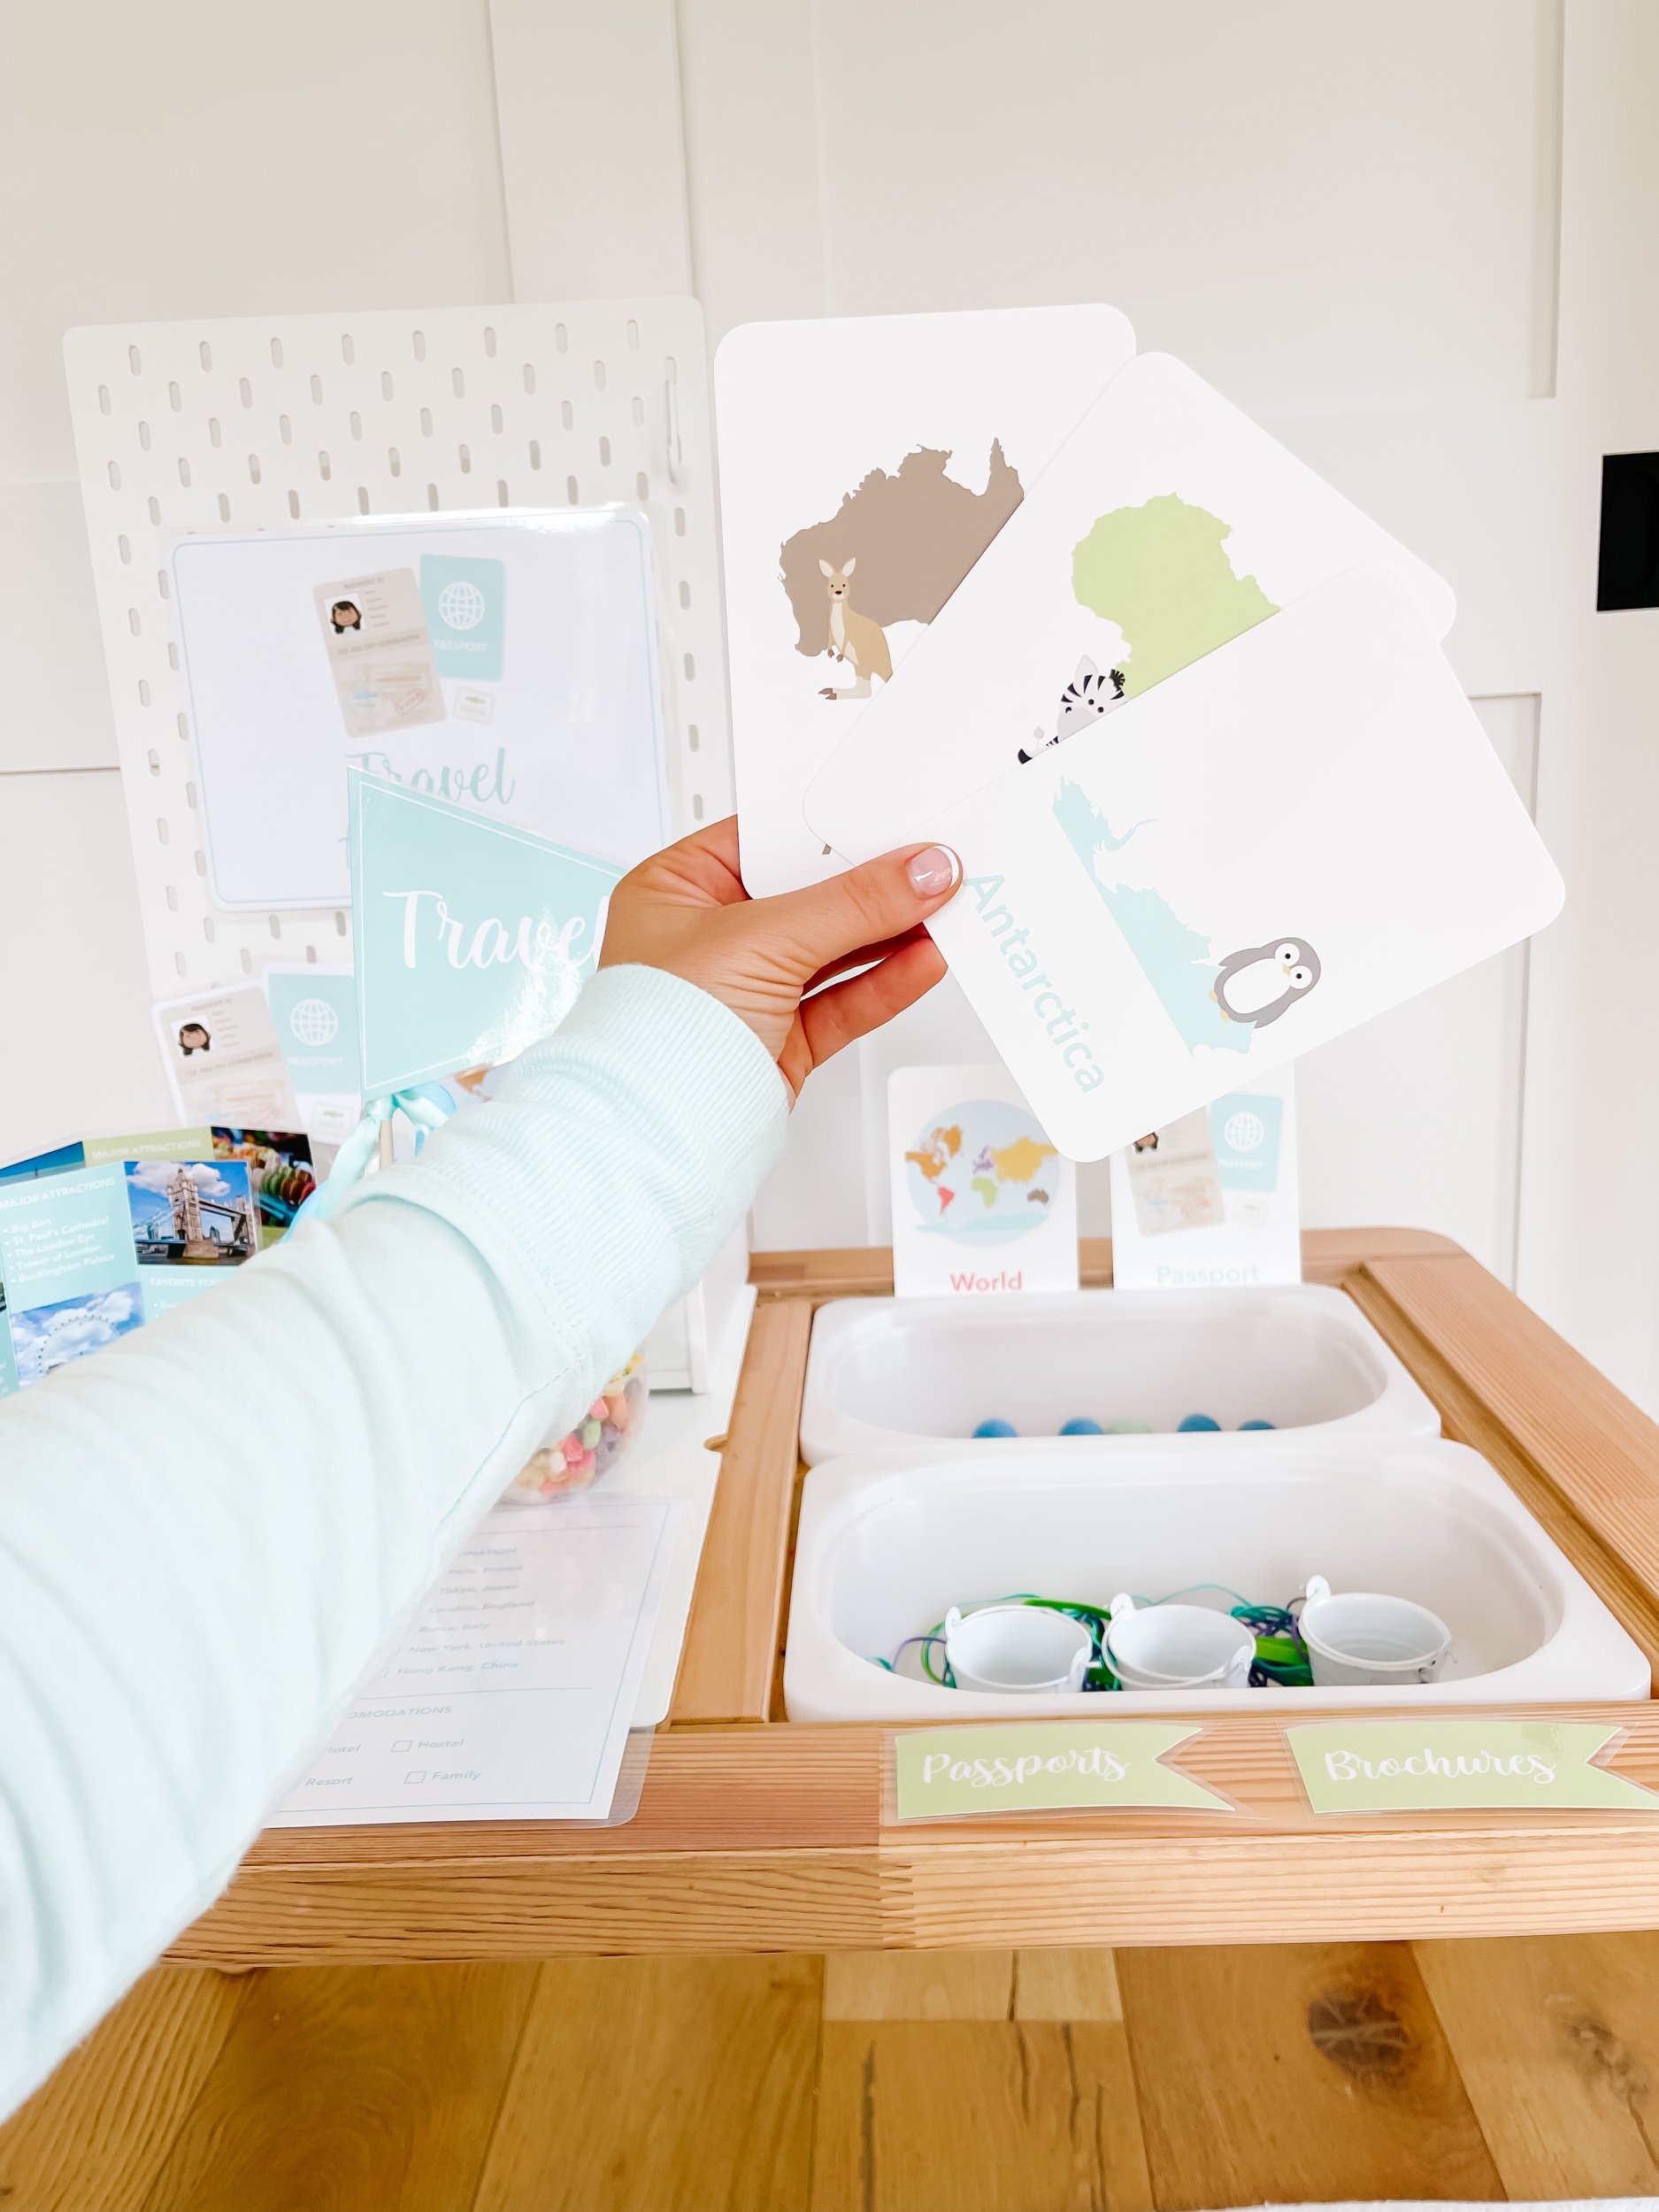
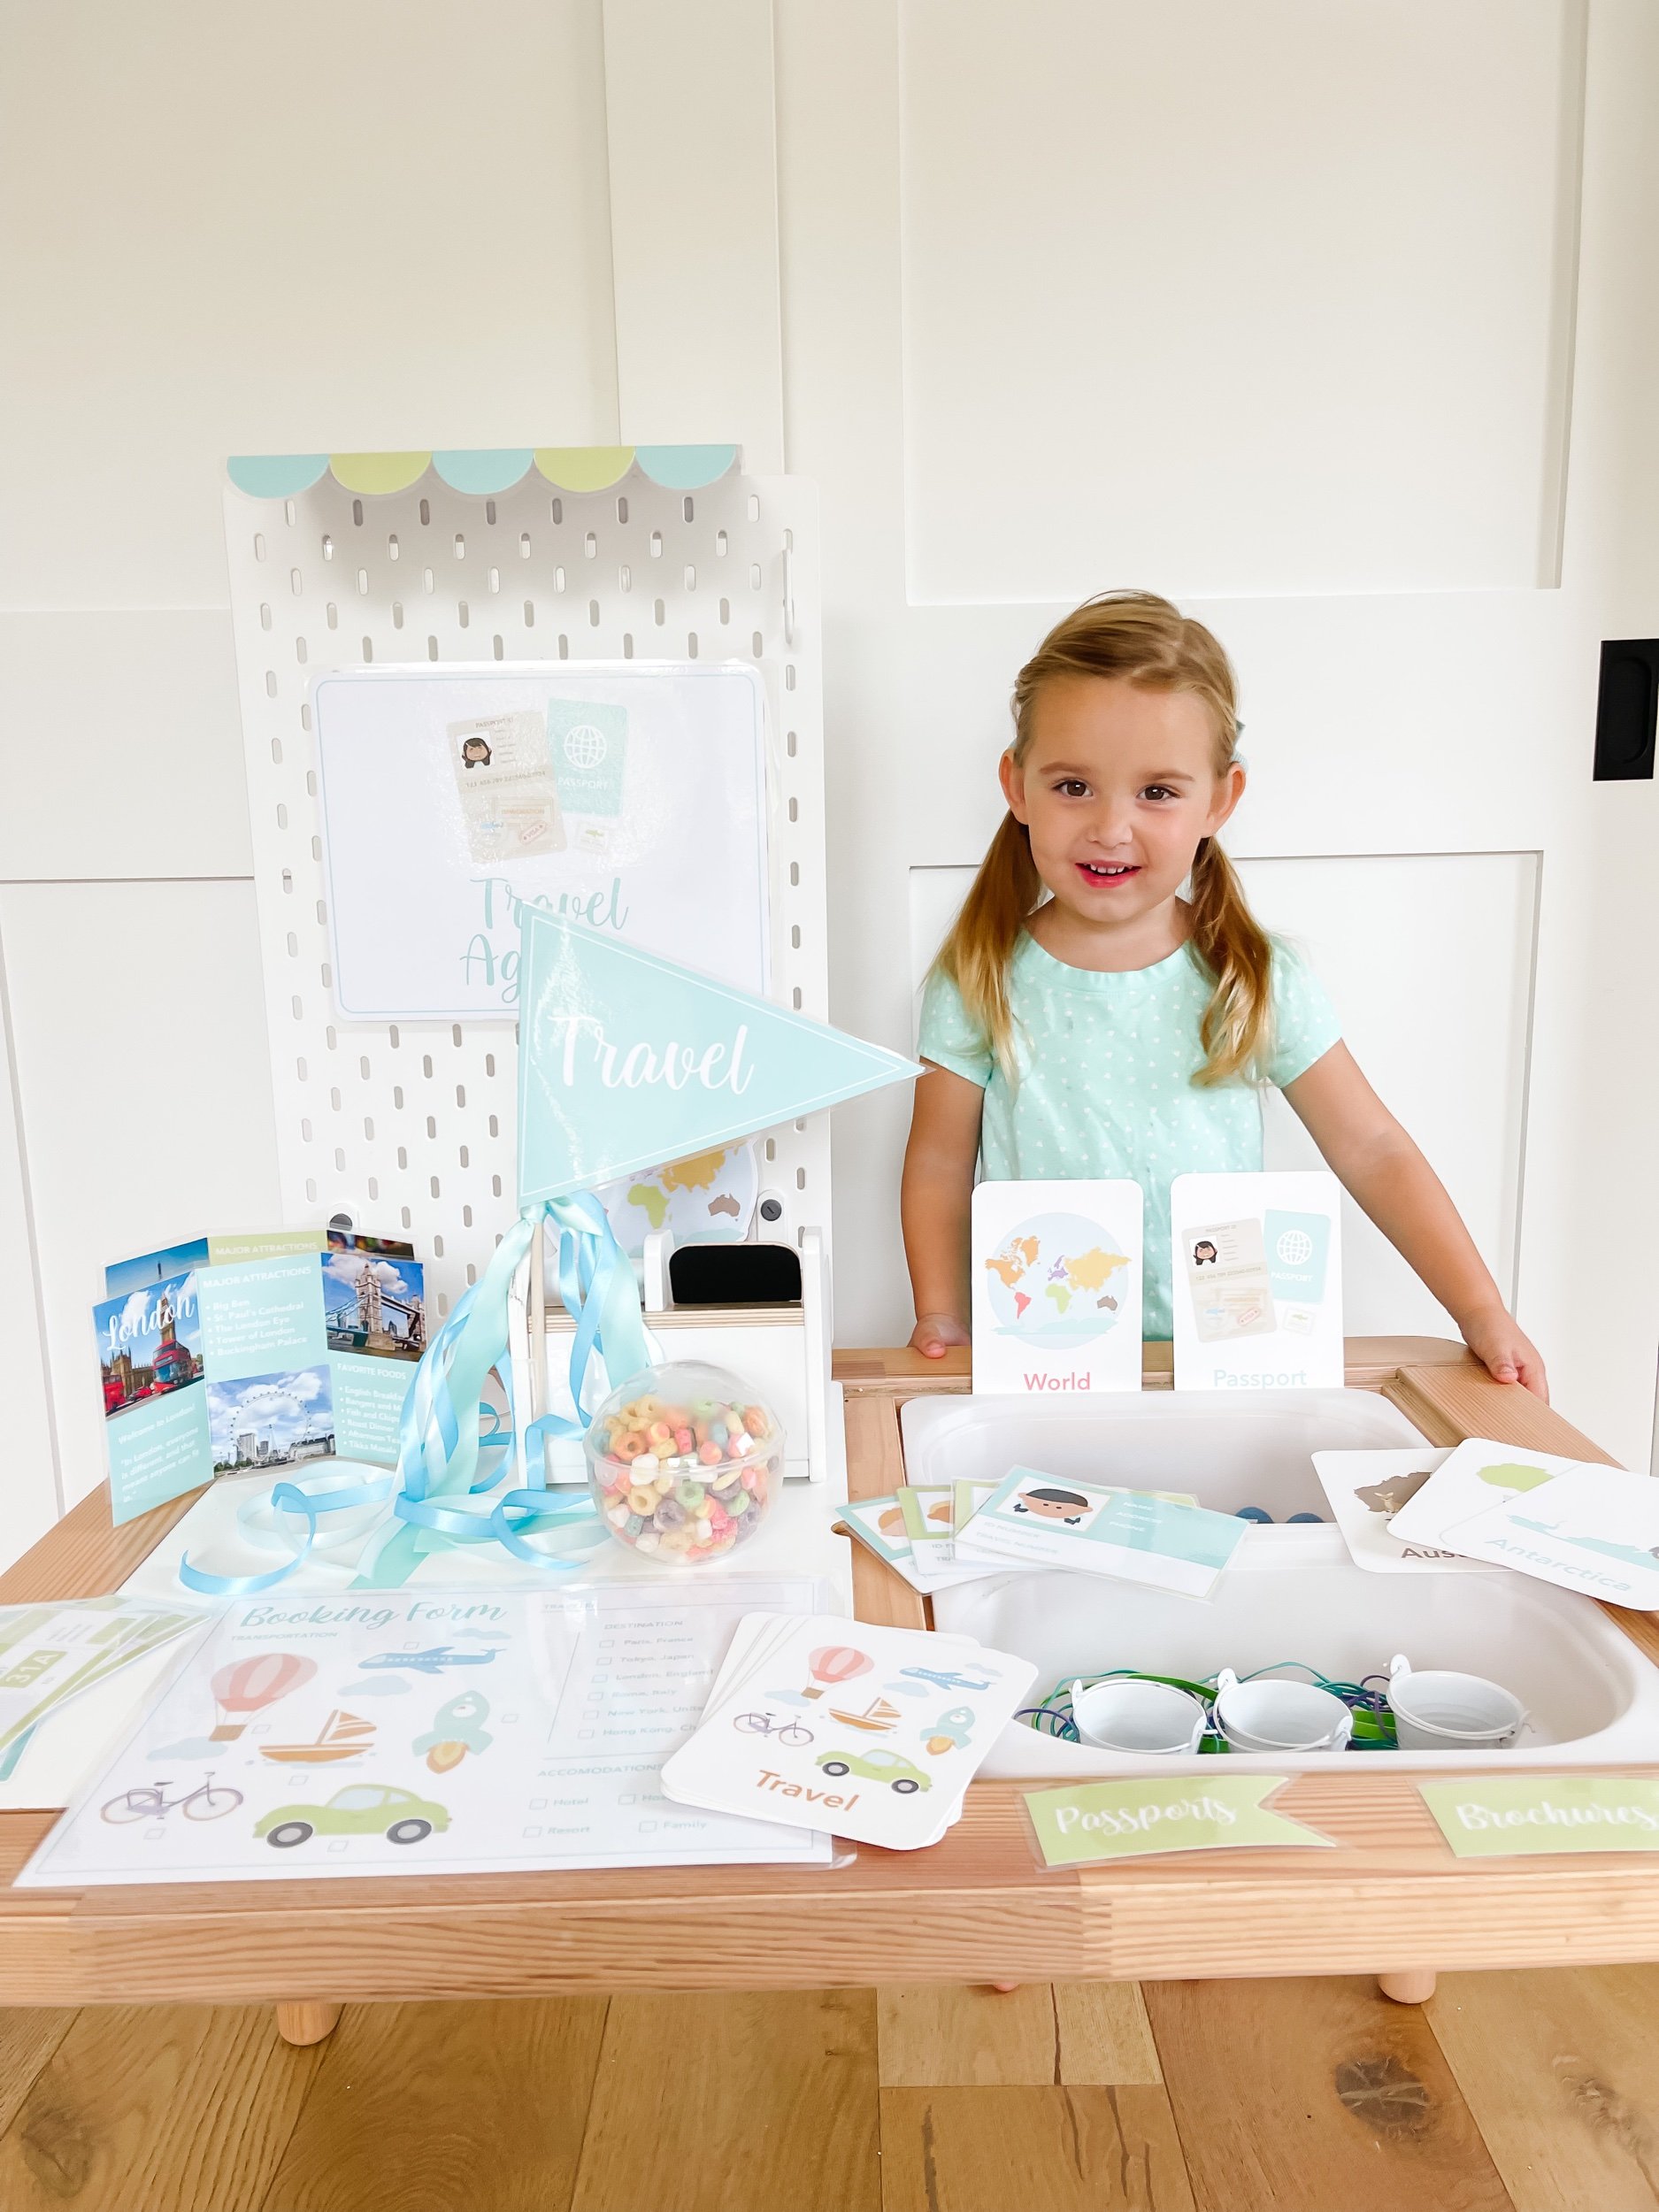
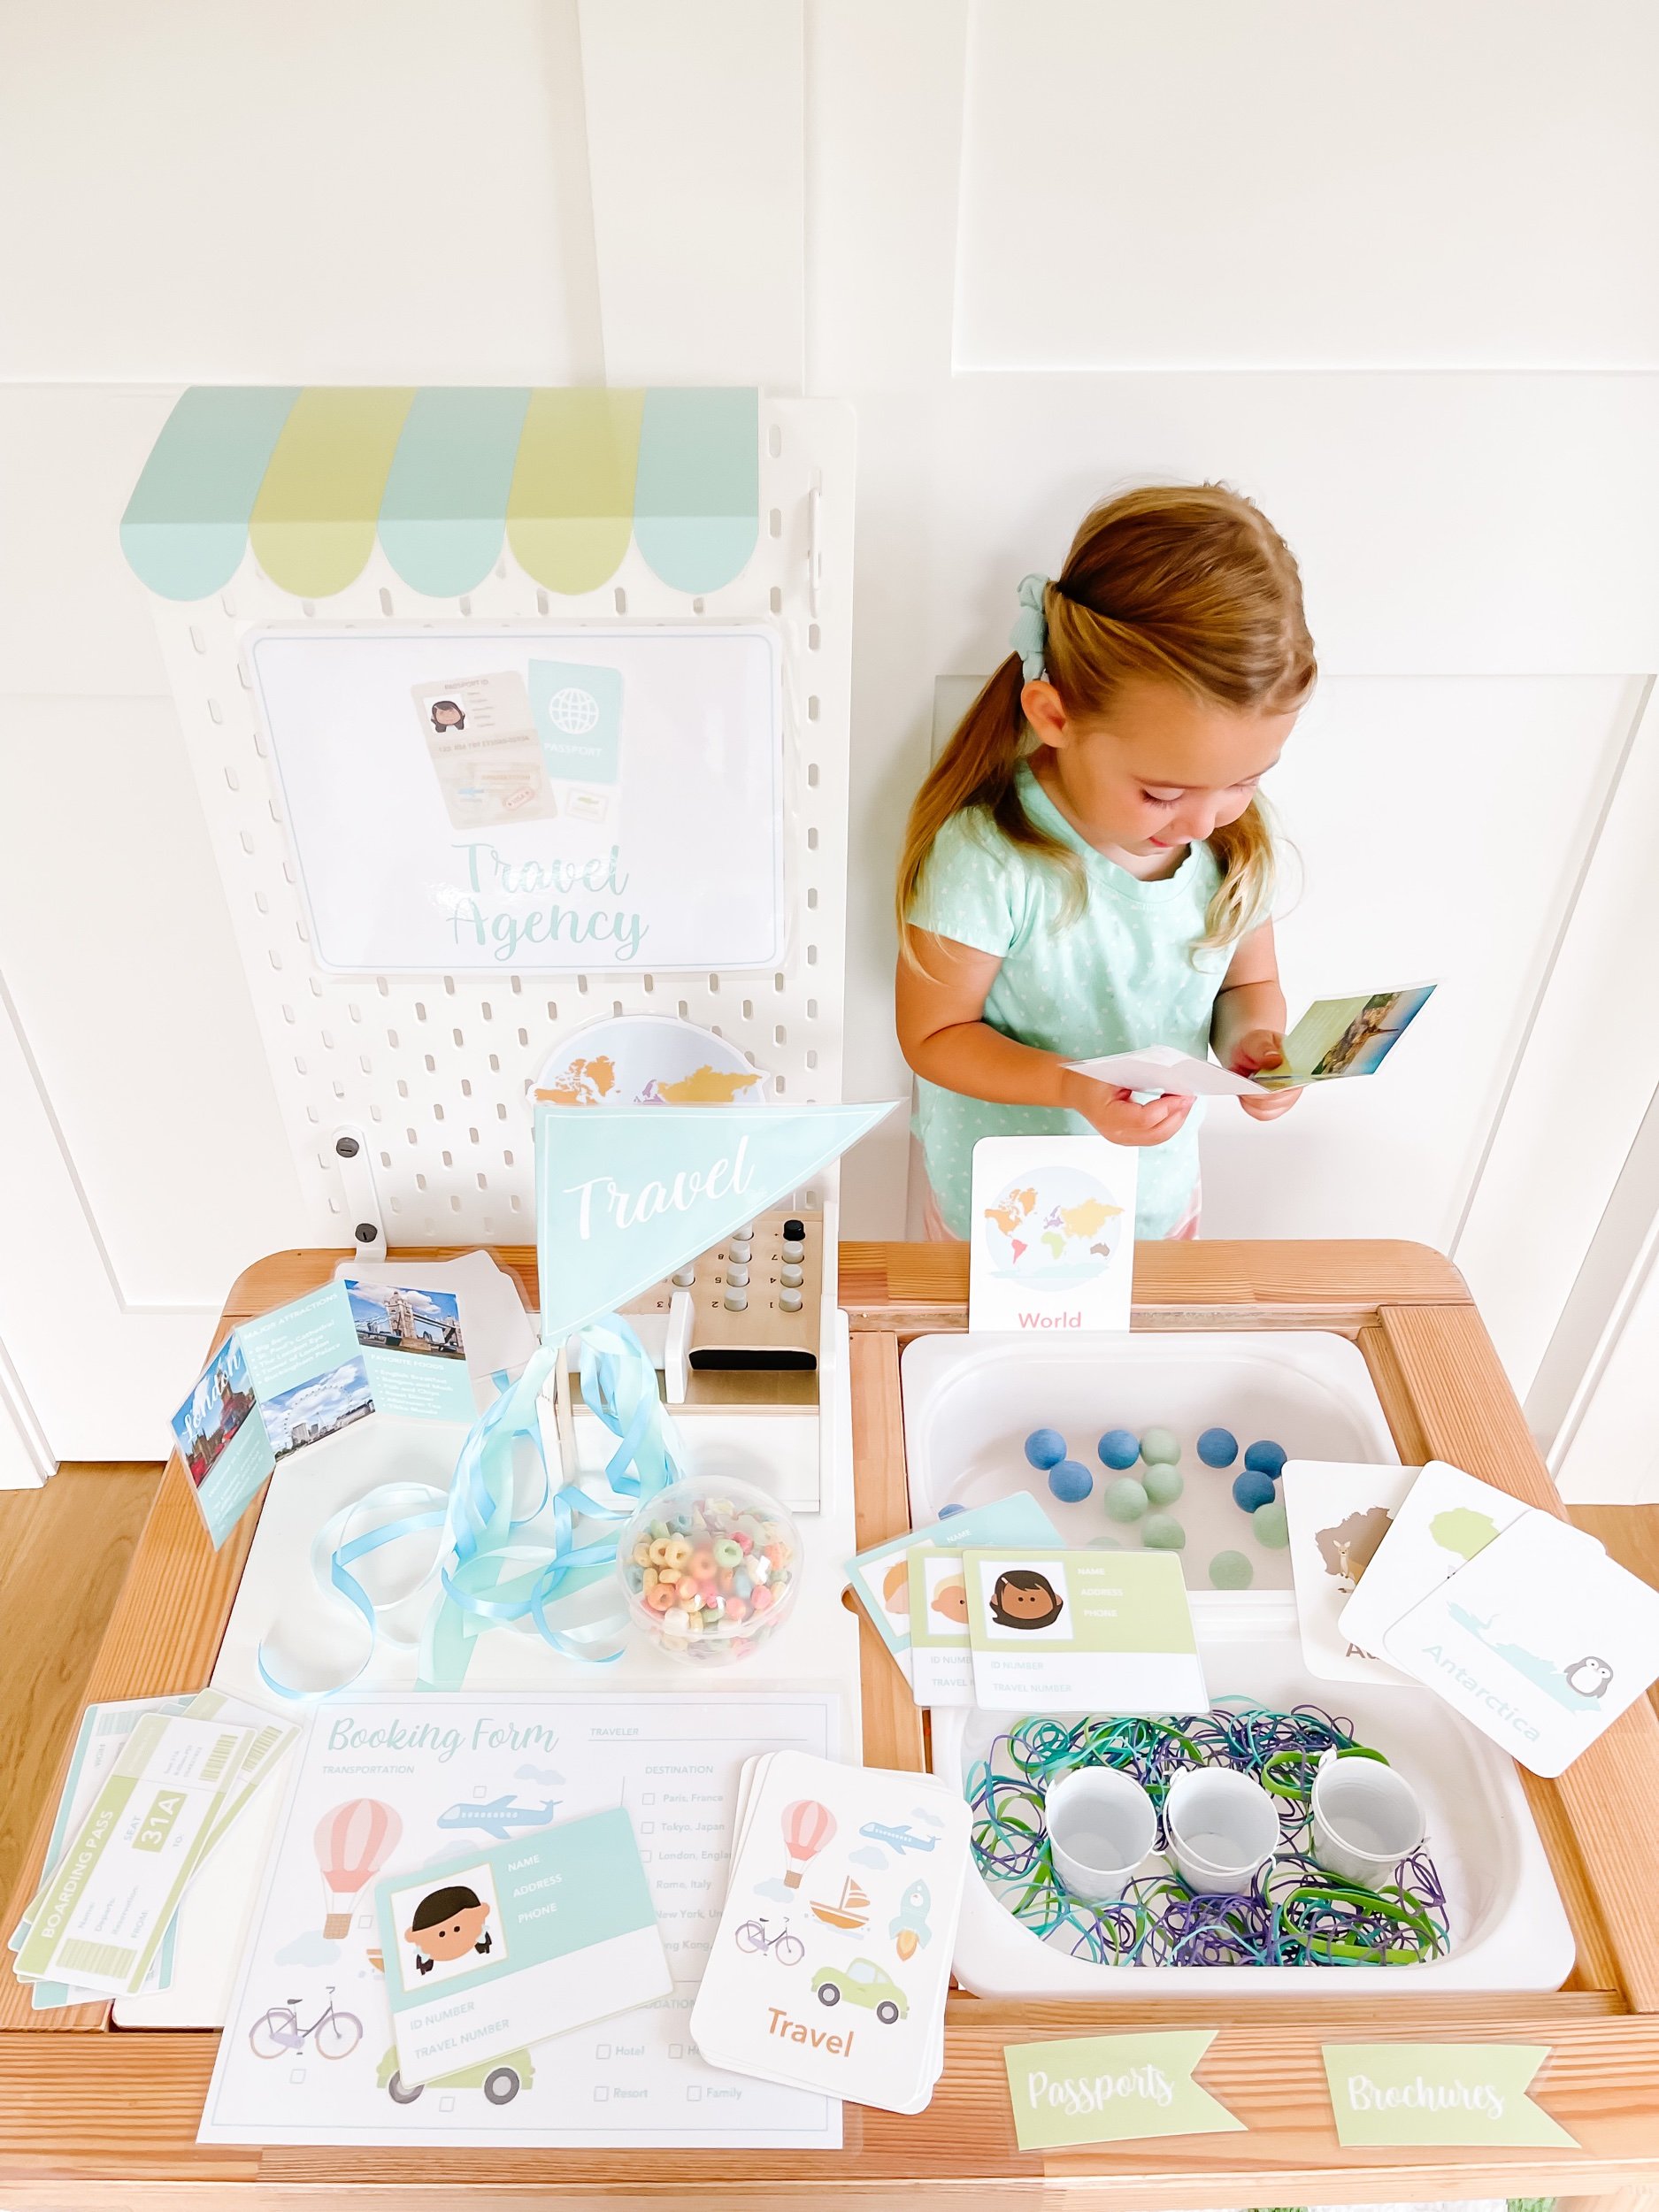
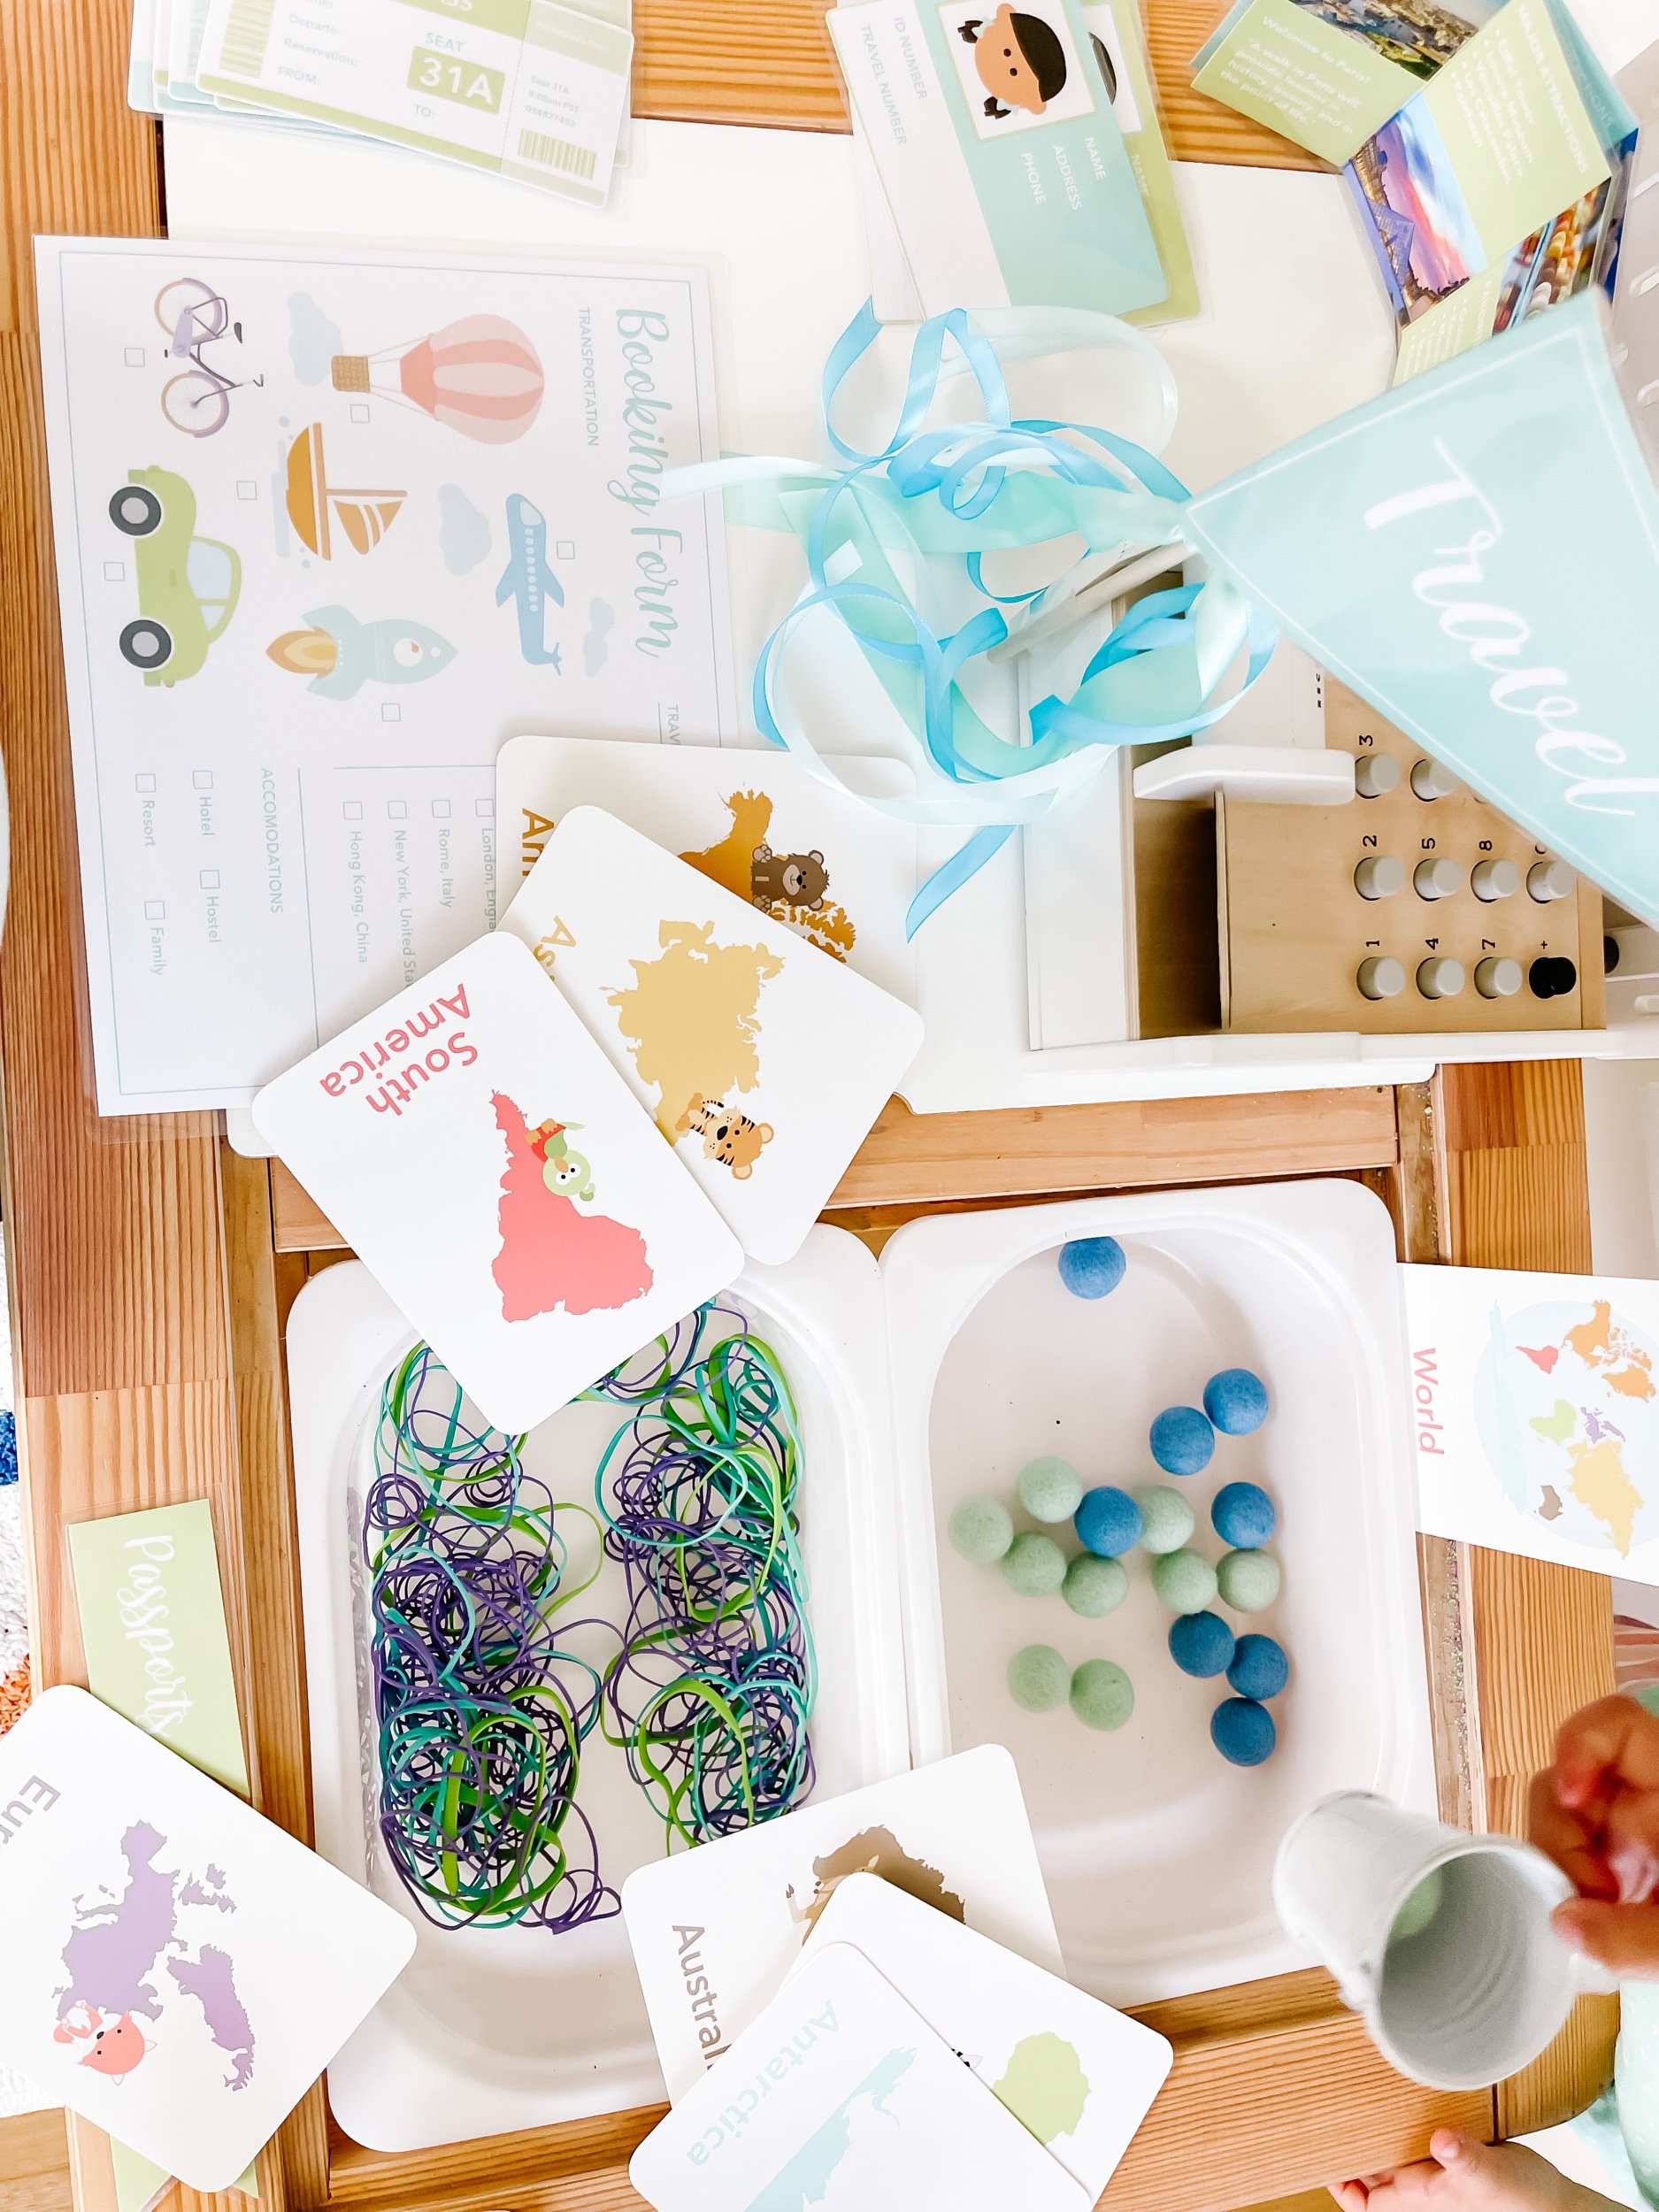

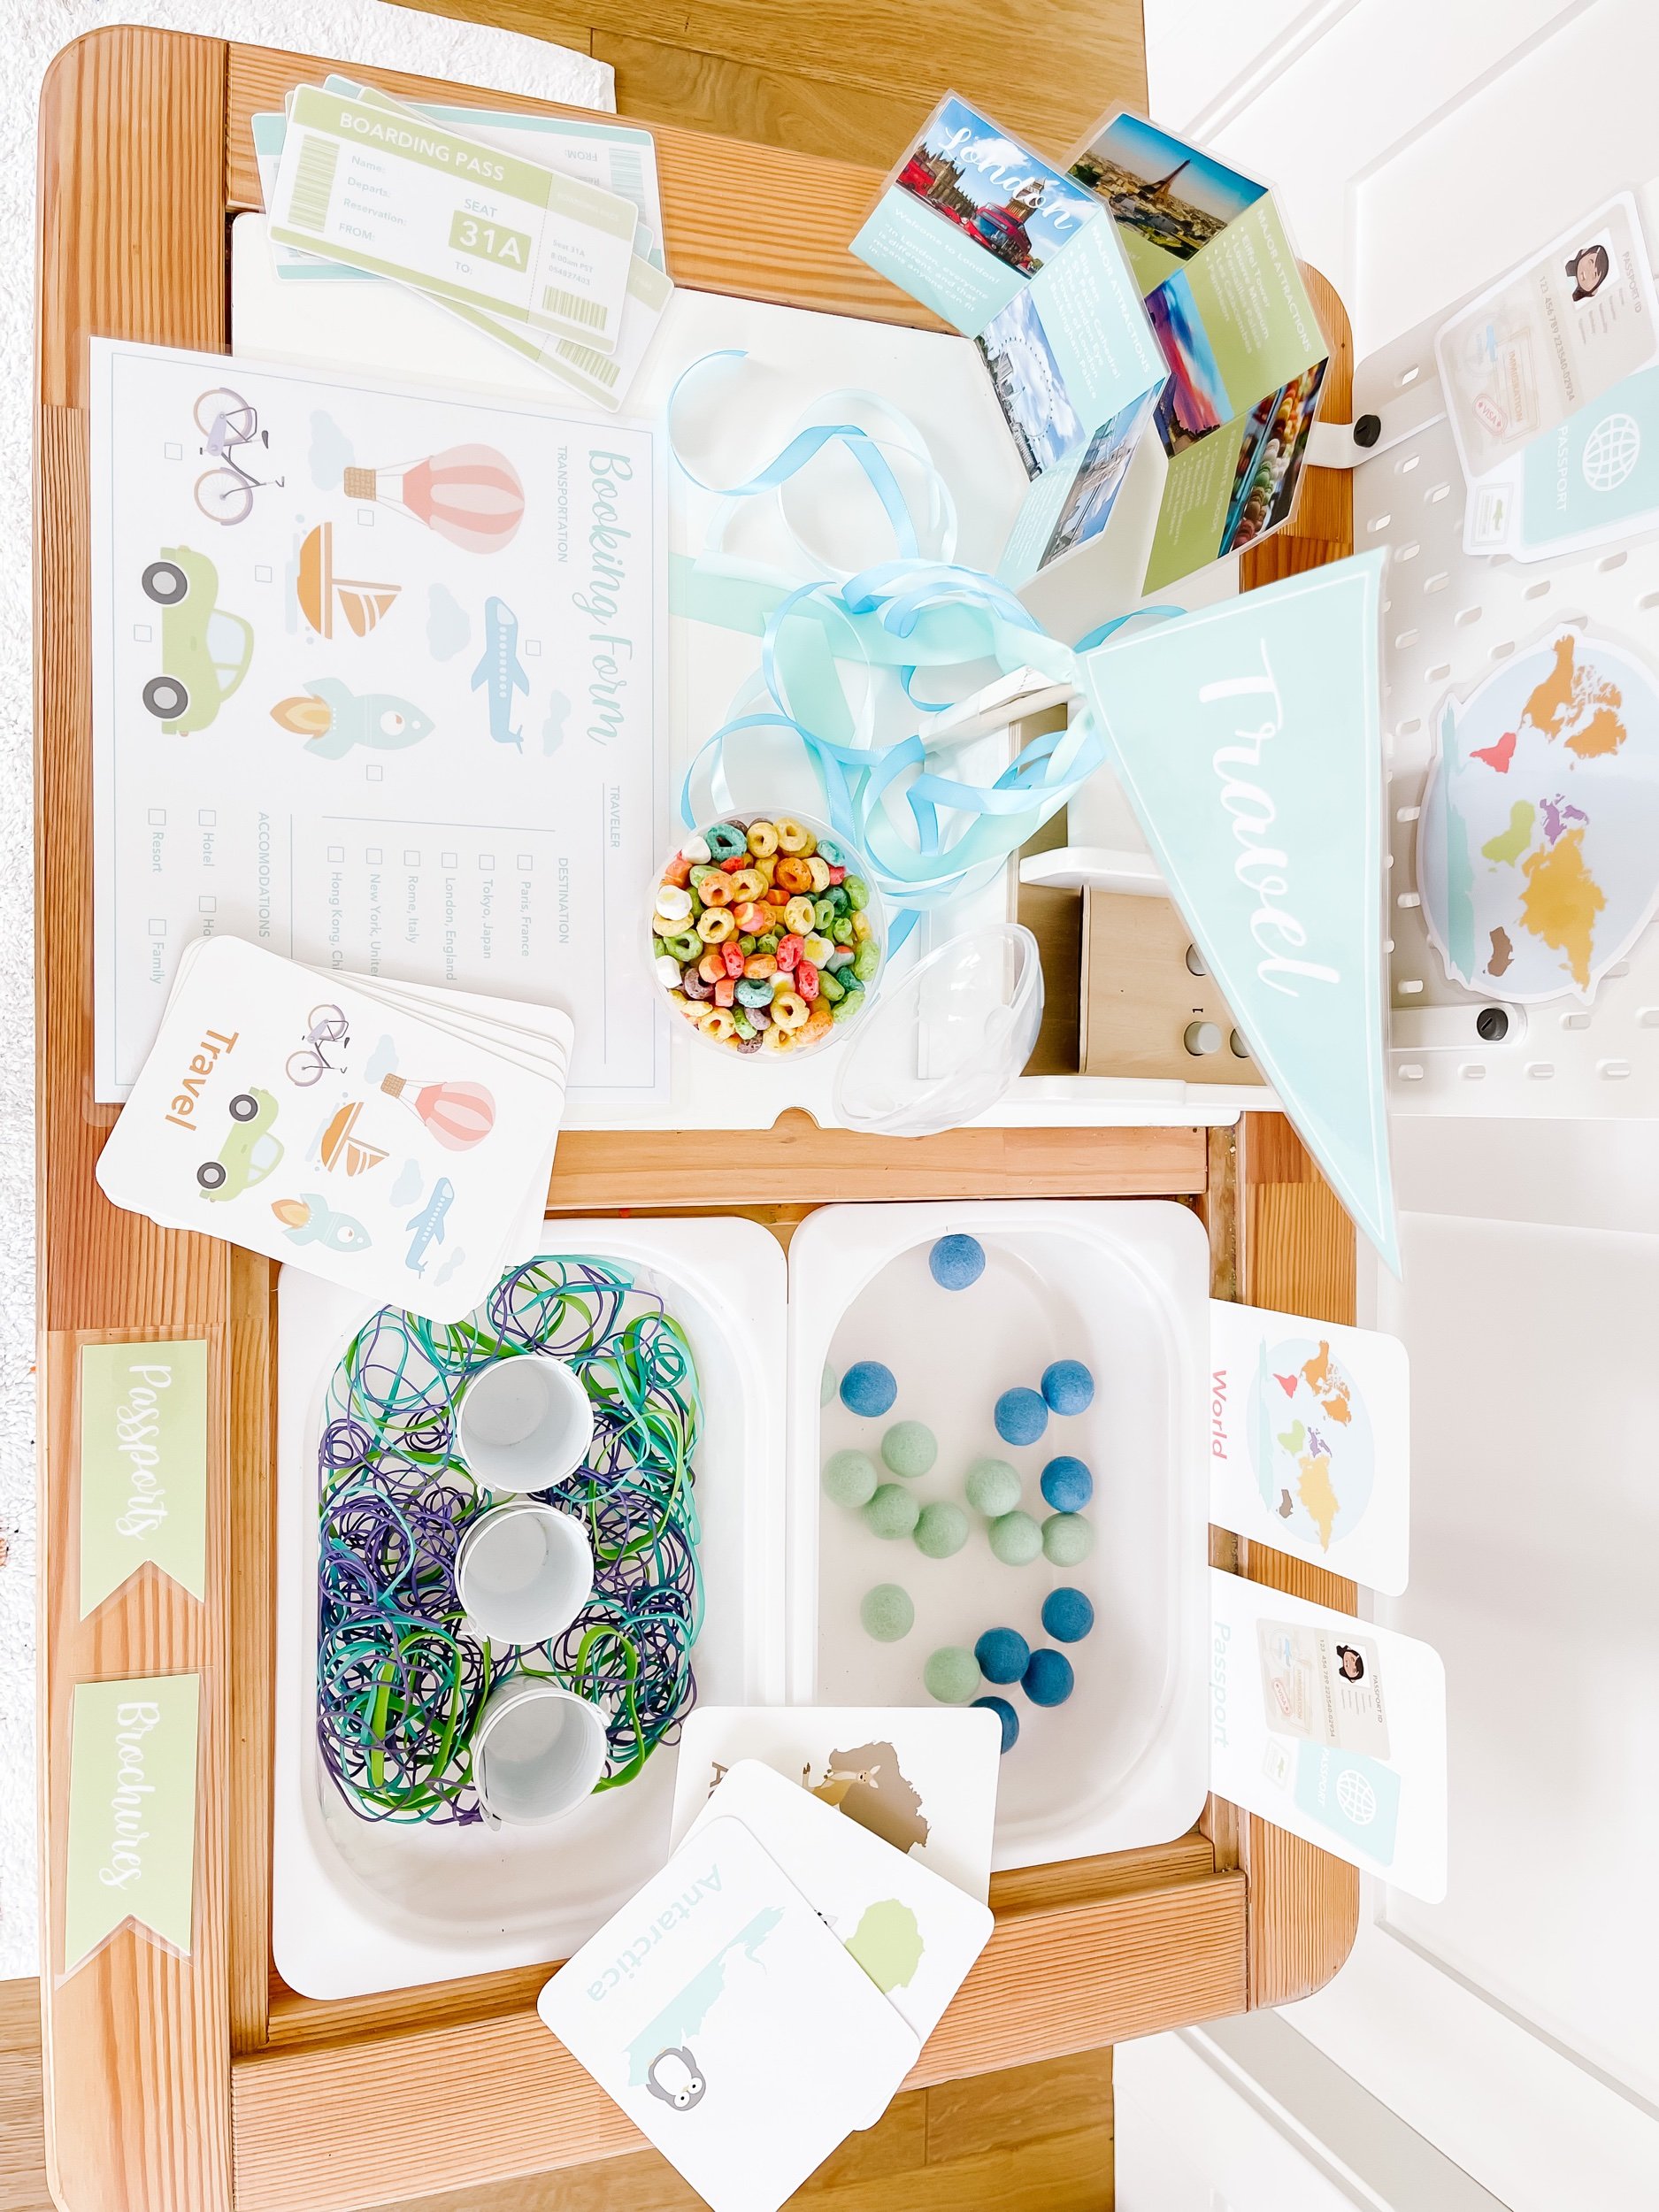

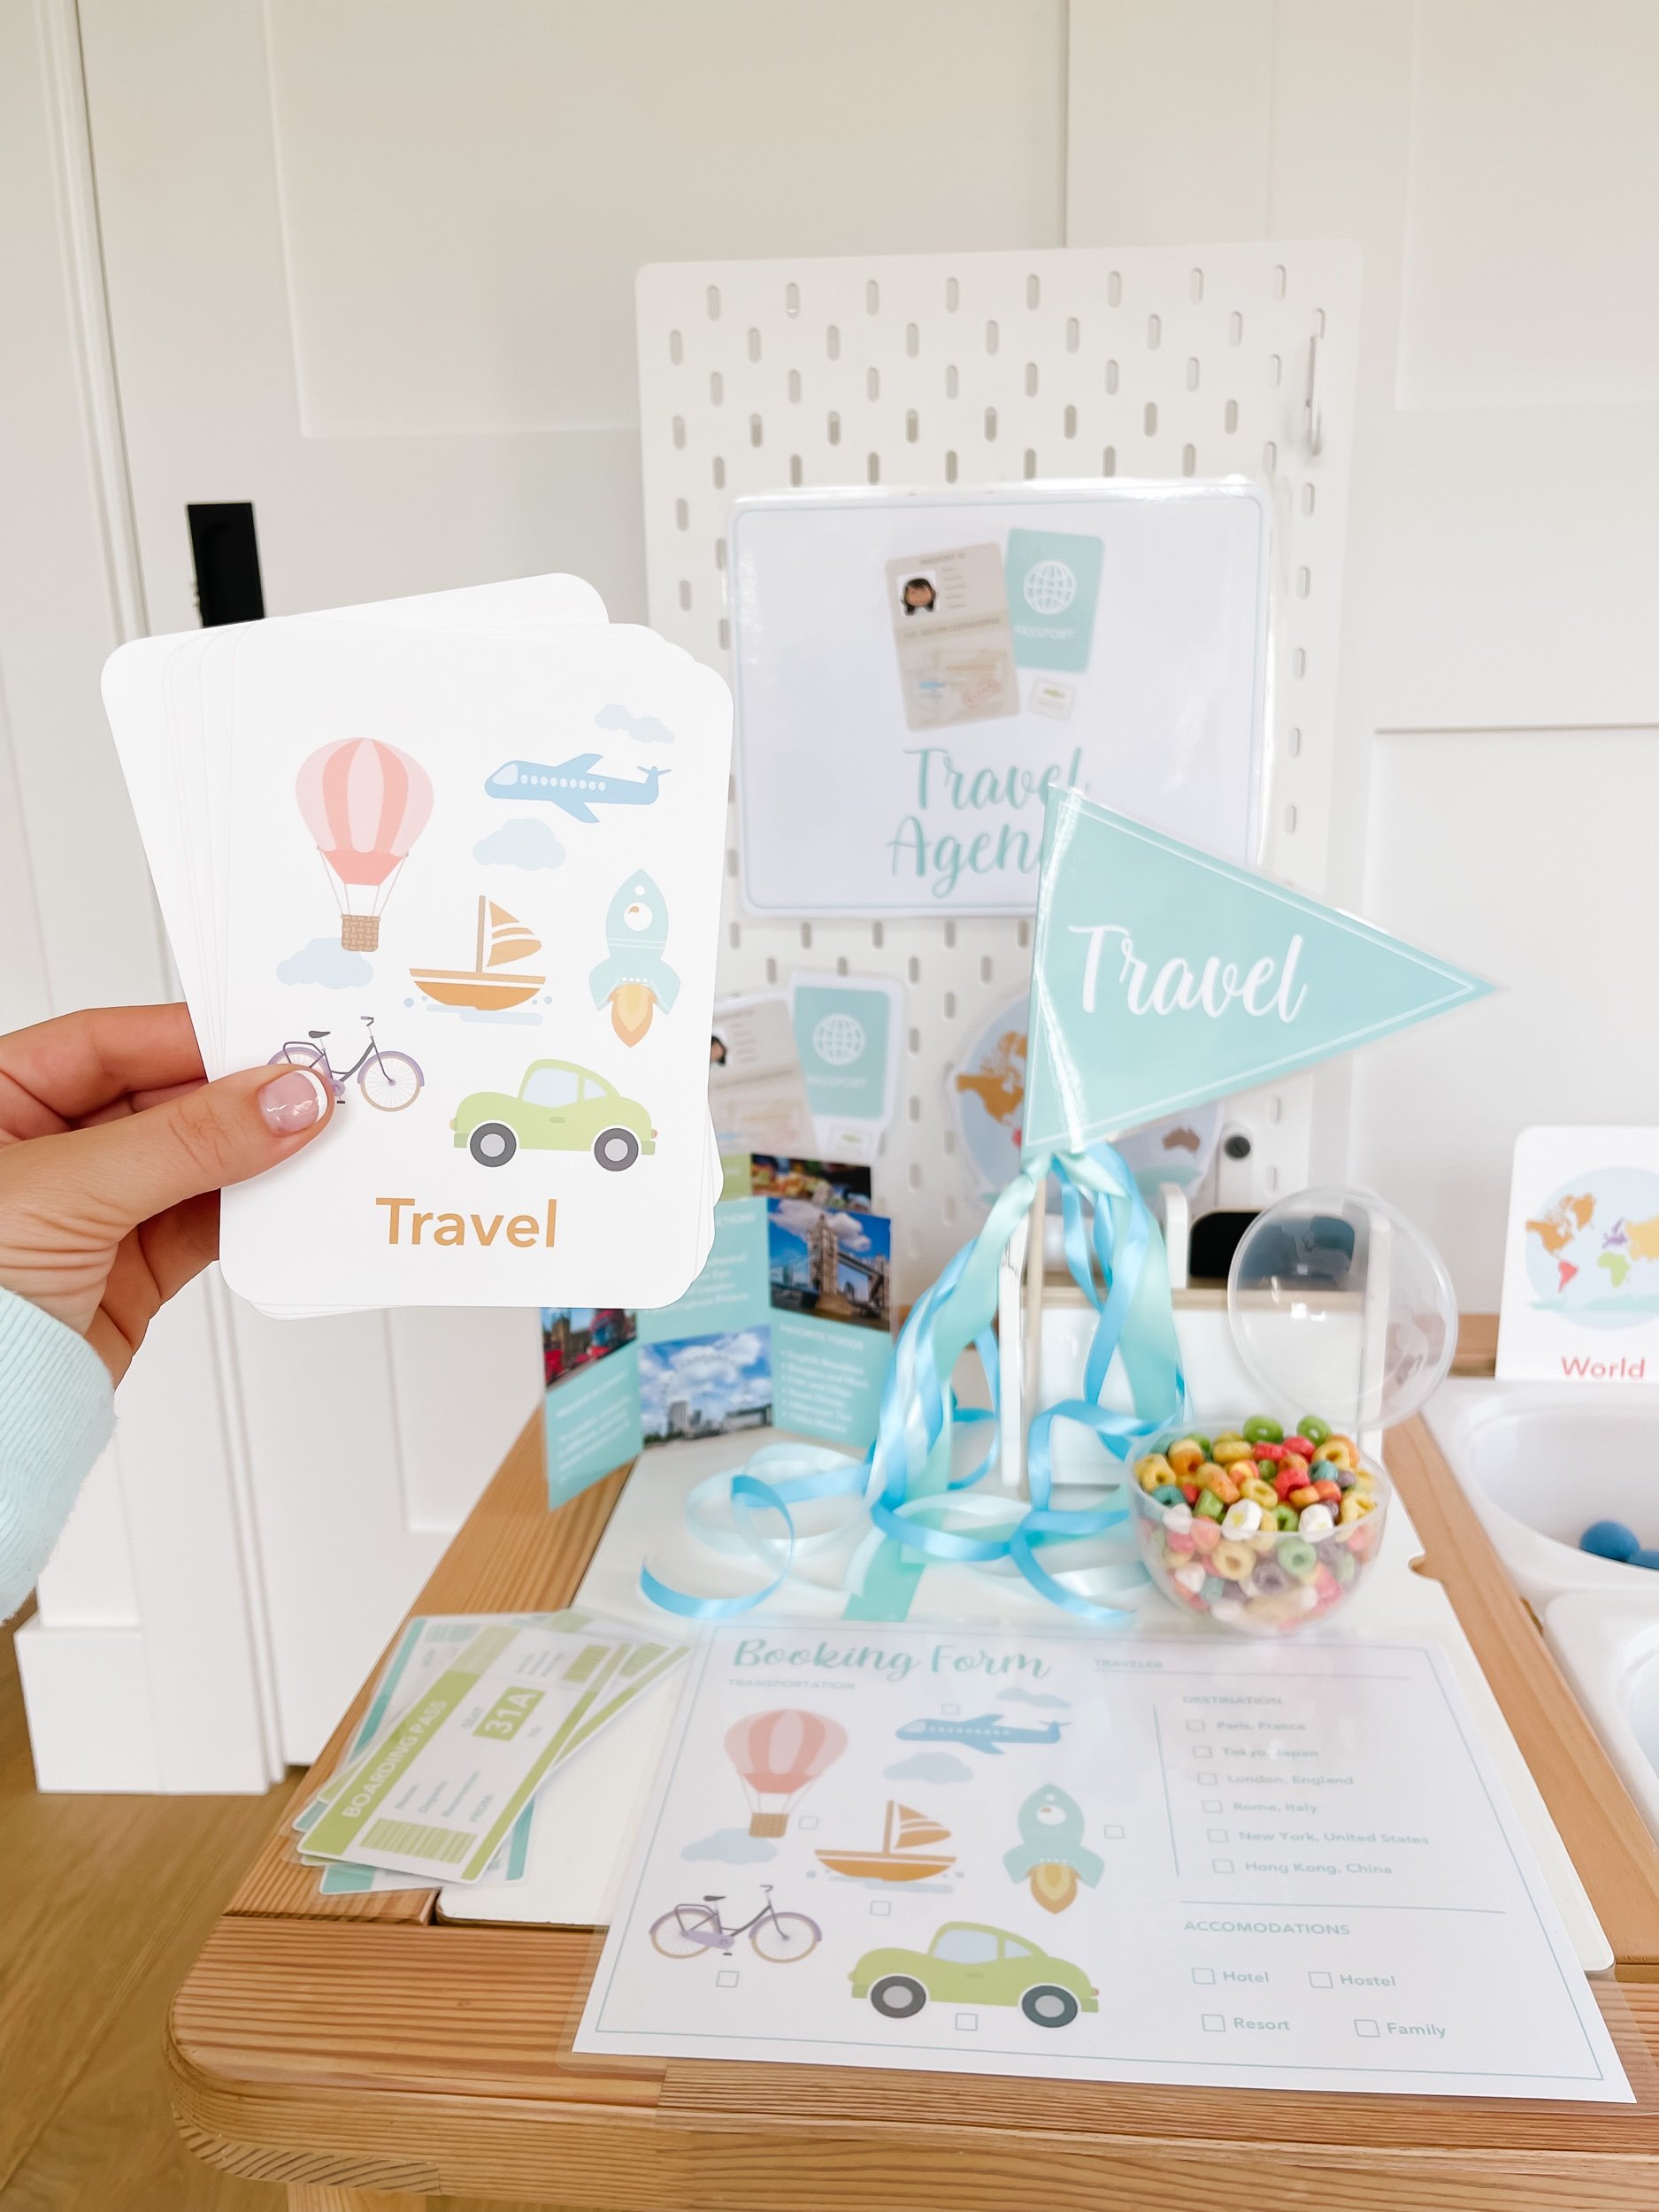
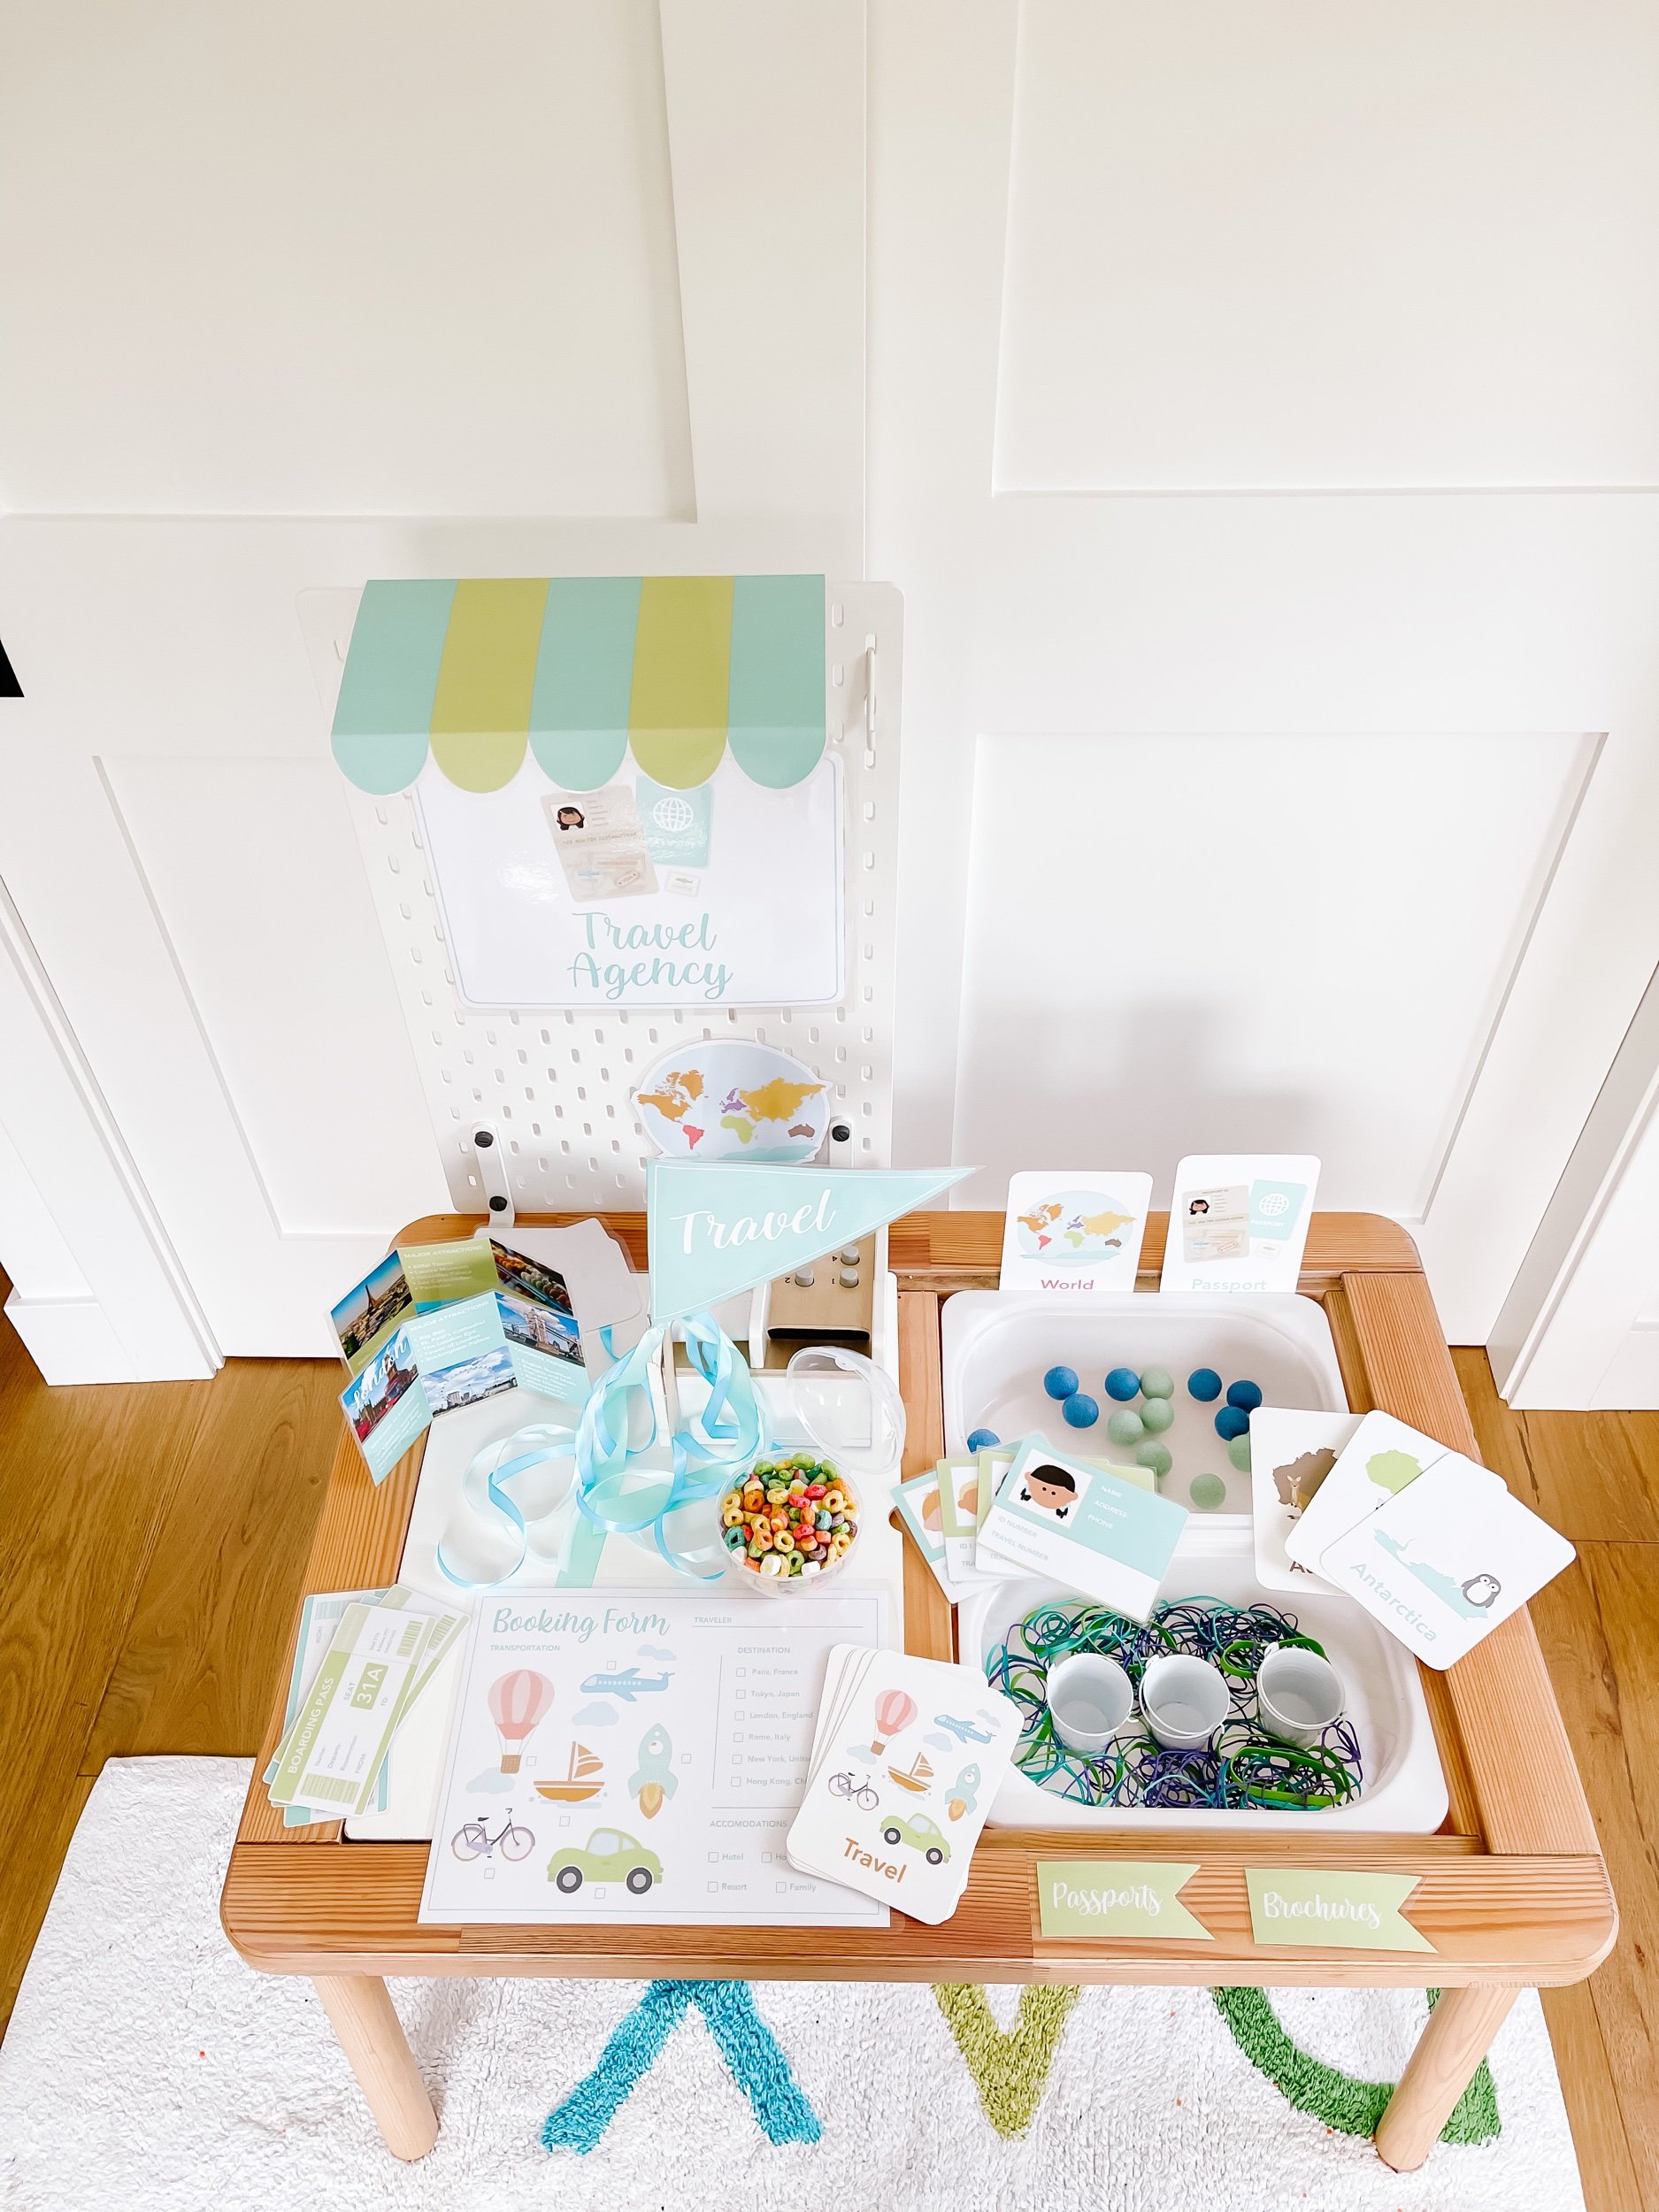
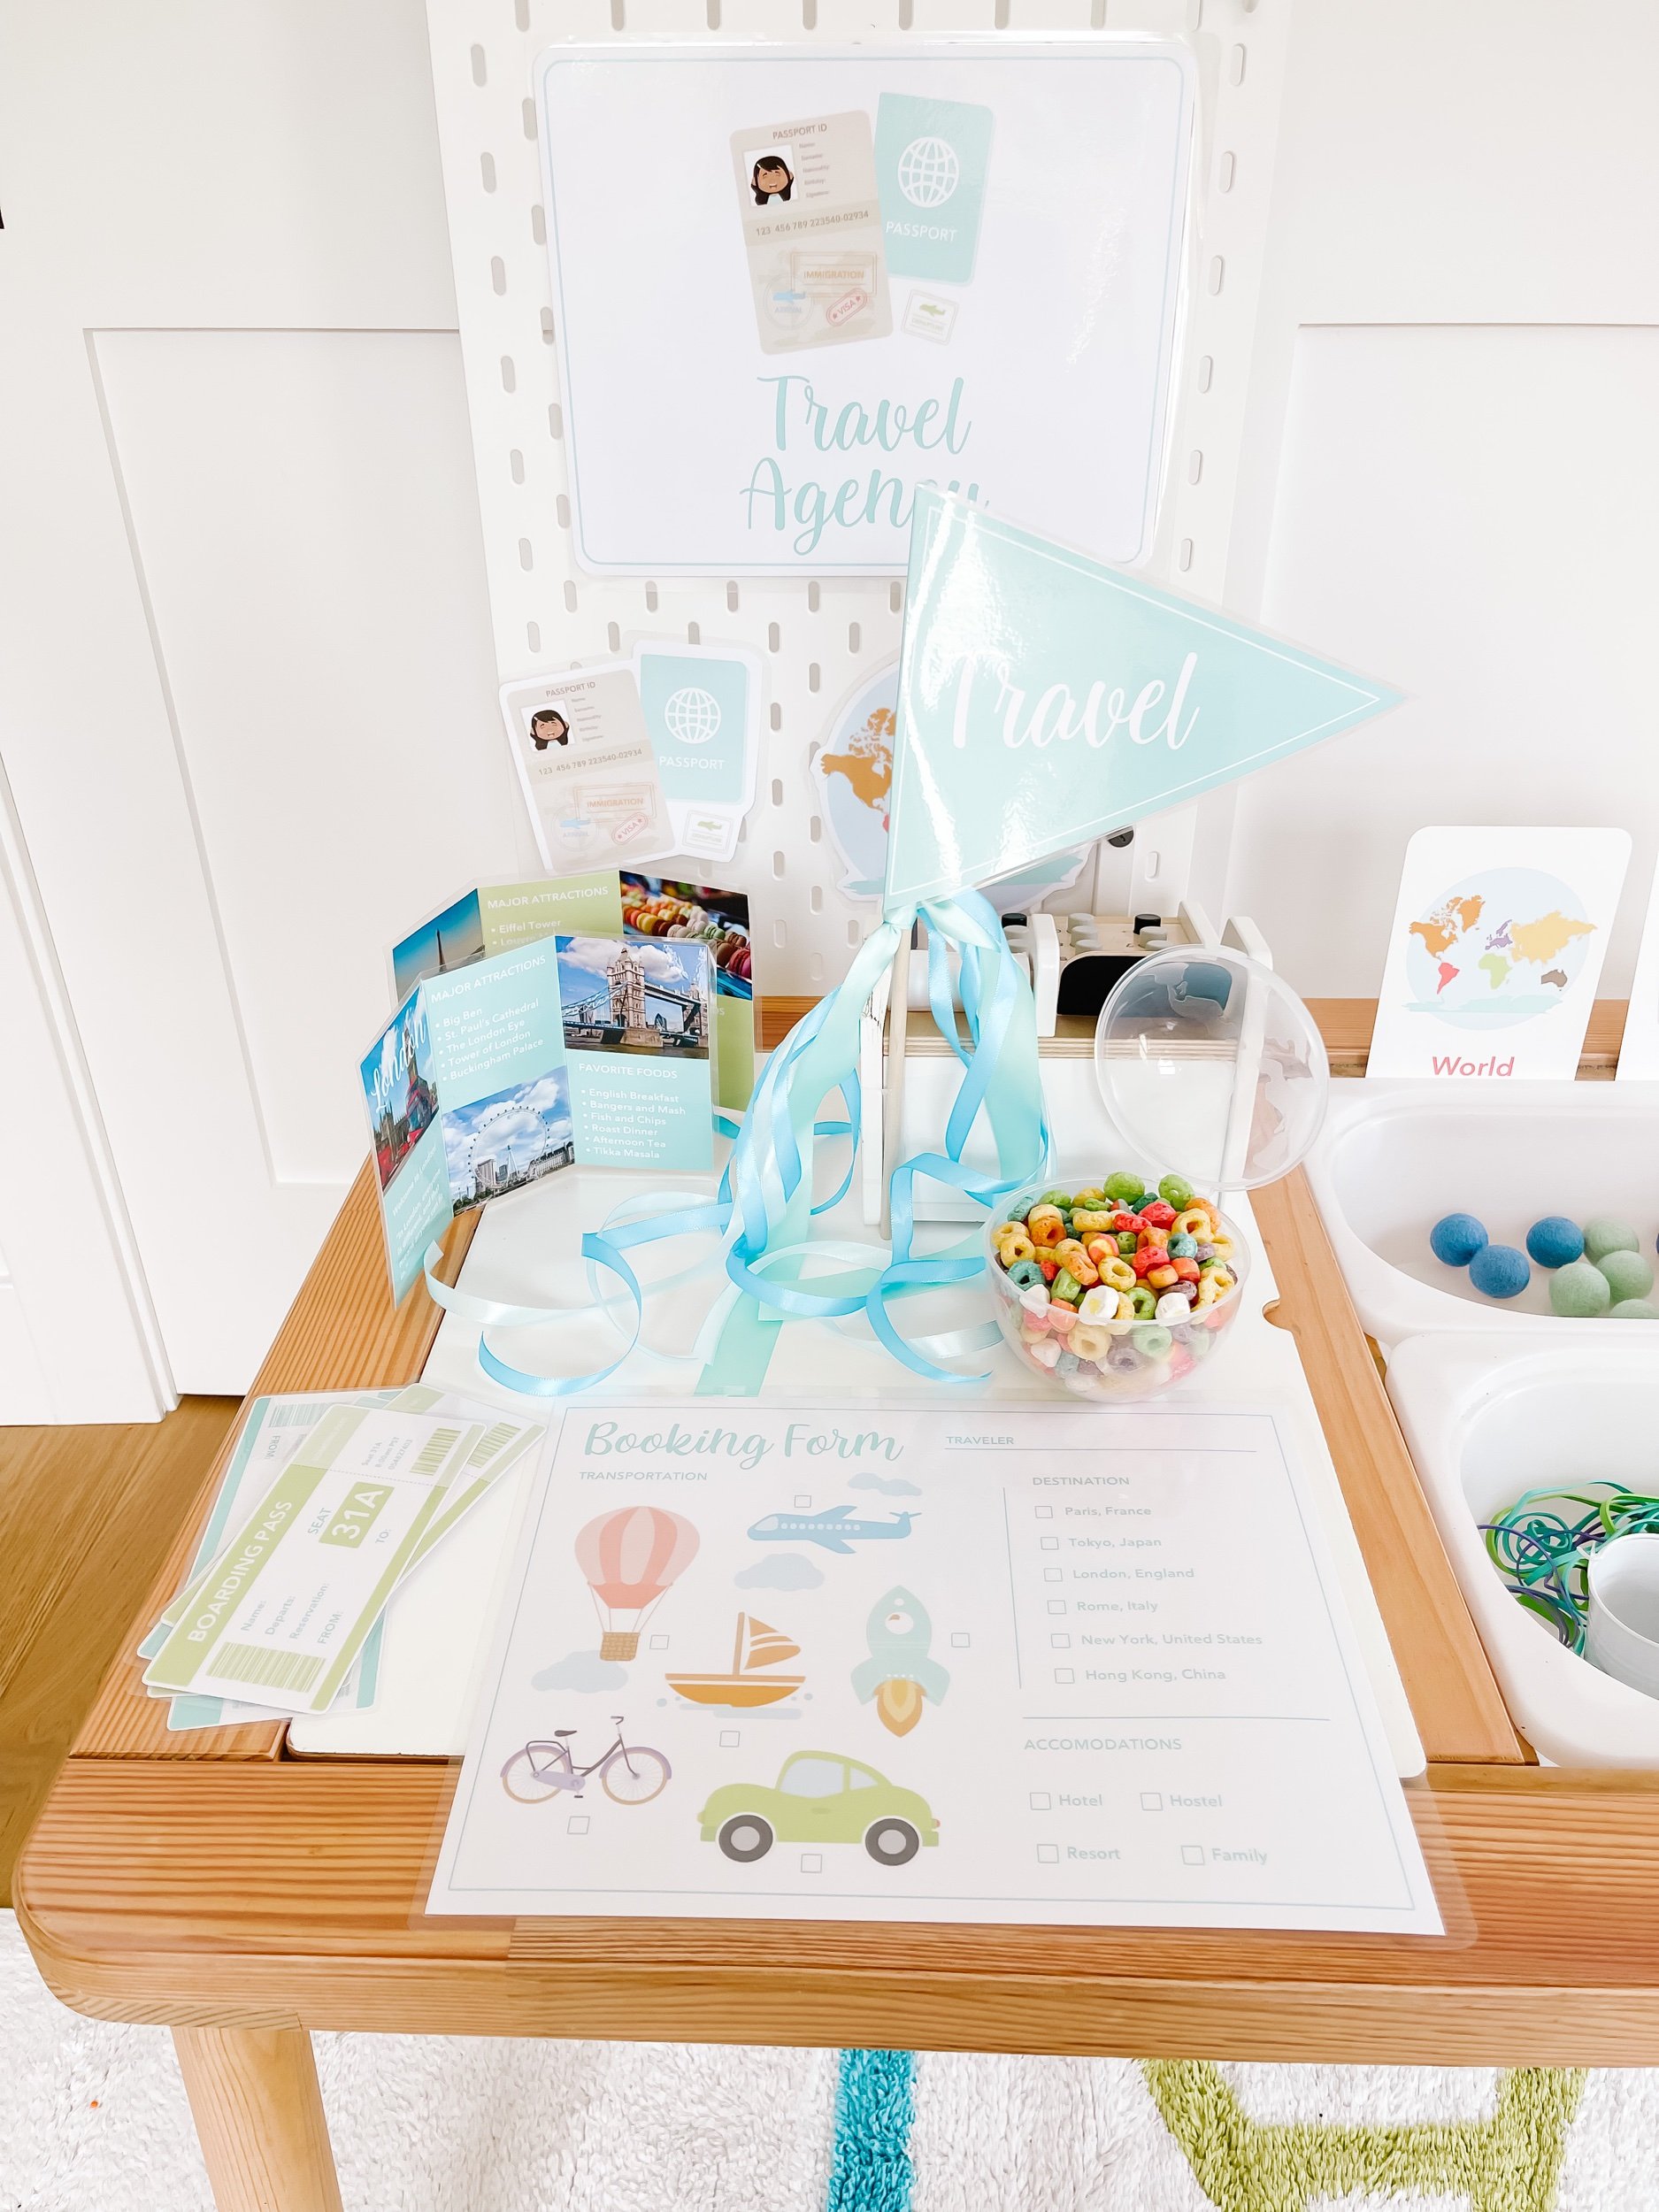

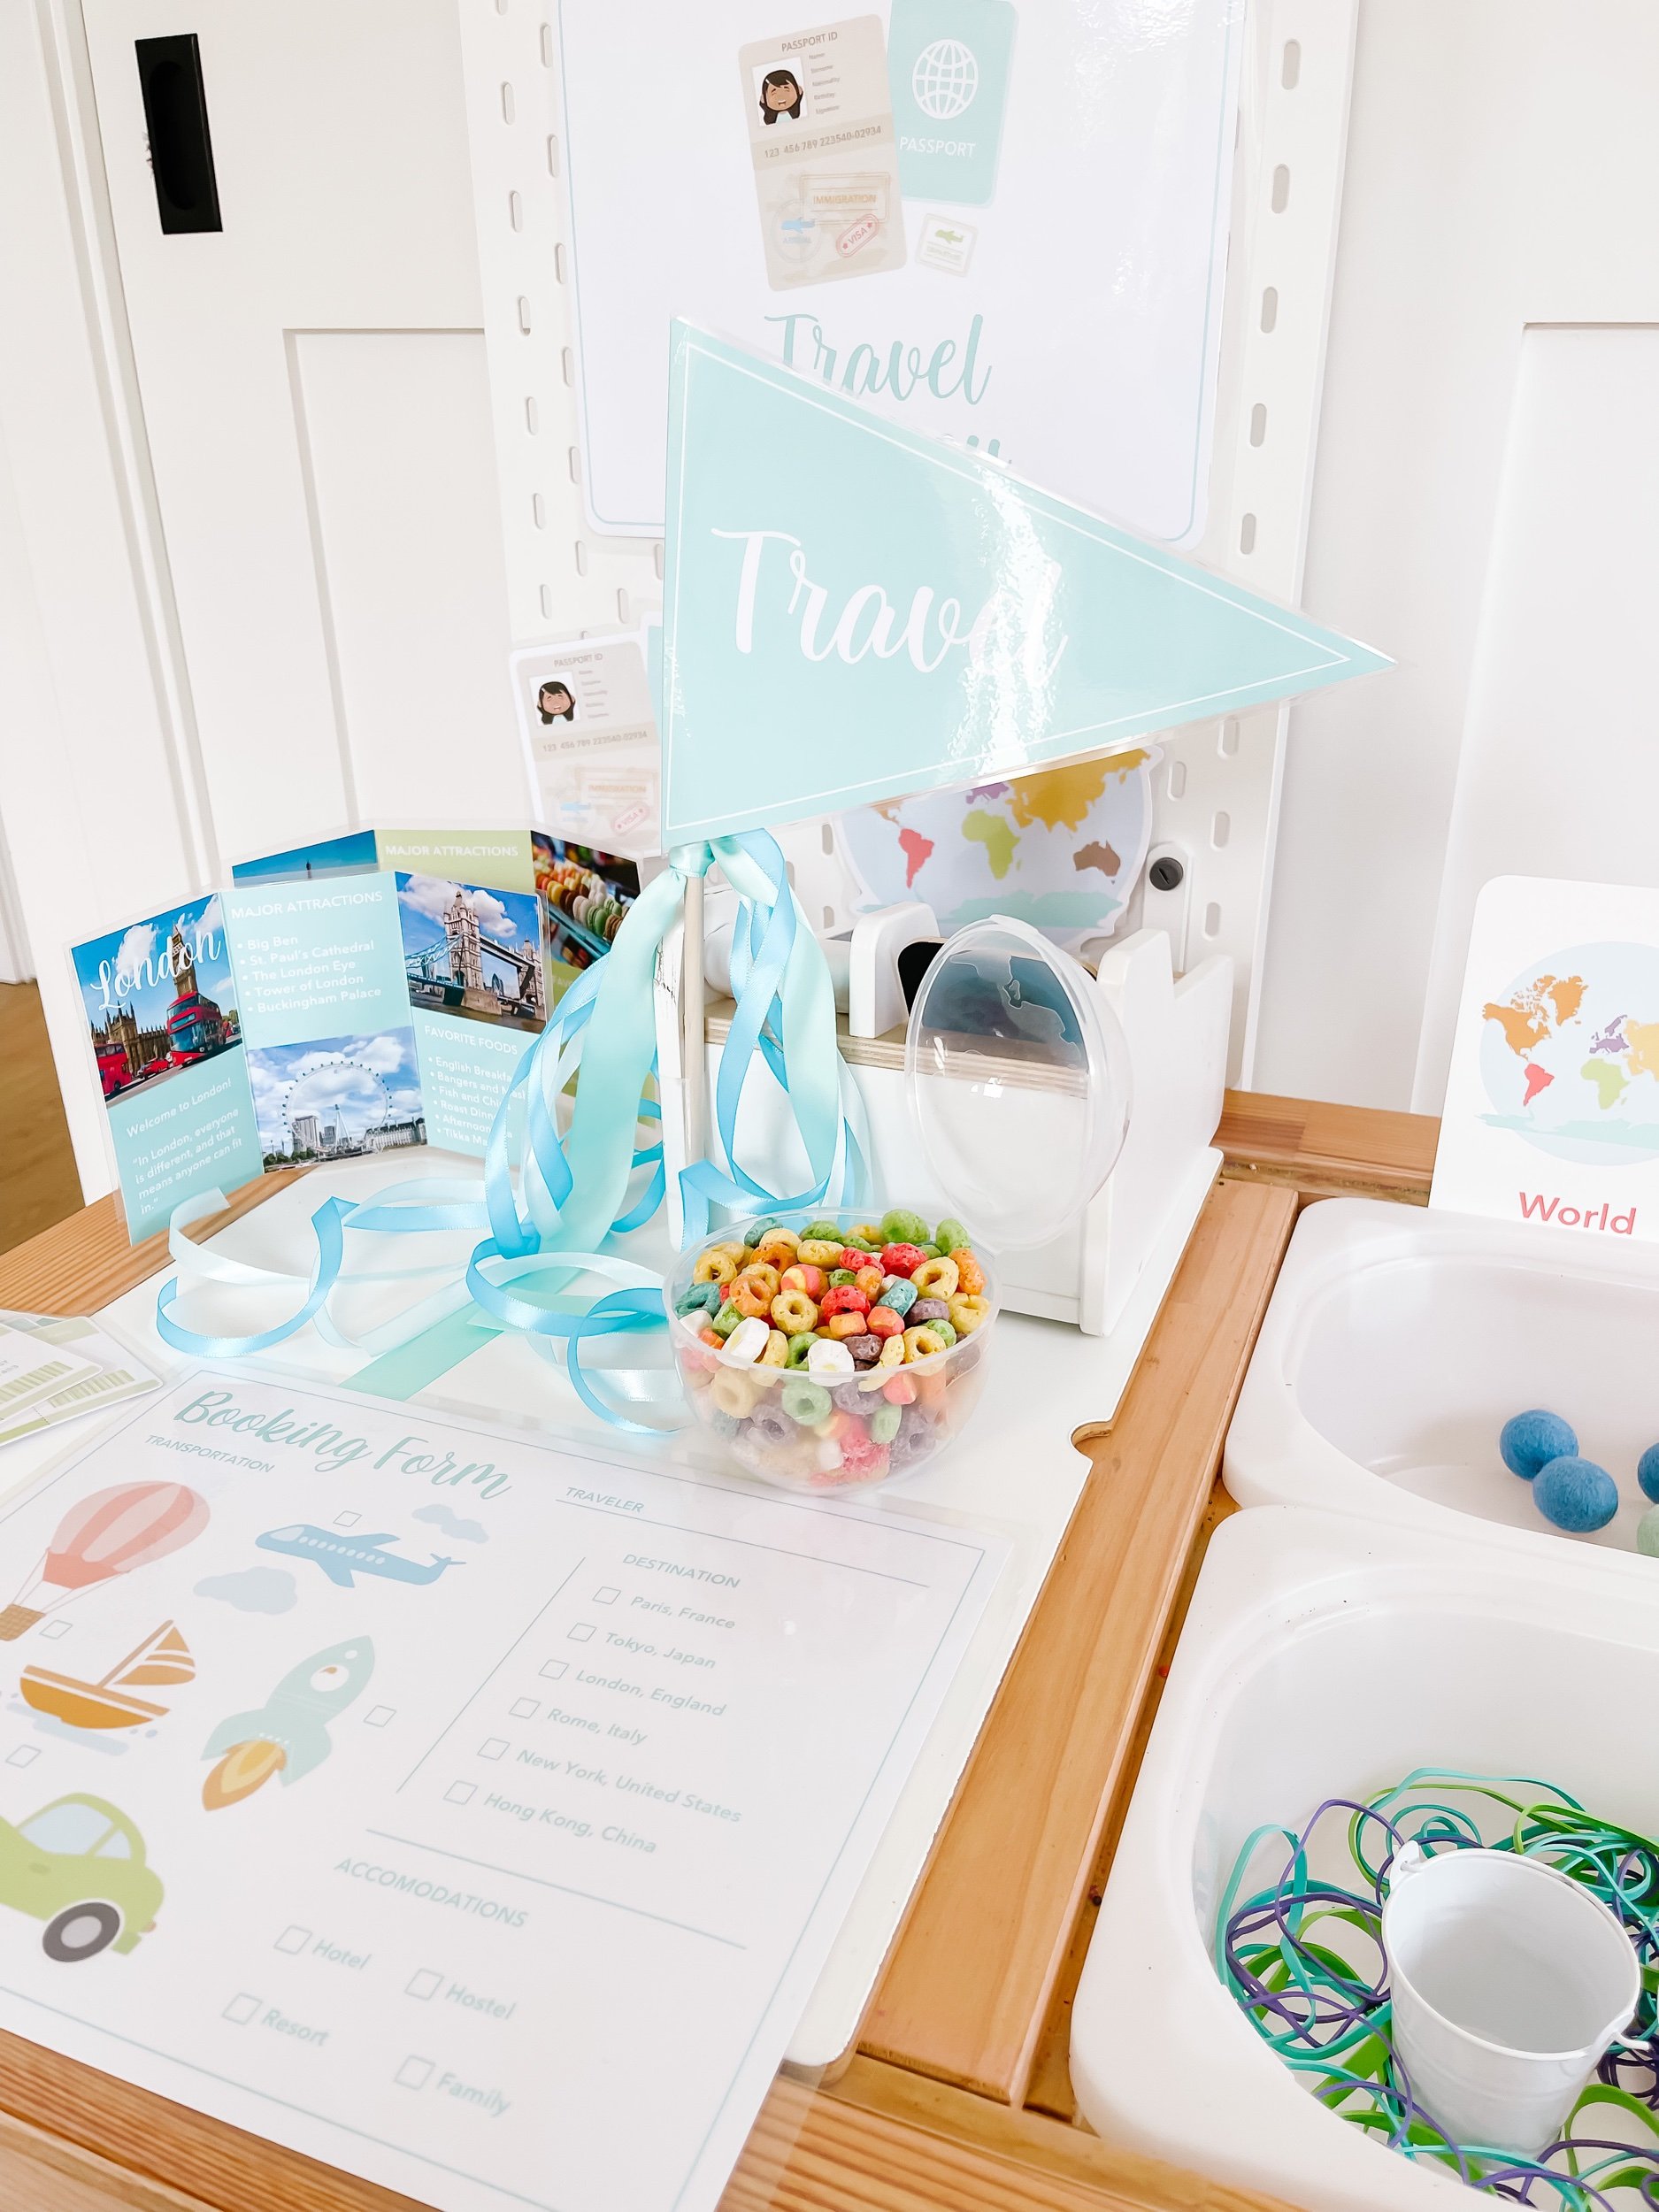
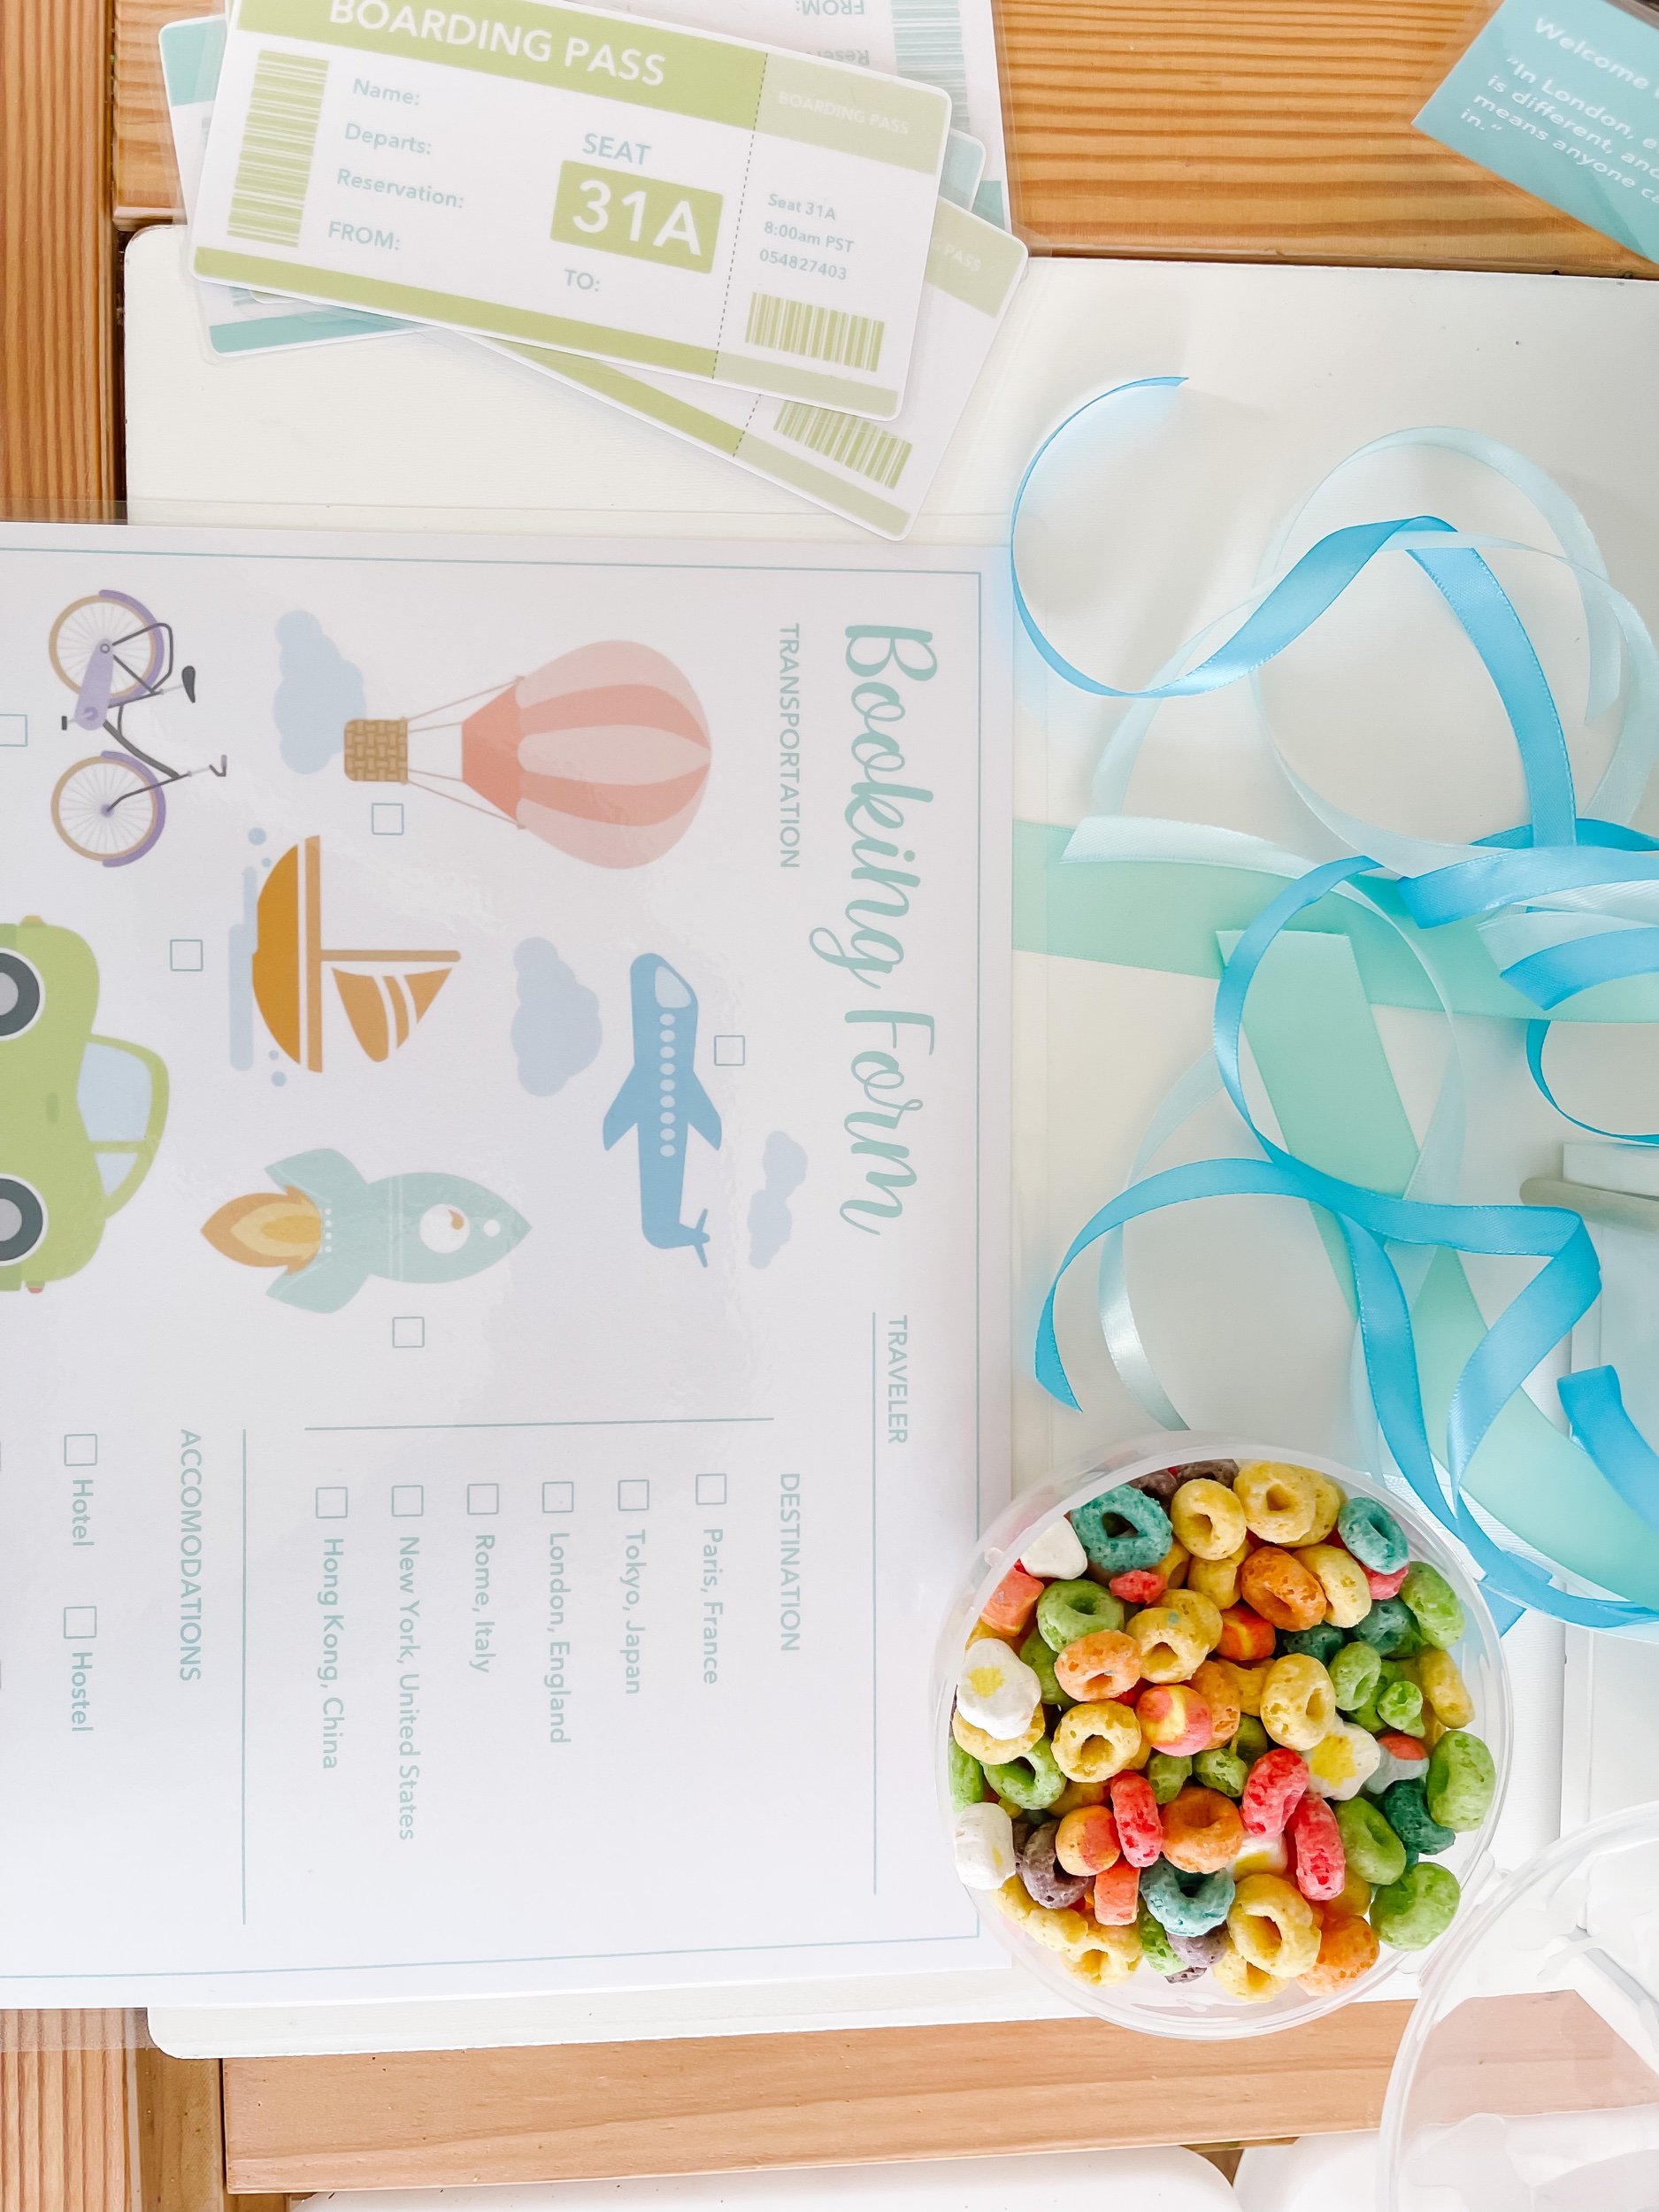
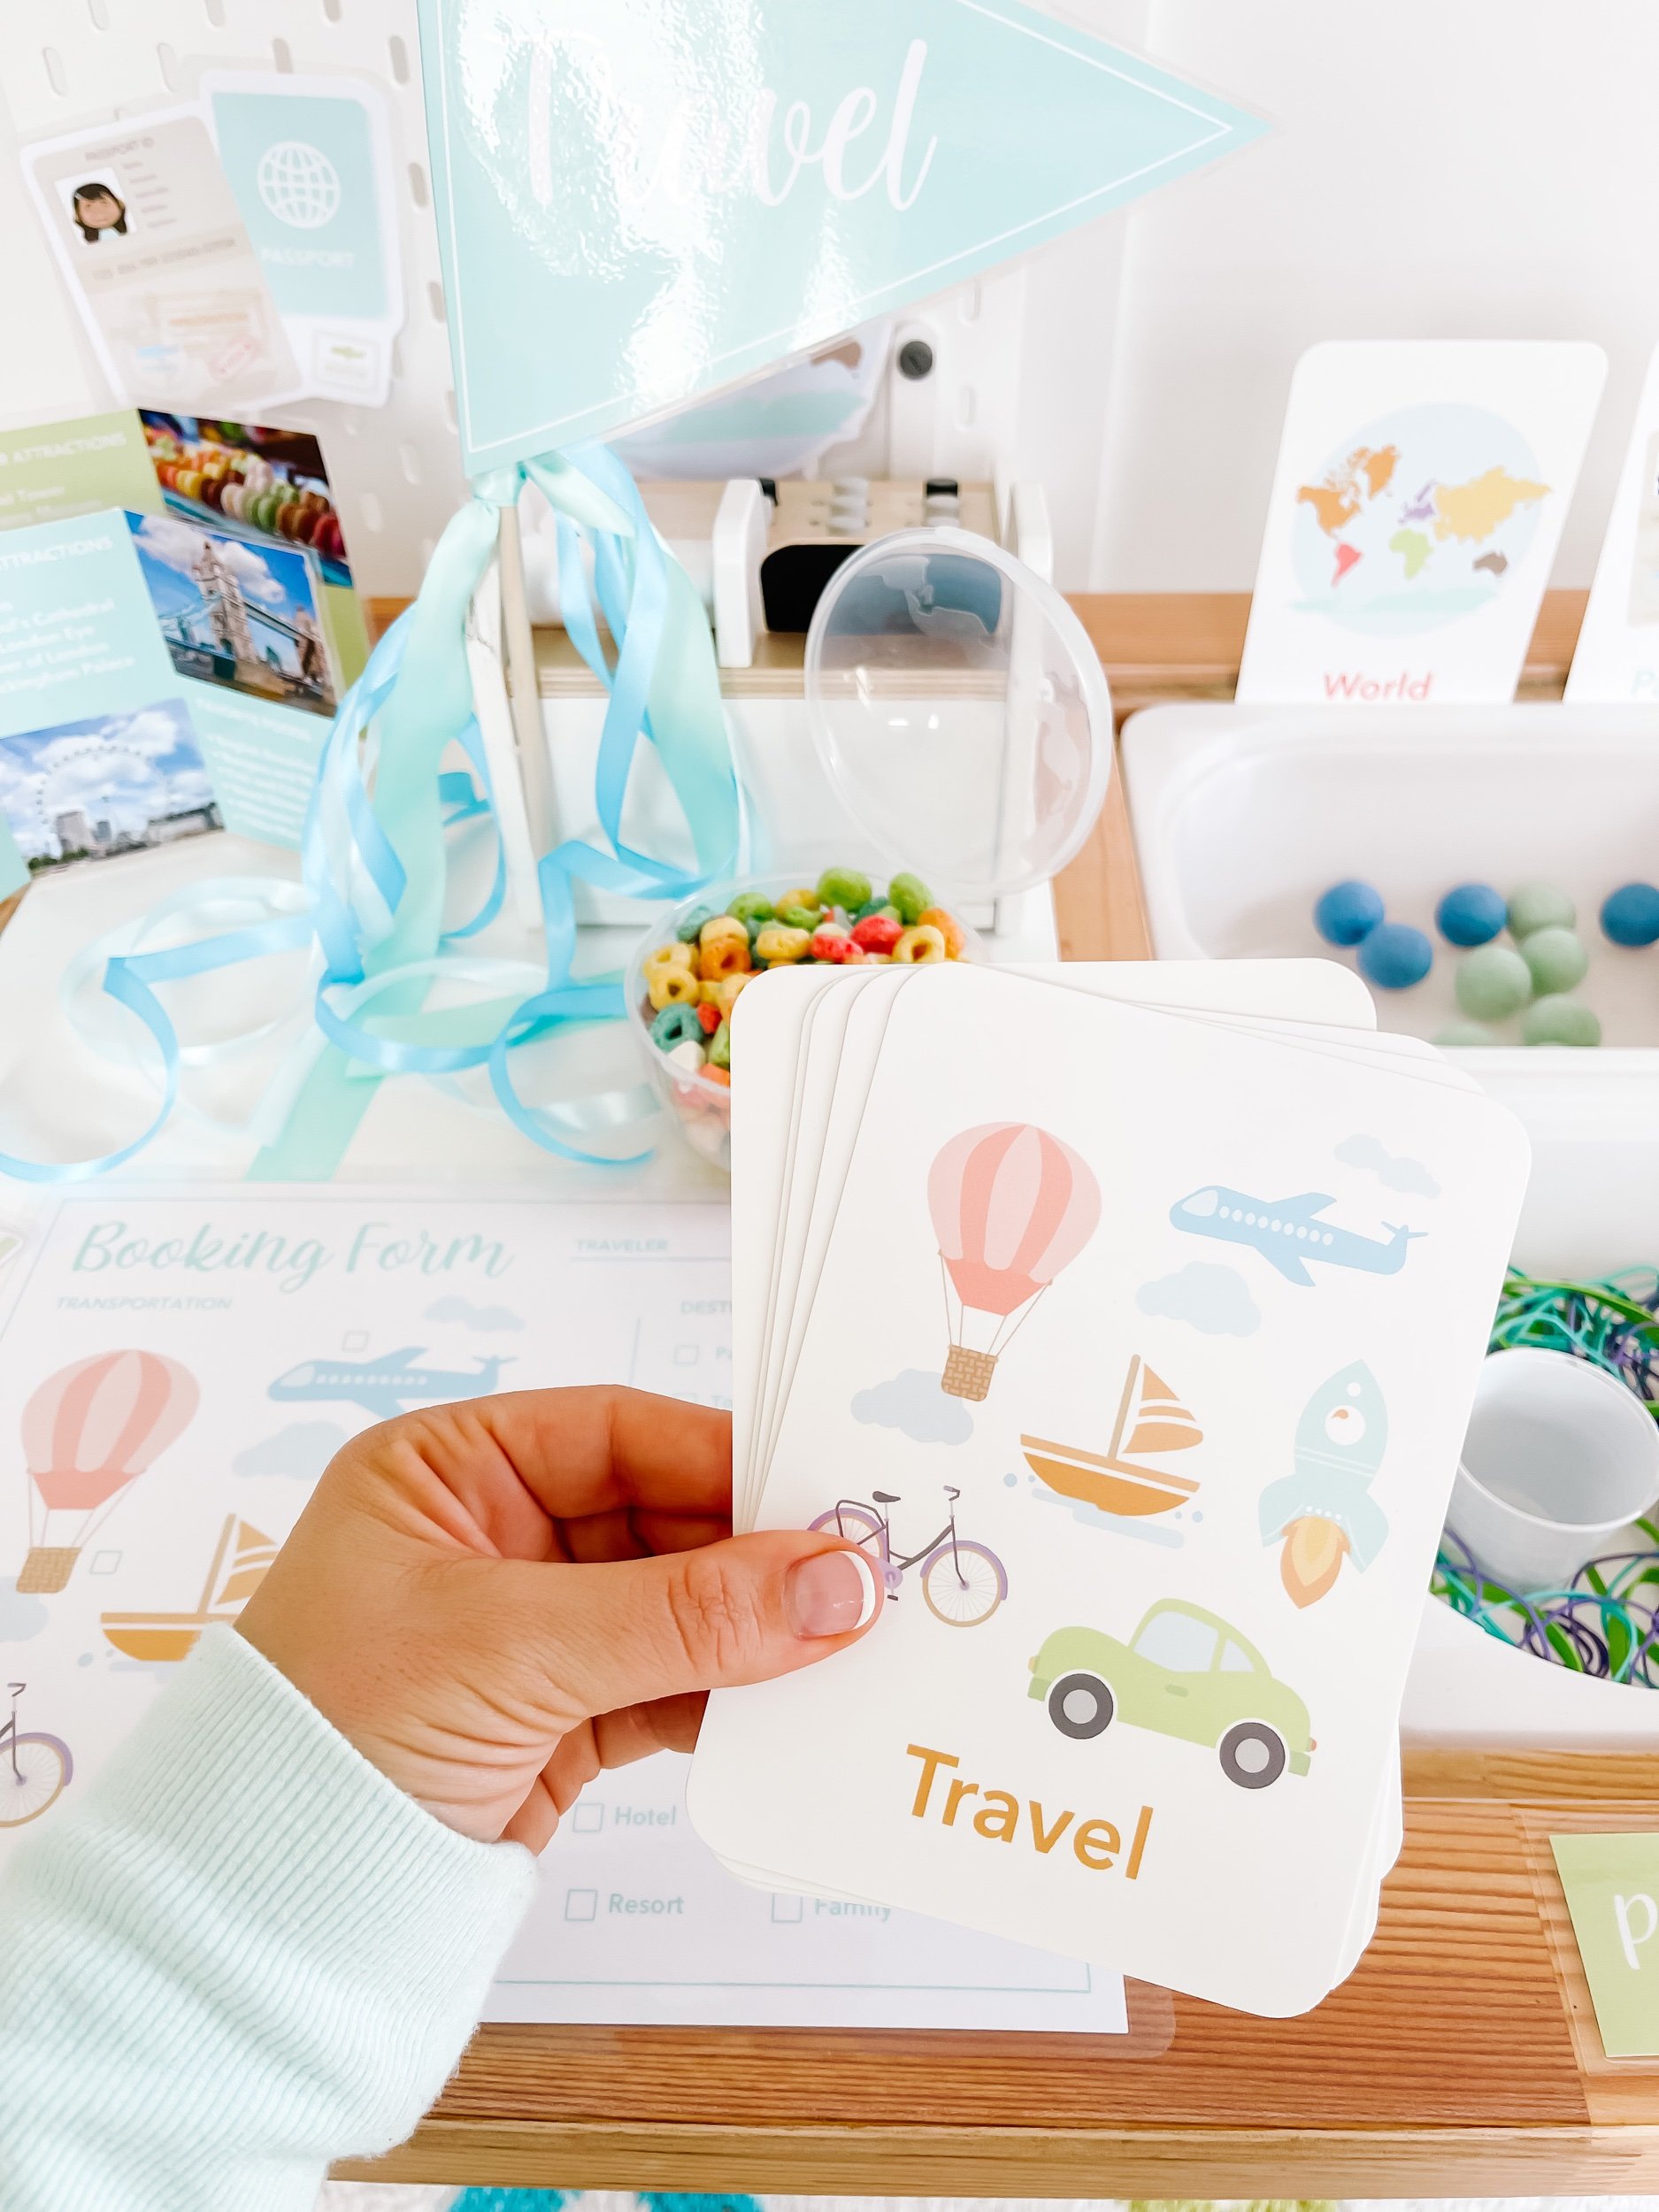
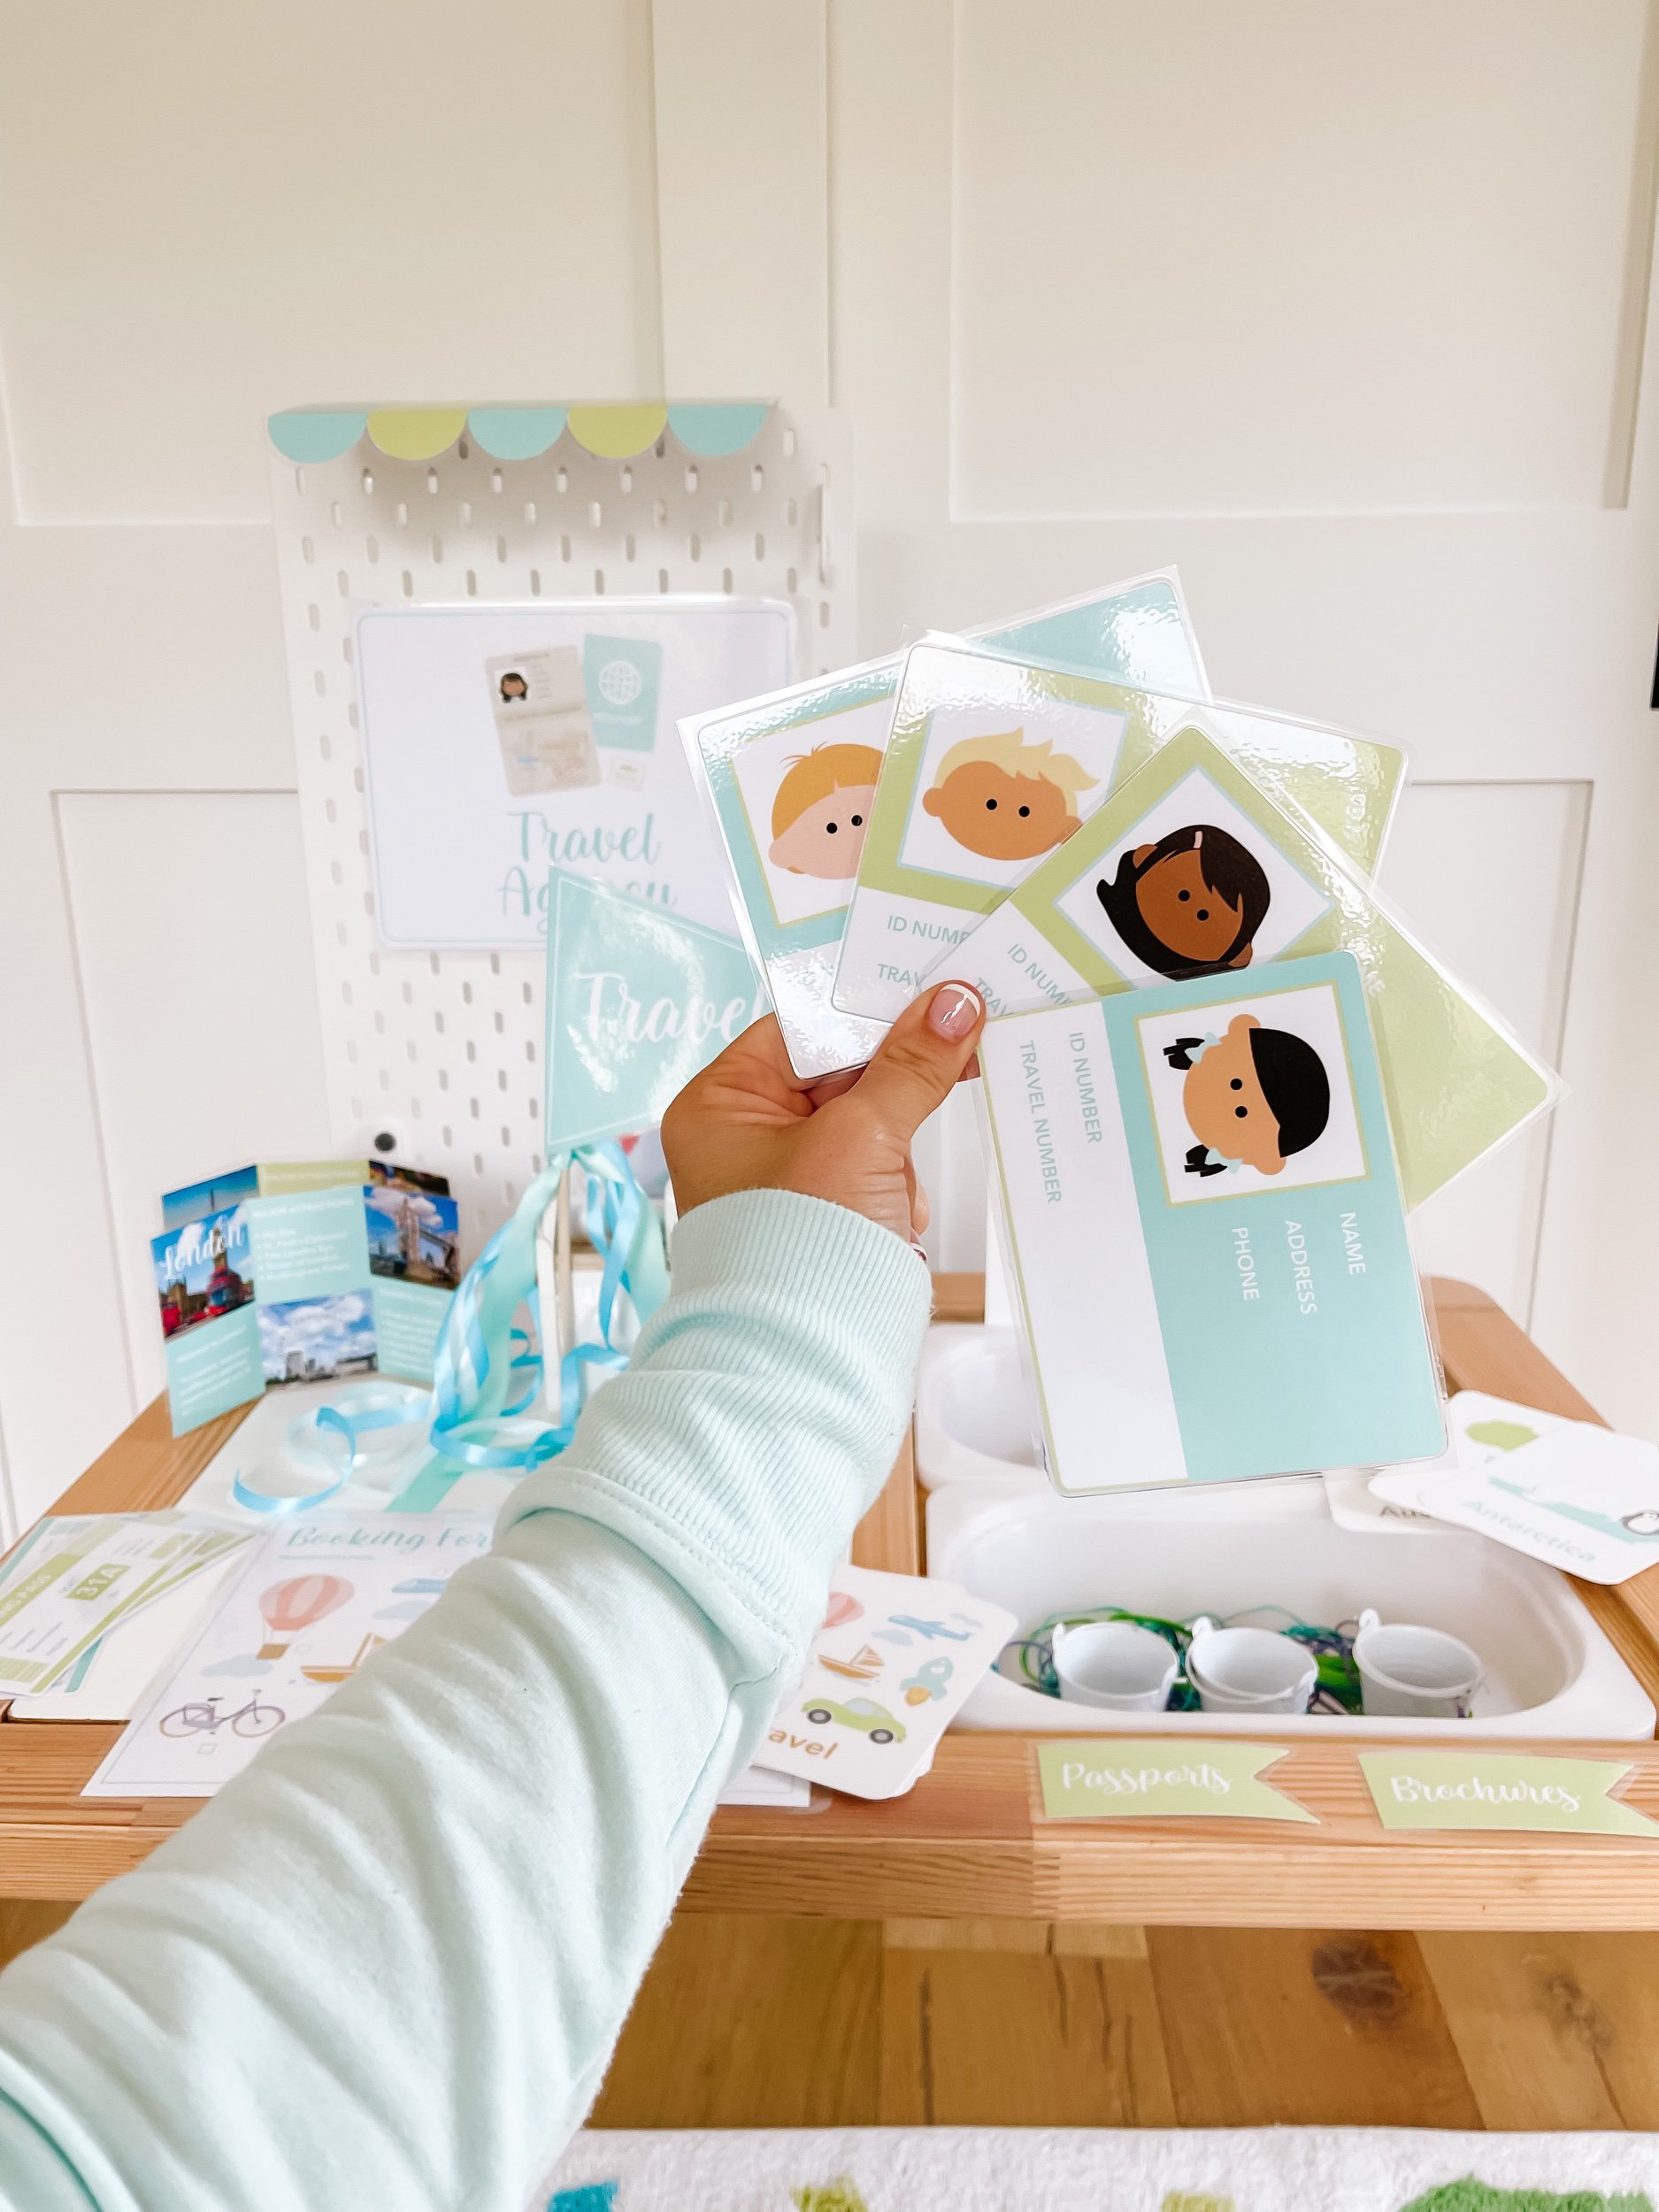
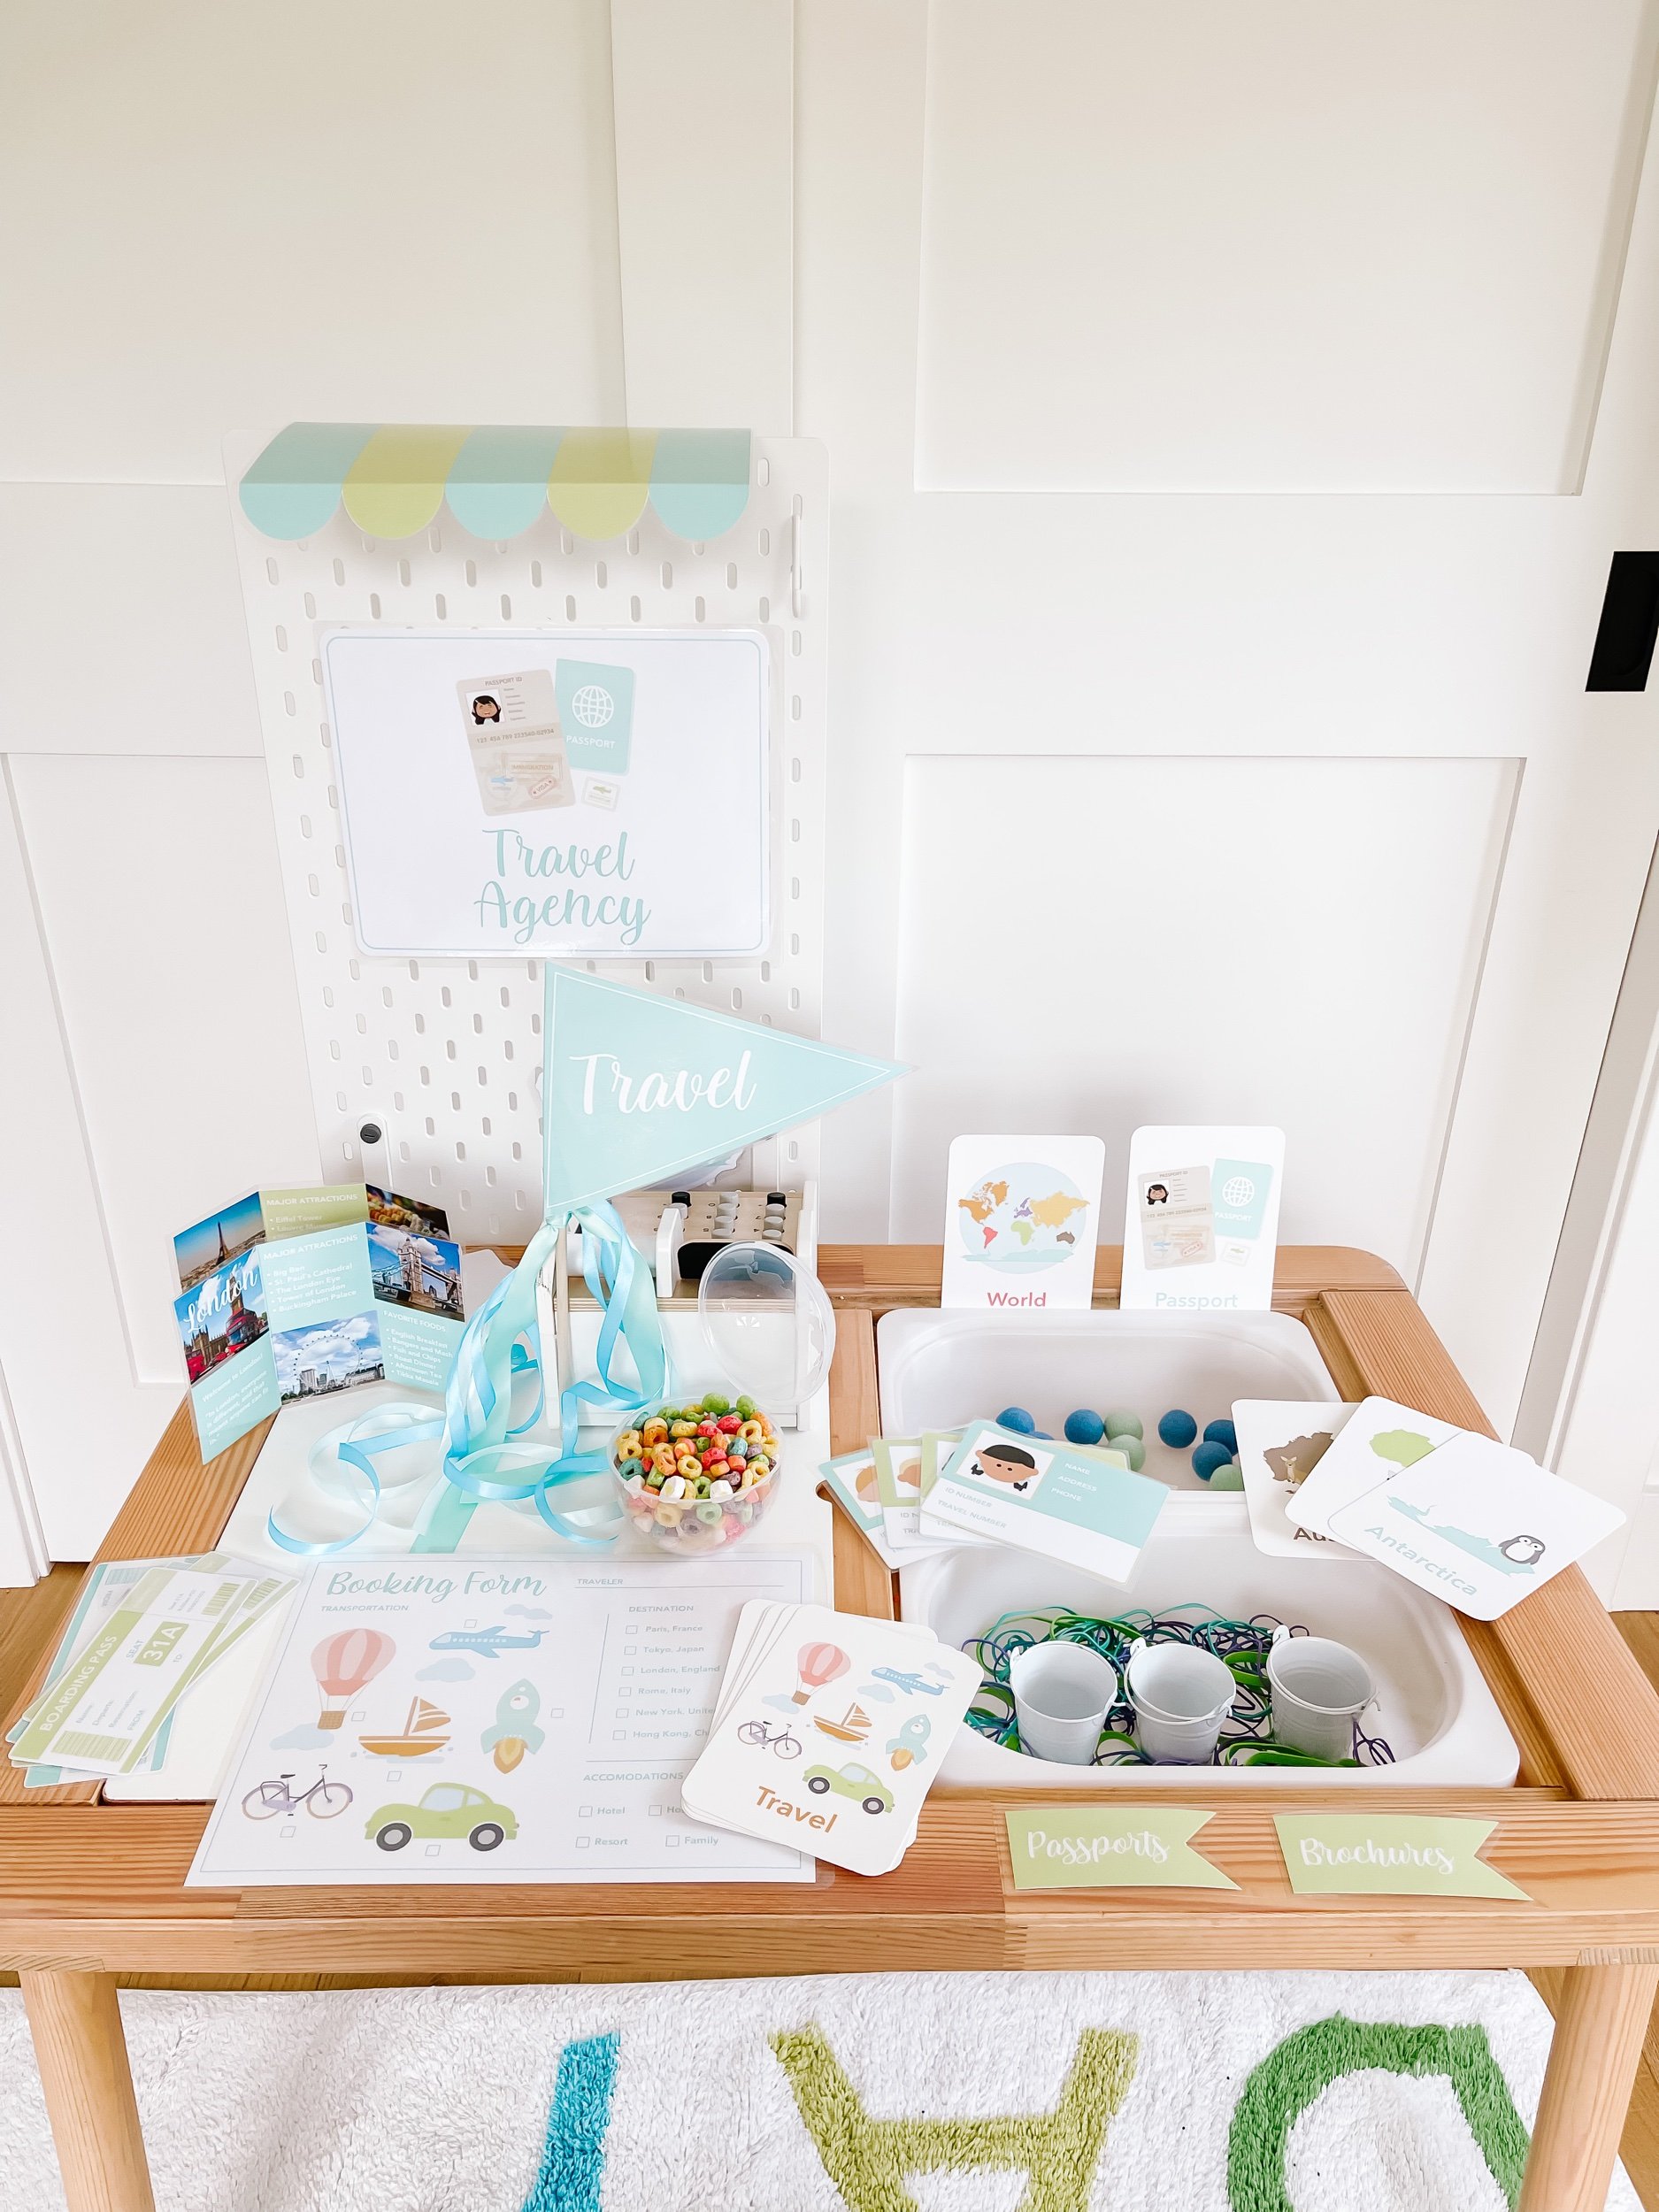
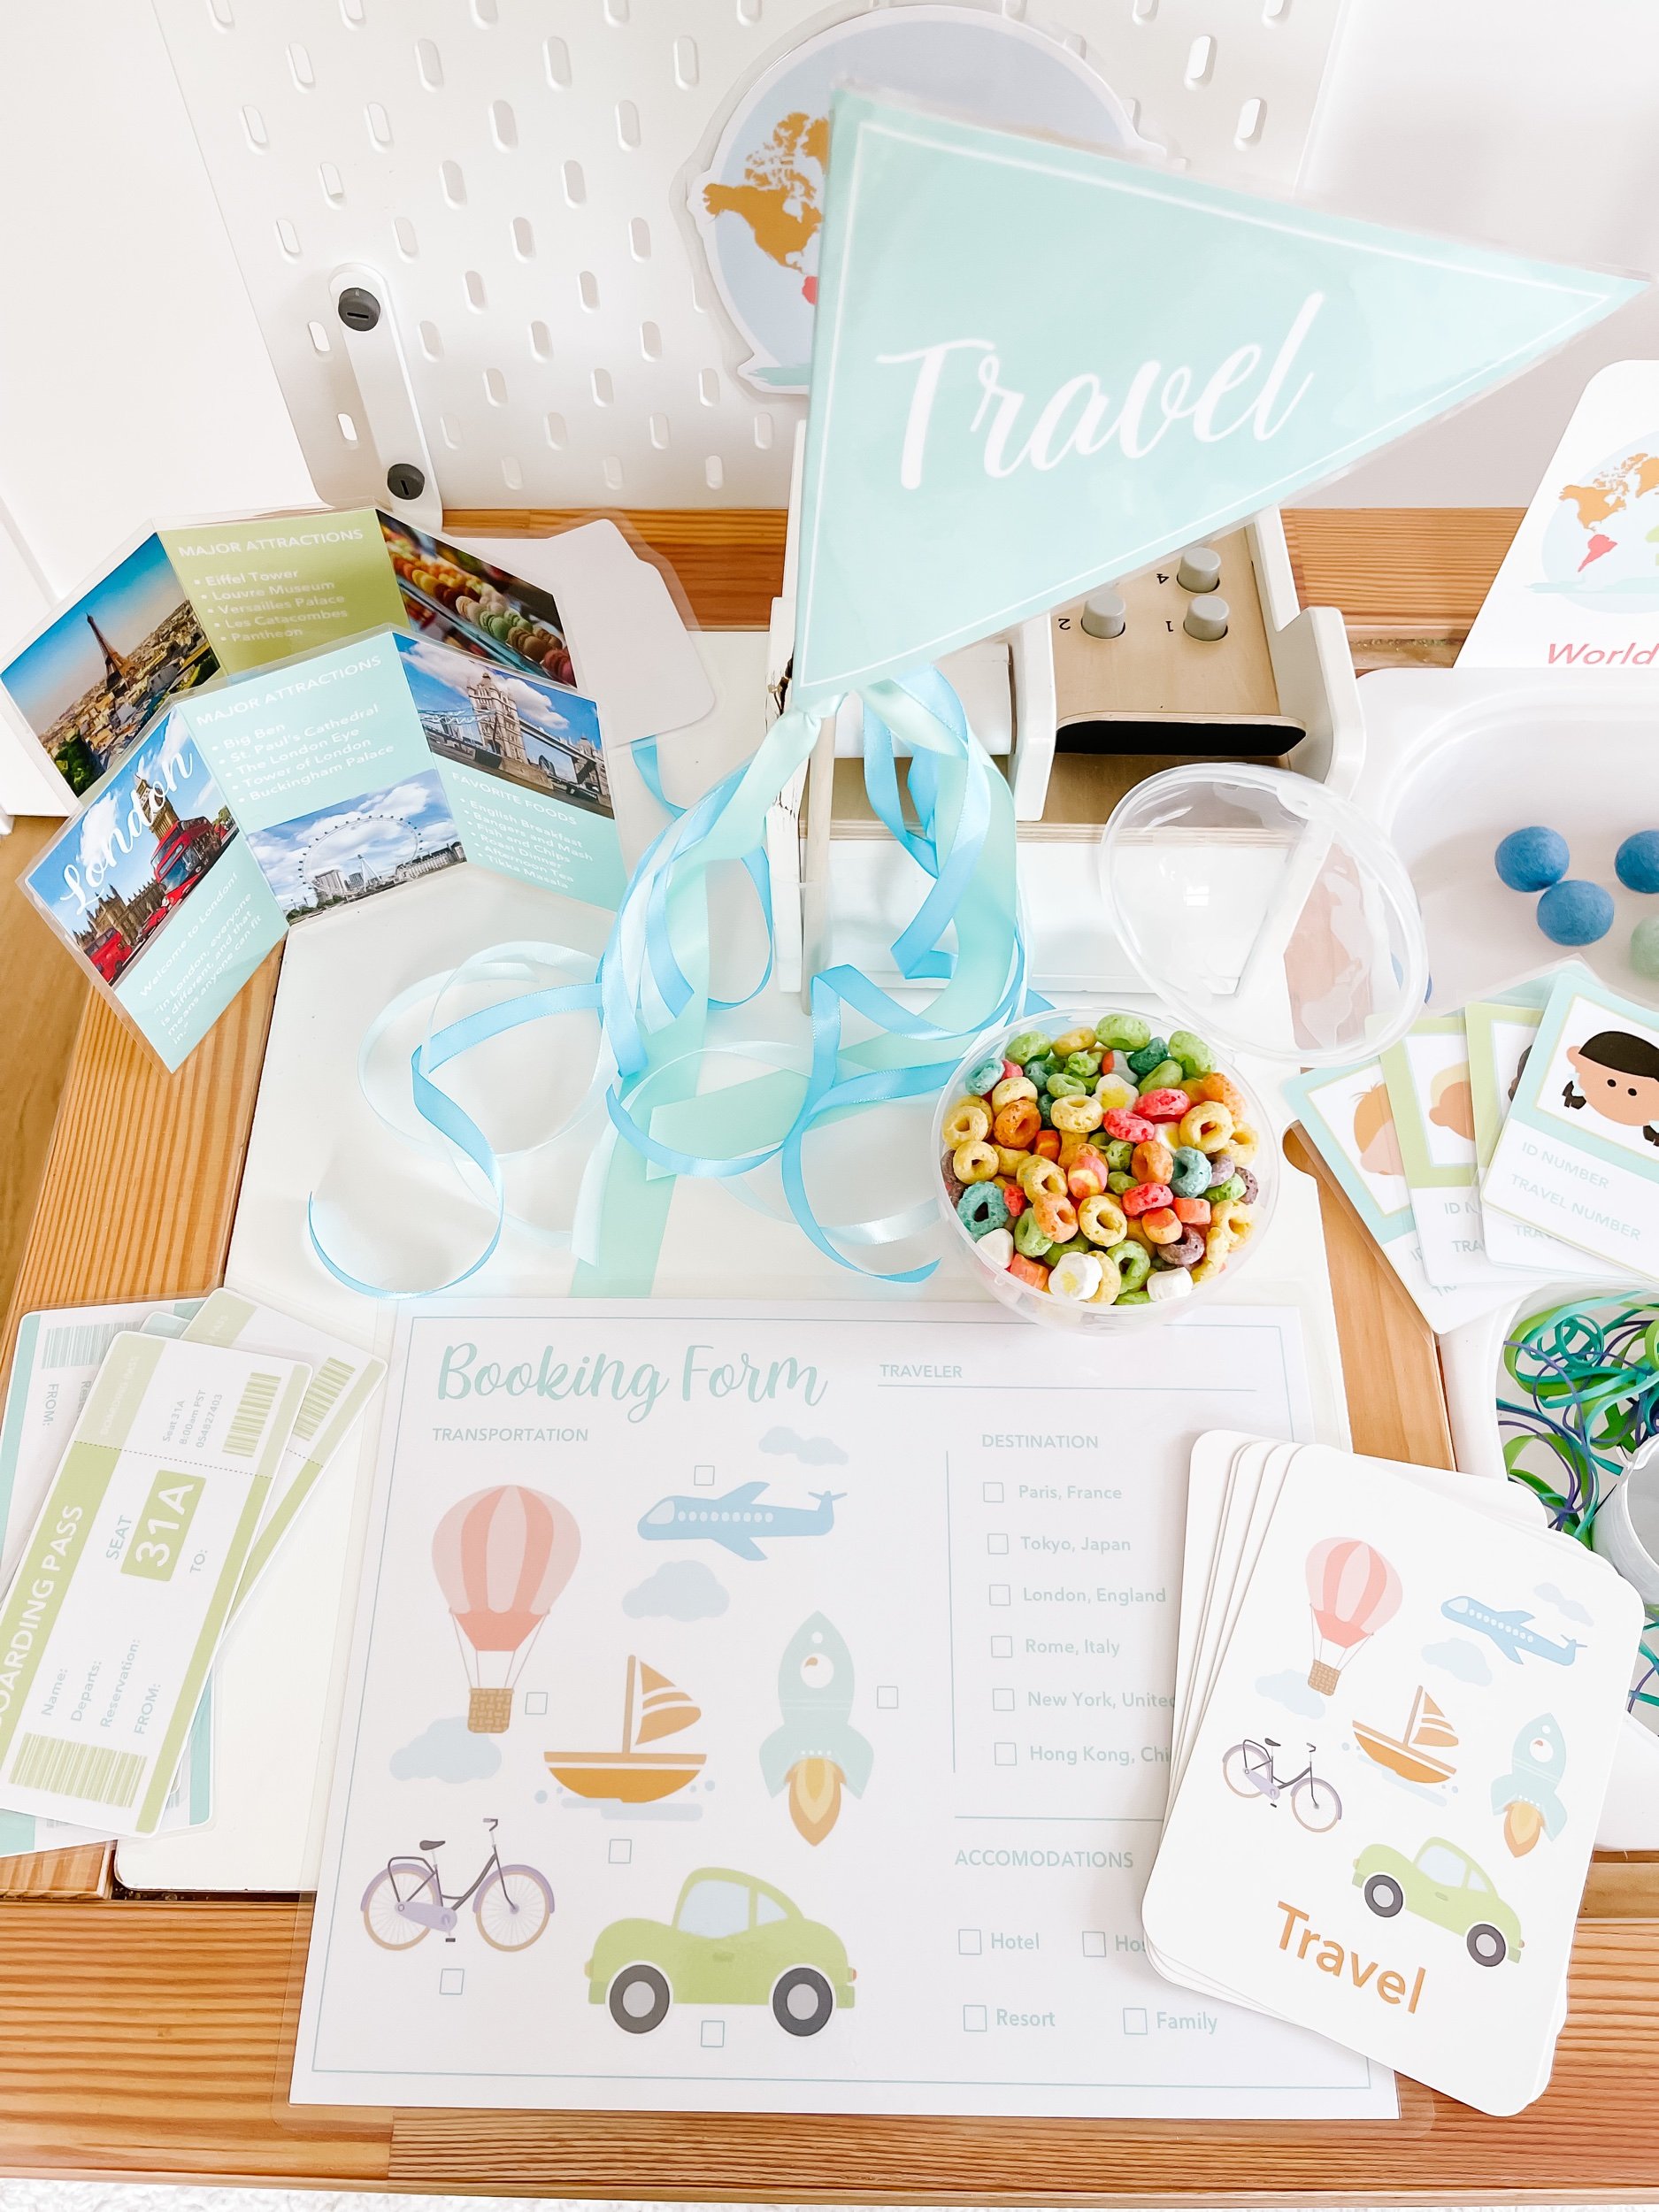

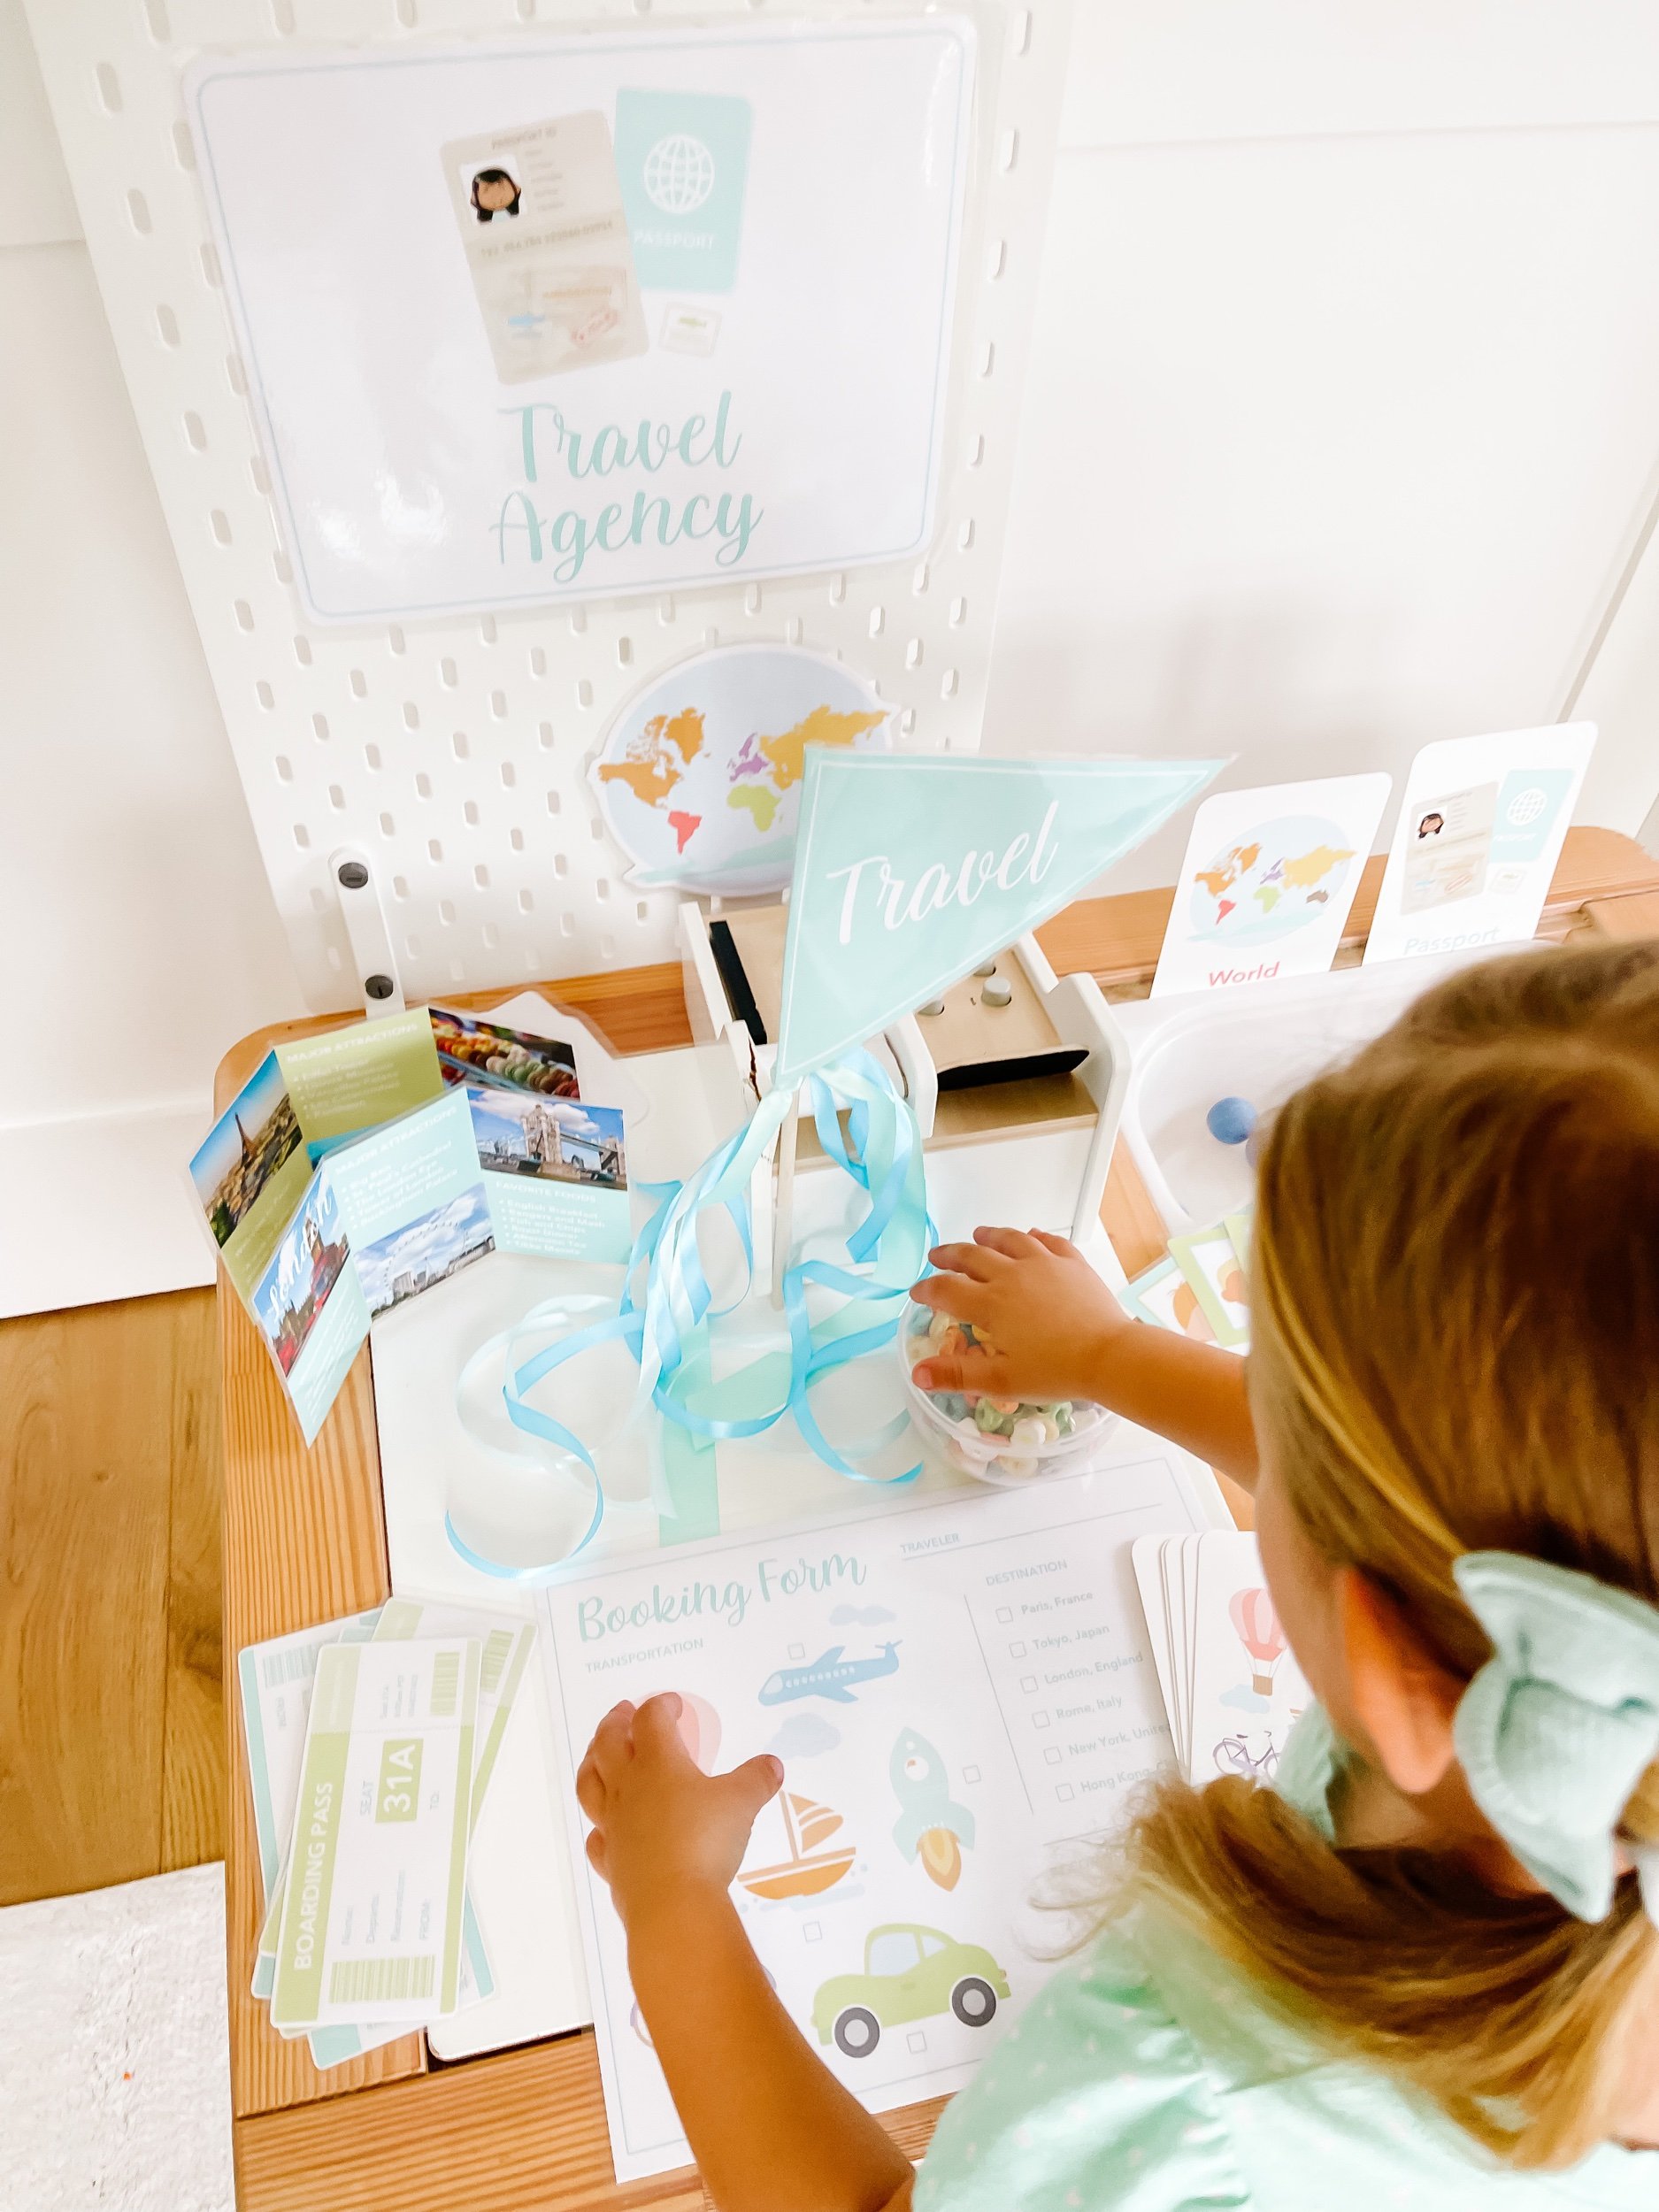
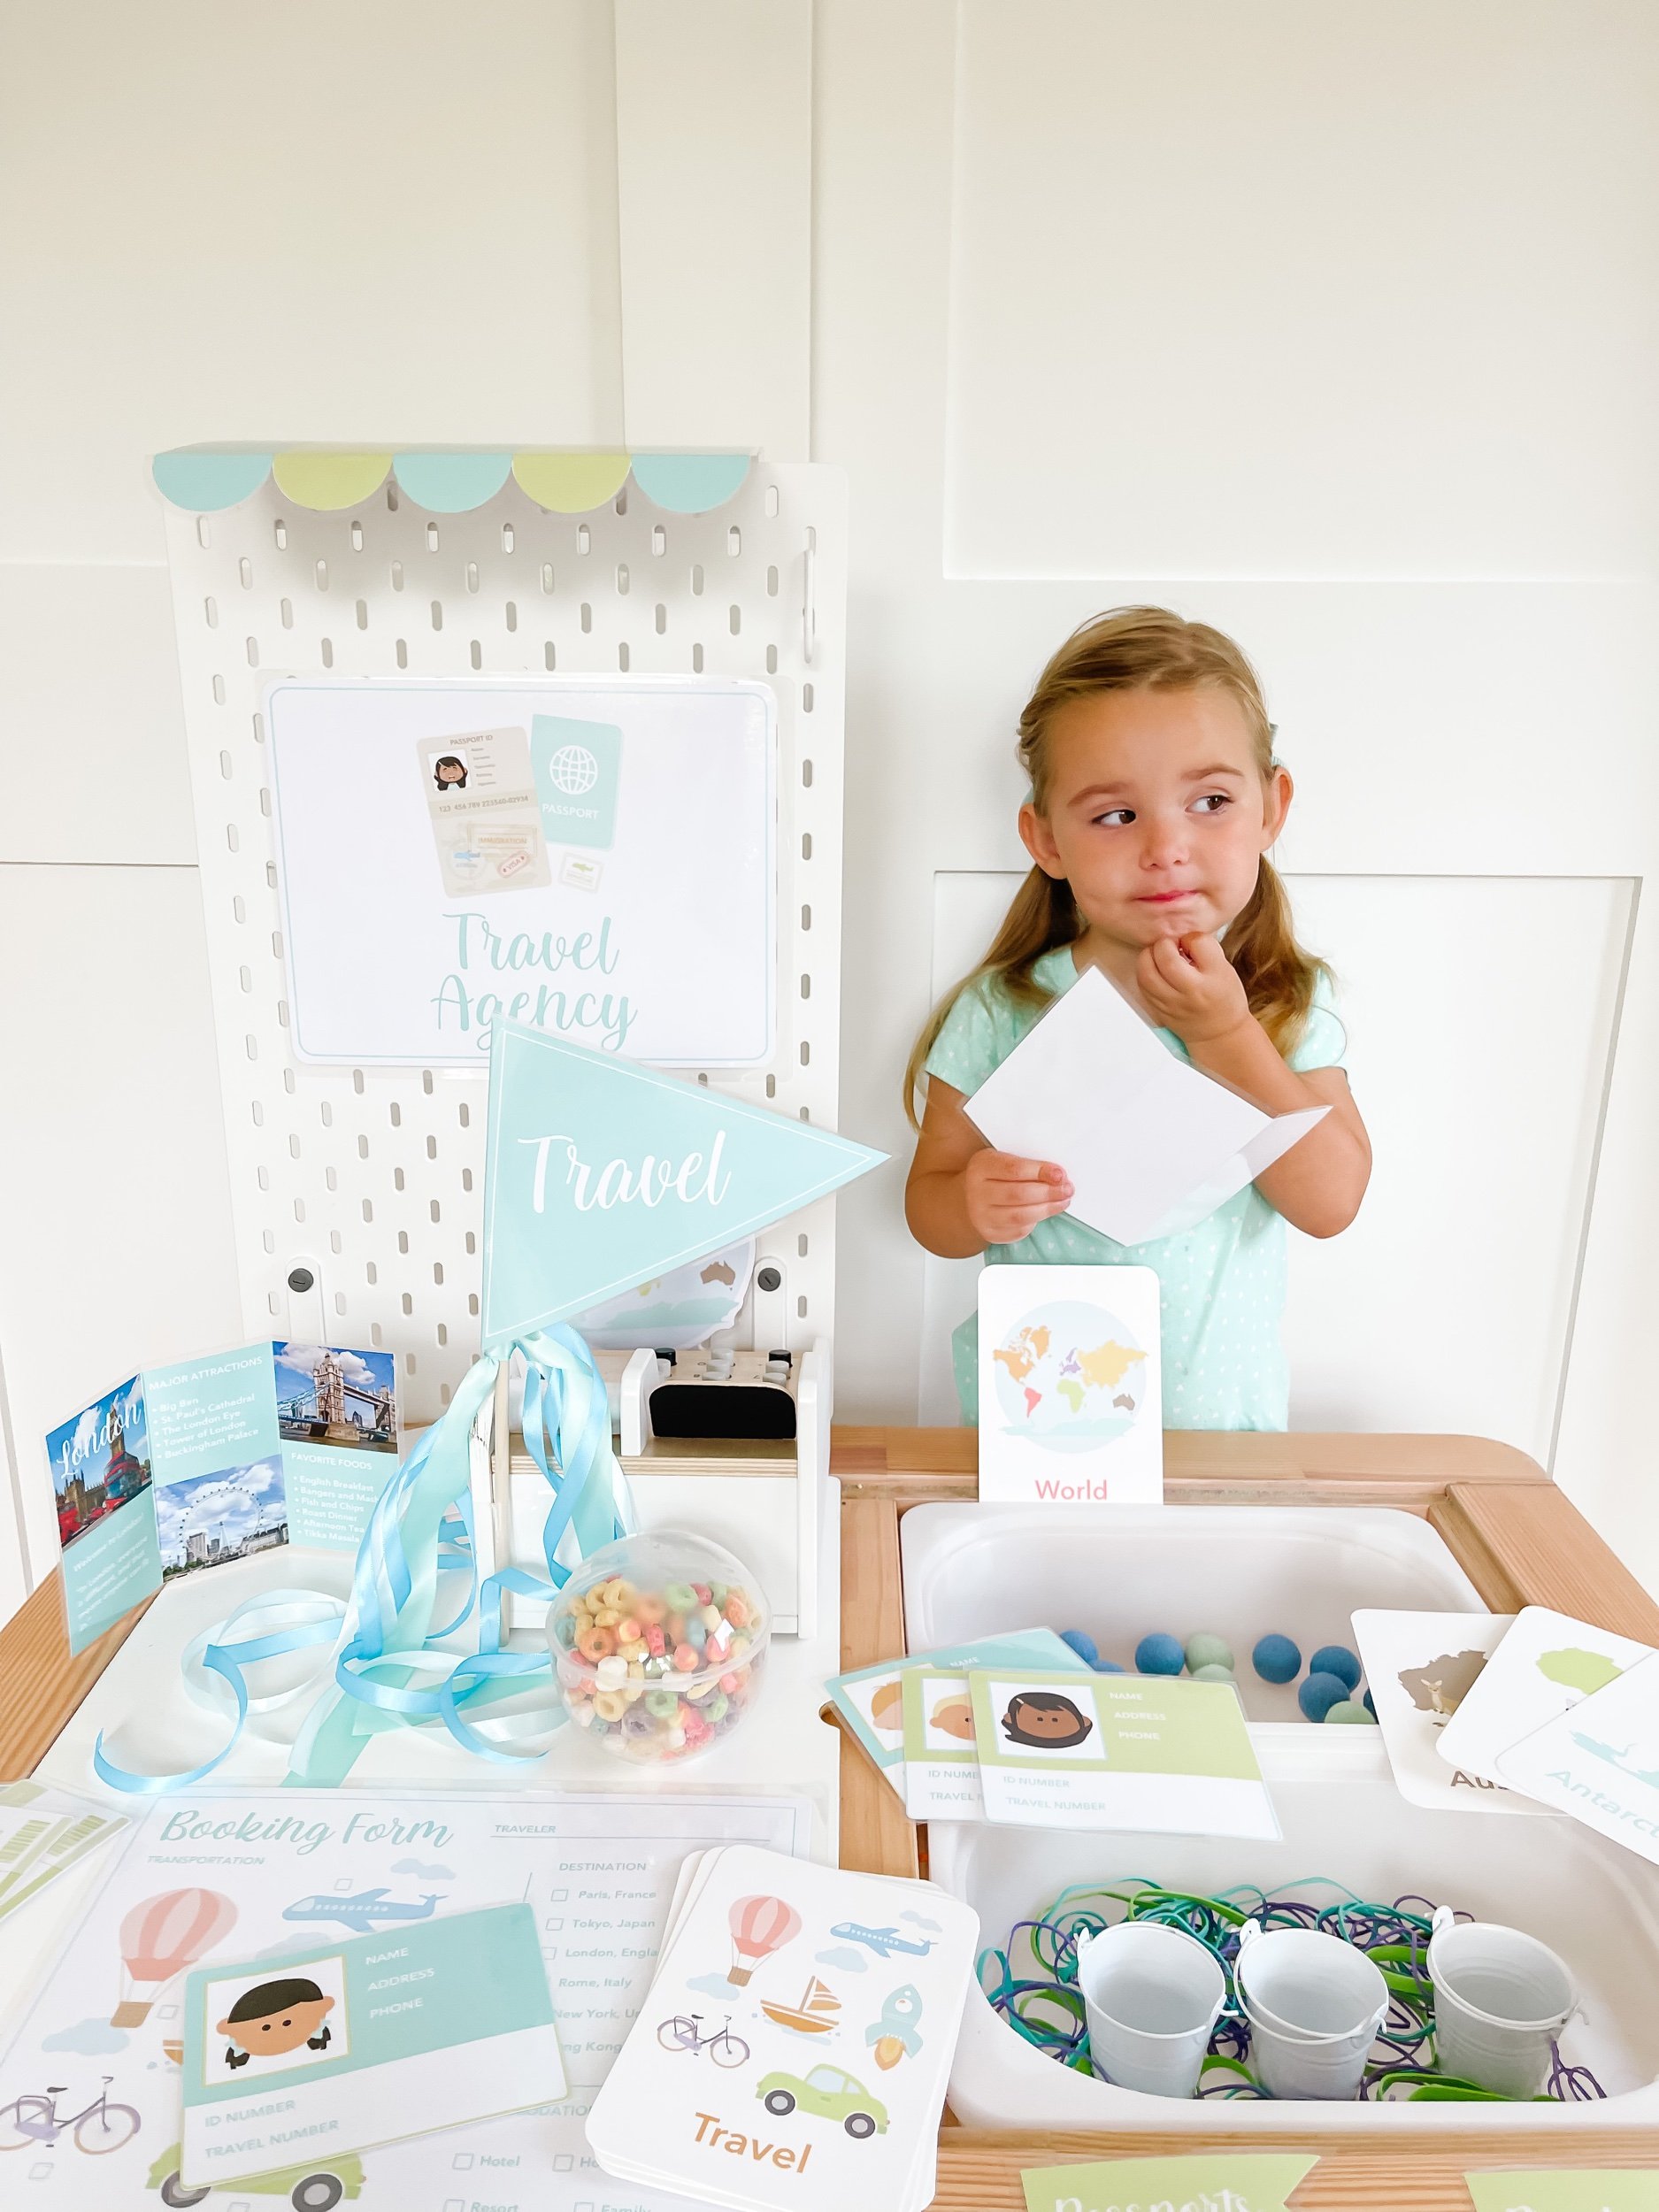
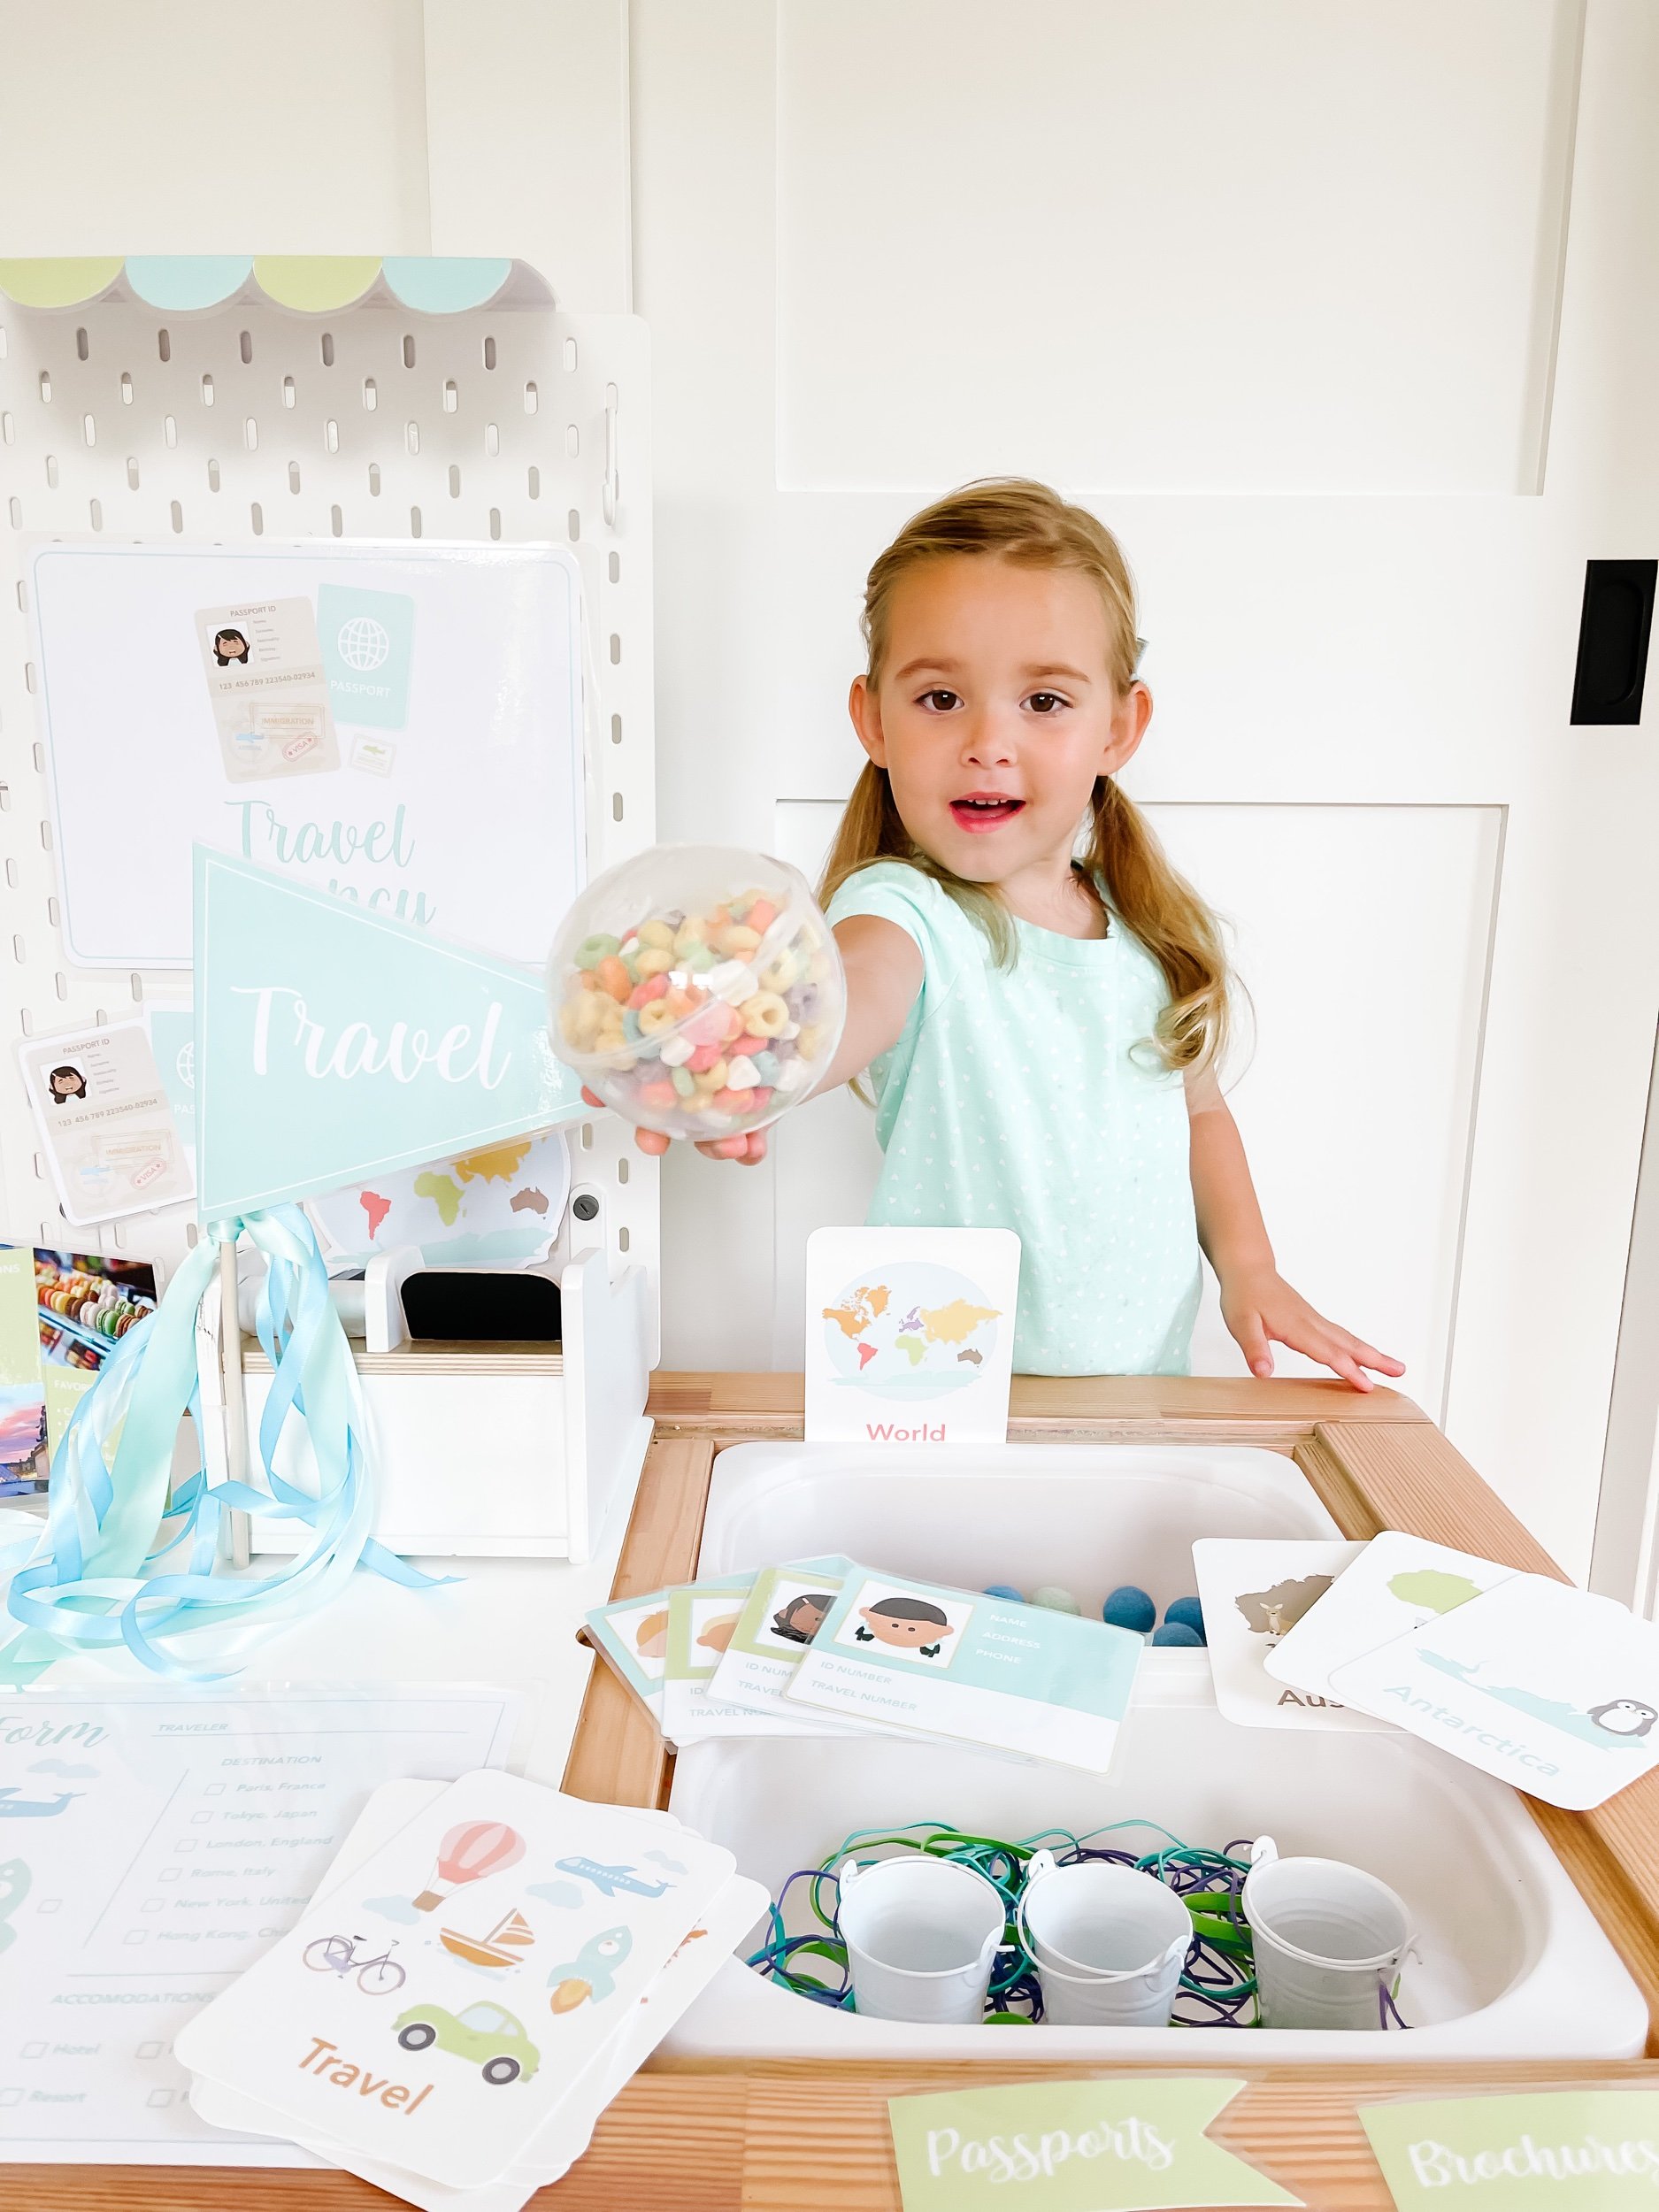
Our printable decor is designed to create an immersive and engaging environment for toddlers to explore and play. Featuring vibrant shades of teal and lime green, the decor includes an awning, a travel agency sign, a pennant flag, a cut-out globe, two brochures, and a travel form. The kit also includes a passport, airplane tickets, and 4 identification cards. With these visually stimulating pieces, your little ones will feel like they are embarking on a real travel adventure!
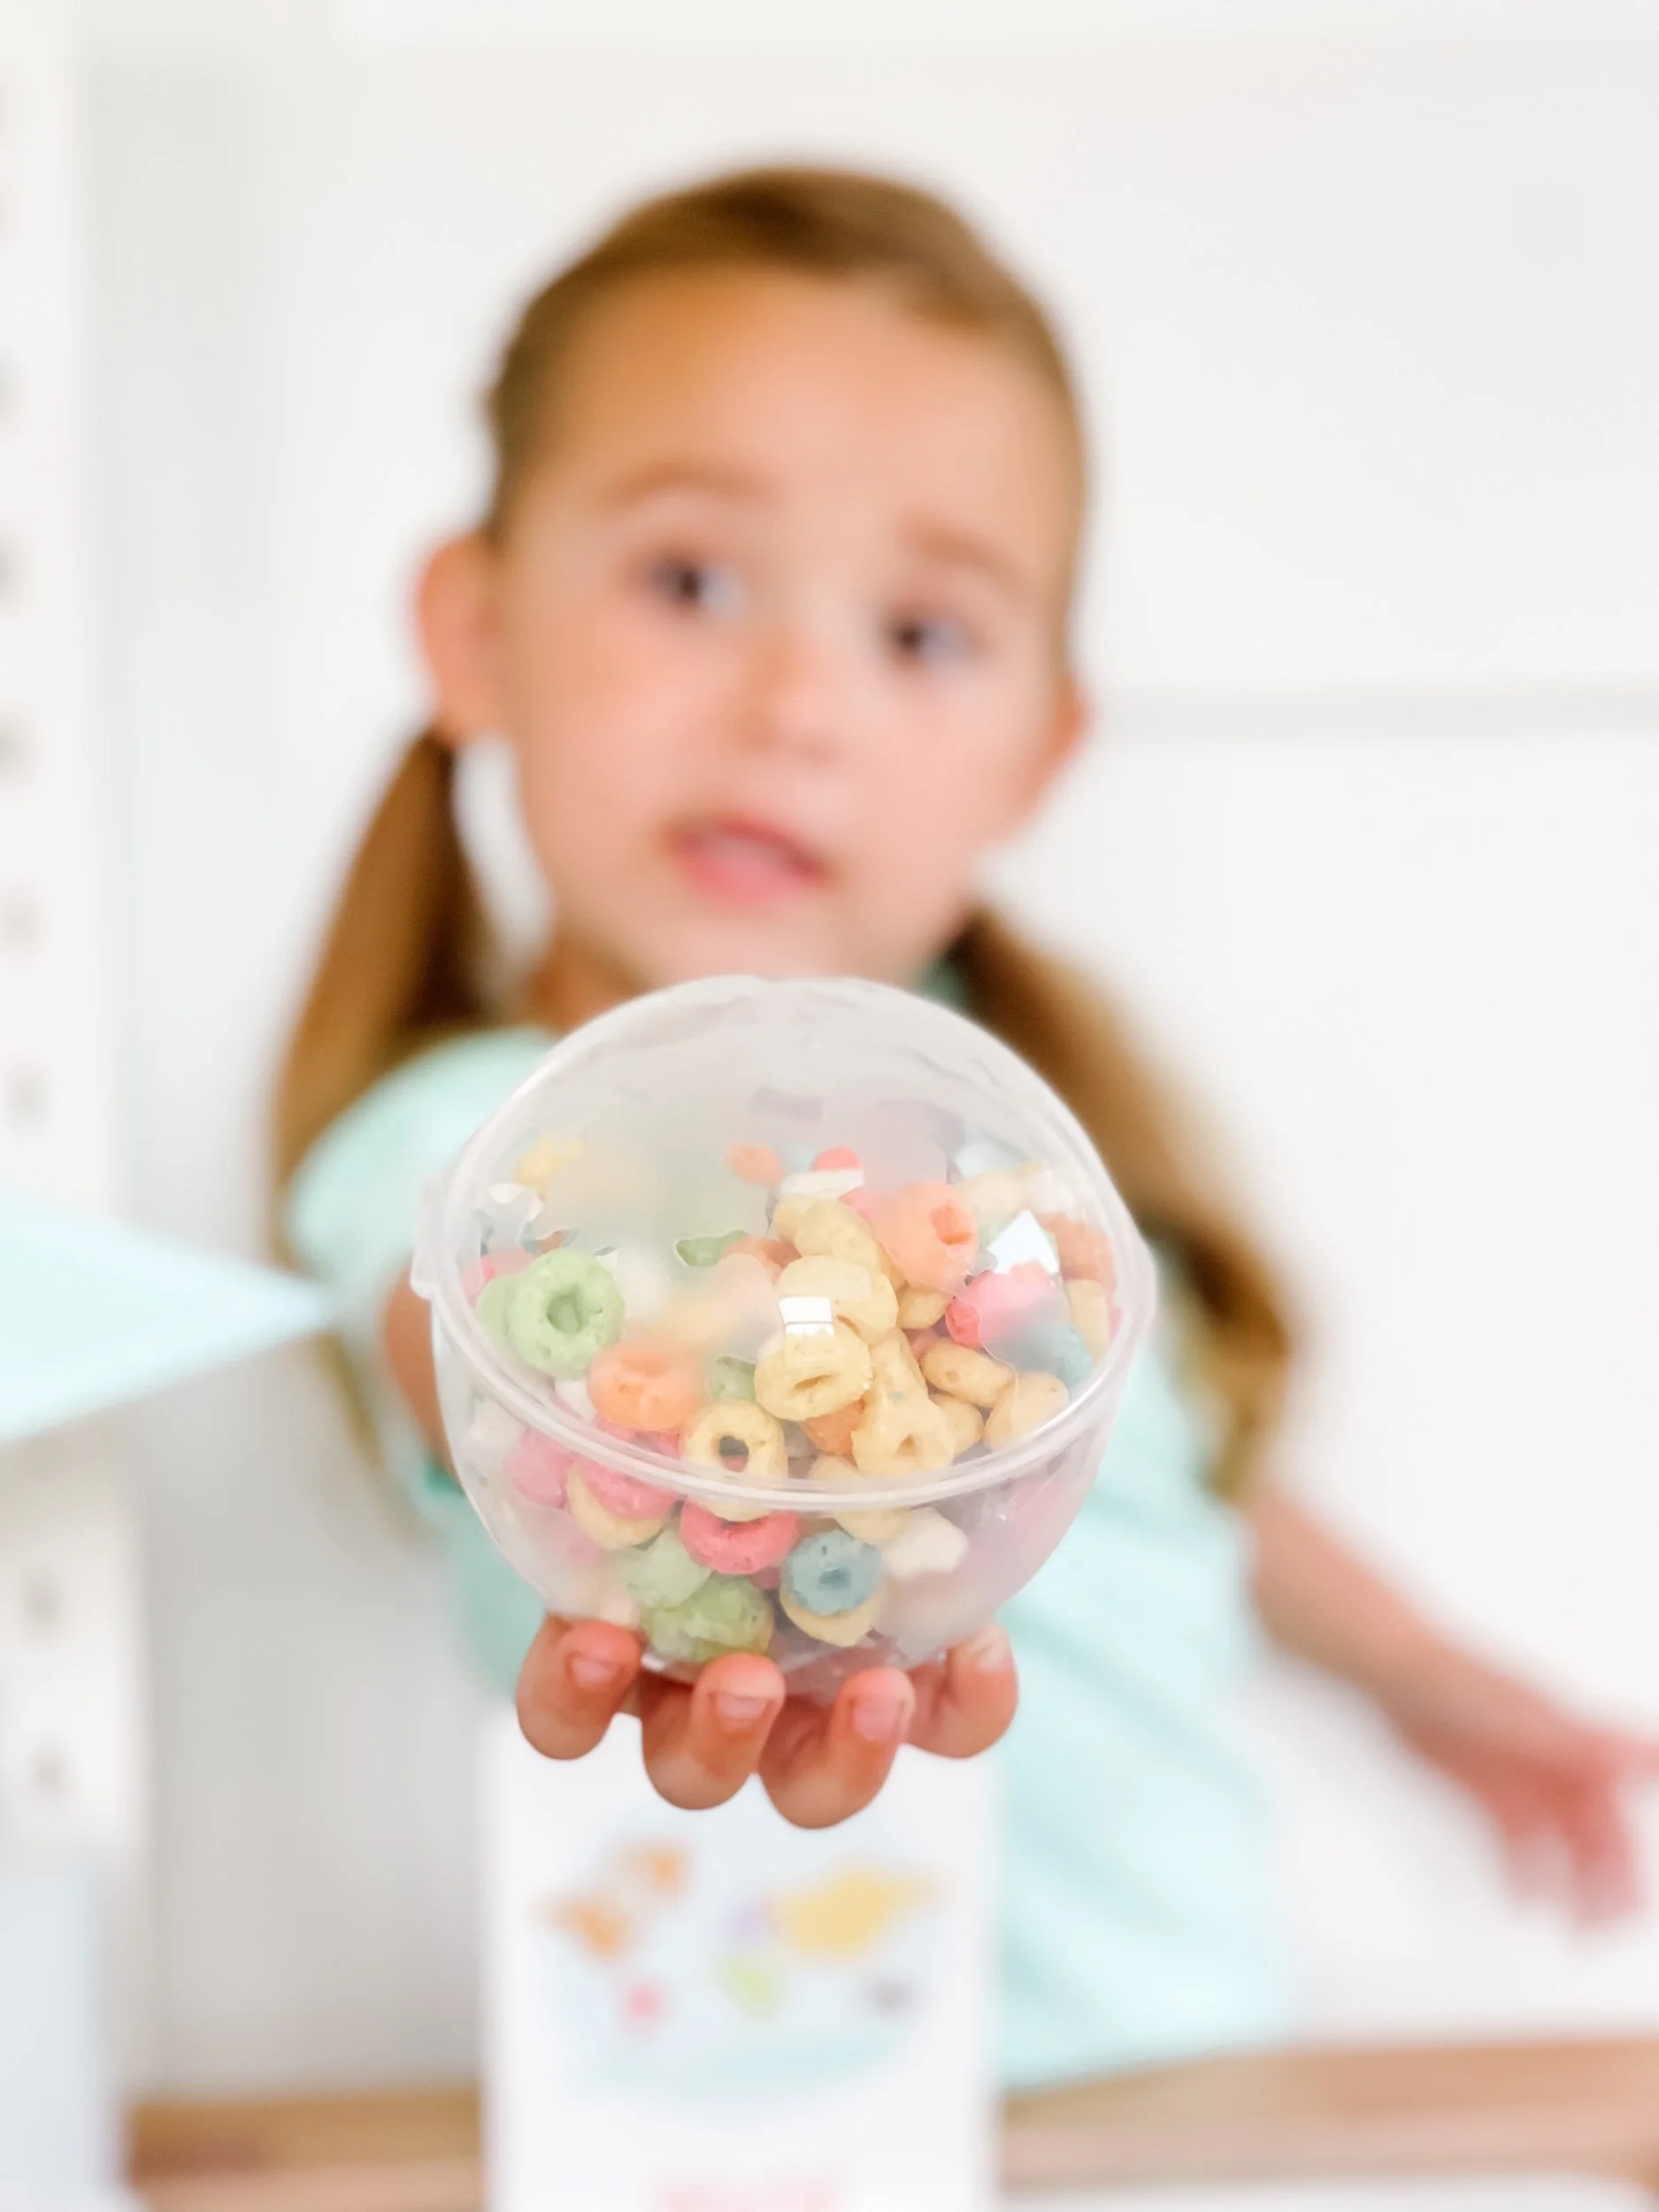
One of the sensory bin activities included in our kit involves using colorful fruit loops to match the colors to the continents on the globe. This activity not only engages toddlers' senses but also introduces them to the concept of continents and promotes color recognition skills.
For ages 1.5 to 2.5, toddlers can focus on identifying and sorting the fruit loops by color. As they progress to ages 3.5 to 4.5, they can start associating each color with a specific continent, enhancing their geographical knowledge. This adaptable activity caters to different learning needs and allows children to explore at their own pace.
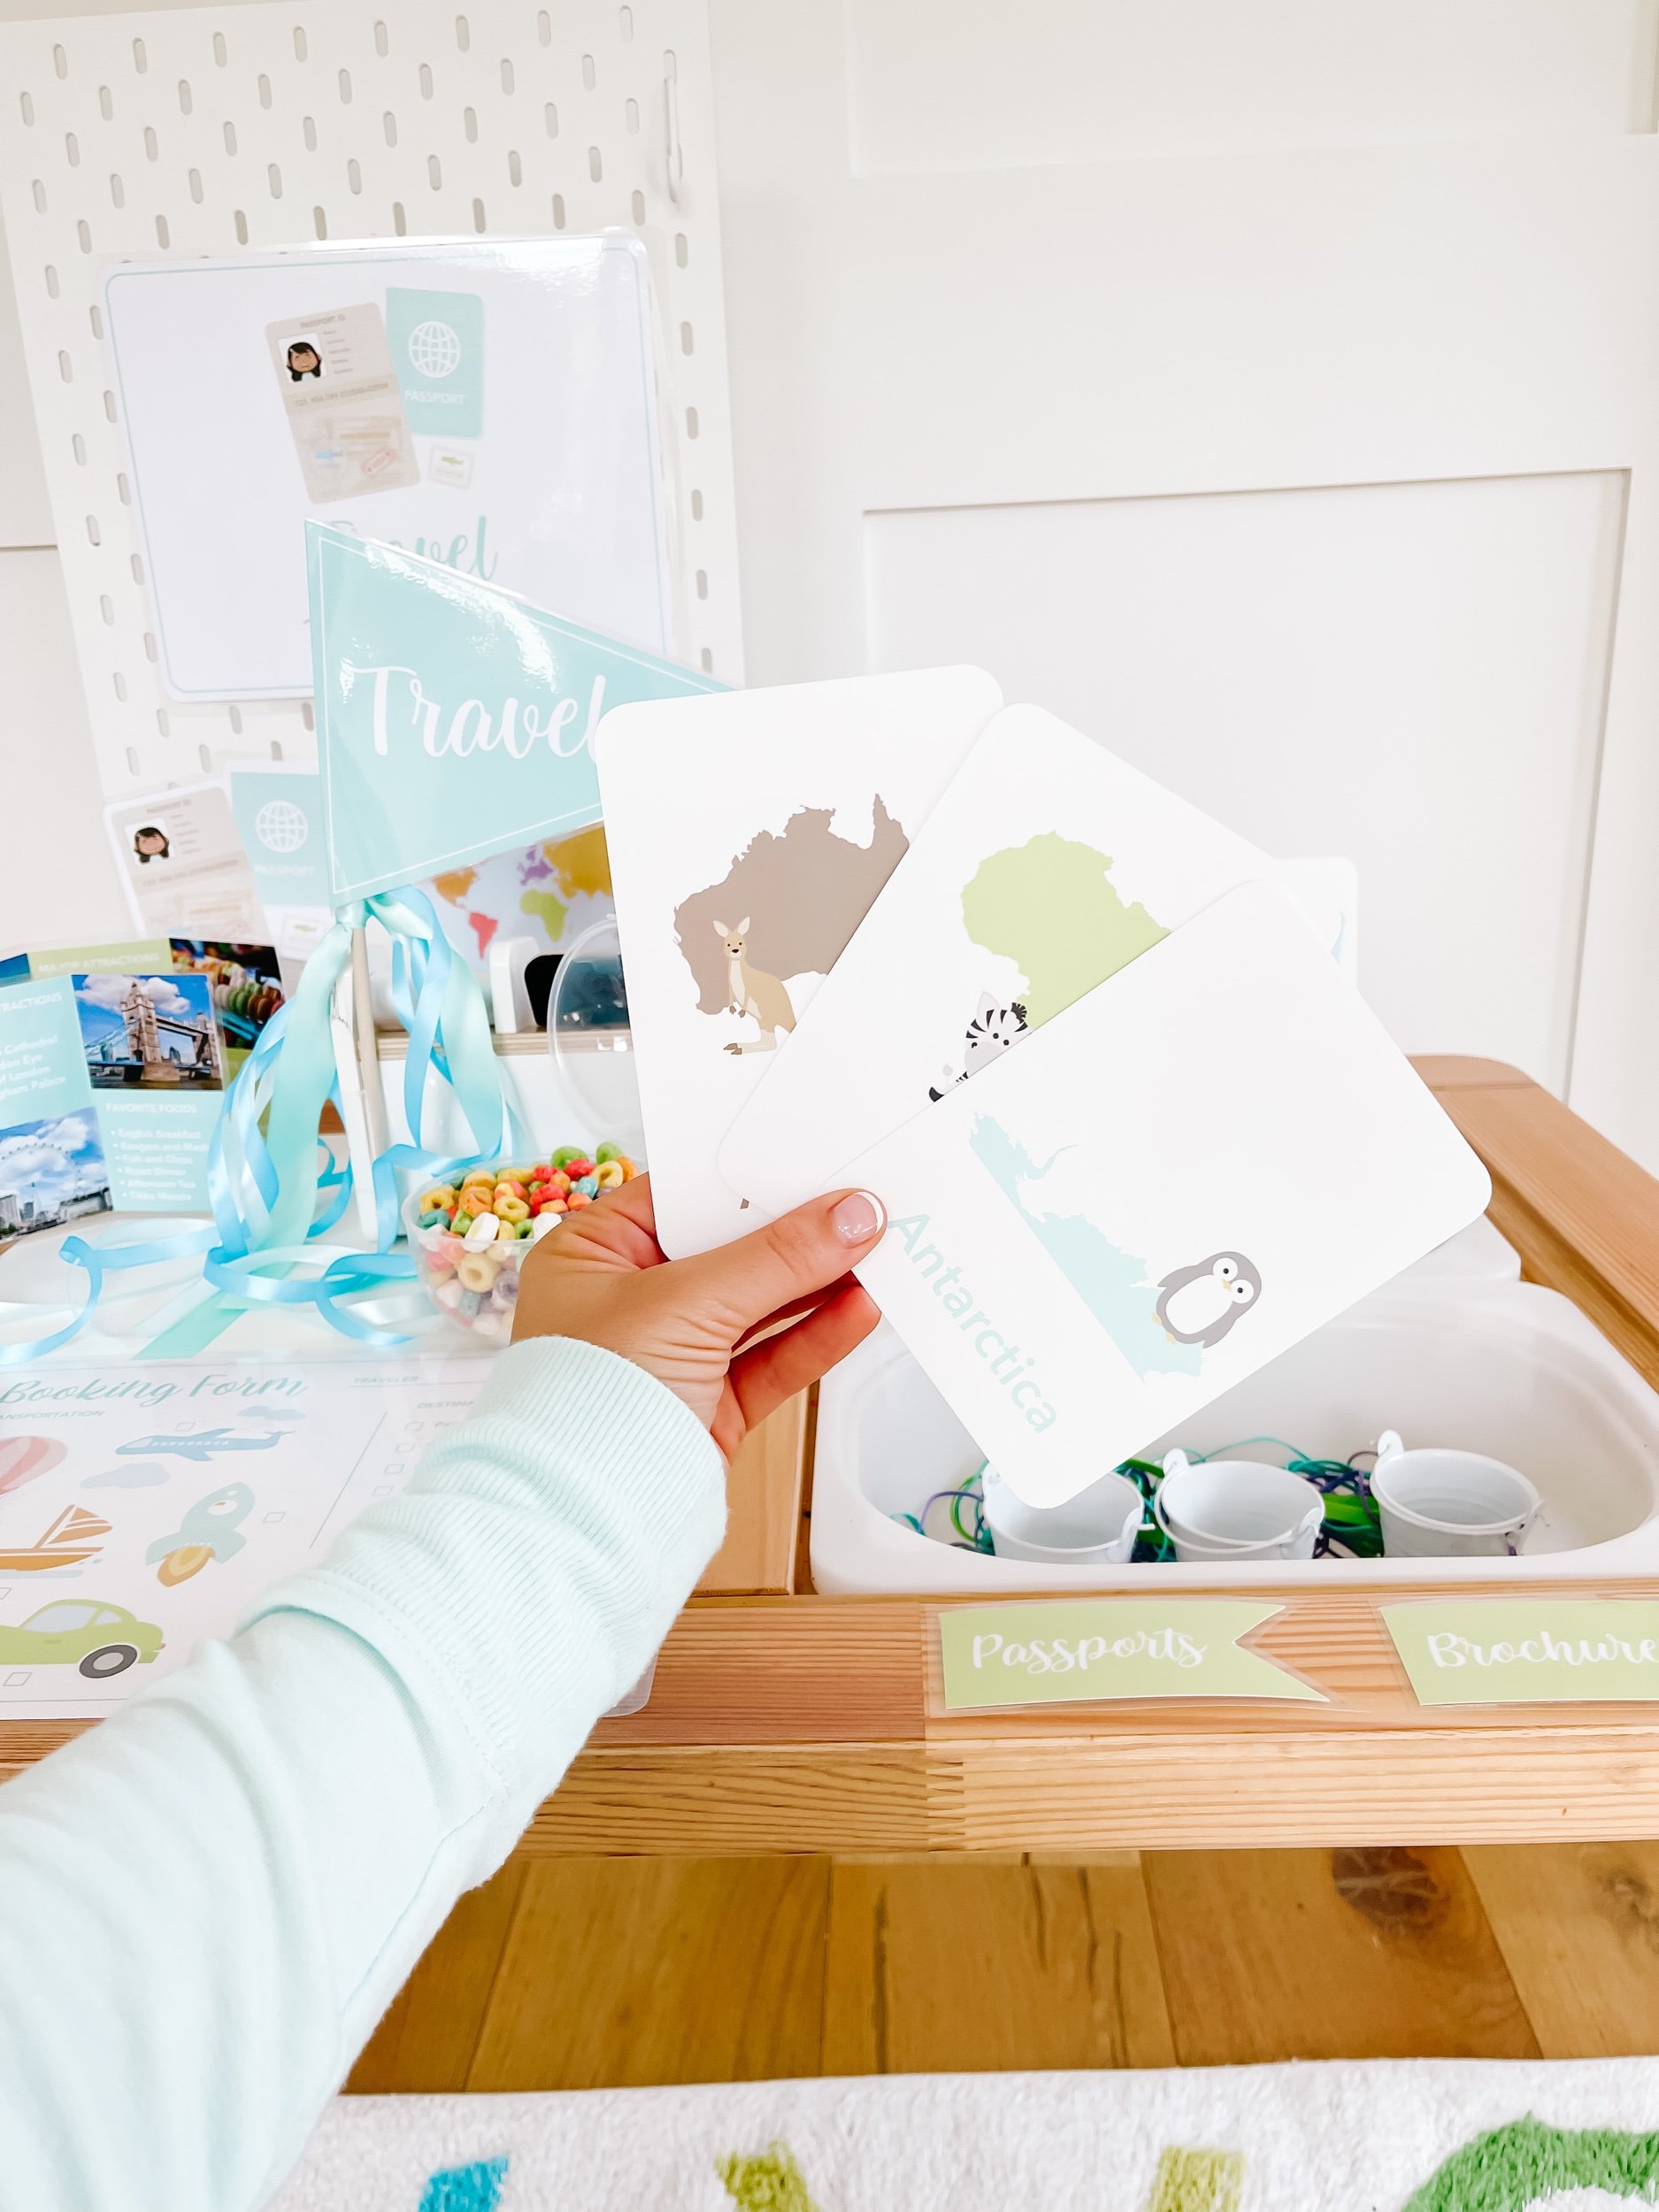
Another exciting sensory bin activity featured in this setup involves wool balls for sorting and matching. Toddlers can enjoy the tactile experience of playing with soft wool balls while developing their fine motor skills and hand-eye coordination. They can sort the balls by size, color, or texture, promoting critical thinking and problem-solving abilities.
For younger toddlers aged 1.5 to 2.5, the focus can be on exploring the different textures and practicing basic sorting. As they grow older, ages 3.5 to 4.5, children can be encouraged to match the wool balls to pictures representing famous landmarks or cultural symbols from various countries. This activity promotes cultural awareness, creativity, and cognitive development.
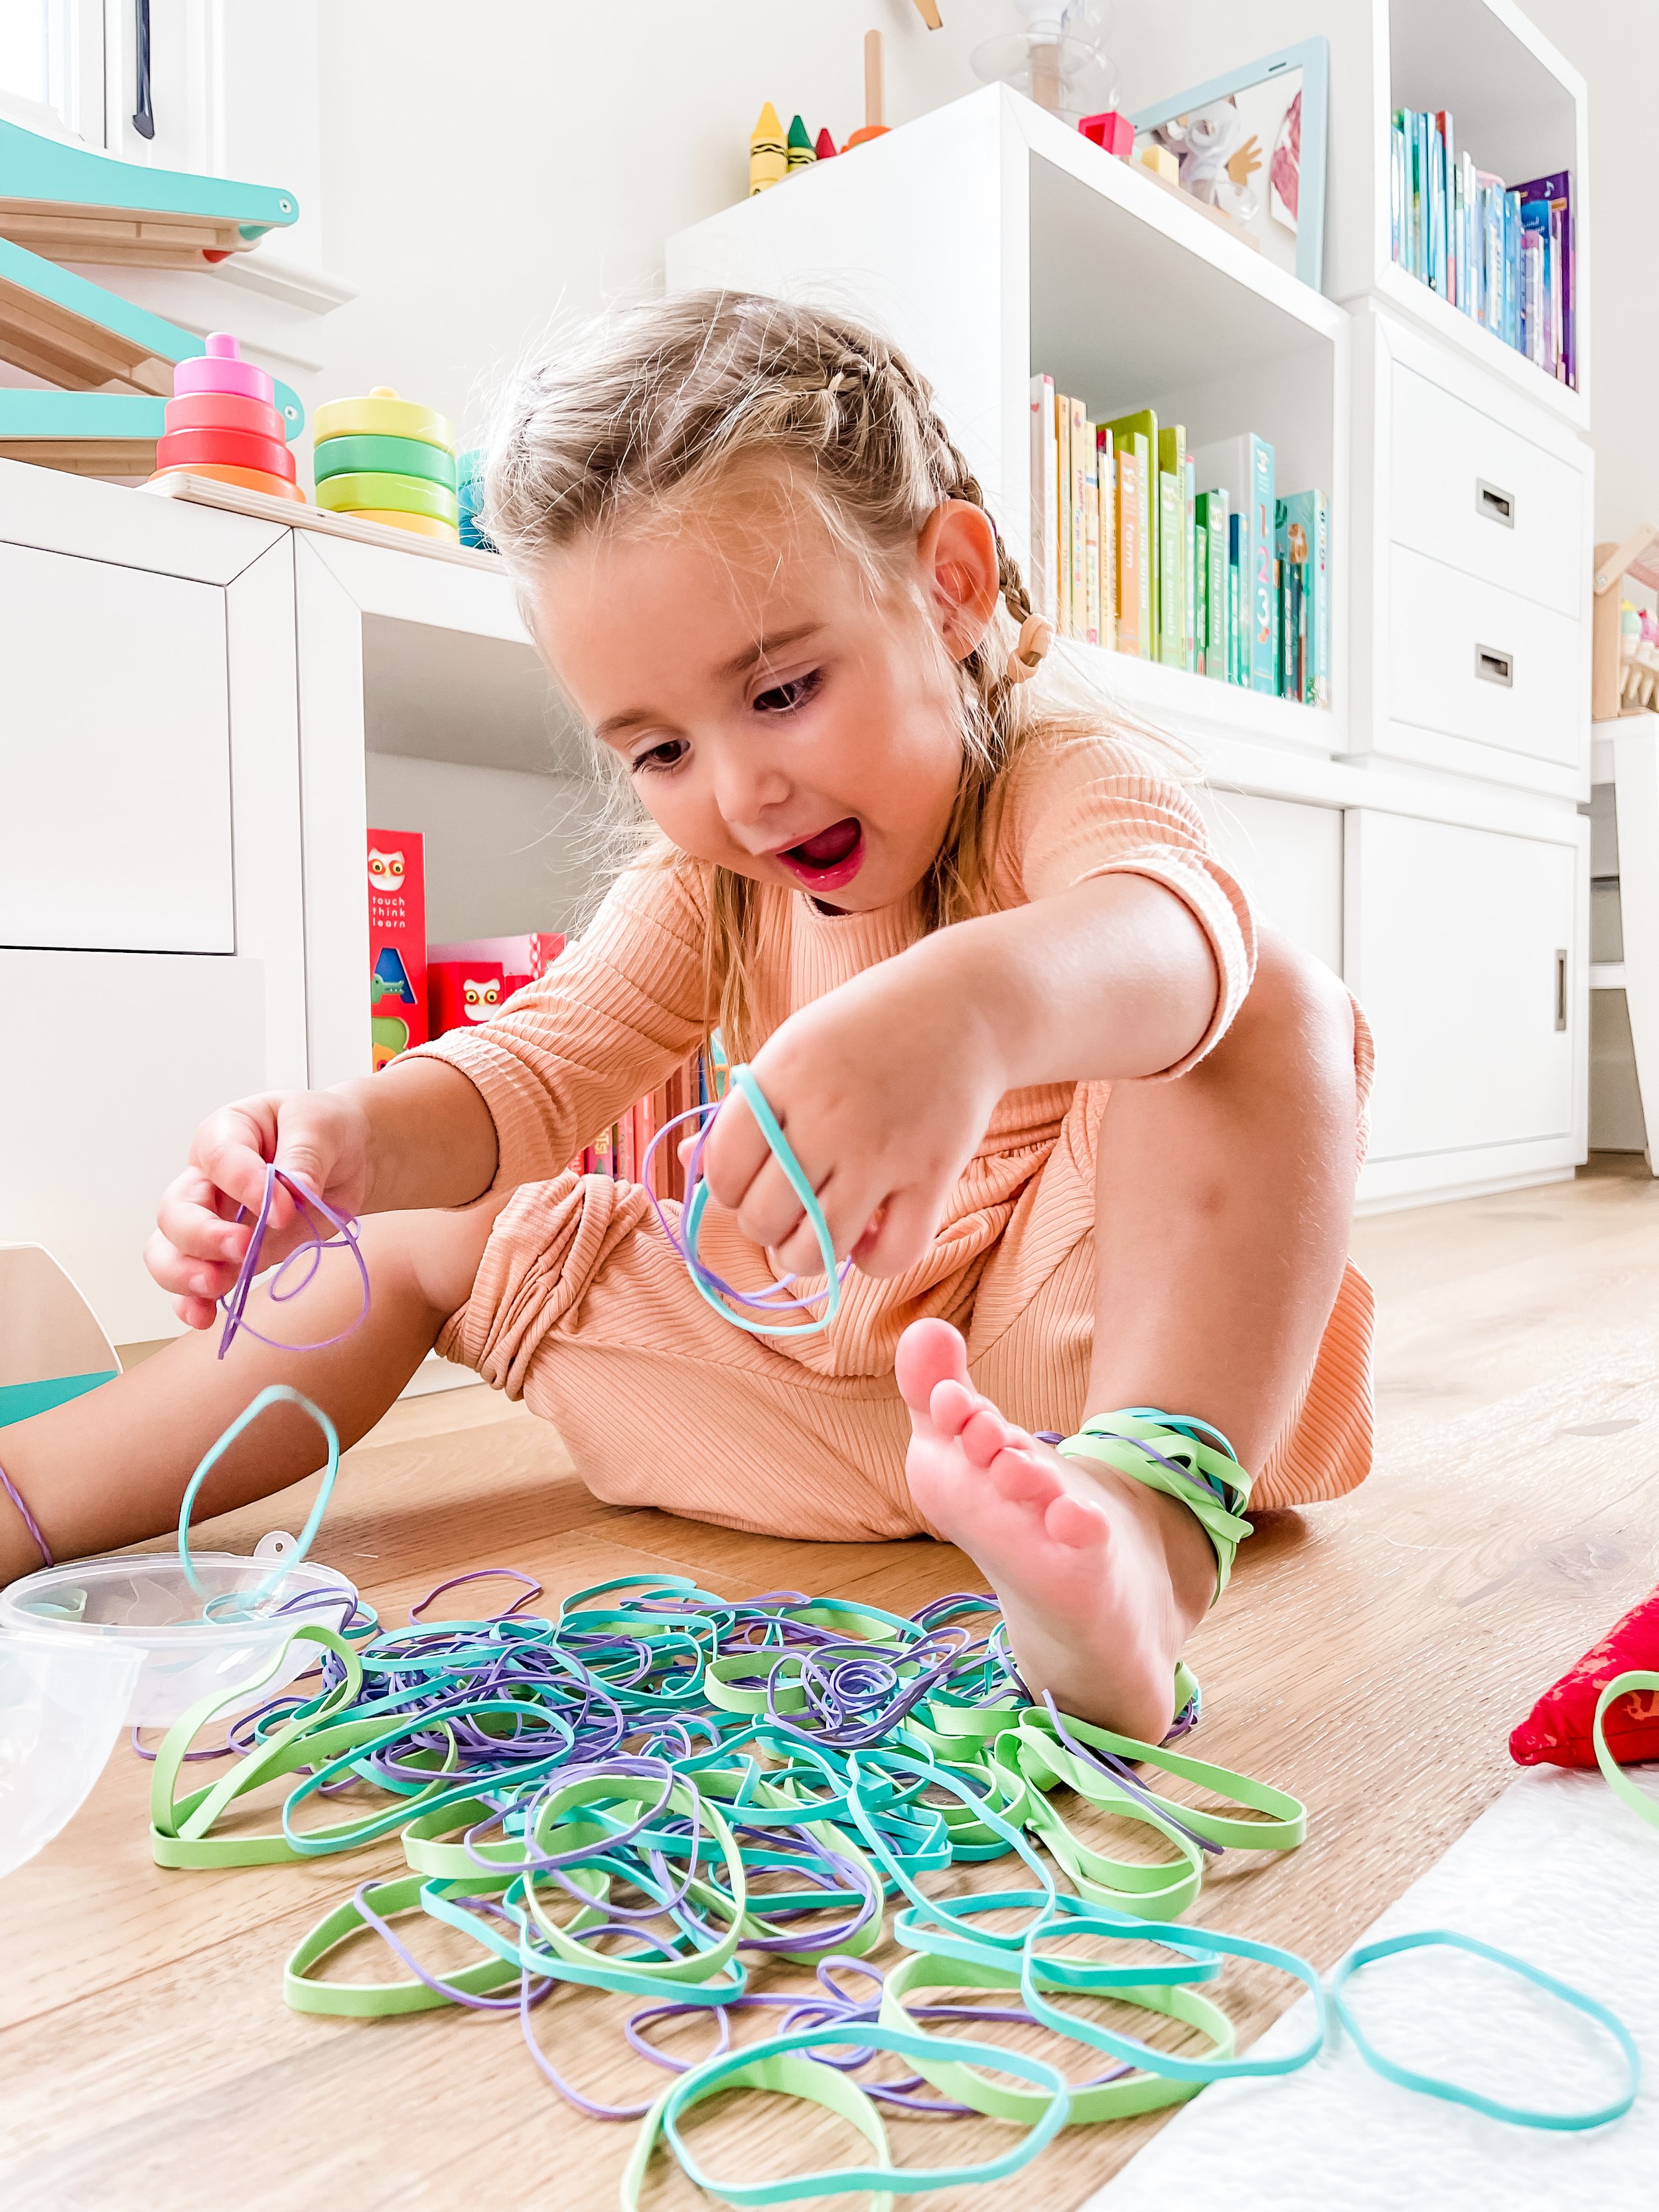
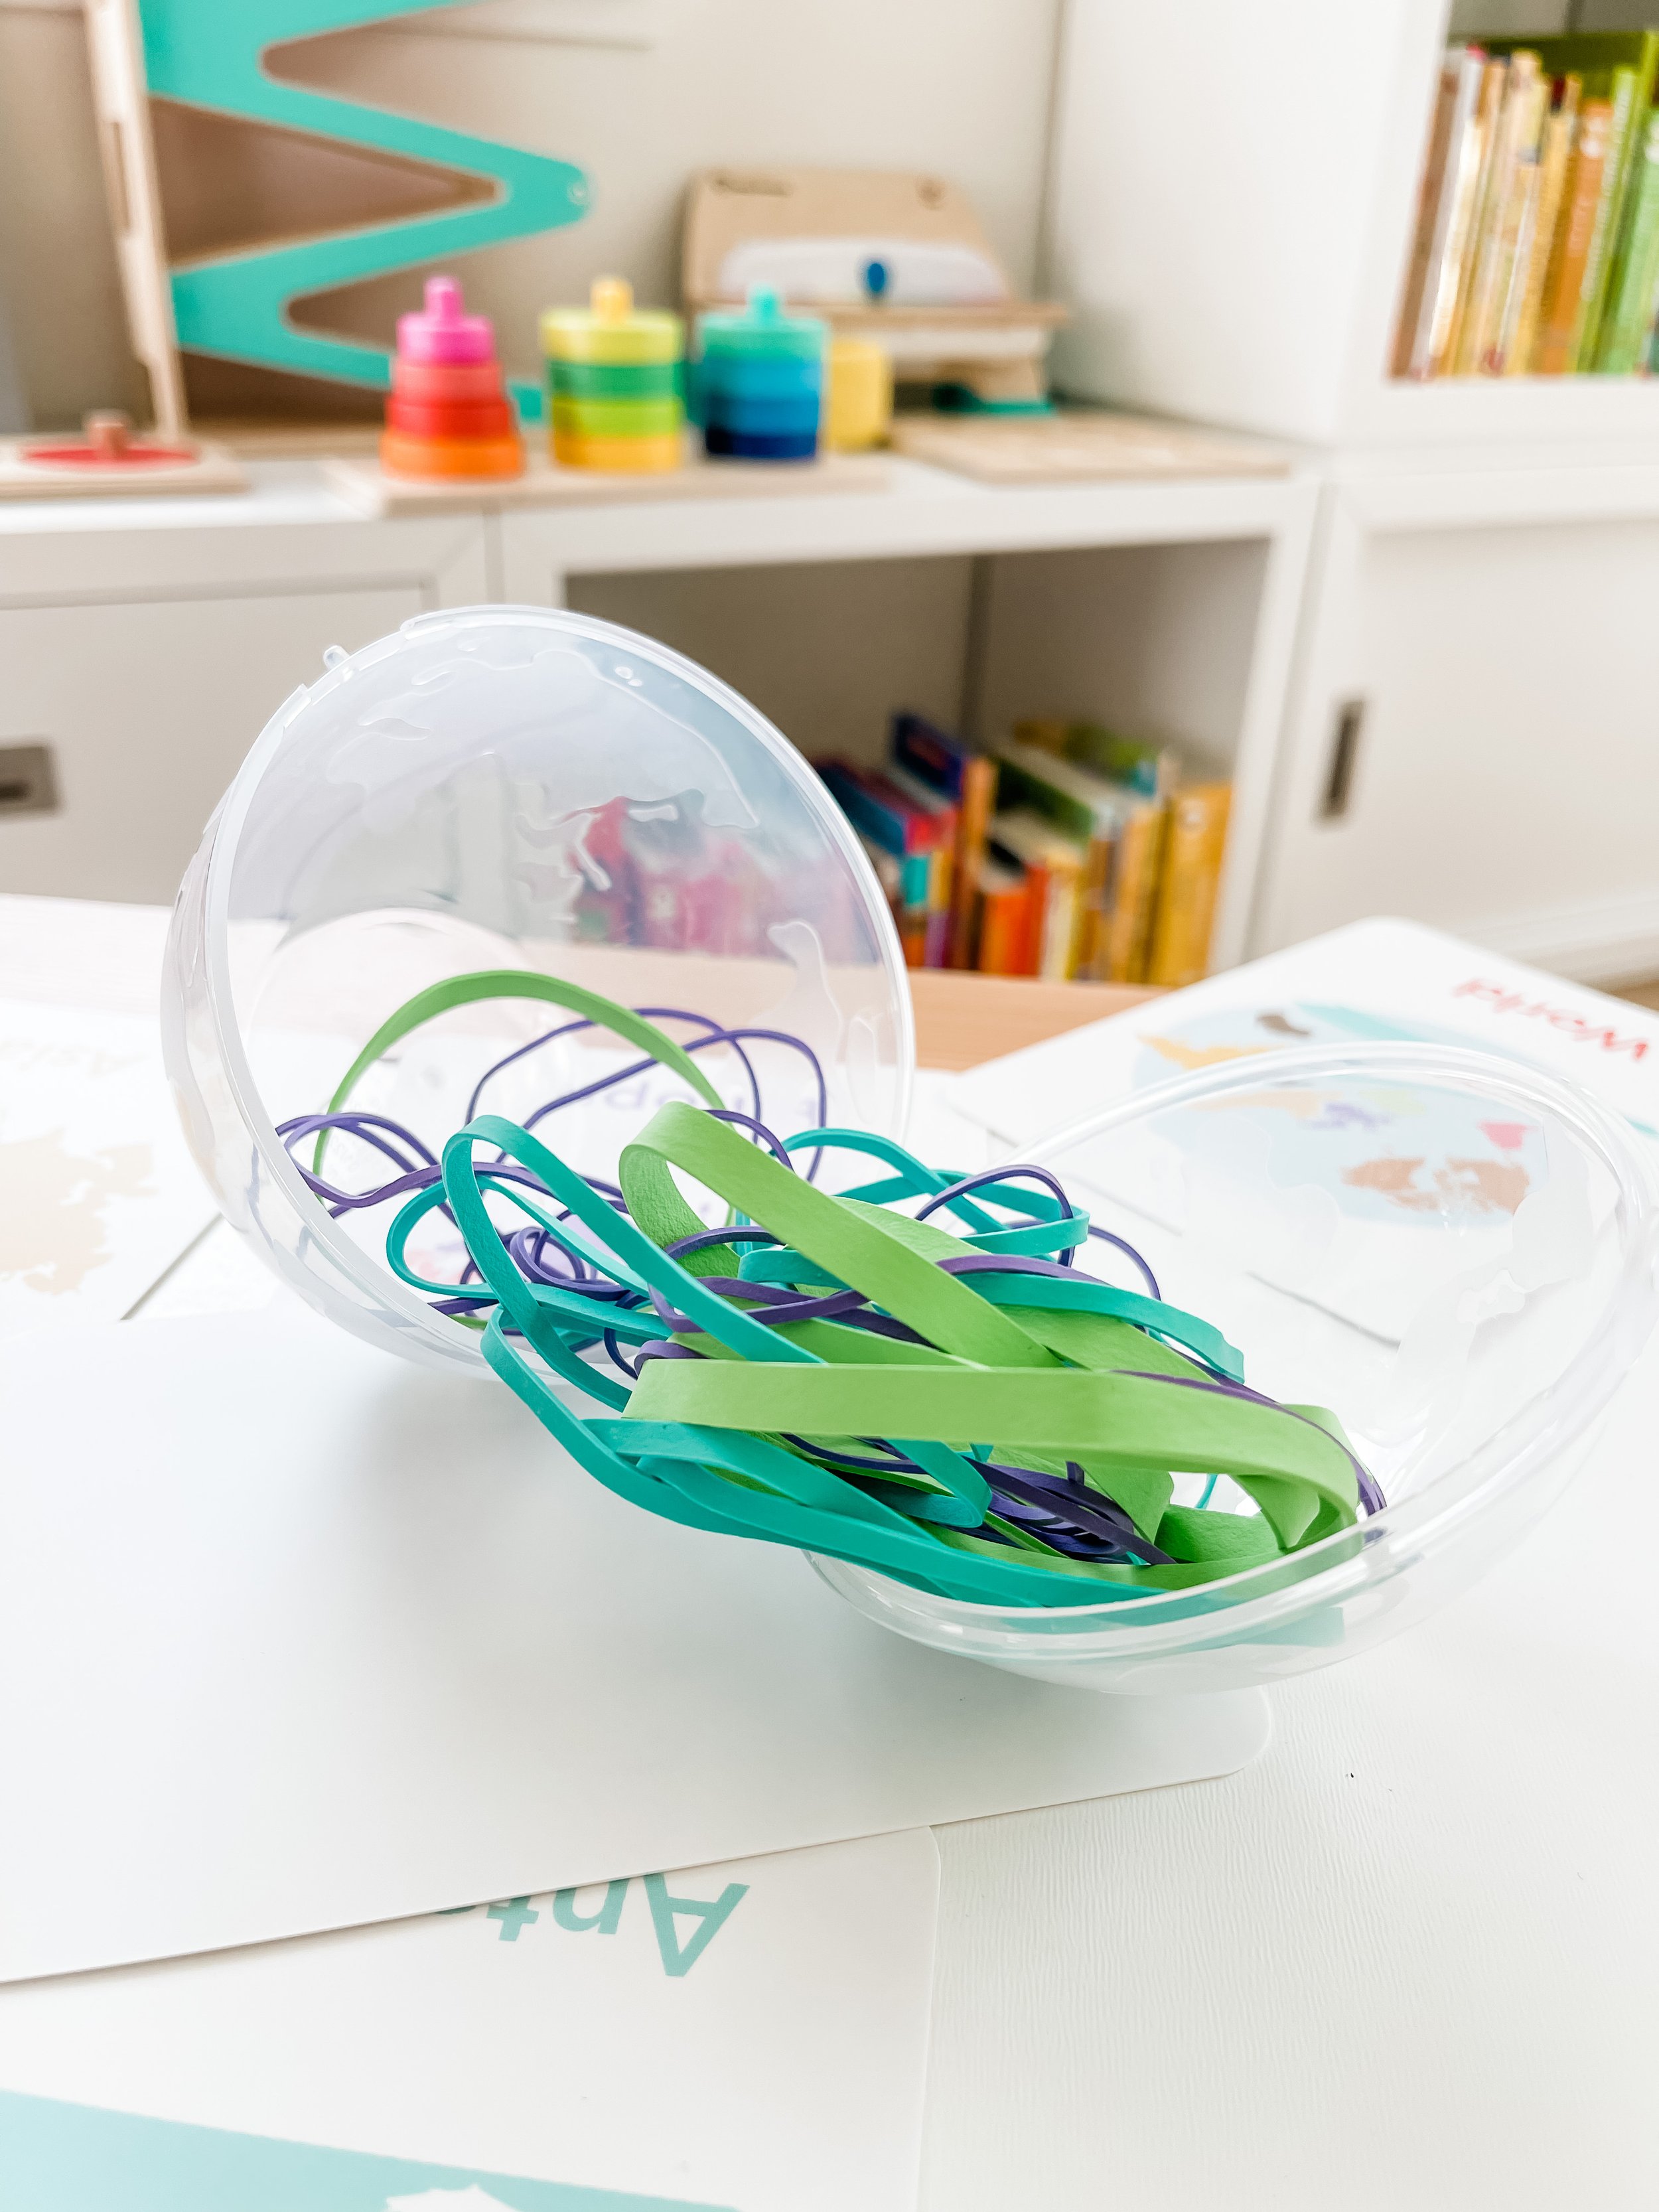
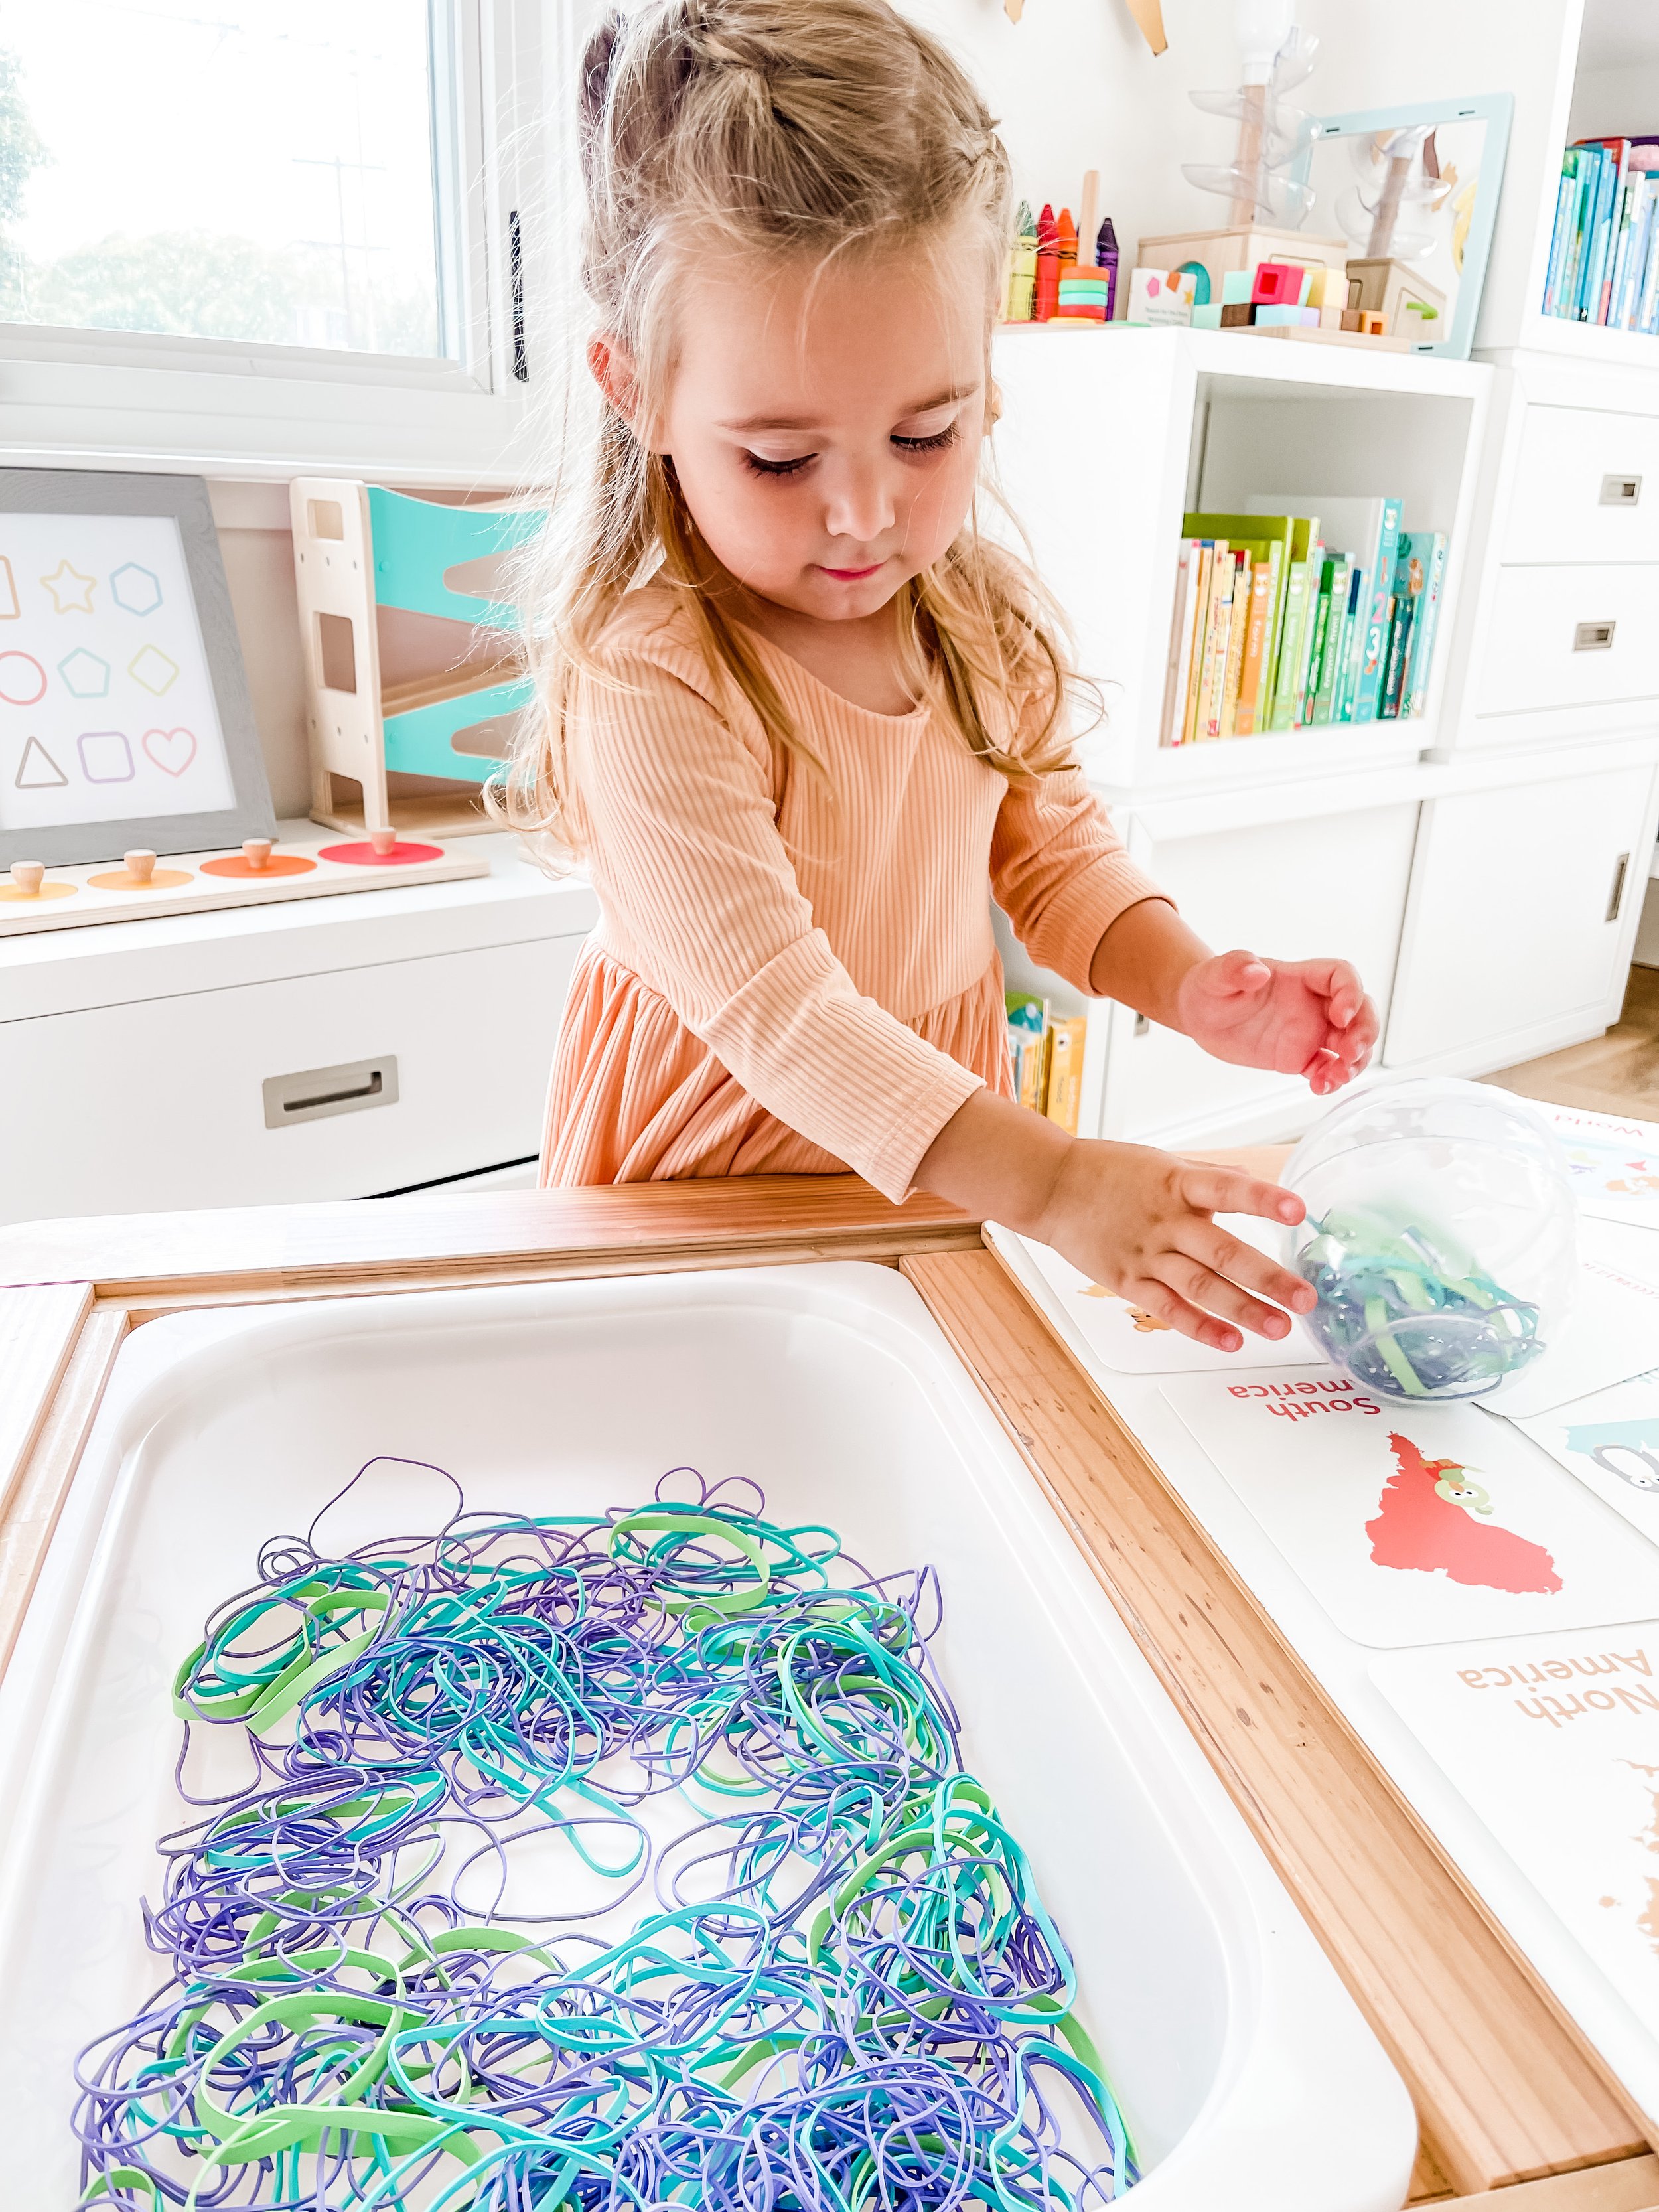
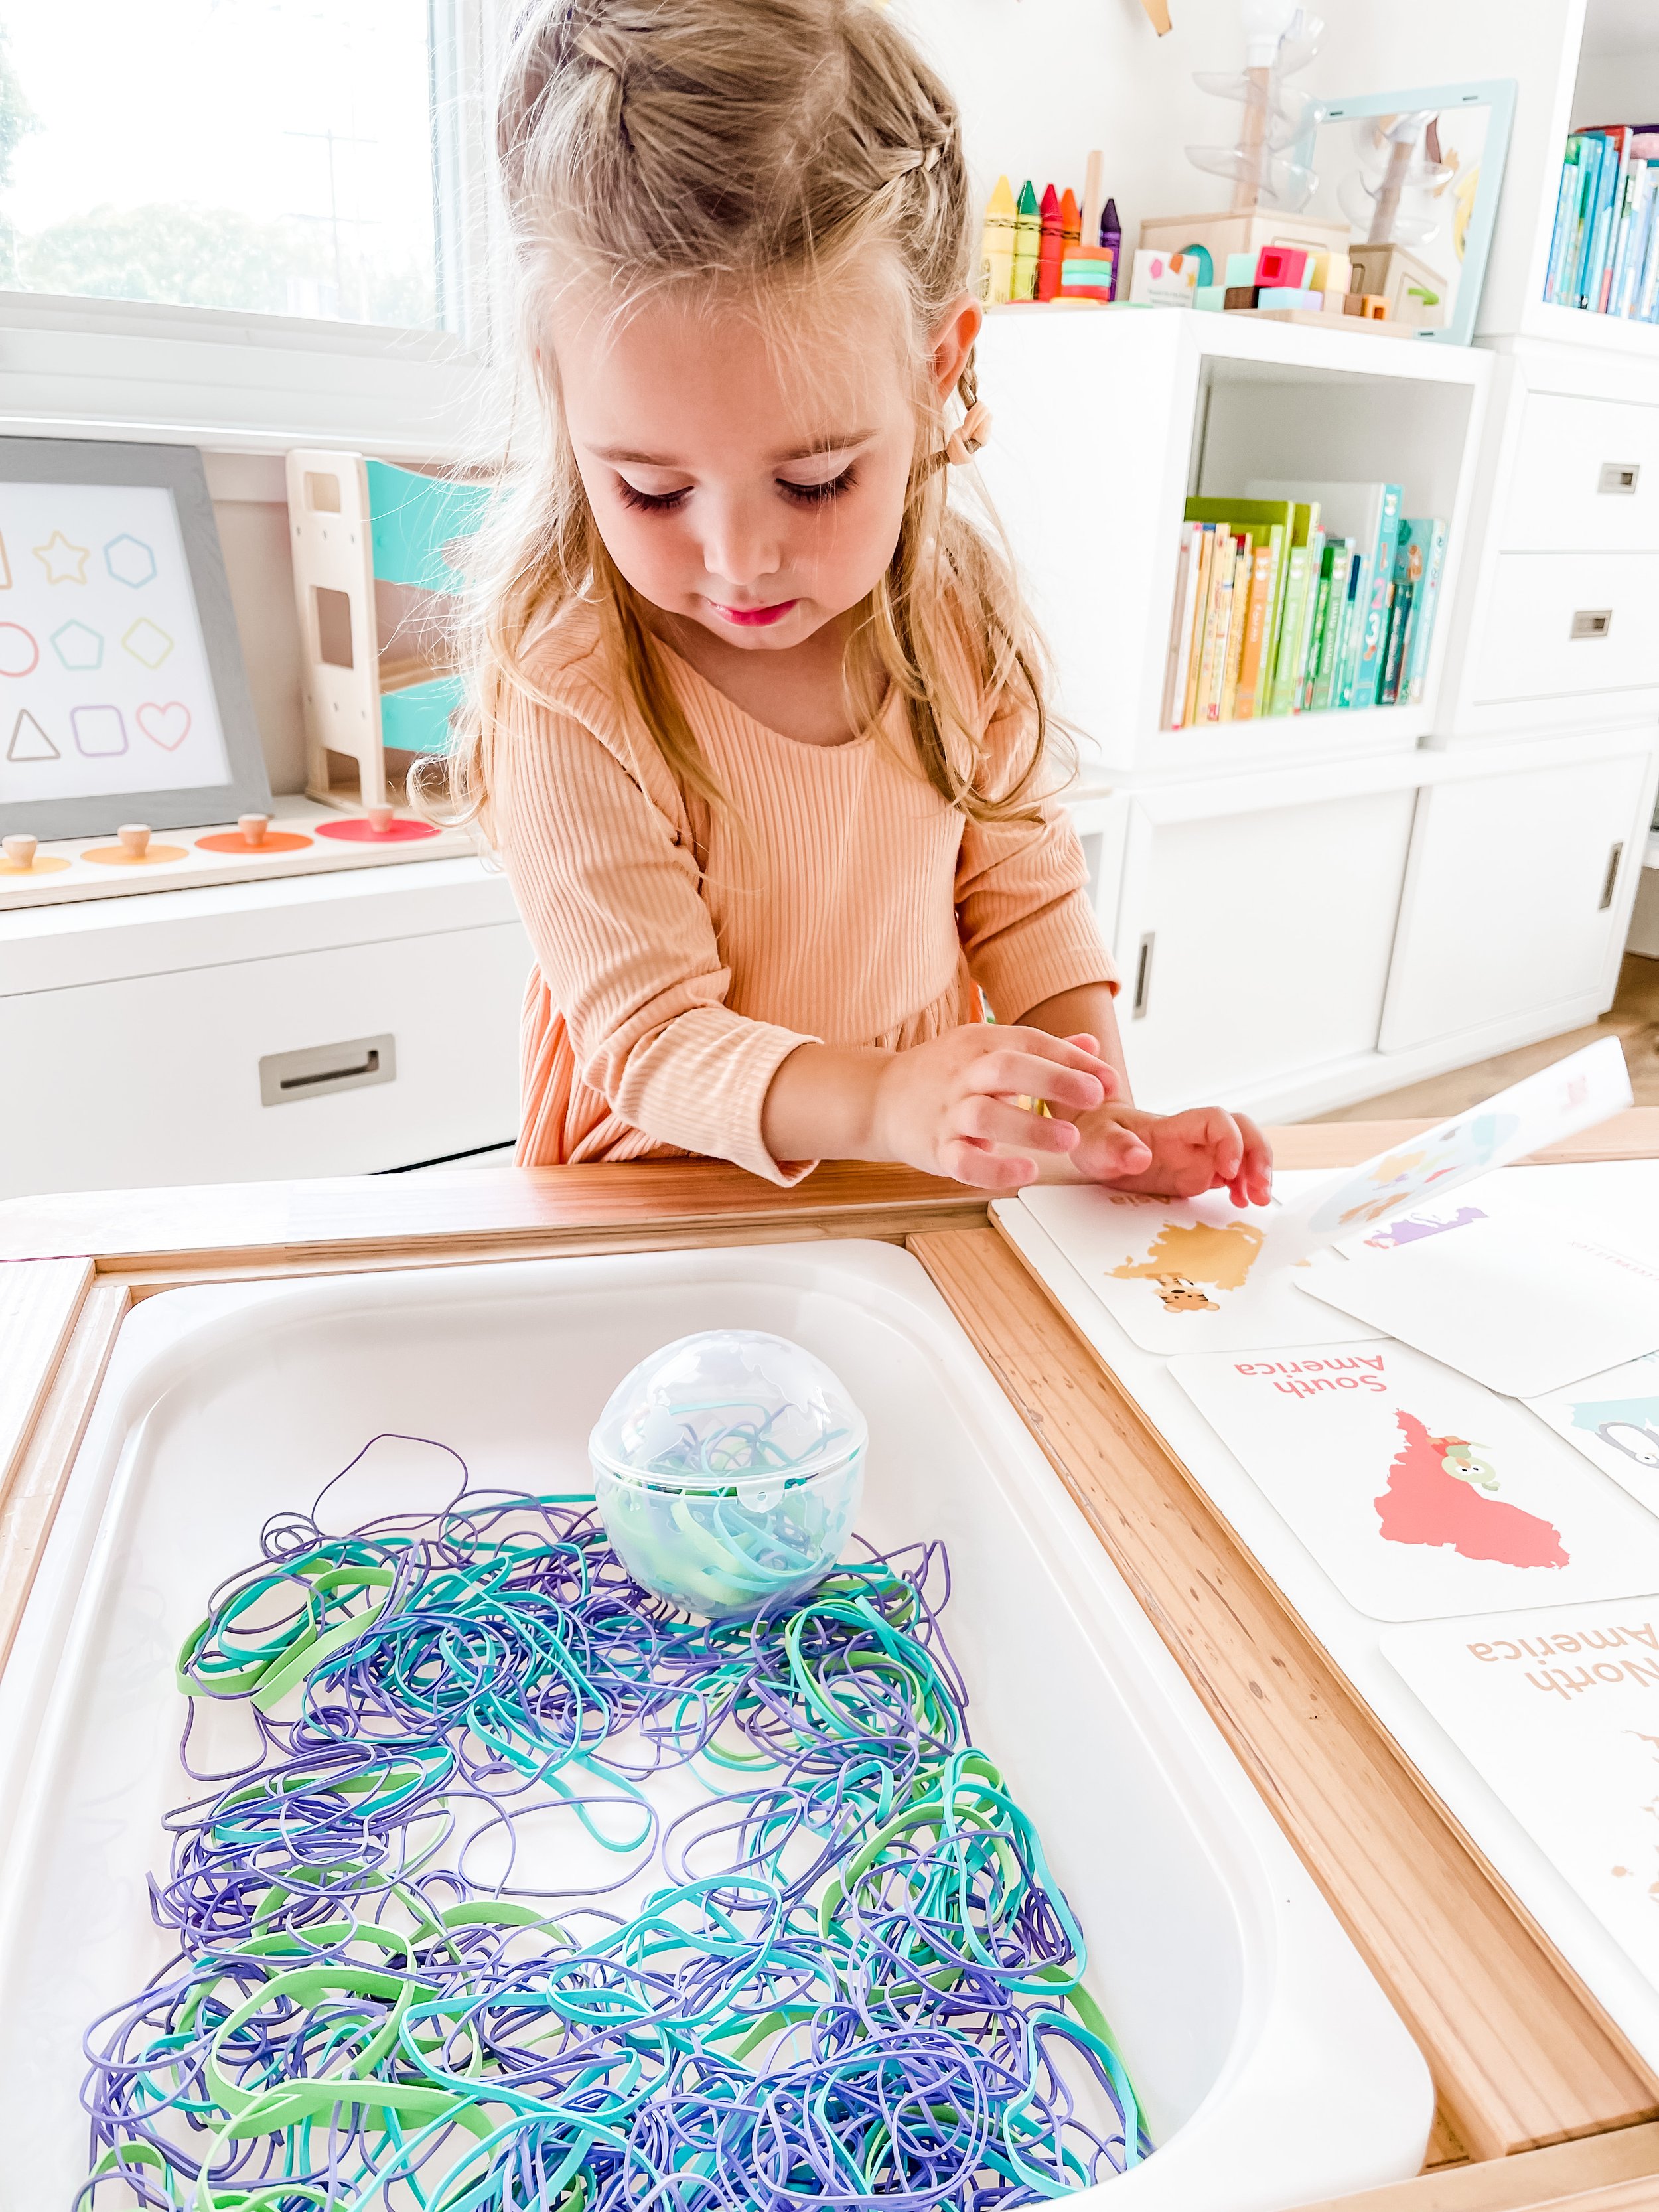
Our third sensory bin activity incorporates rubber bands for creative play. This open-ended activity allows toddlers to explore their imaginations while enhancing their fine motor skills and hand strength. They can stretch, twist, and manipulate the rubber bands to create shapes or patterns, fostering their creativity and problem-solving abilities. Sofia loved this part of the activity! She dumped the rubber bands on the floor and began putting them around her wrists and ankles.
For younger toddlers aged 1.5 to 2.5, the focus can be on exploring the sensory properties of the rubber bands, such as stretchiness and texture. As they progress to ages 3.5 to 4.5, children can be encouraged to create letters, numbers, or simple shapes with the rubber bands, incorporating early literacy and numeracy skills into their play.
Engaging in sensory play offers numerous benefits for children's development. It stimulates their senses, allowing them to explore different materials, textures, colors, and sounds, which in turn enhances their cognitive, physical, and social-emotional growth. Sensory play supports the development of fine motor skills, hand-eye coordination, and sensory processing abilities, making it an essential aspect of early childhood education.
Dramatic play provides children with valuable opportunities to develop social skills, creativity, and problem-solving abilities. Through their imaginative scenarios and role-playing, toddlers learn how to communicate, negotiate, and cooperate with others. When combined with learning about the world through travel, food, culture, and geography, dramatic play becomes a rich and immersive experience that broadens children's horizons and fosters a sense of curiosity and respect for different cultures.
In conclusion, our Travel Agency Dramatic and Sensory Play Kit is a perfect way to introduce your little ones to the wonders of the world while promoting sensory exploration and imaginative play. With our printable decor in a captivating teal and lime green theme and three exciting sensory bin activities, your toddlers will embark on an educational journey that will stimulate their senses, inspire their creativity, and ignite their passion for learning. So, let's join hands and set off on a thrilling adventure together!
1. Travel: The act of going from one place to another.
2. World: The Earth and all its people, places, and things.
3. Explore: To look around and discover new things.
4. Adventure: A thrilling and exciting experience.
5. Discover: To find or learn about something new.
6. Map: A flat drawing that shows where places are located.
7. Compass: A tool that tells you which way is north, south, east, and west.
8. Airplane: A flying vehicle that takes people on long journeys.
9. Train: A long vehicle that runs on tracks and takes people to different places.
10. Boat: A water vehicle that can sail on rivers, lakes, or oceans.
11. Suitcase: A bag used for carrying clothes and personal belongings while traveling.
12. Passport: An important travel document that identifies a person and allows them to enter different countries.
13. Ticket: A piece of paper that shows you paid for a journey or event.
14. Airport: A place where airplanes take off and land.
15. Hotel: A place where people stay overnight while traveling.
16. Guidebook: A book that gives information about a specific place.
17. Postcard: A card with a picture on one side and space for writing on the other, sent to family and friends while traveling.
18. Suitcase: A bag used for carrying clothes and personal belongings while traveling.
19. Tourist: Someone who visits a place for enjoyment and exploration.
20. Currency: The type of money used in different countries.
21. Passenger: A person who is traveling in a vehicle like a bus, train, or airplane.
22. Destination: The place where someone is going or planning to visit.
23. Travel Agent: Someone who helps people plan their trips and book travel arrangements.
24. Luggage: The bags and suitcases that you take with you when you travel.
25. Adventure: A thrilling and exciting experience.
Enjoy your journey of learning about the world and travel agencies!

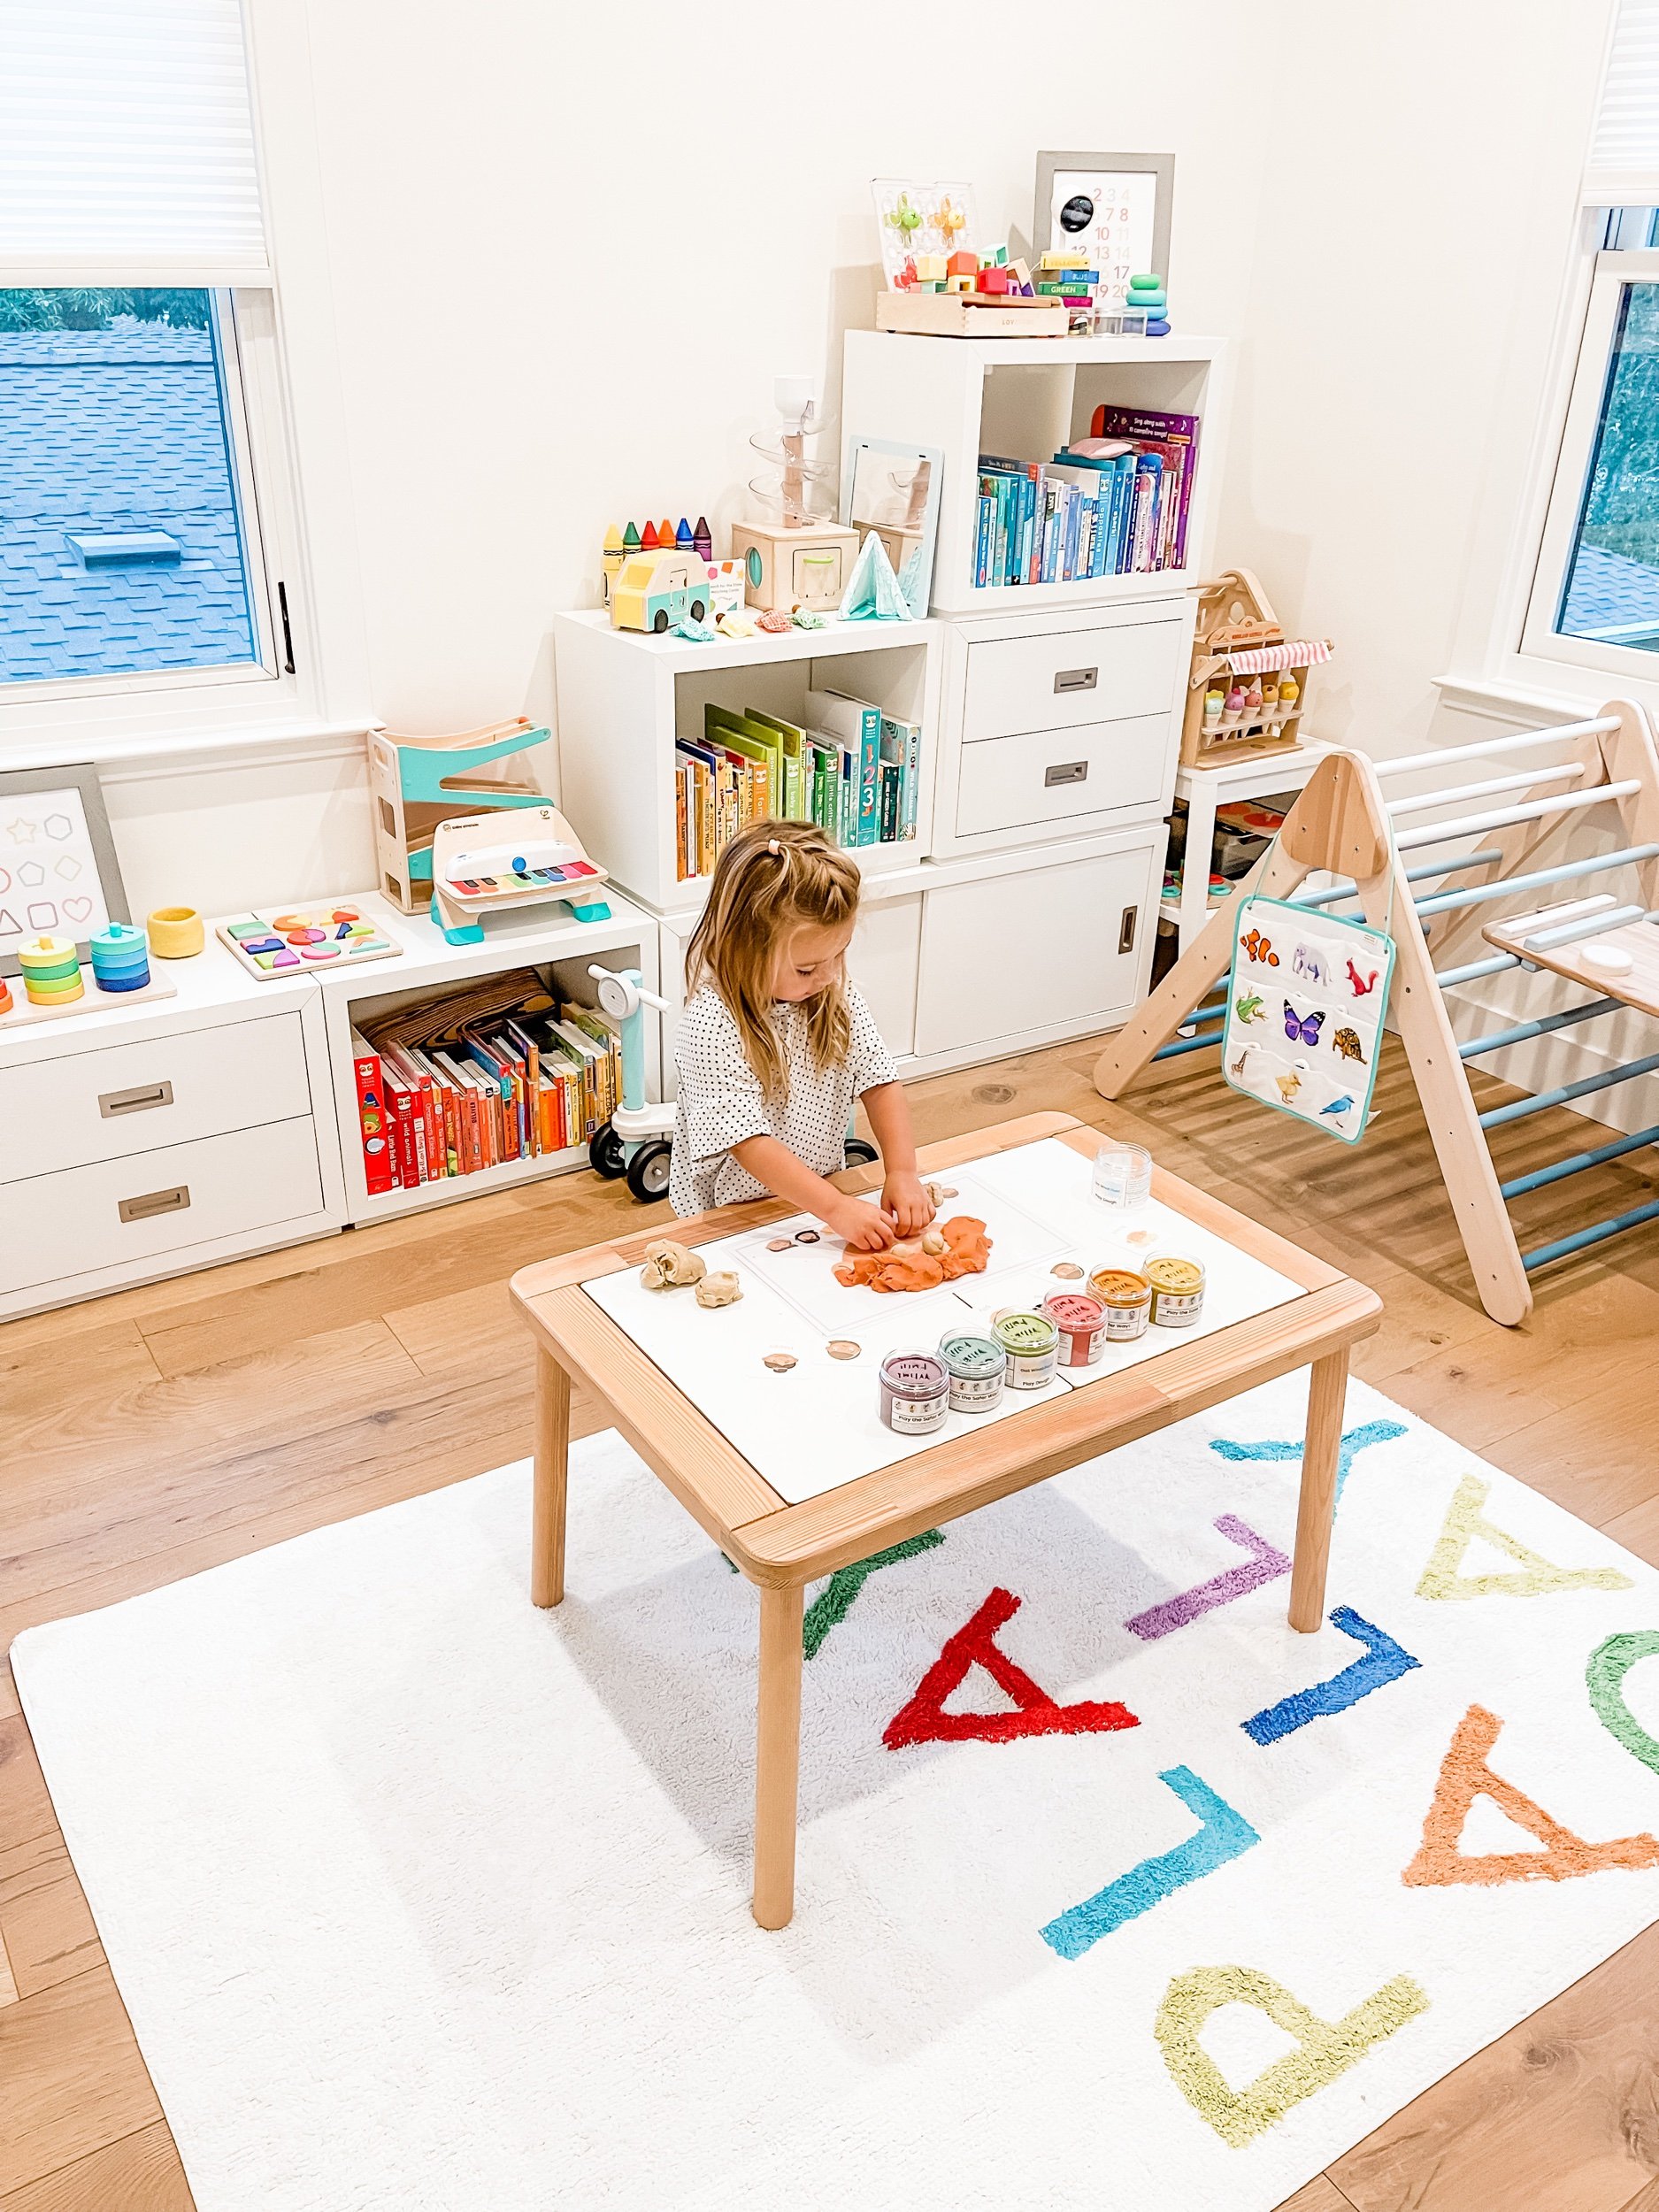
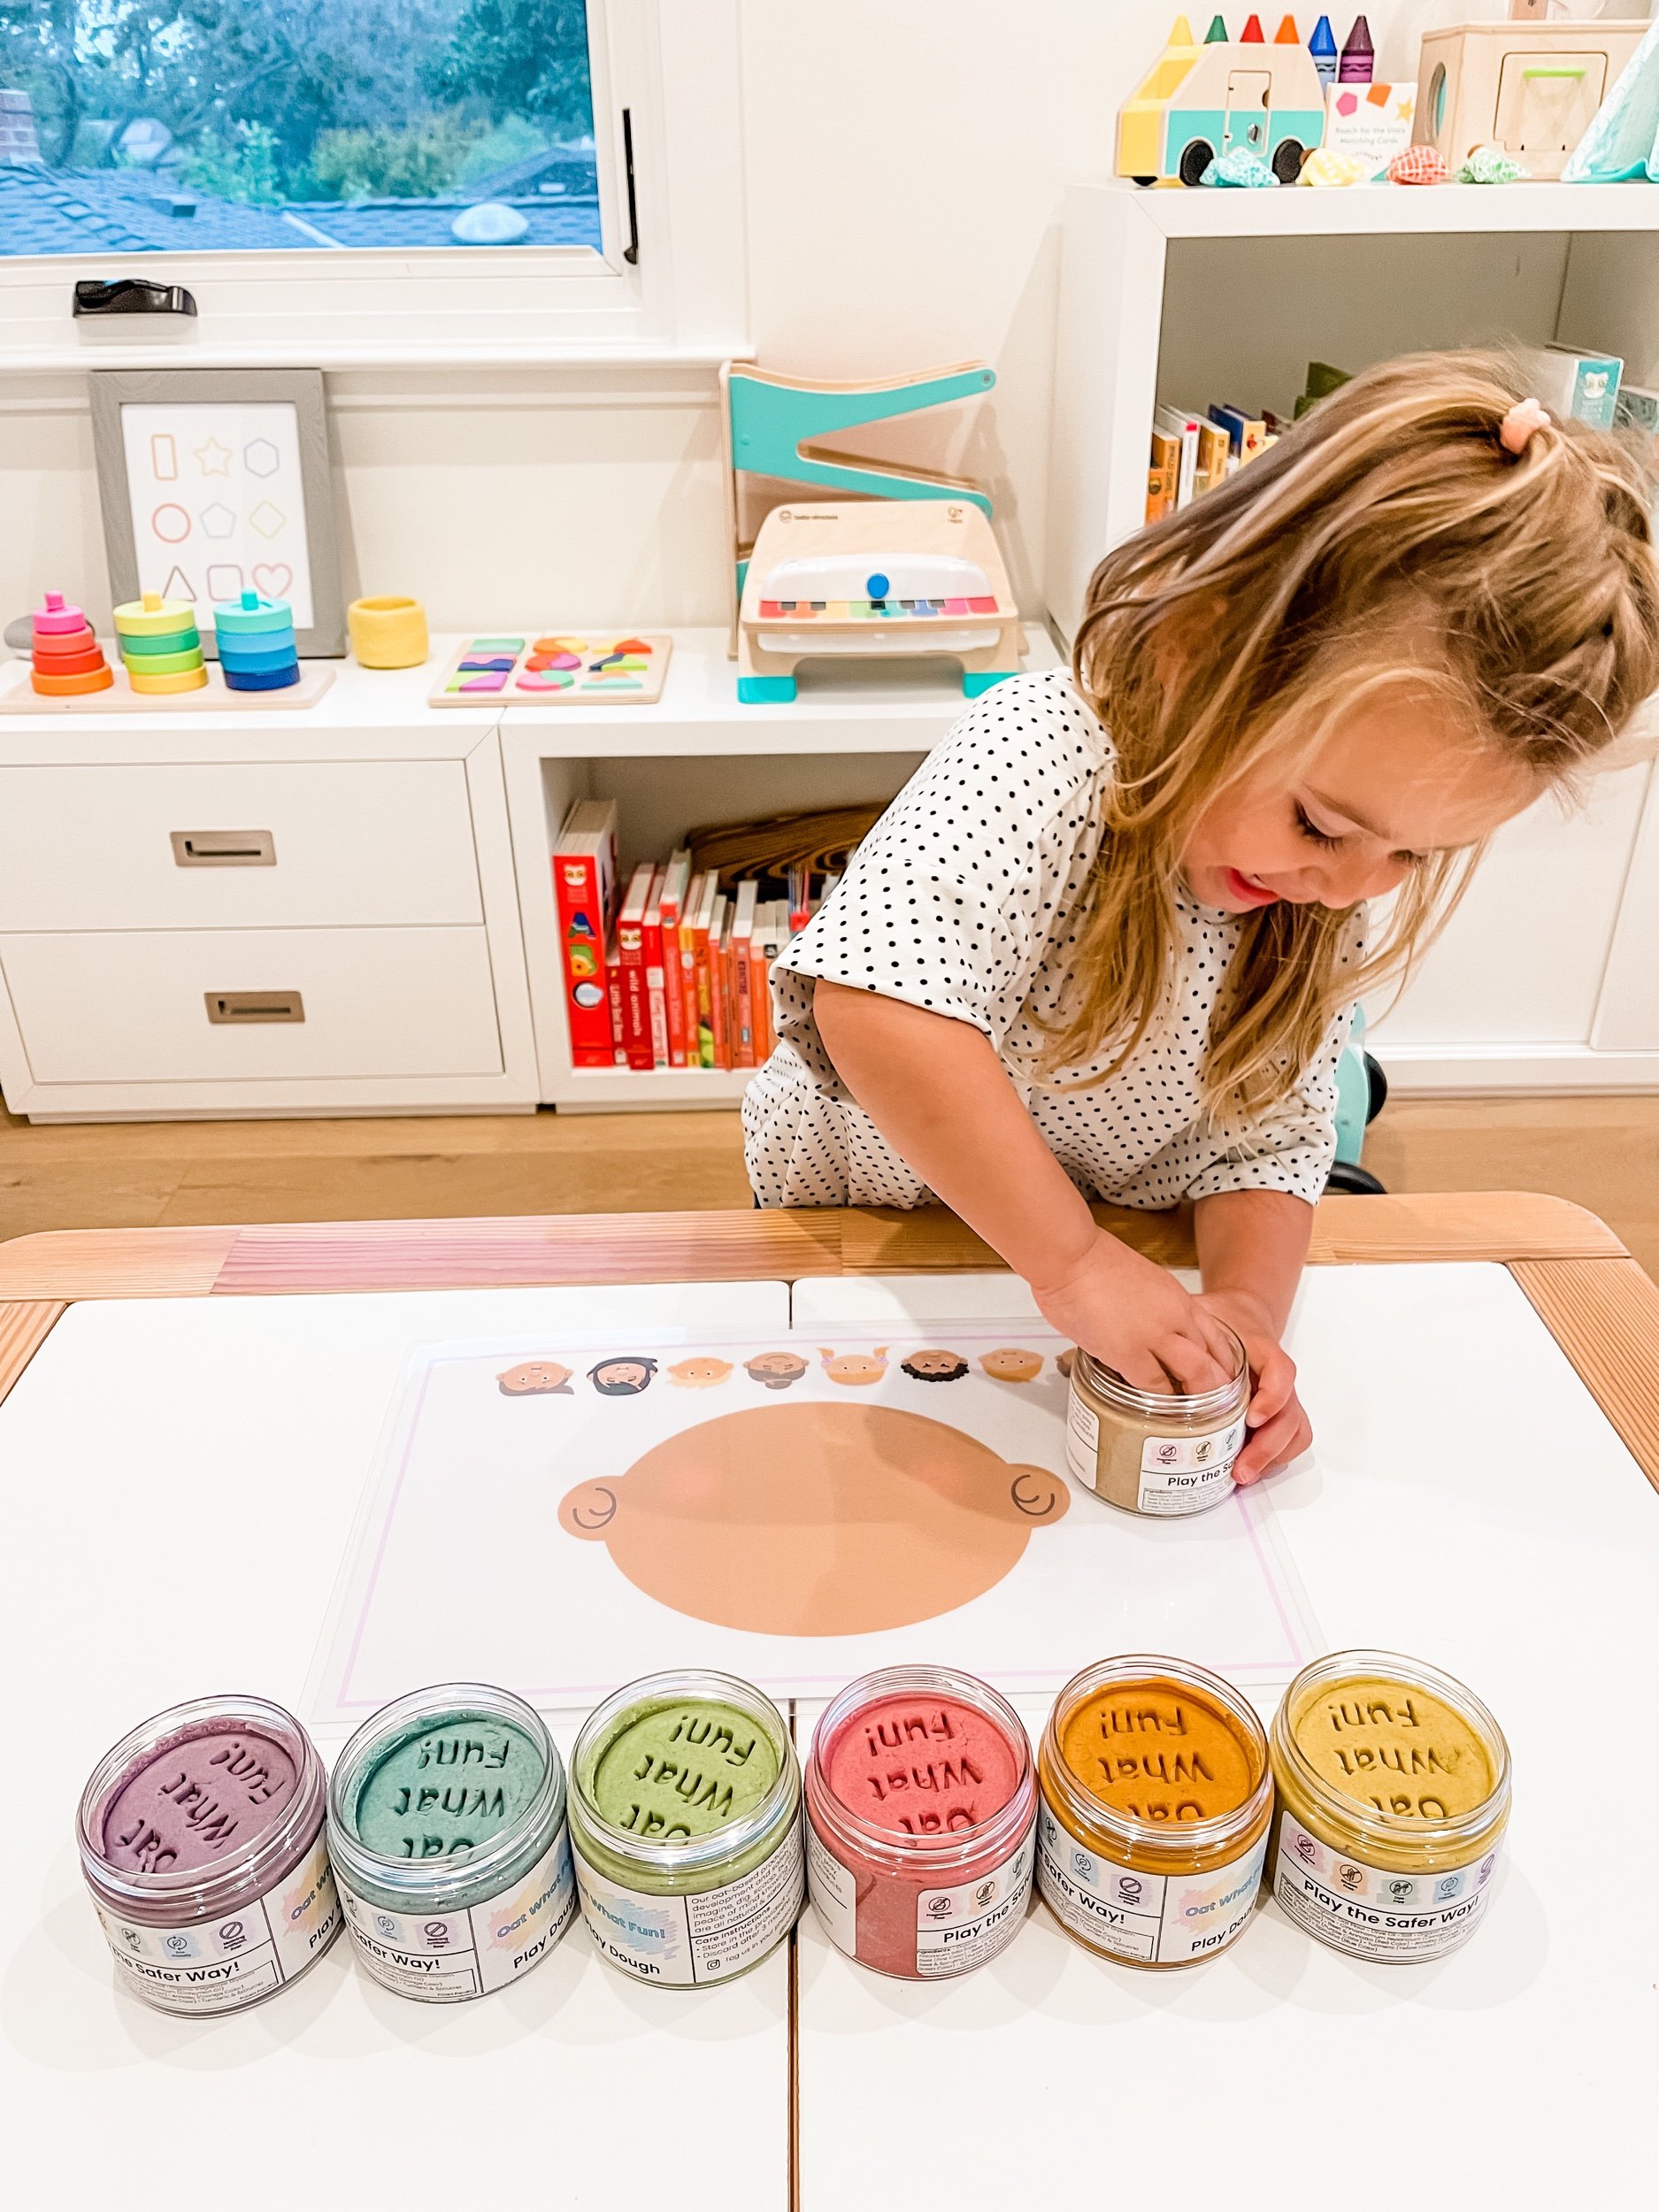
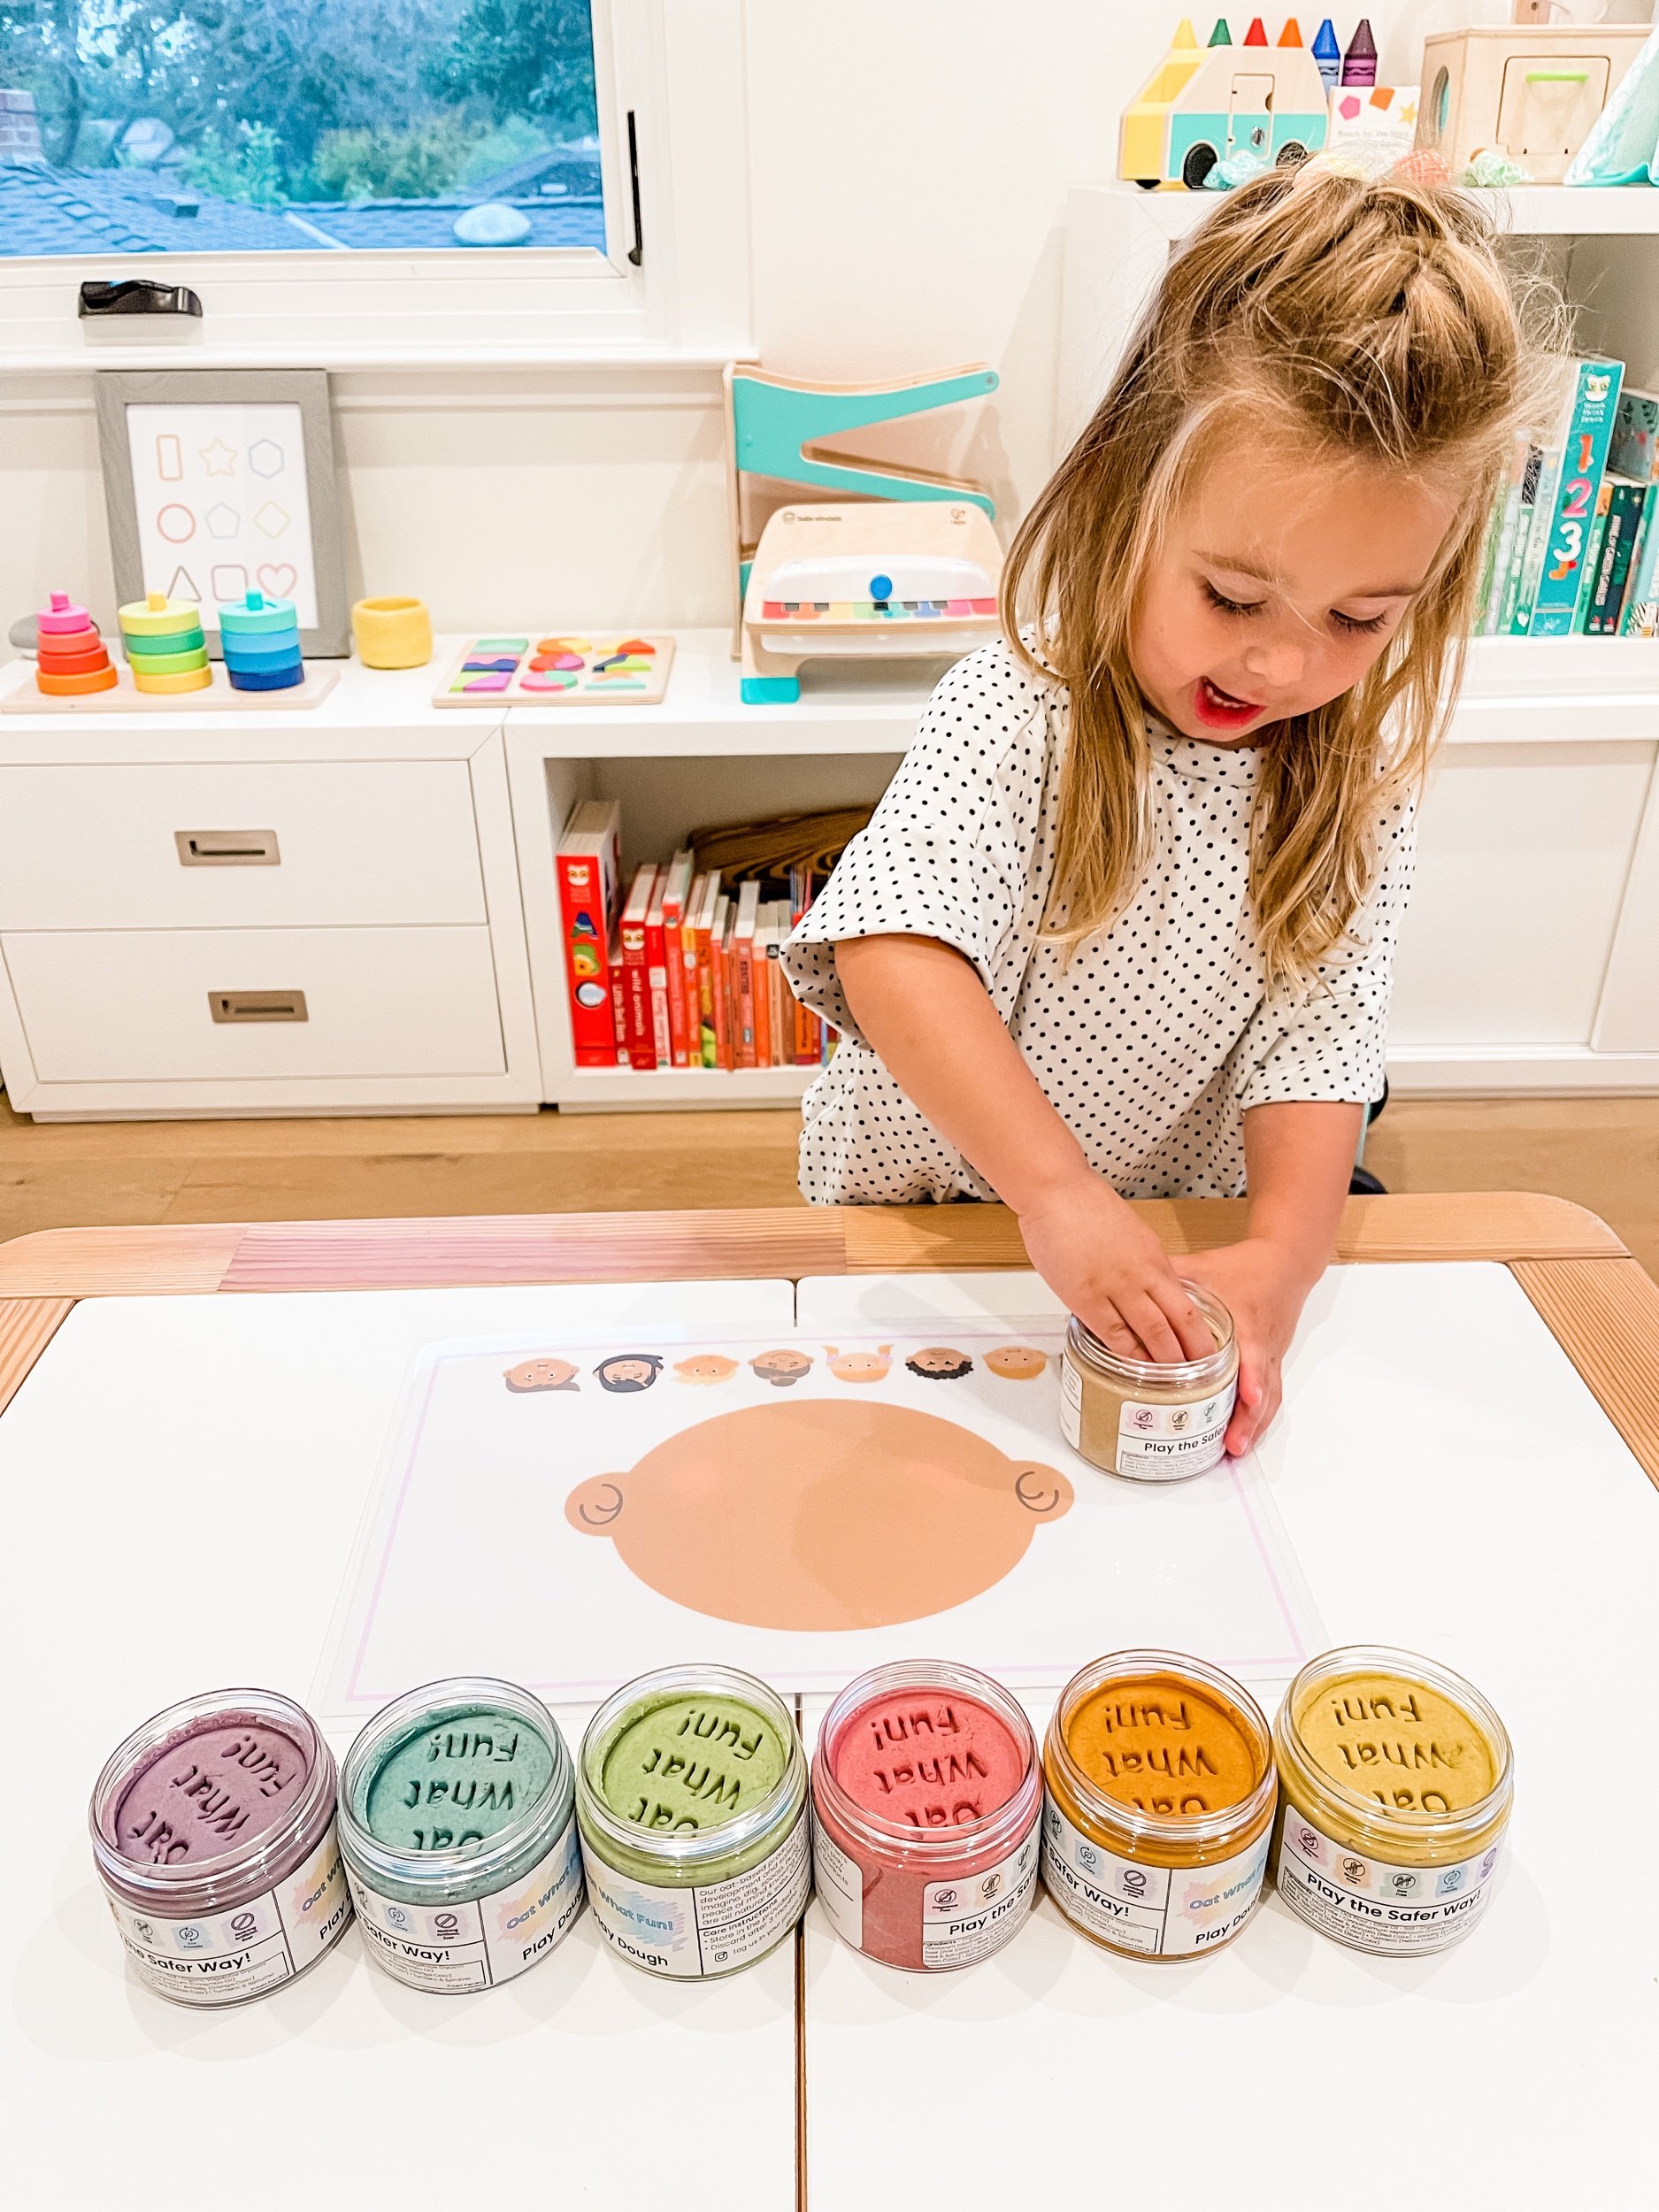
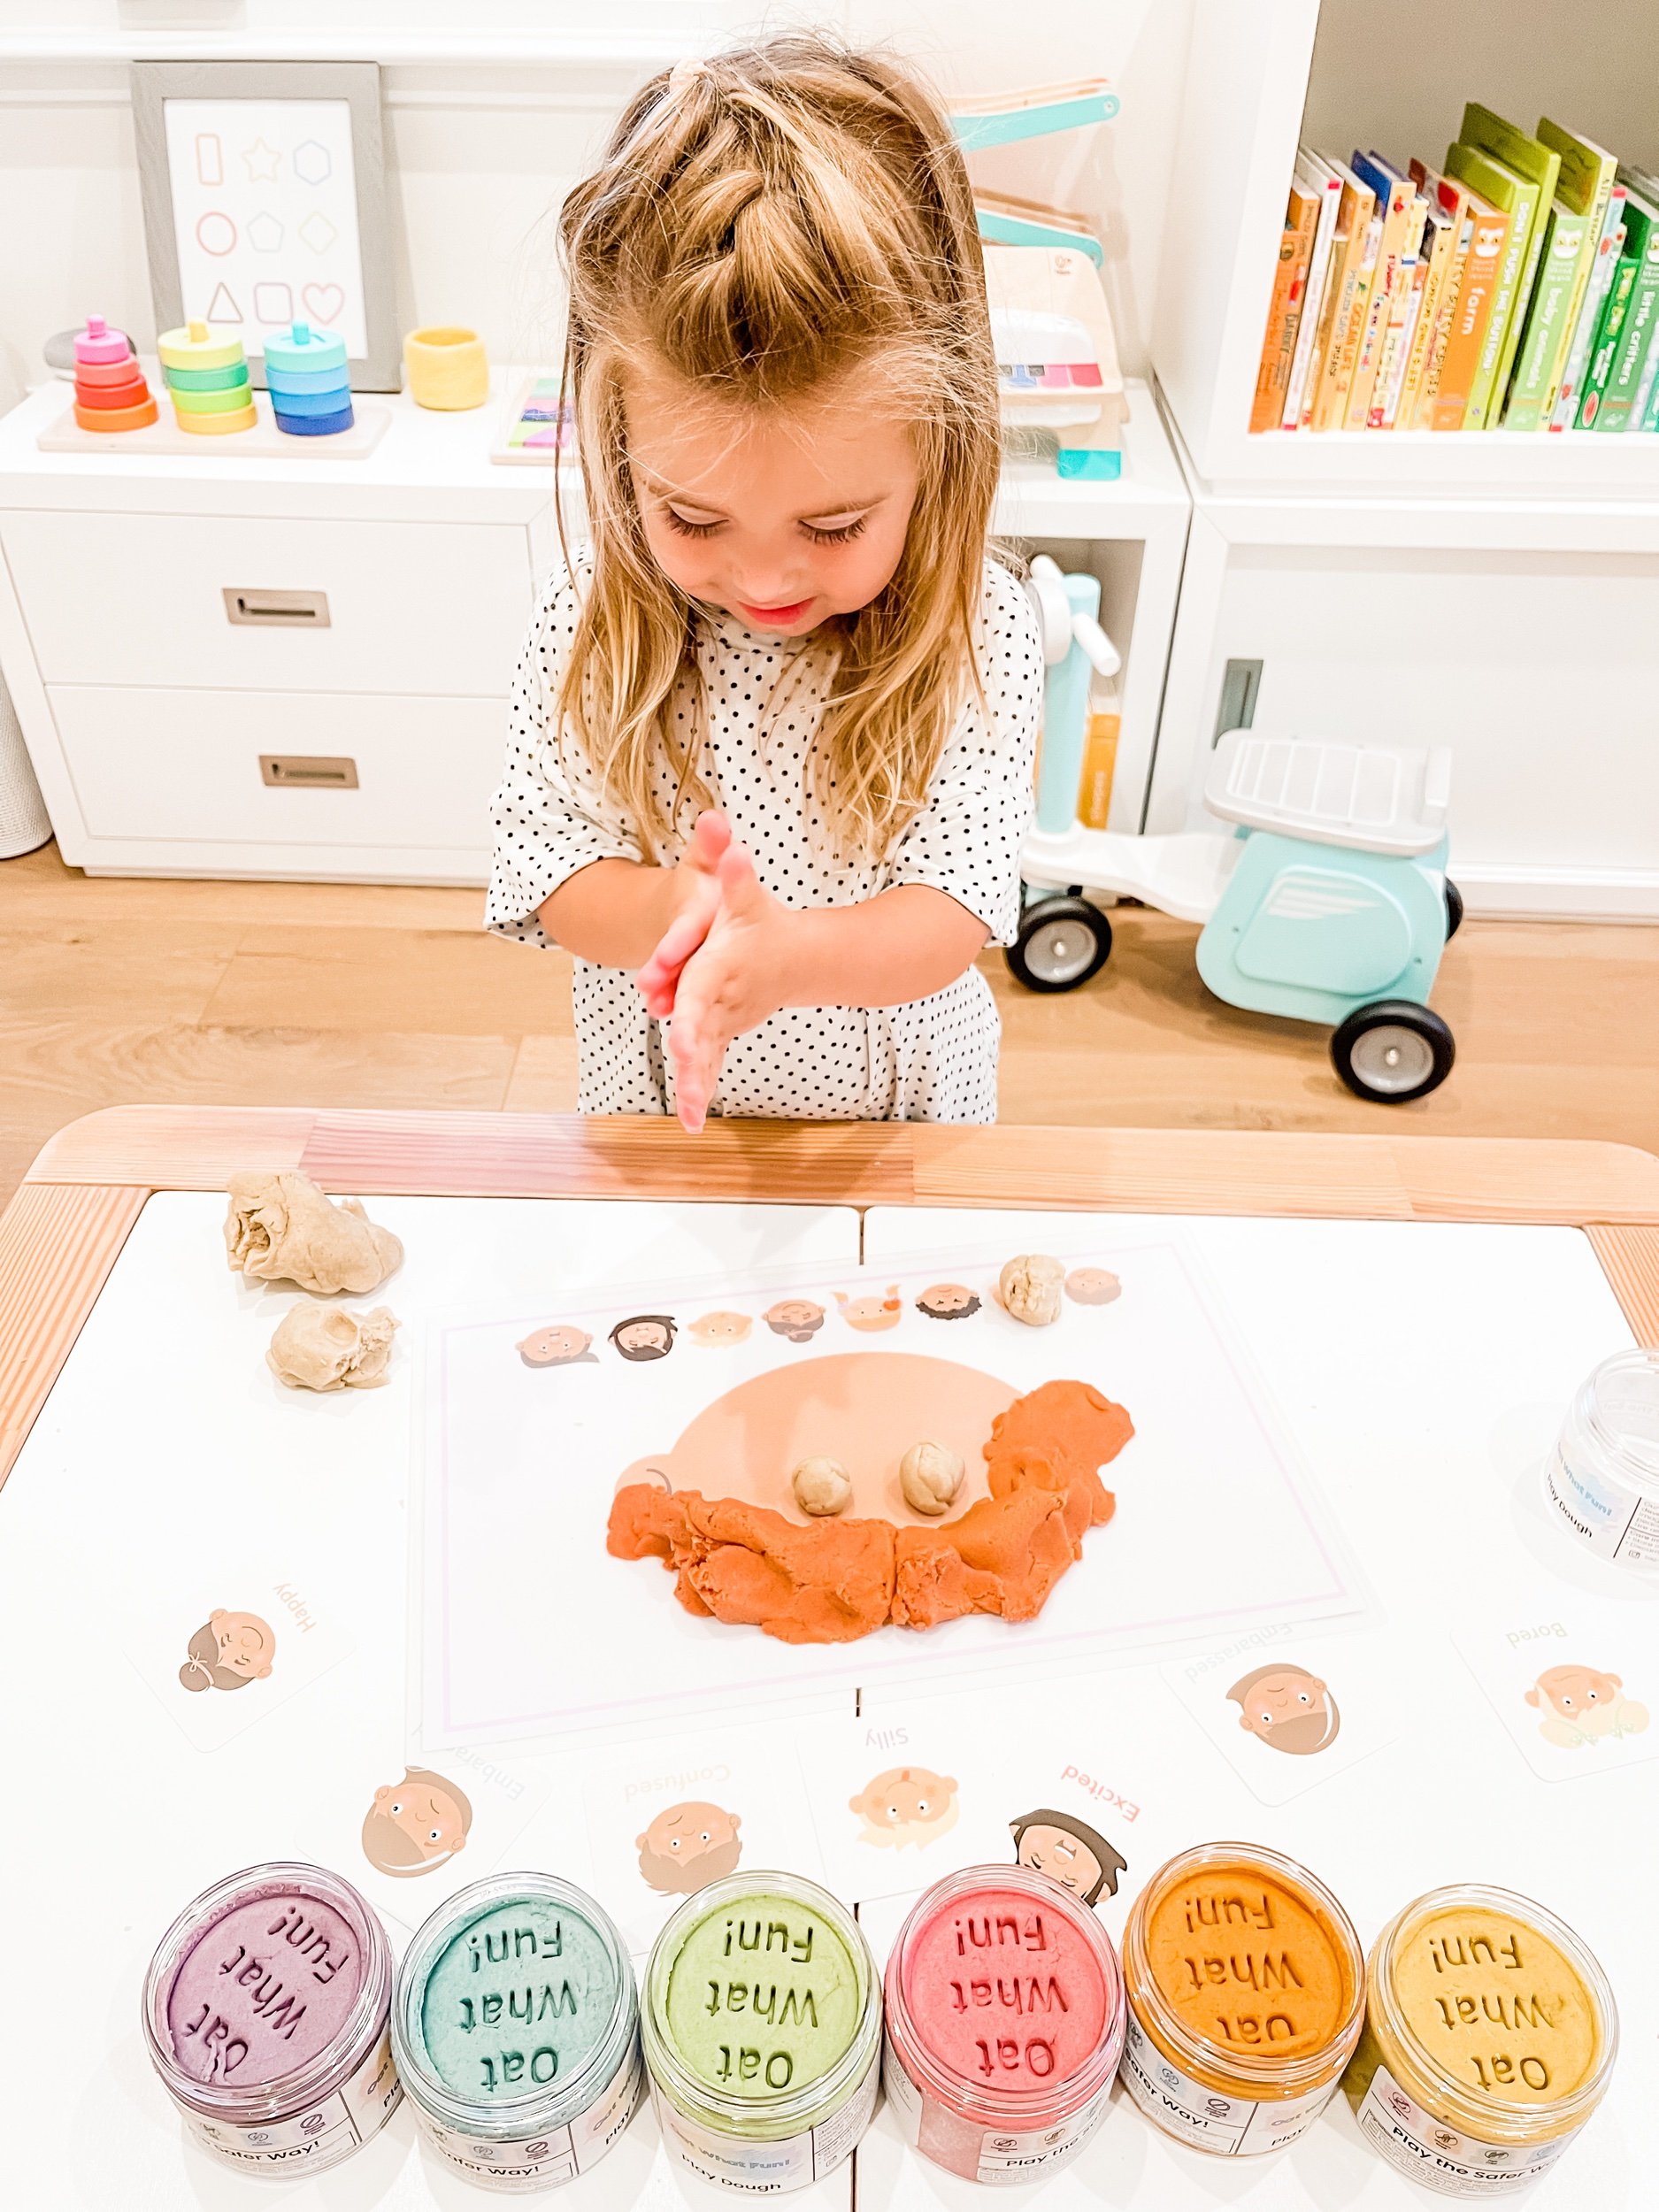
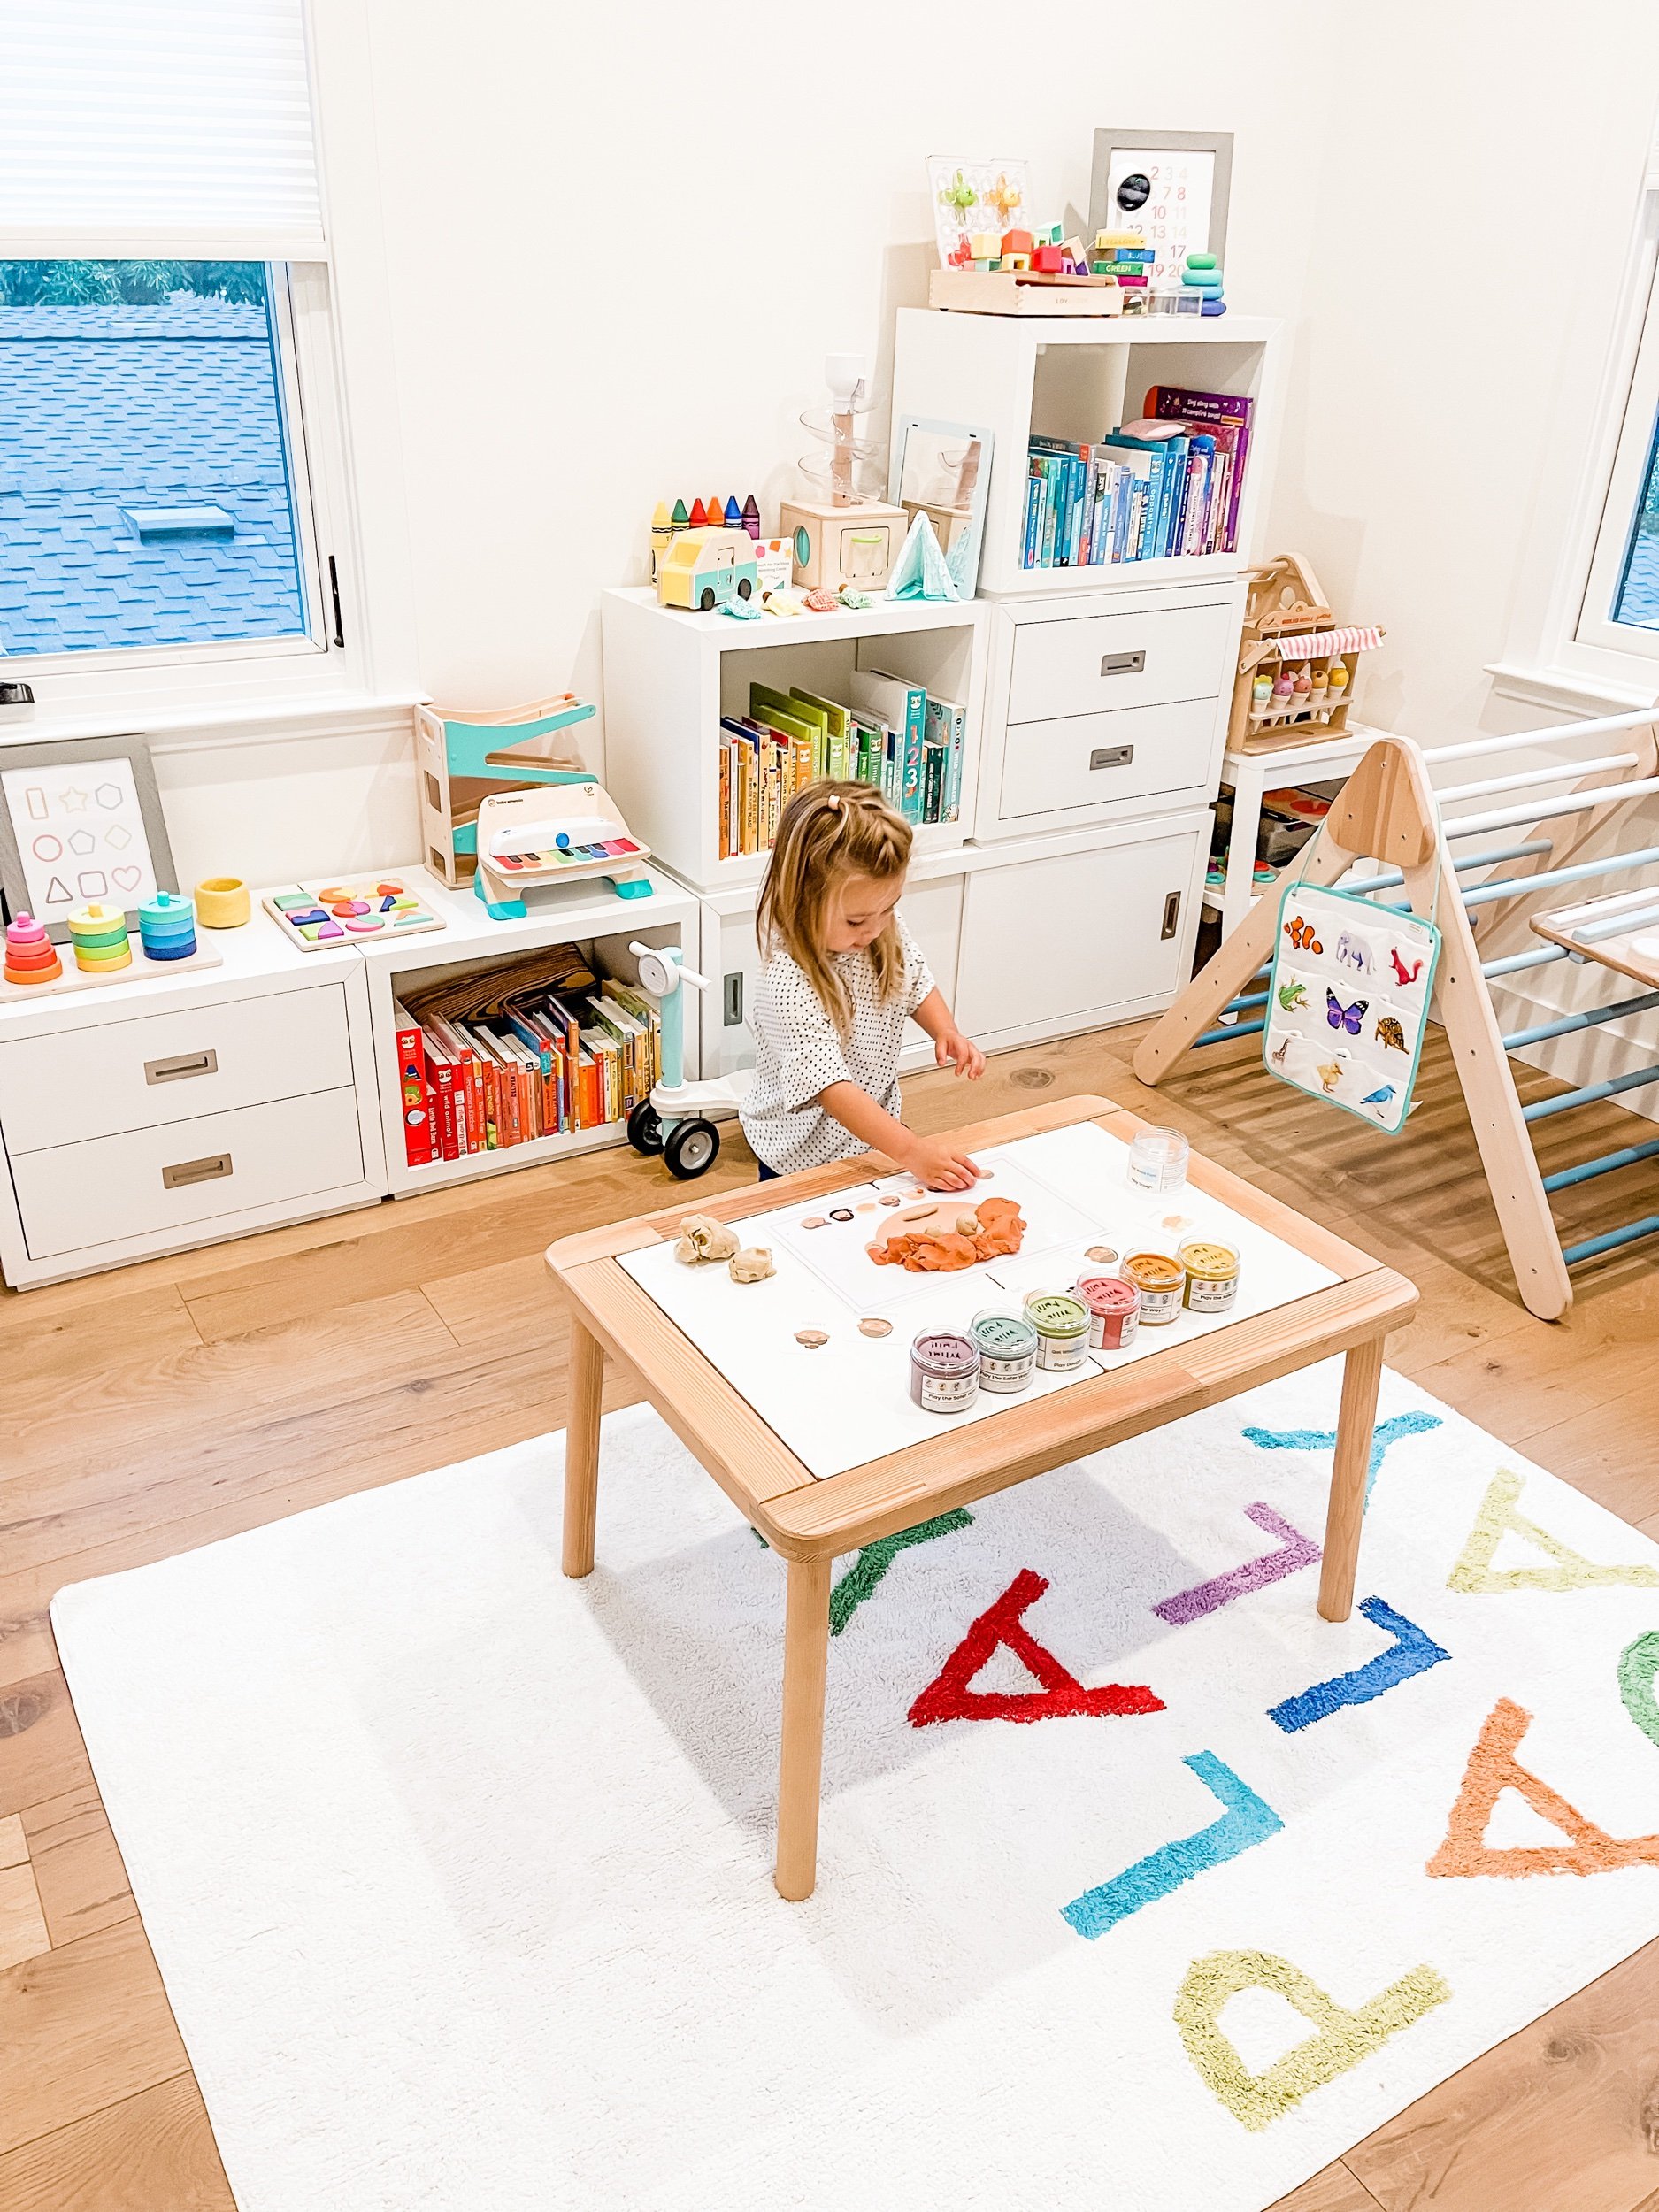
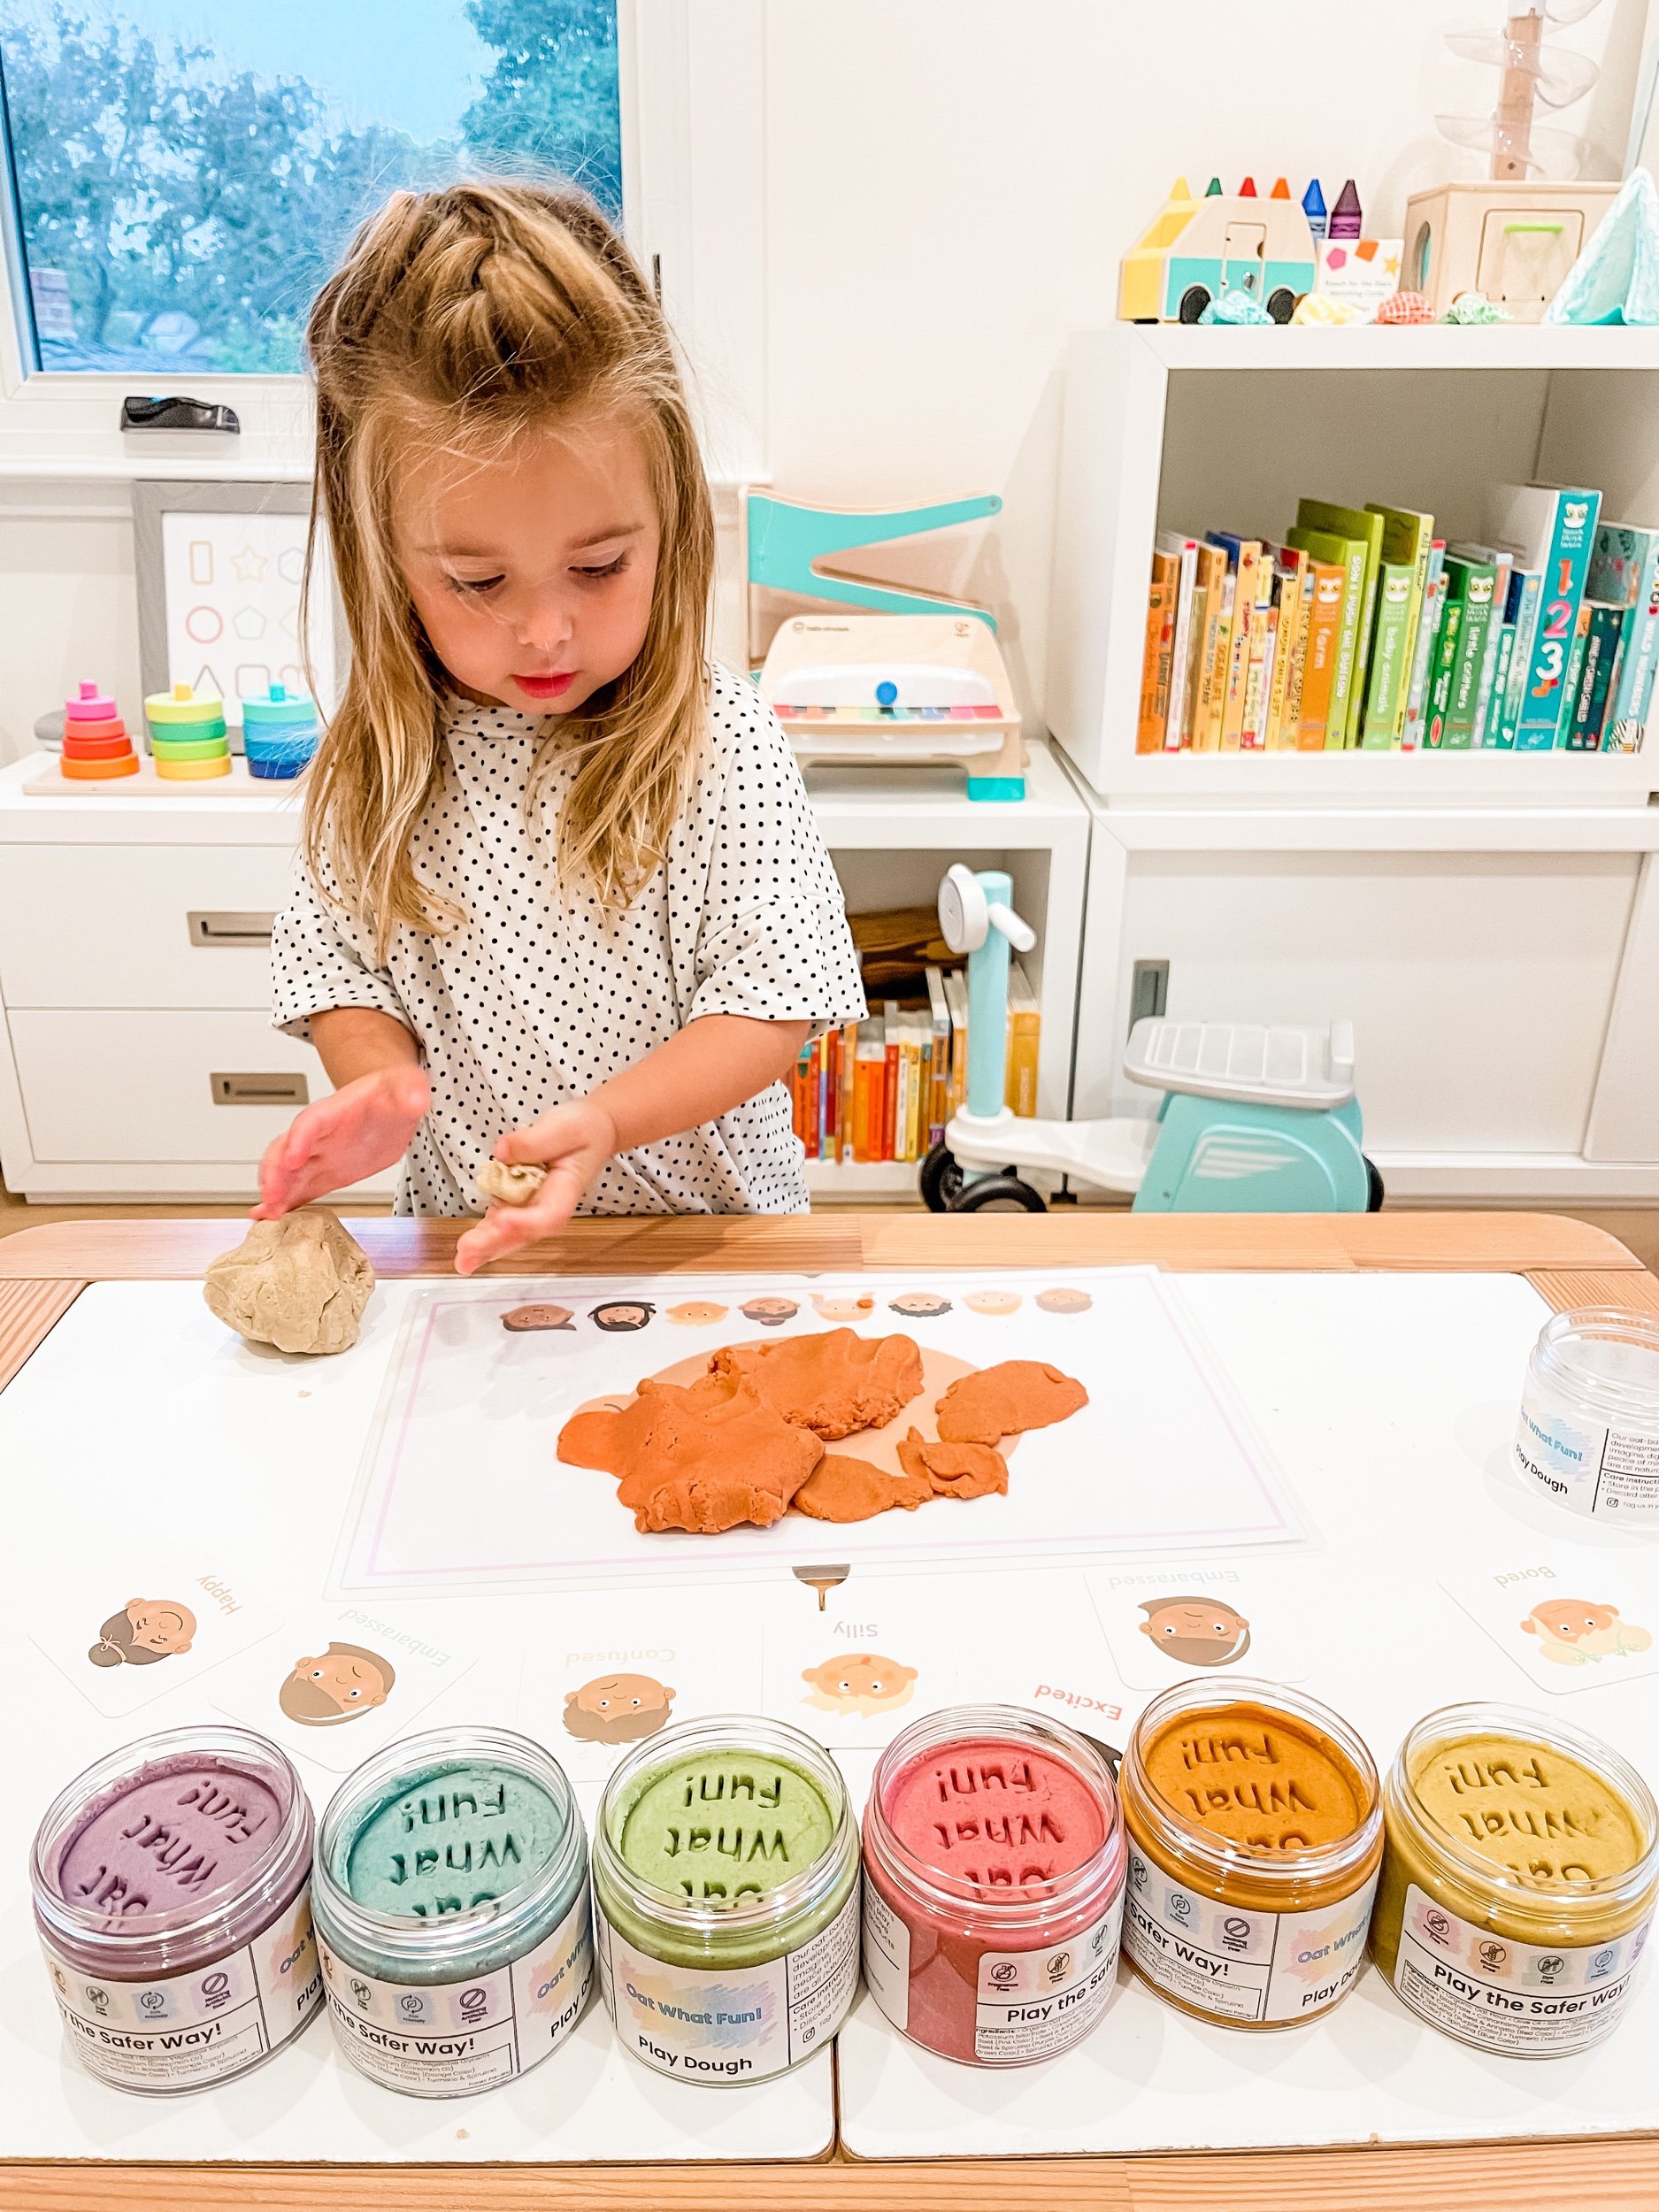
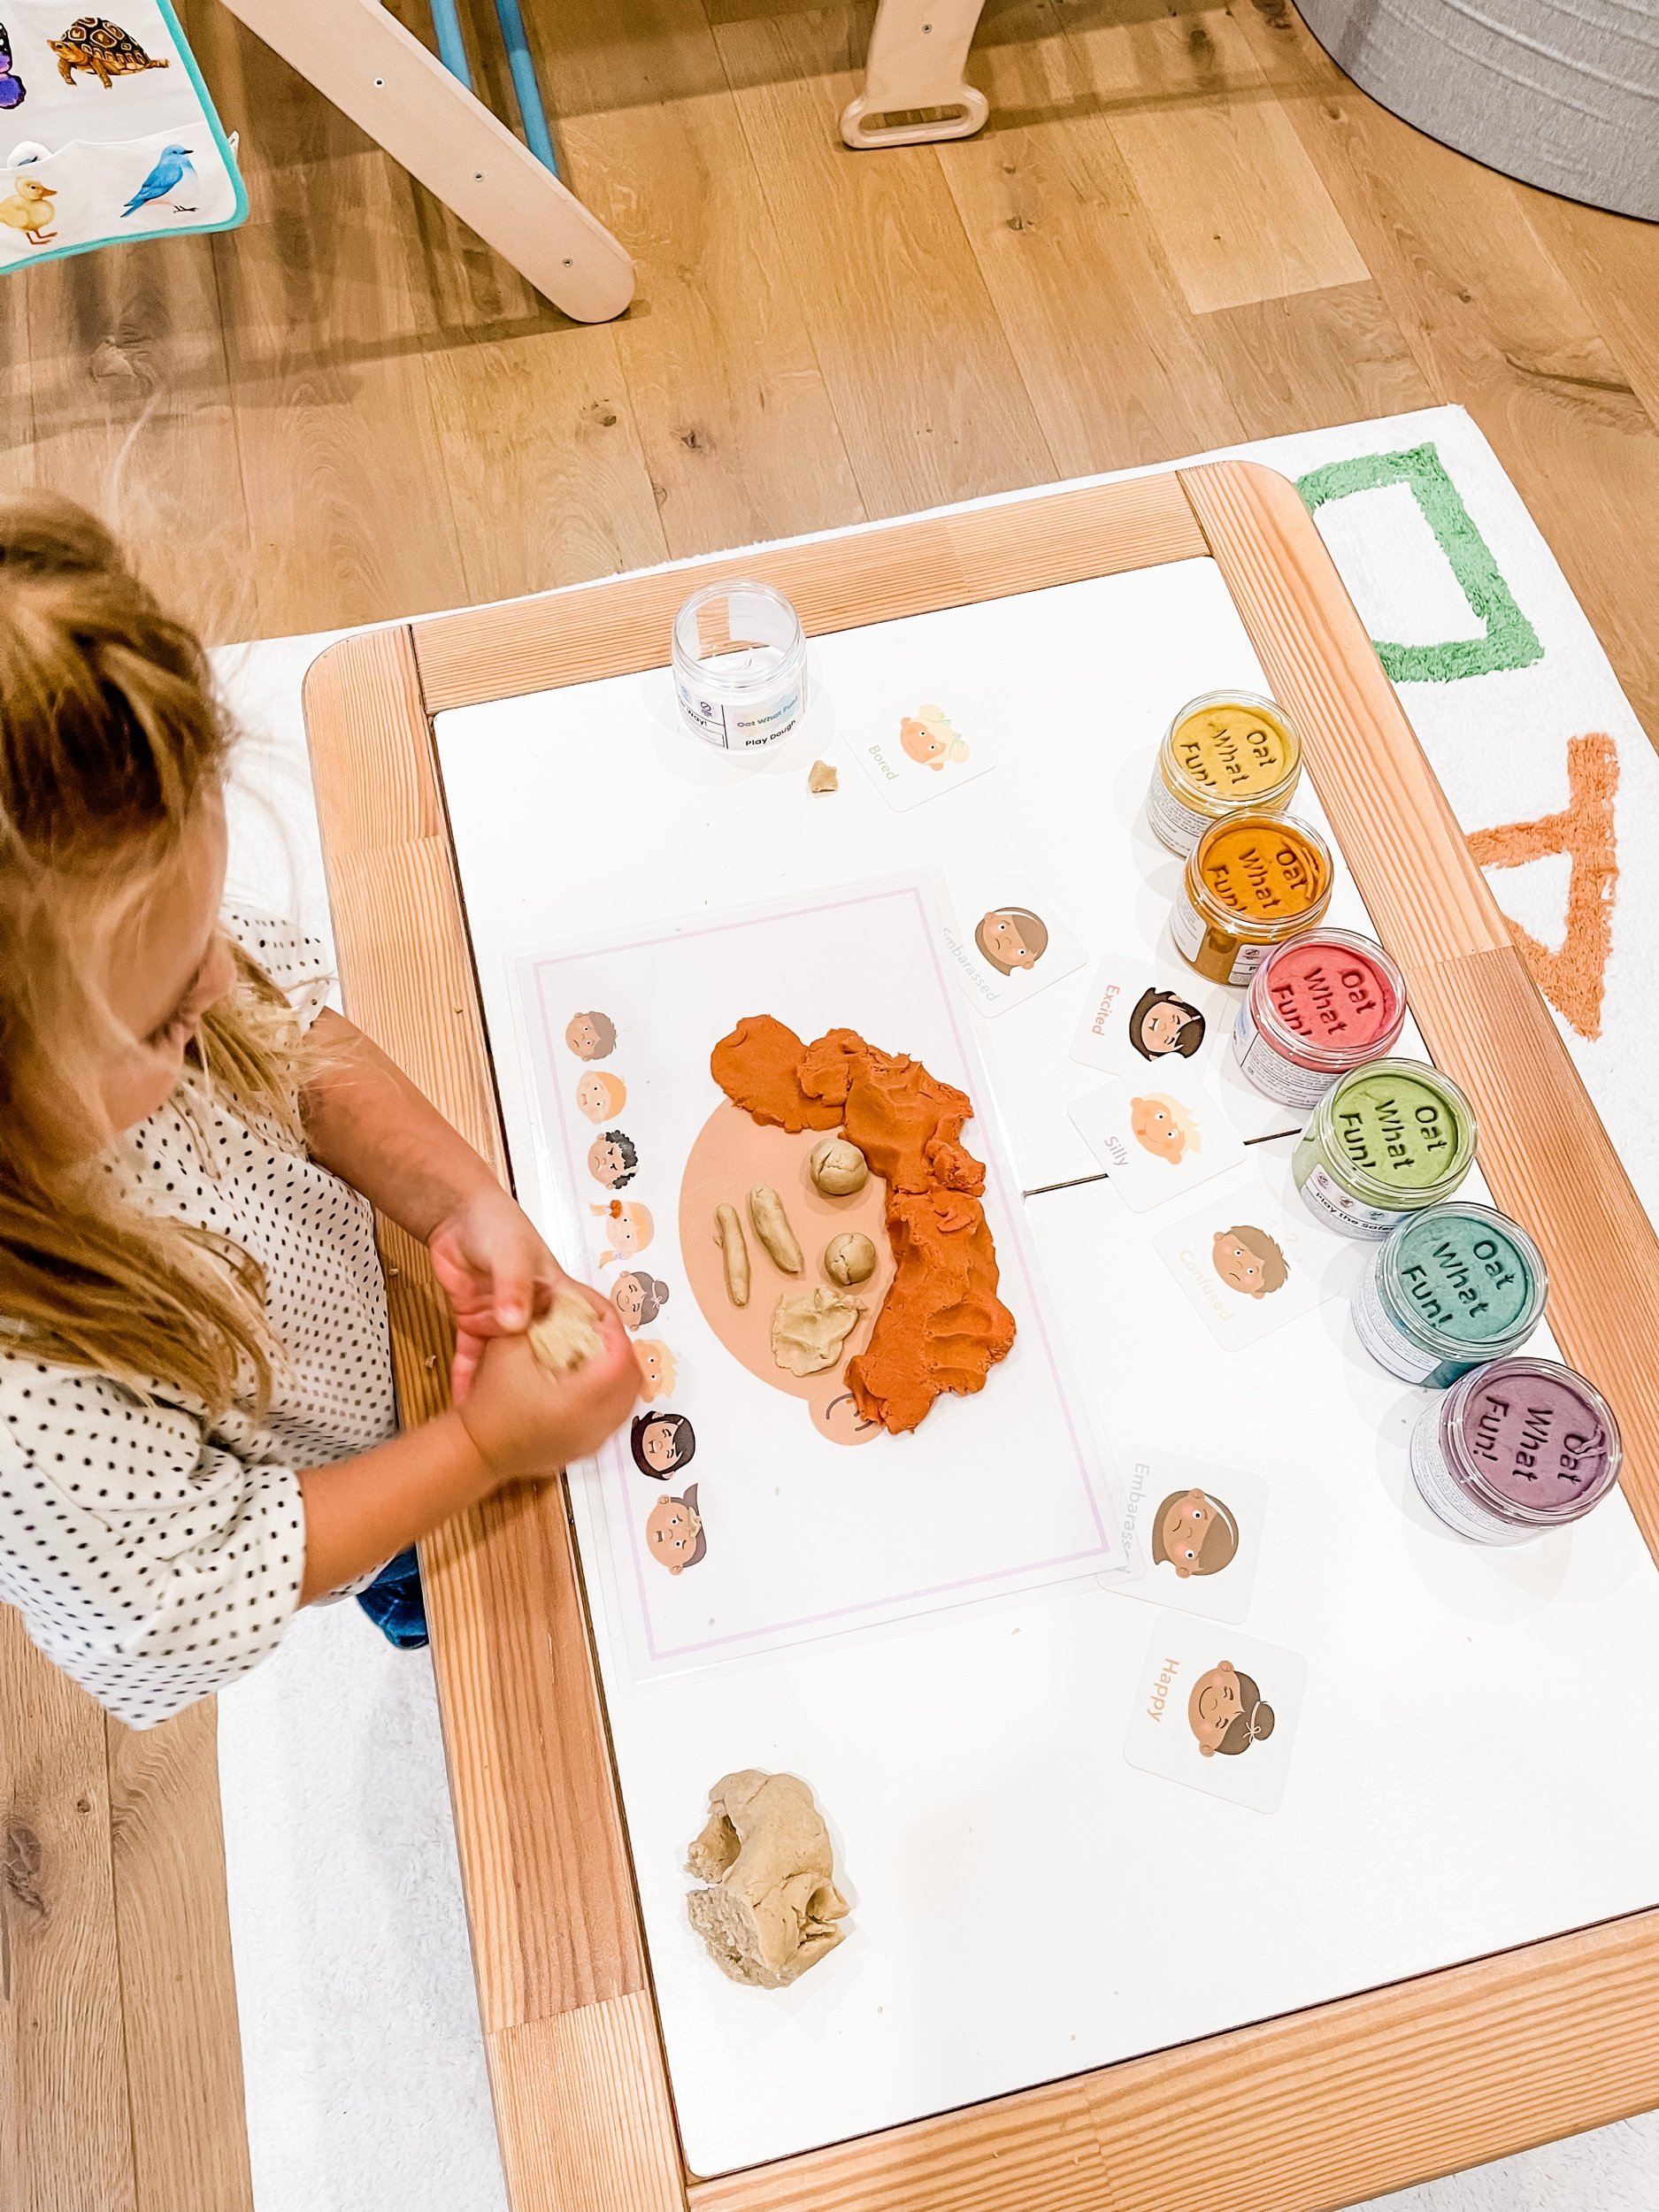
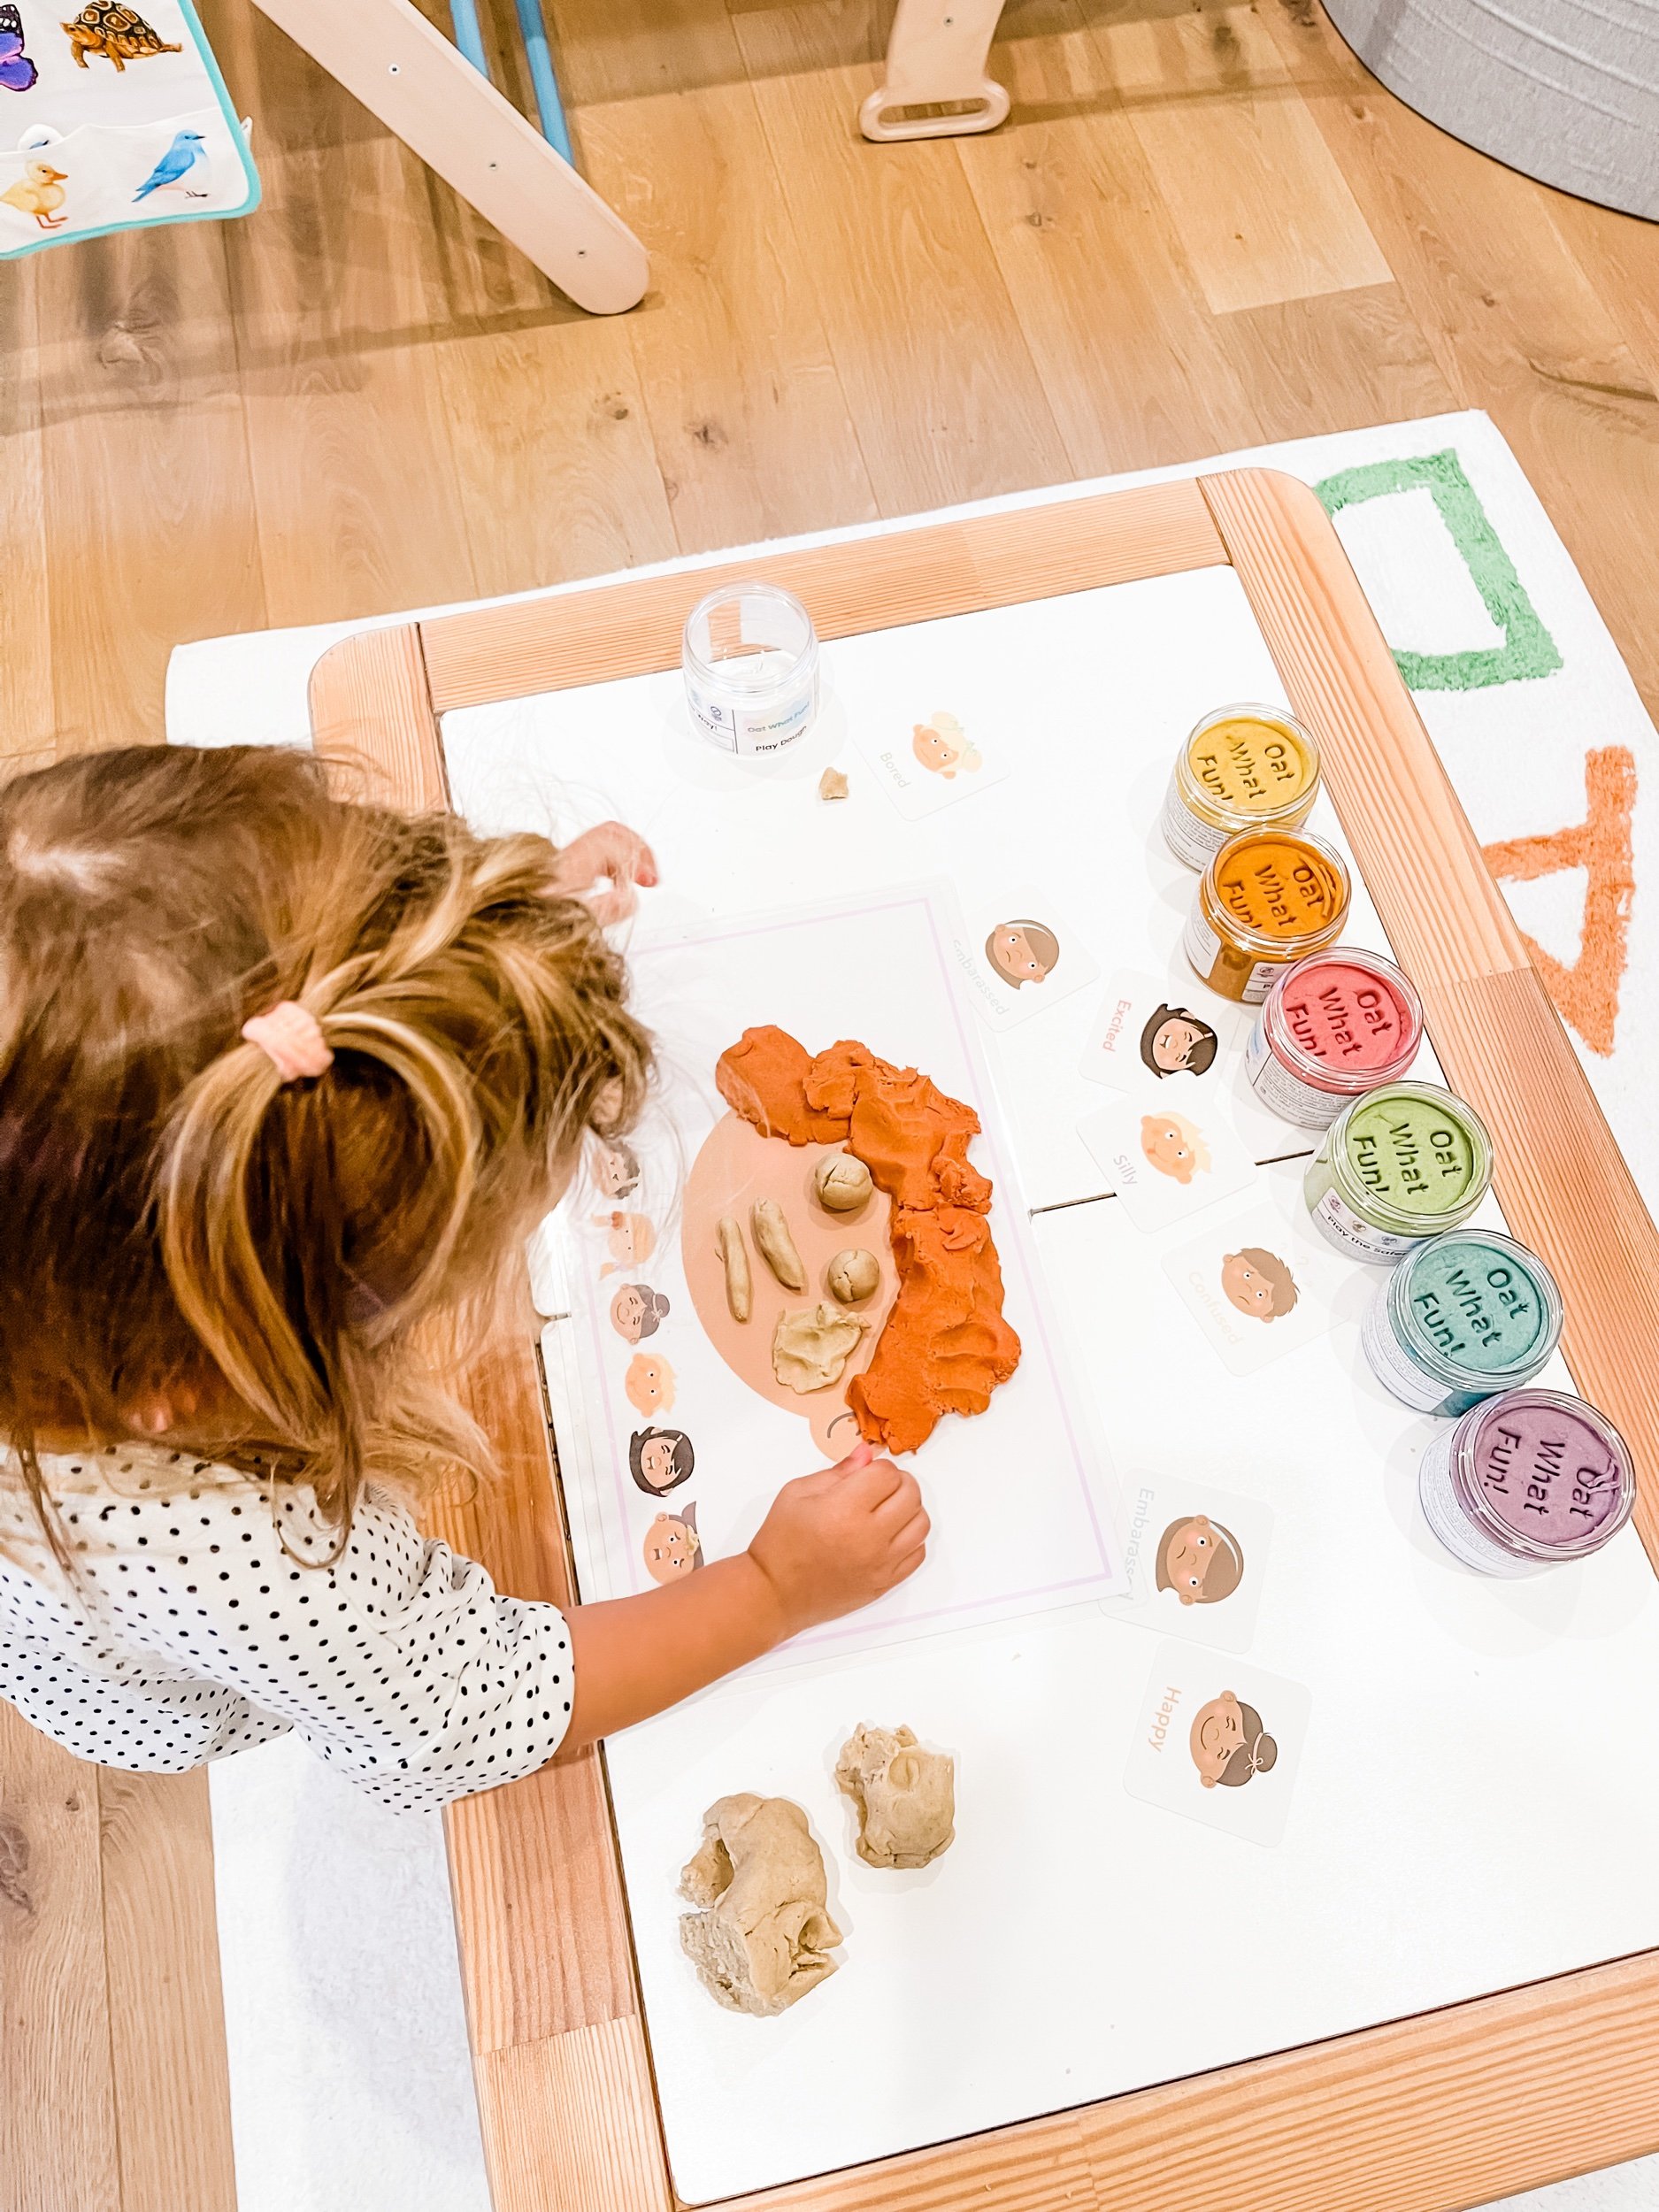
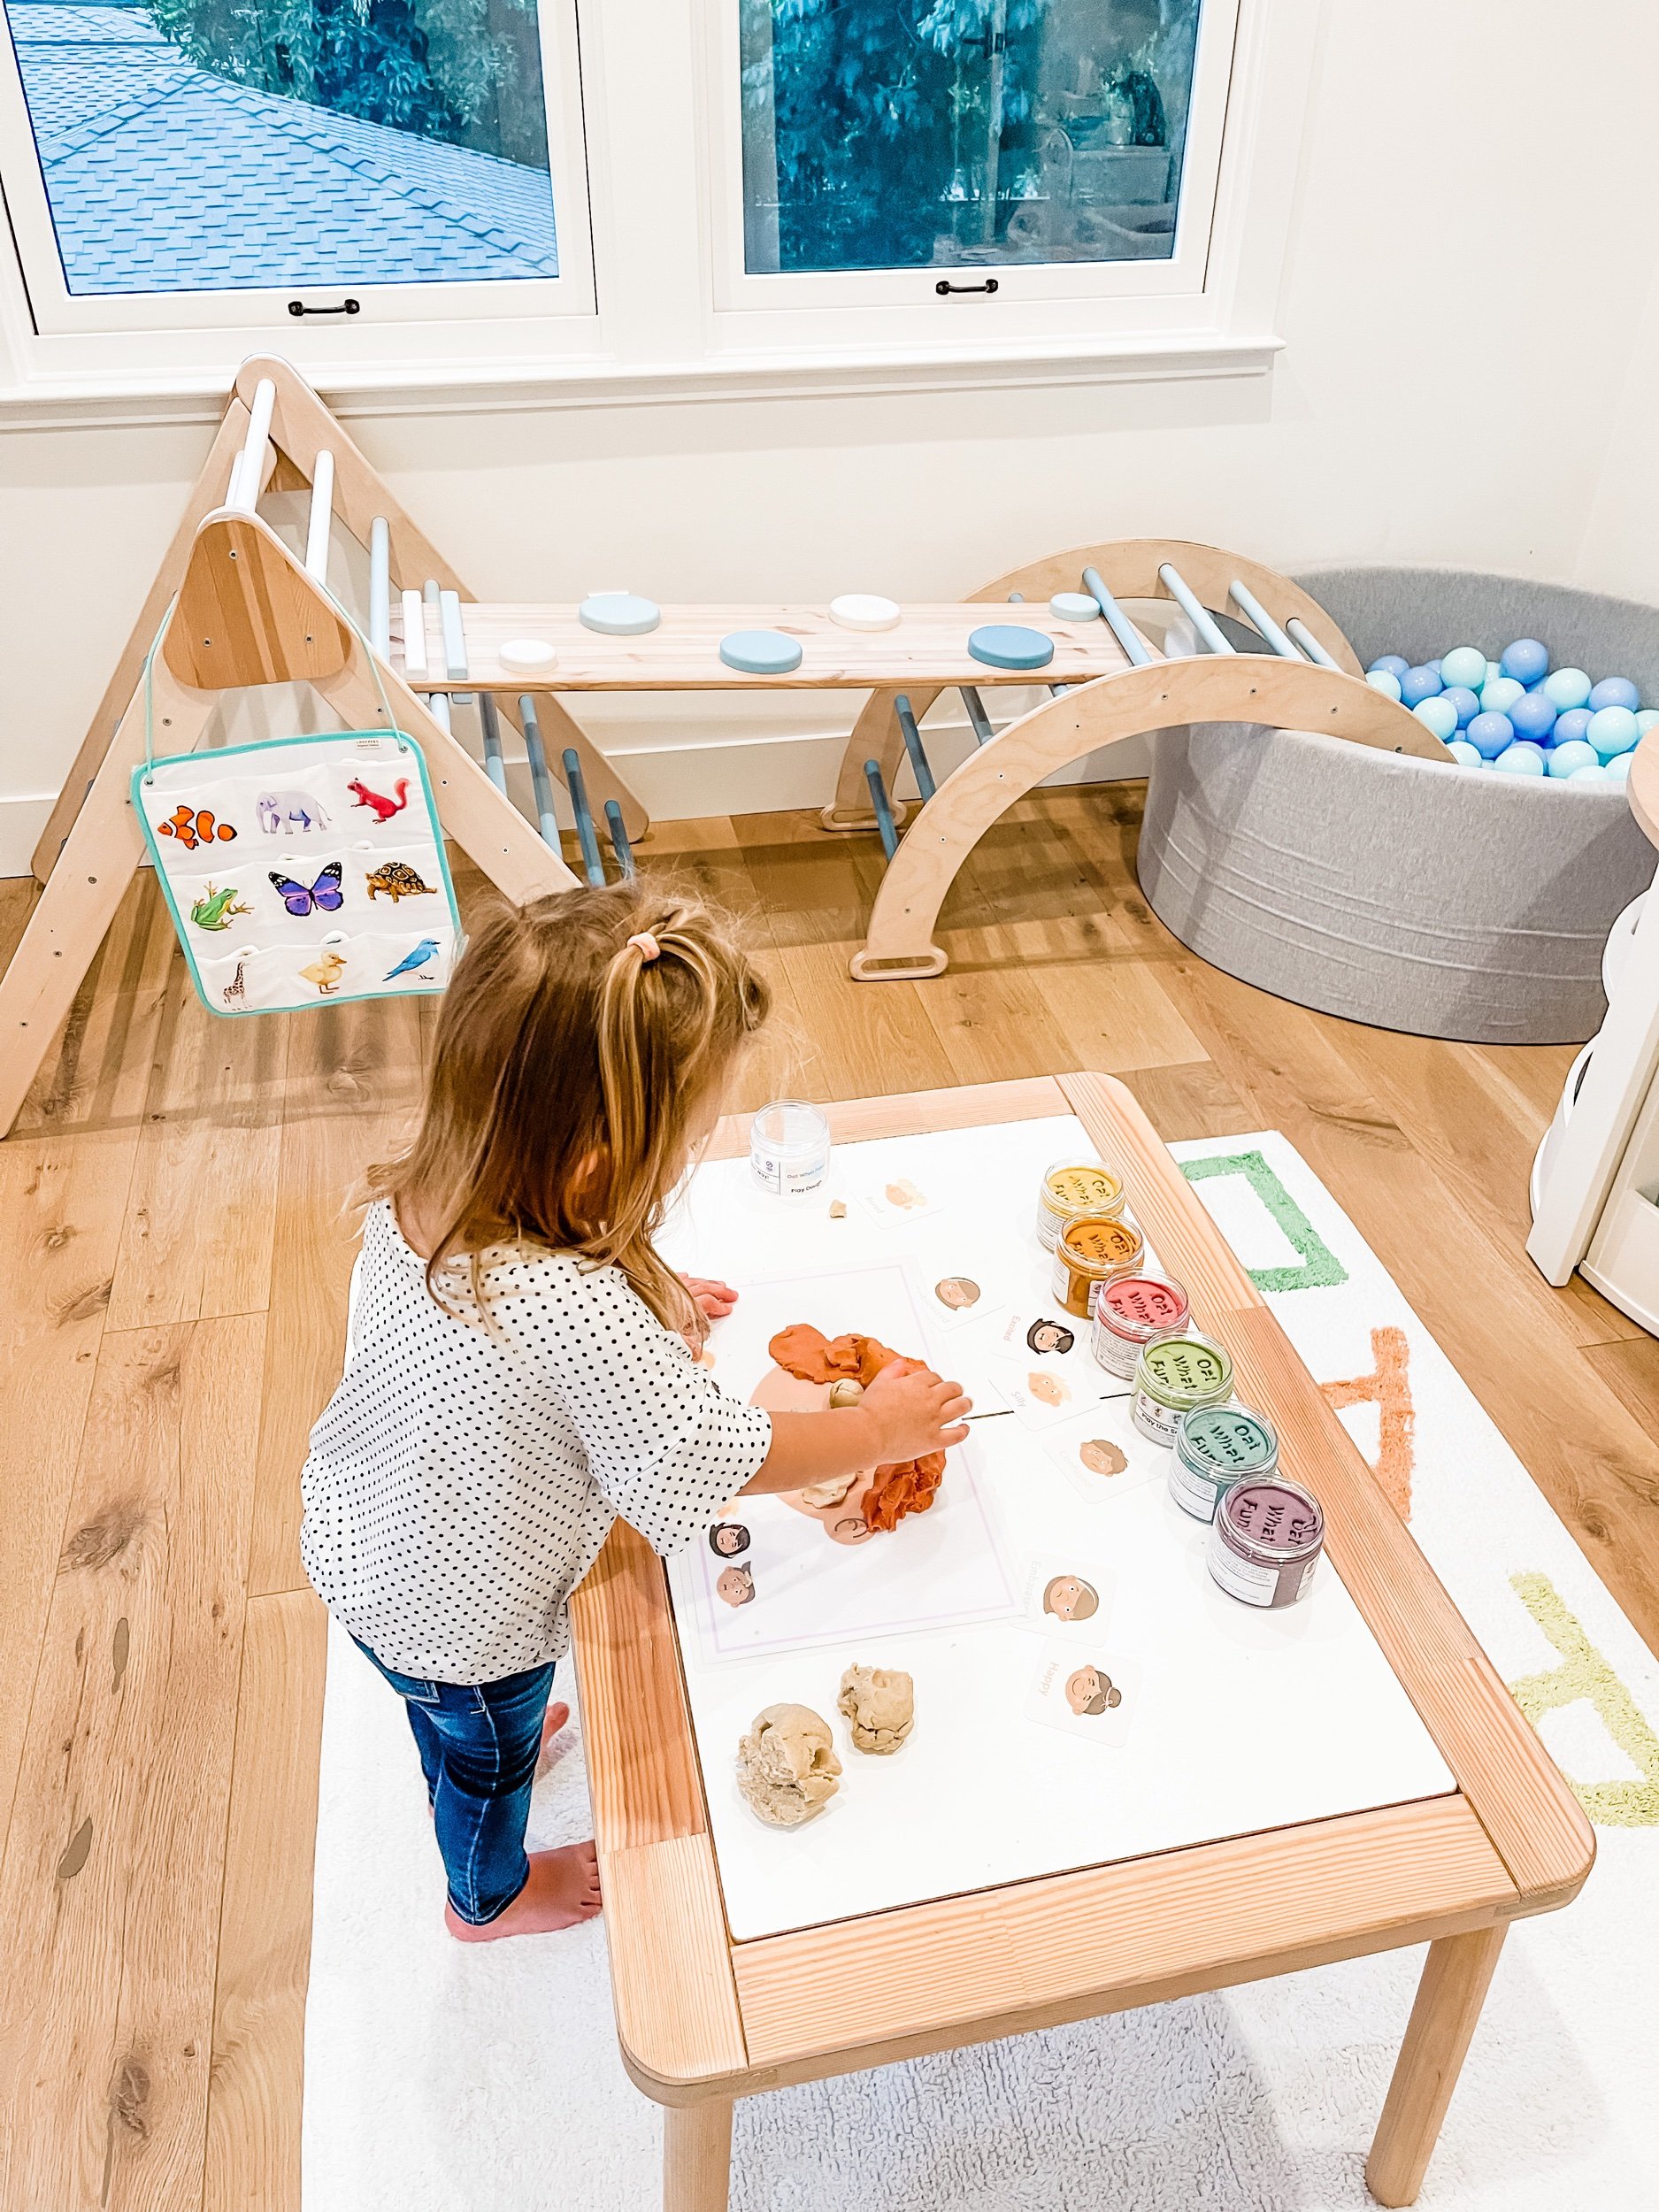
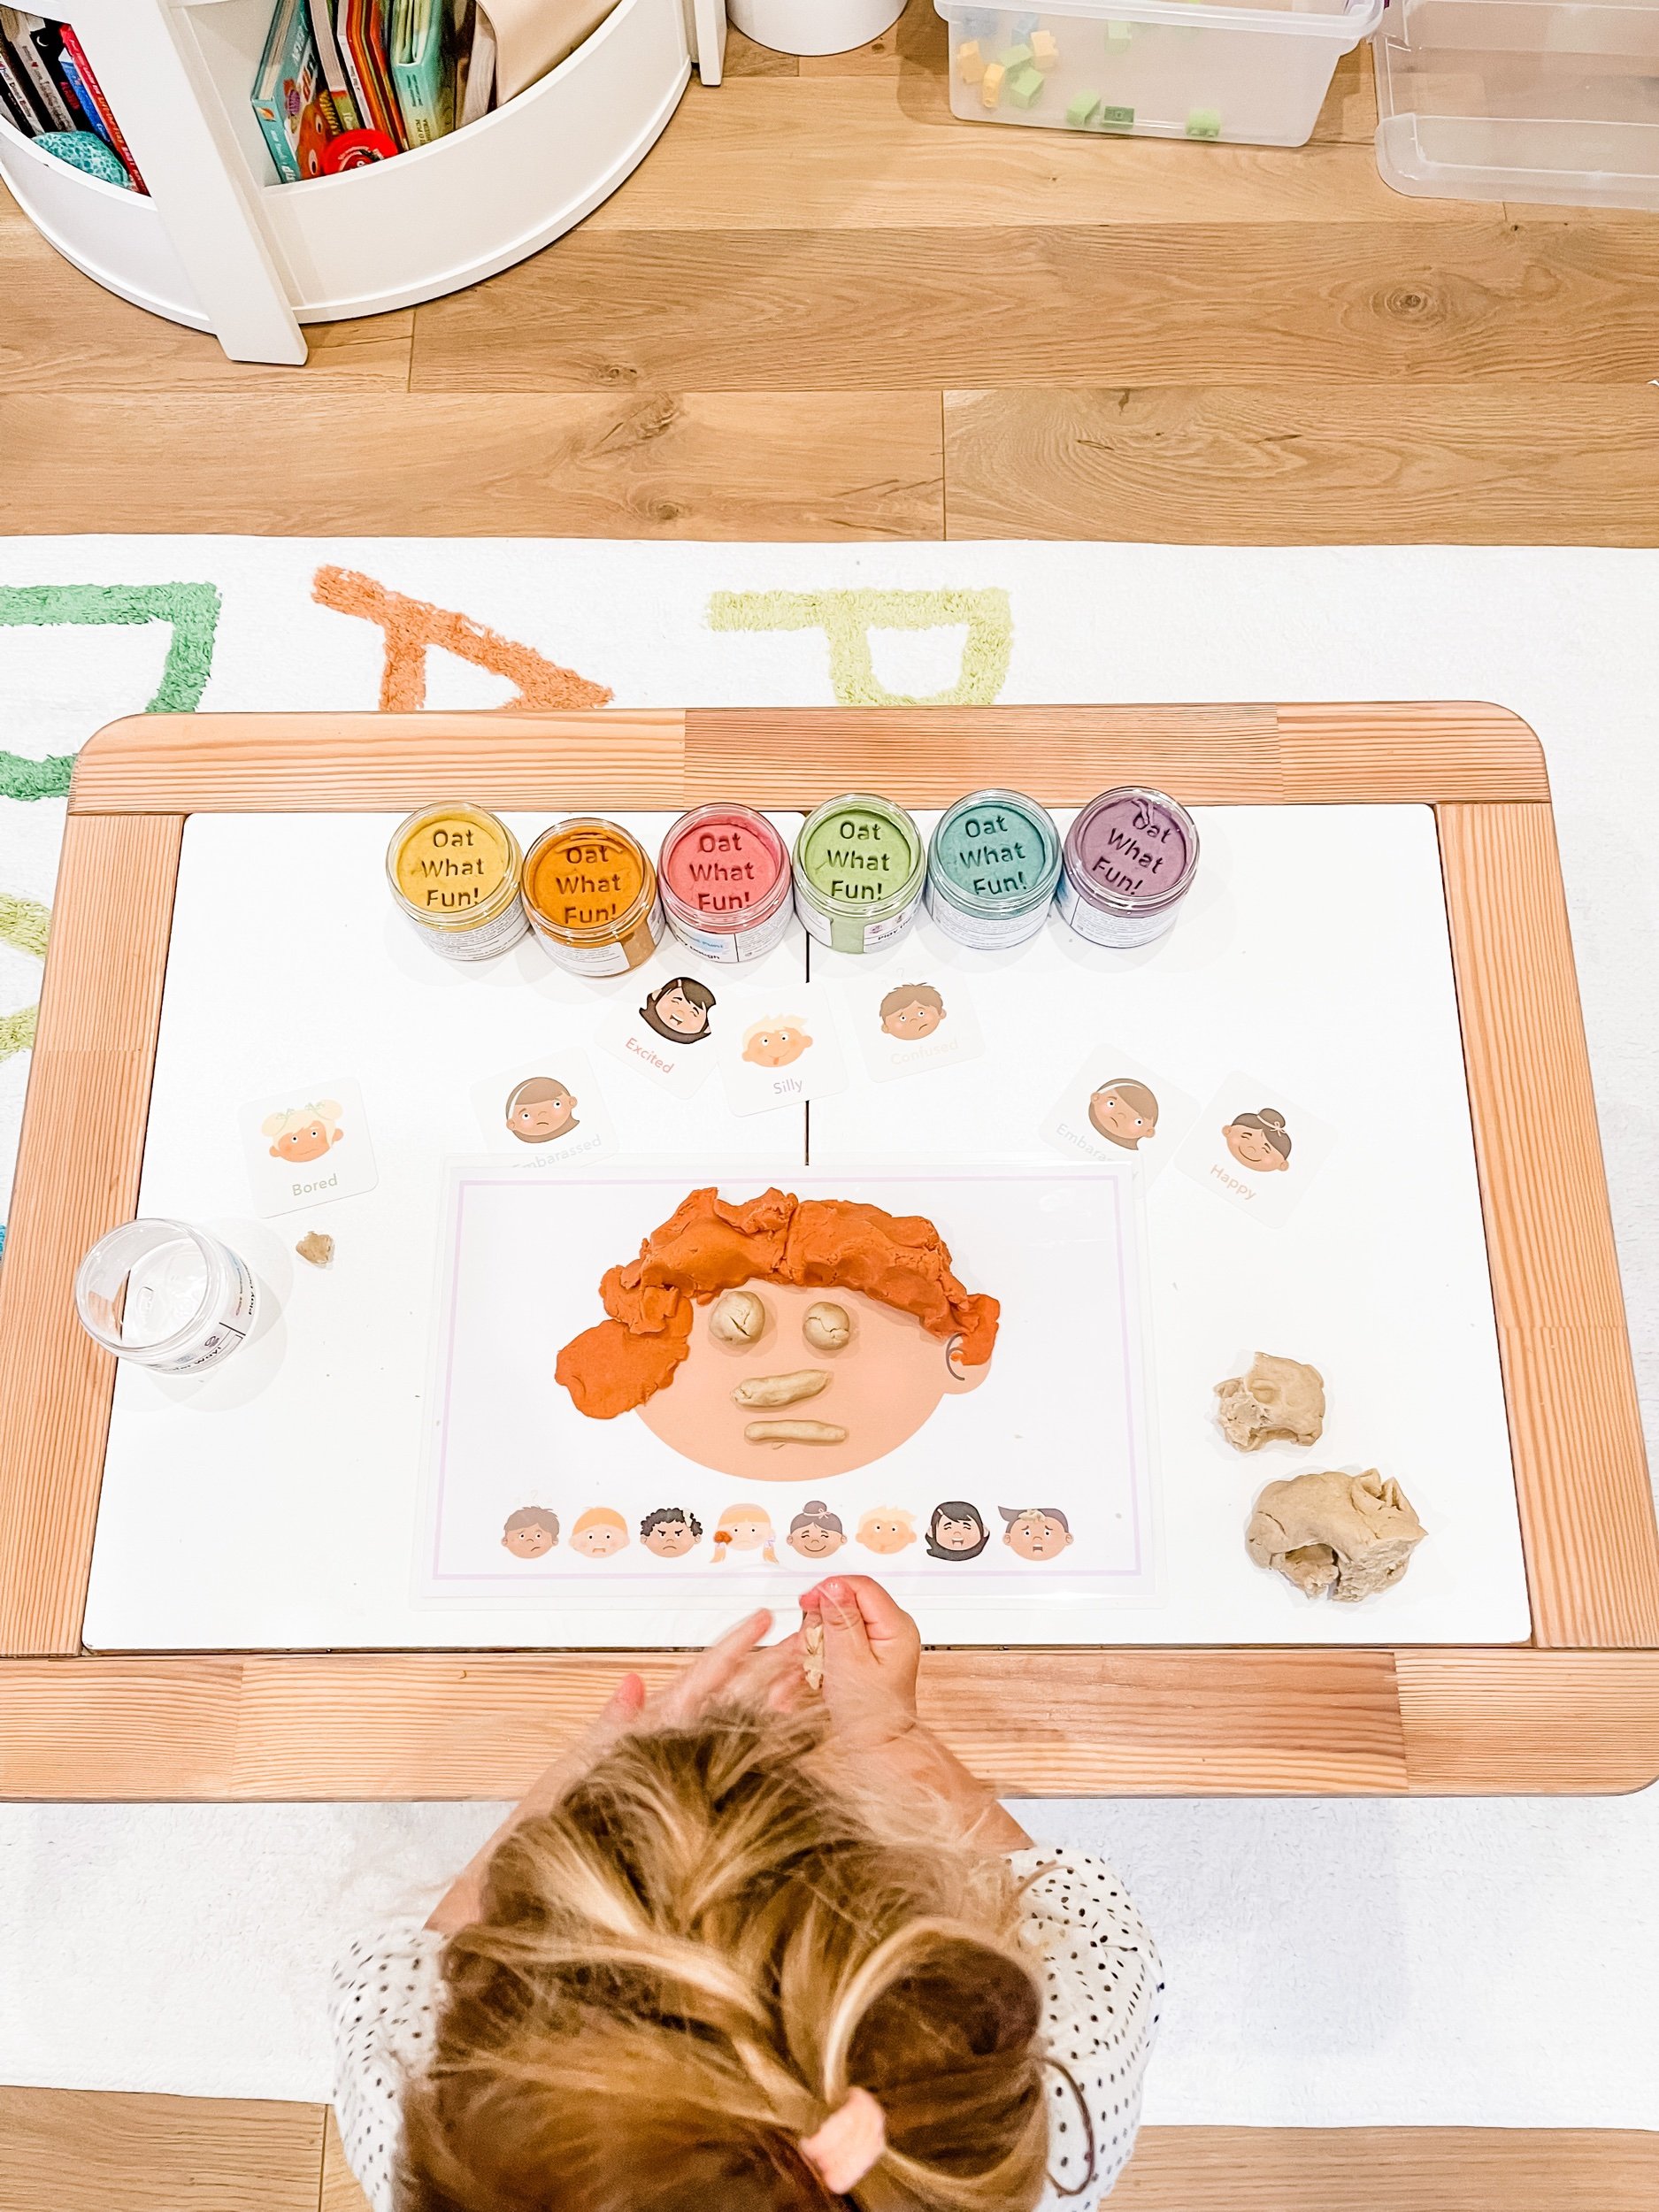
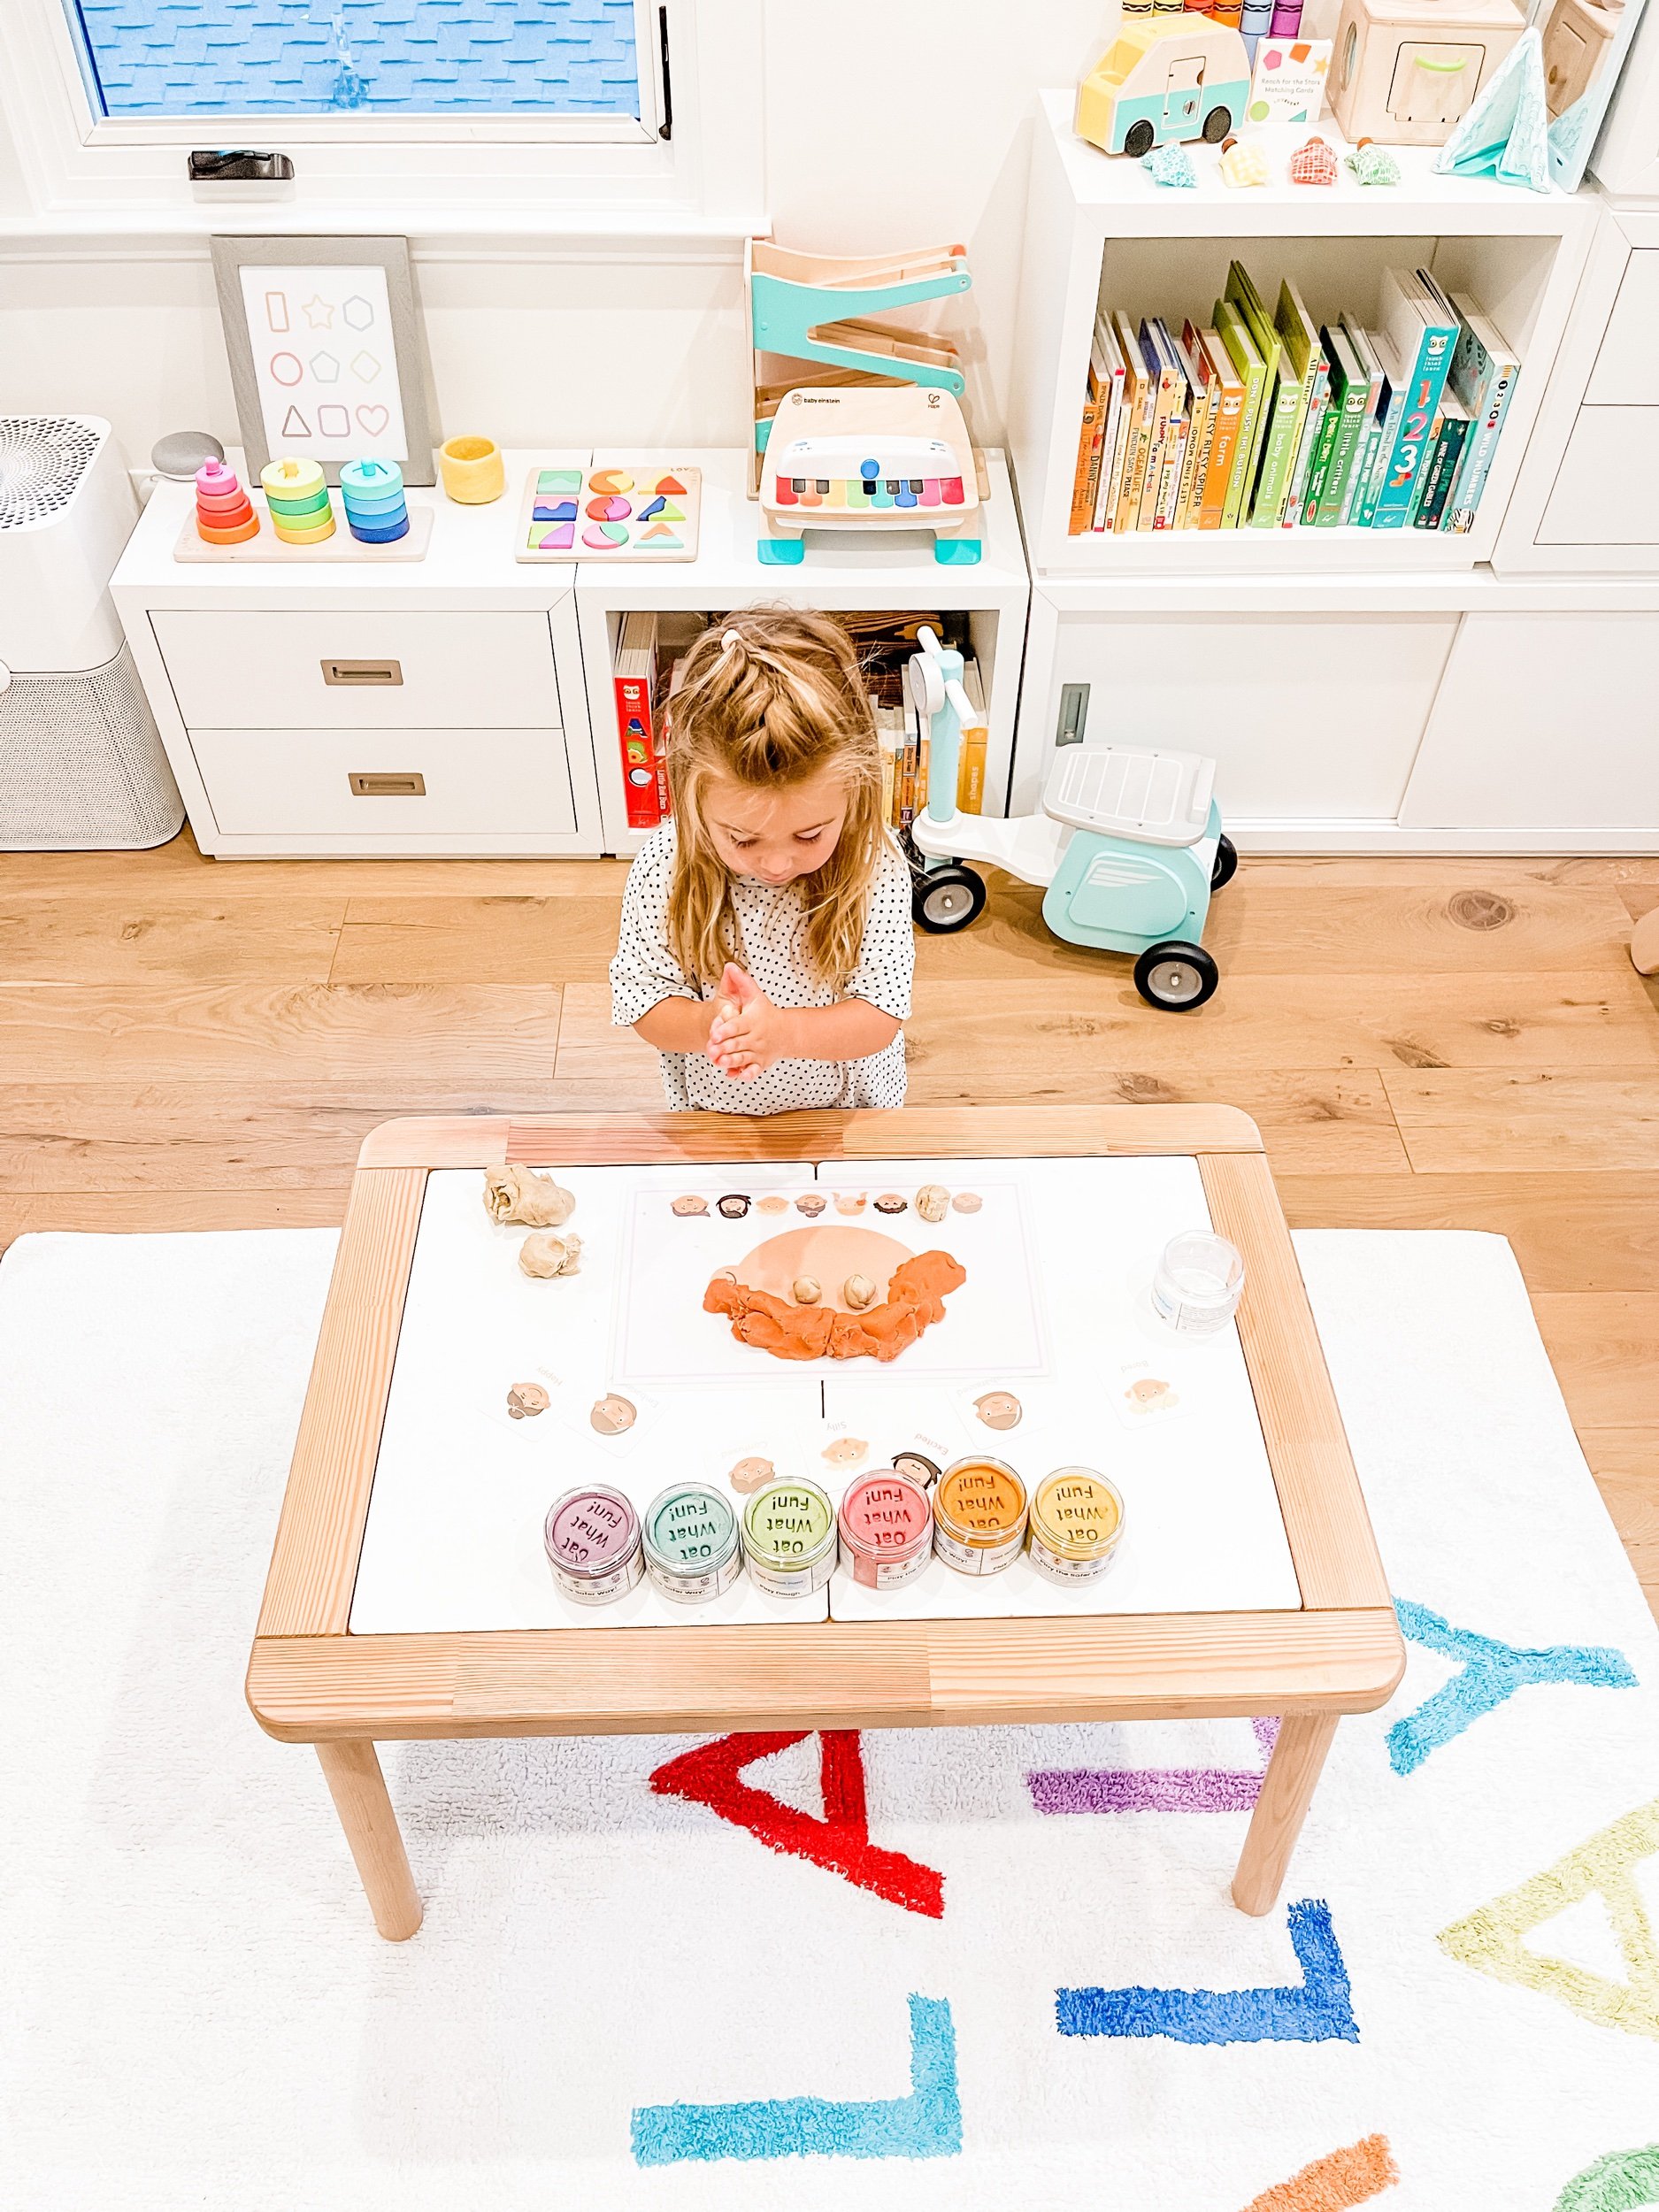
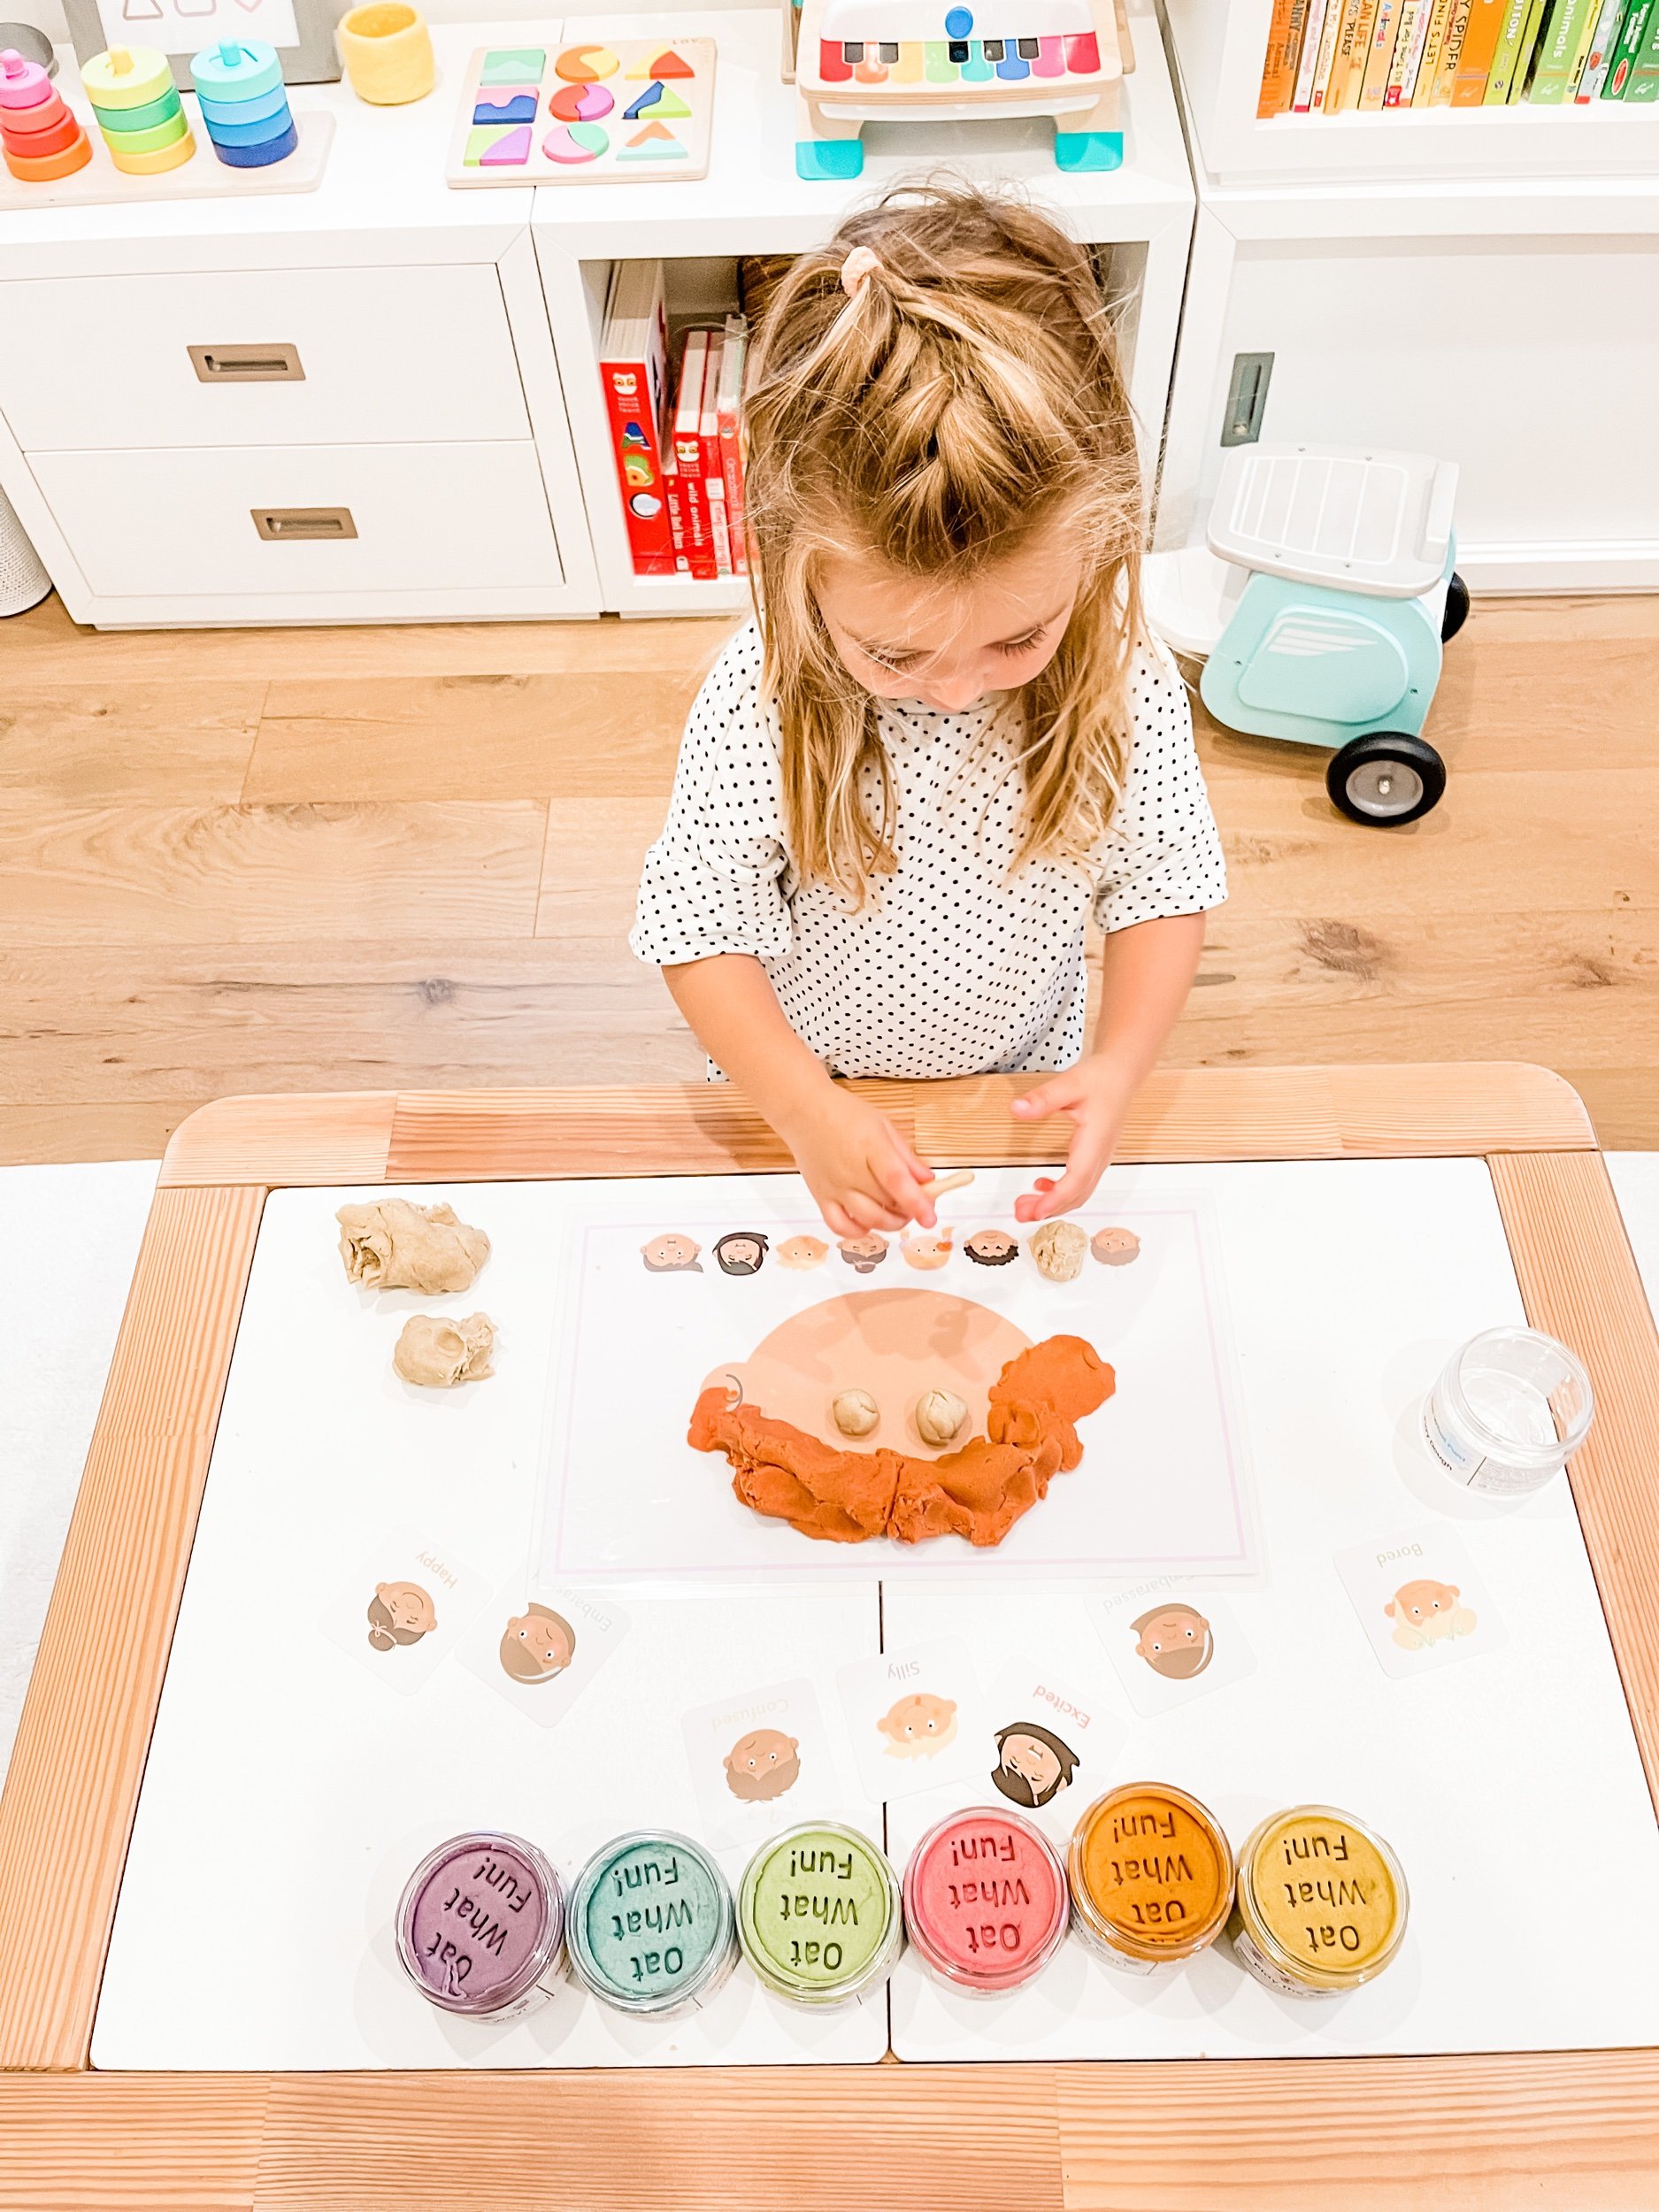
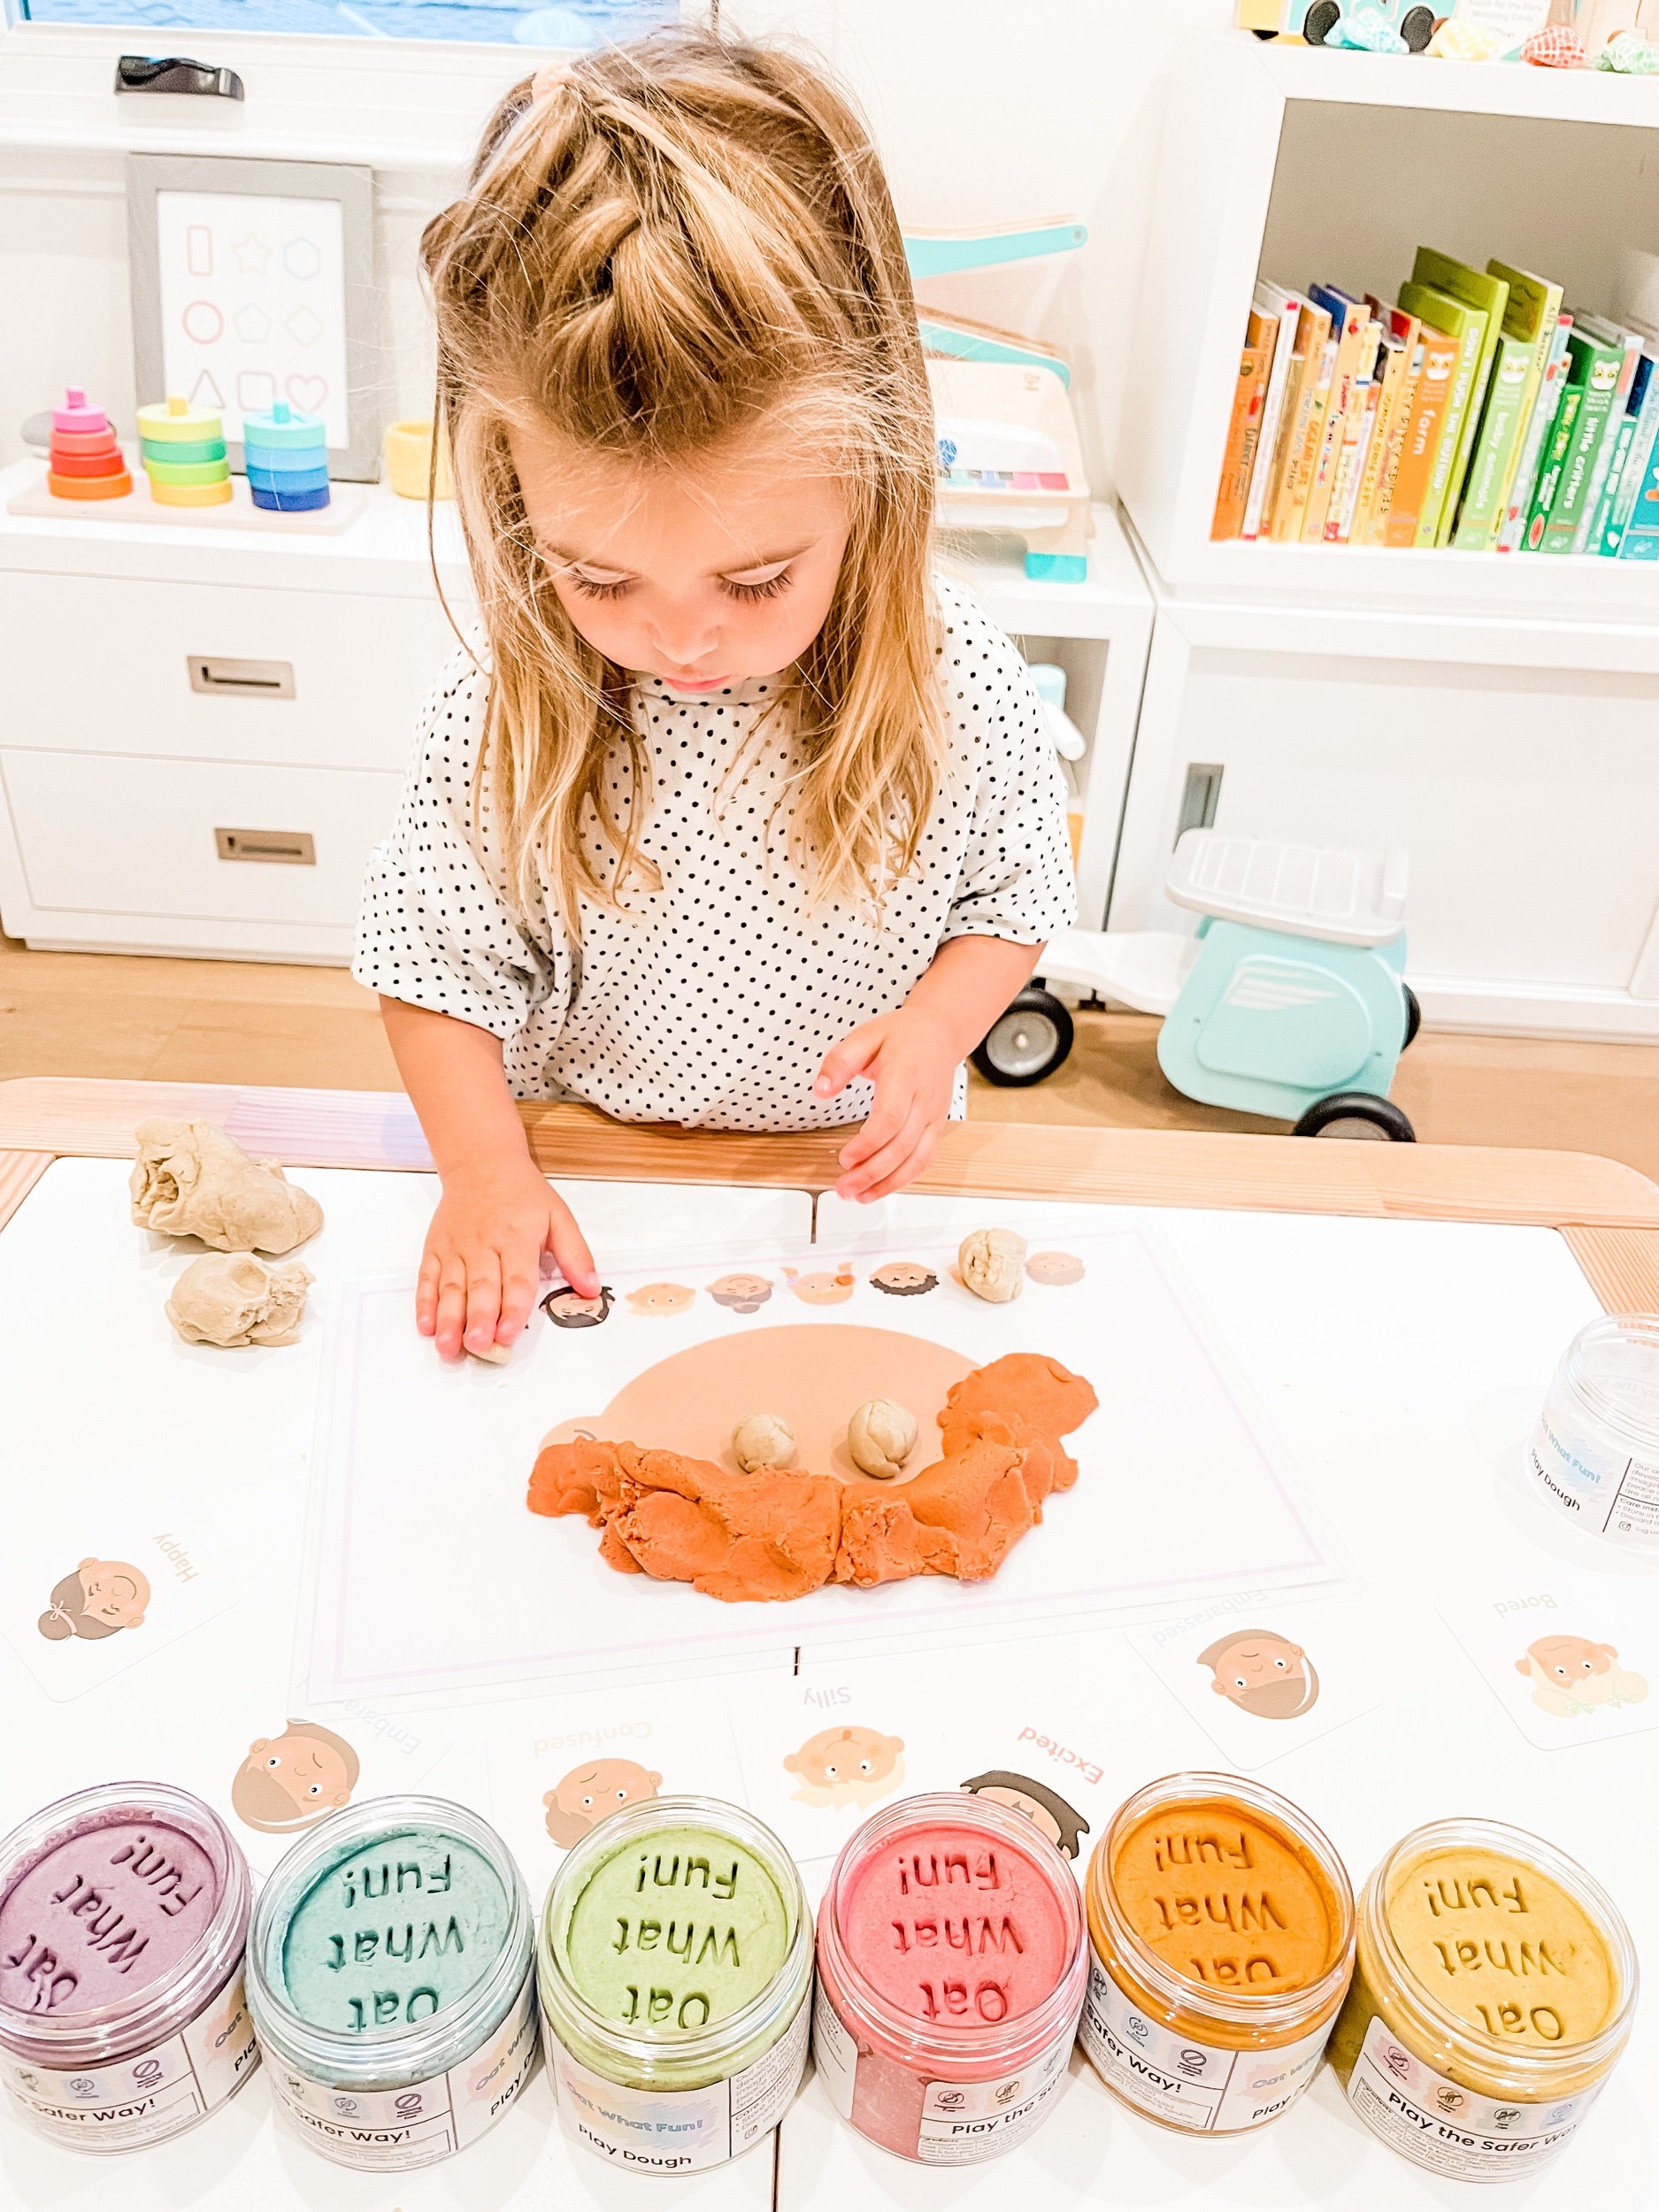
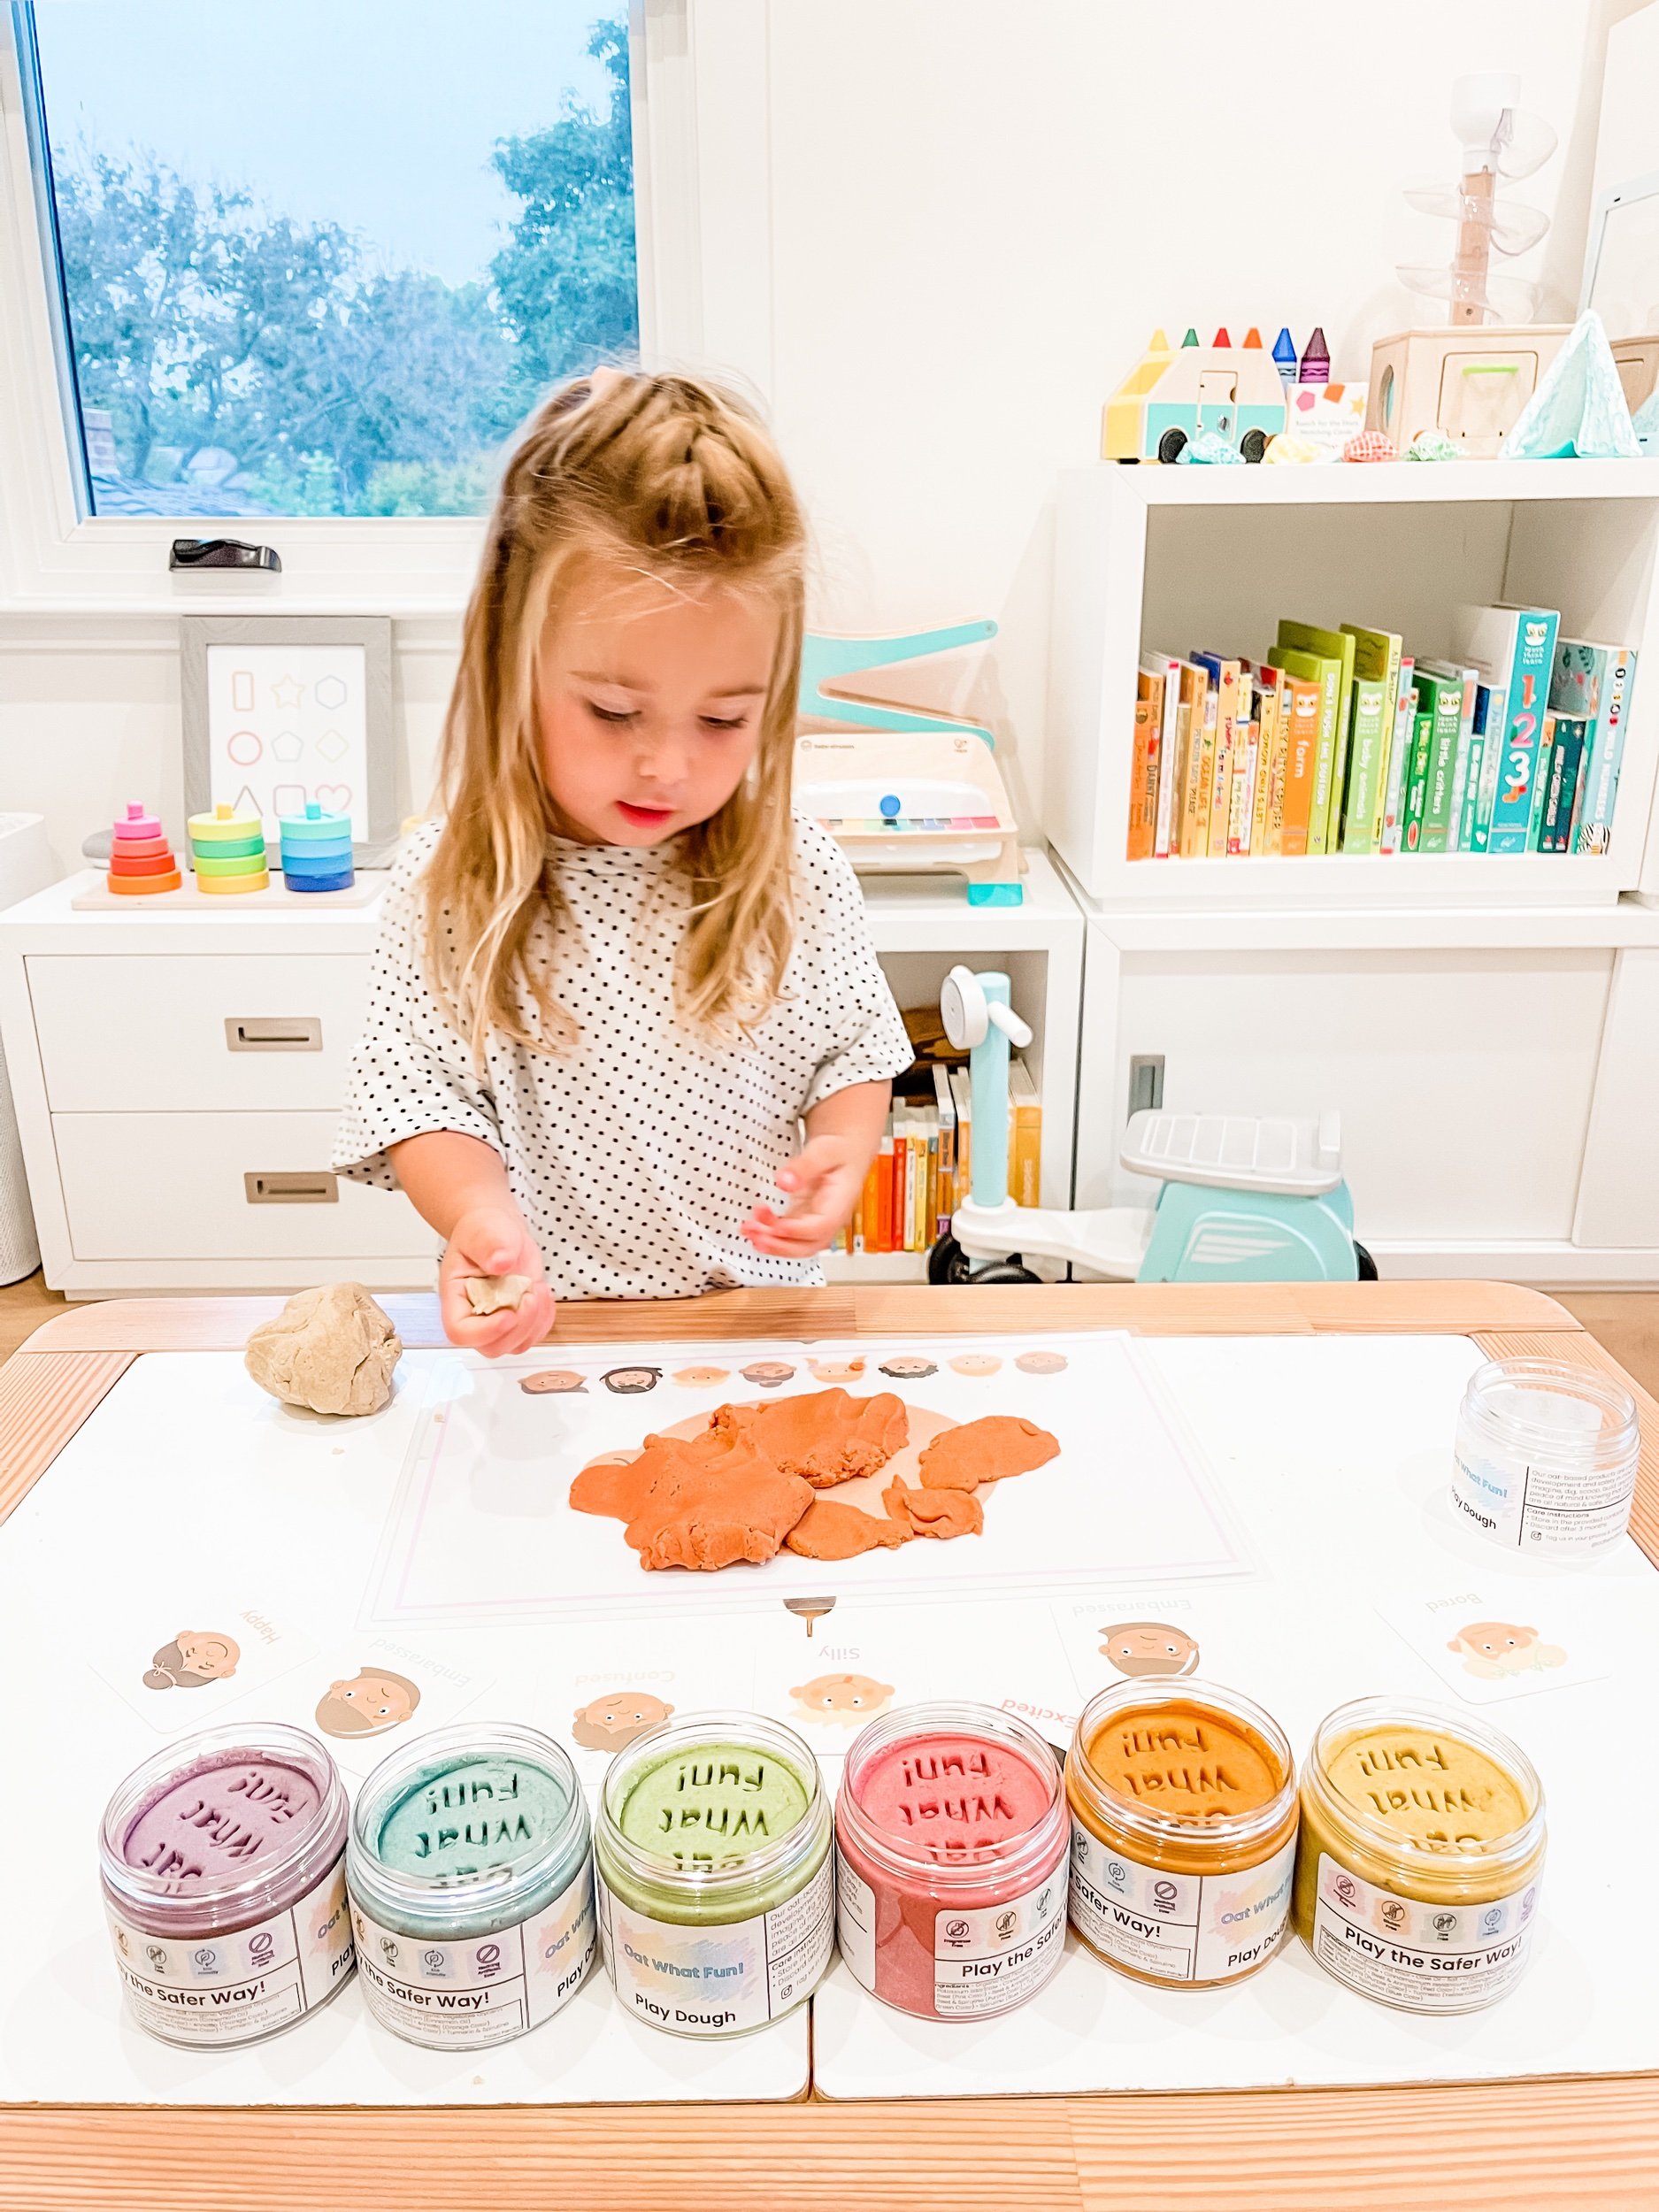
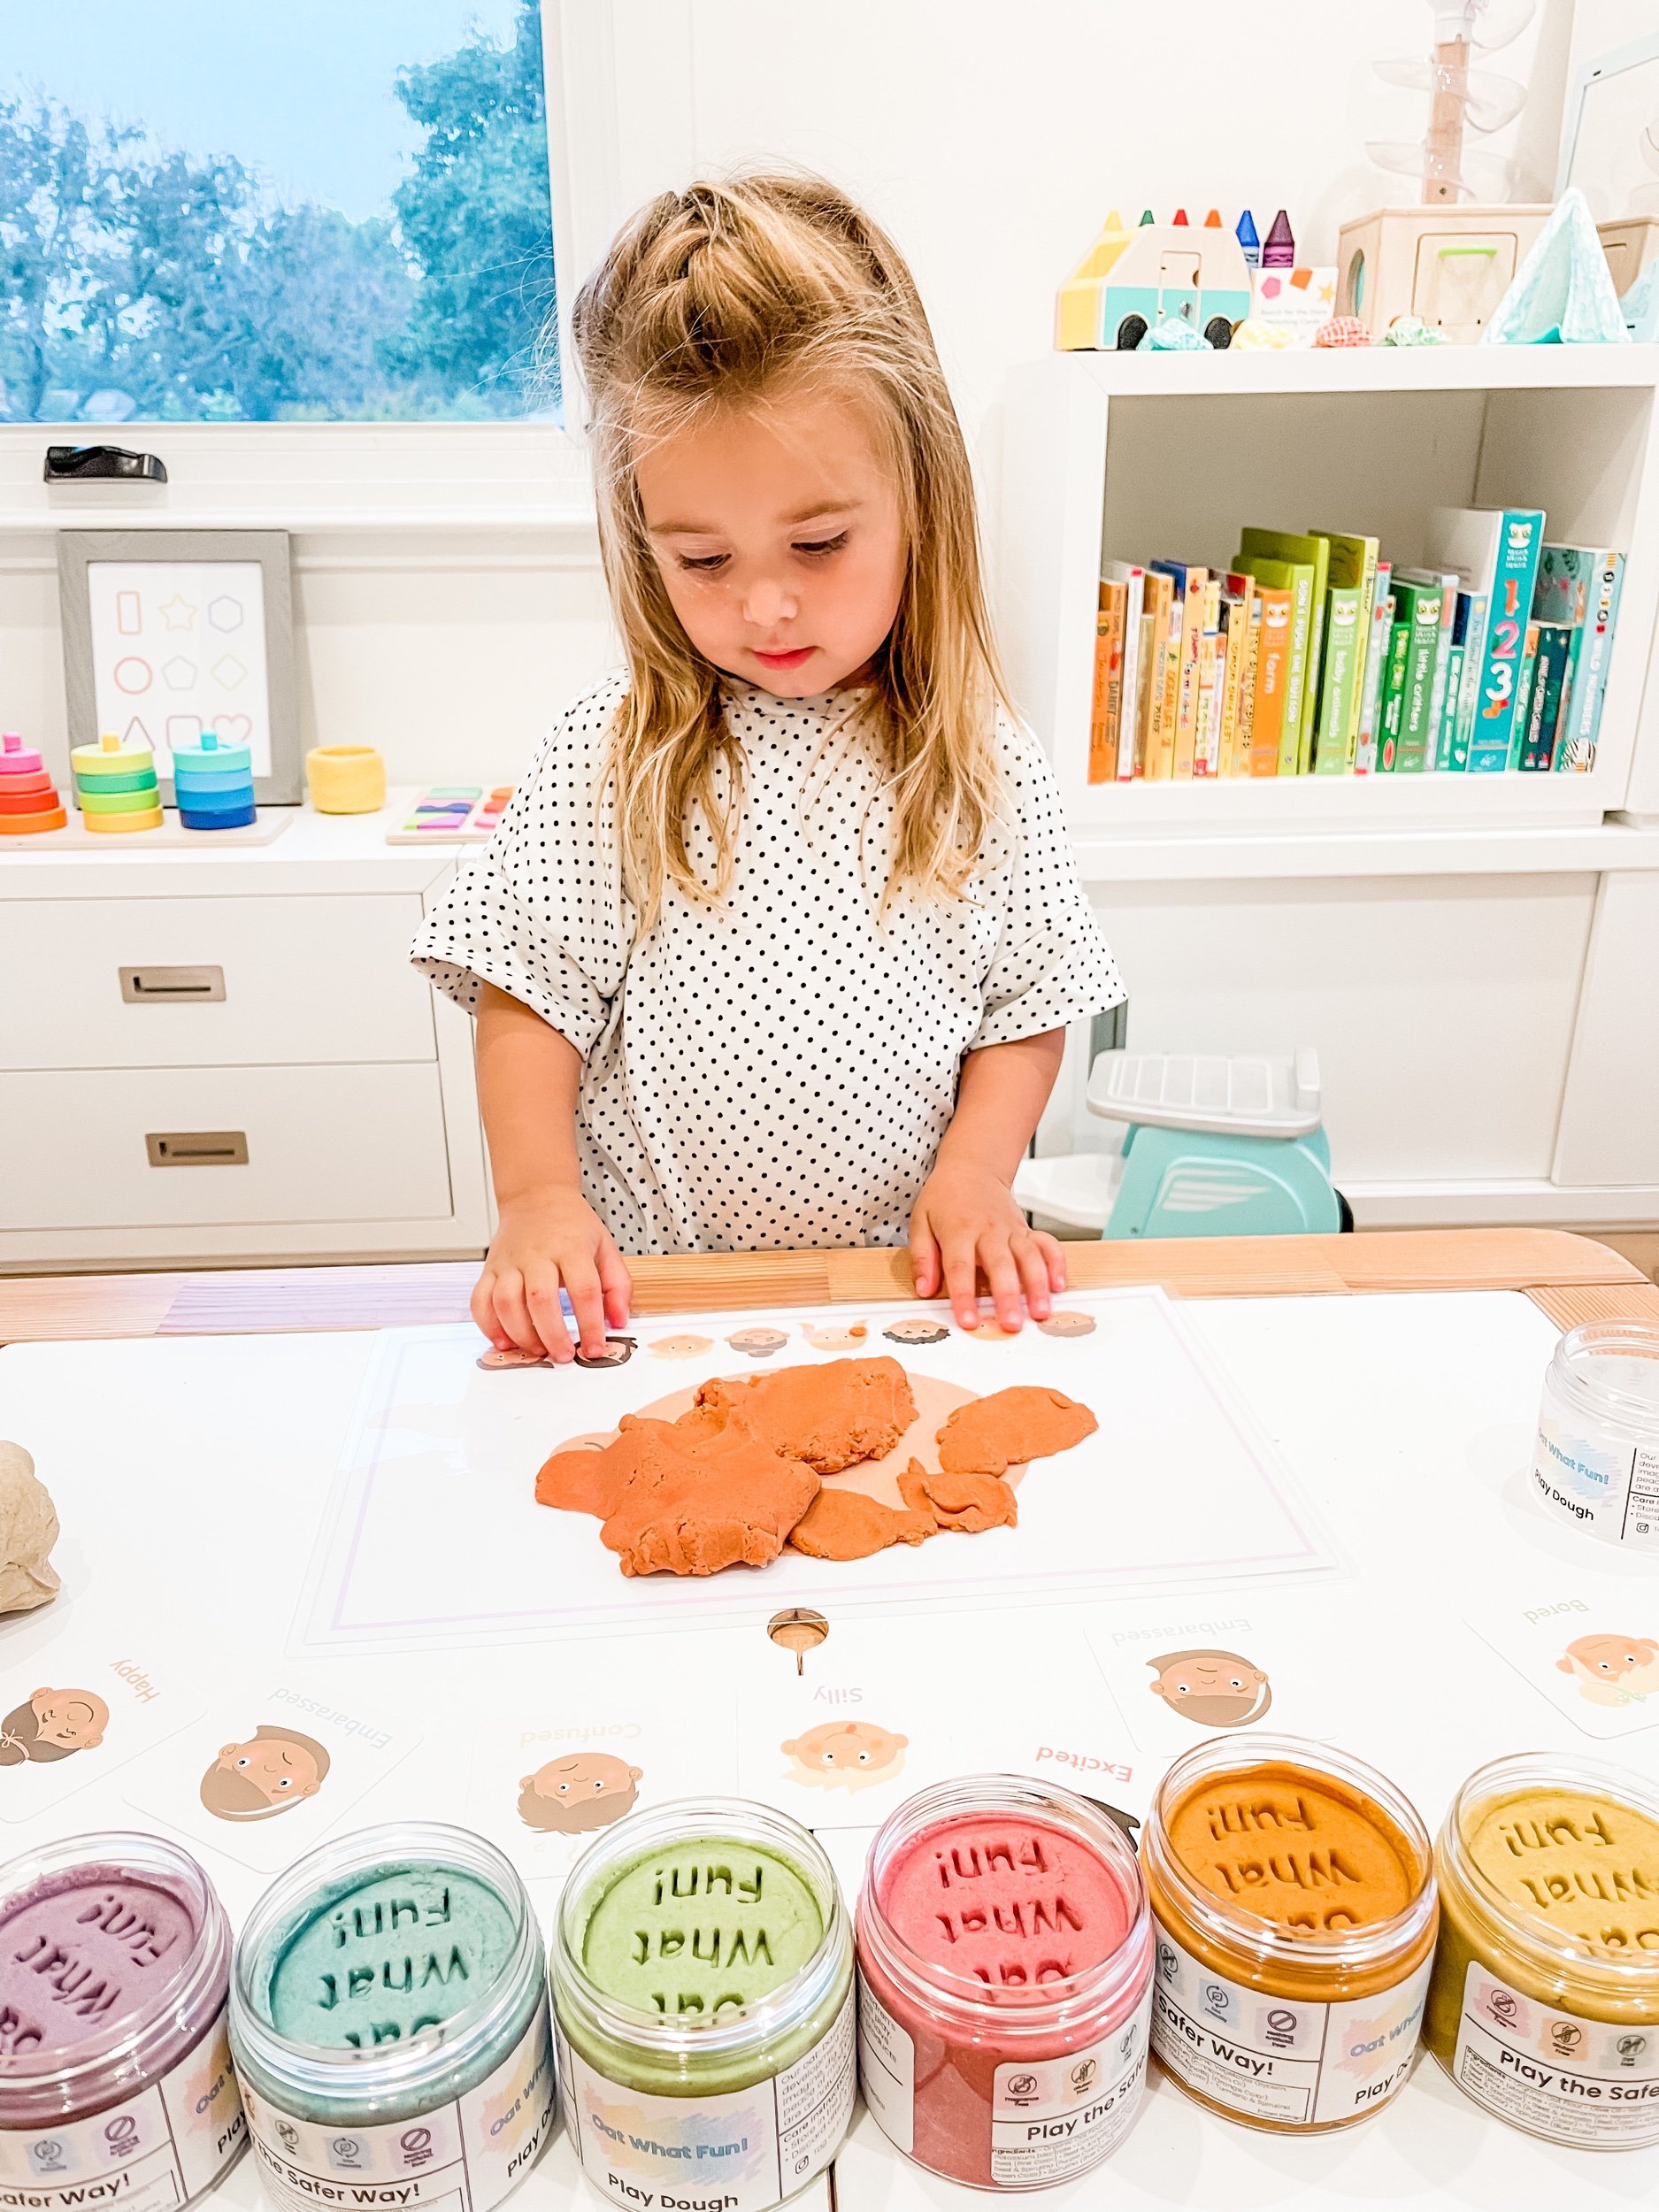
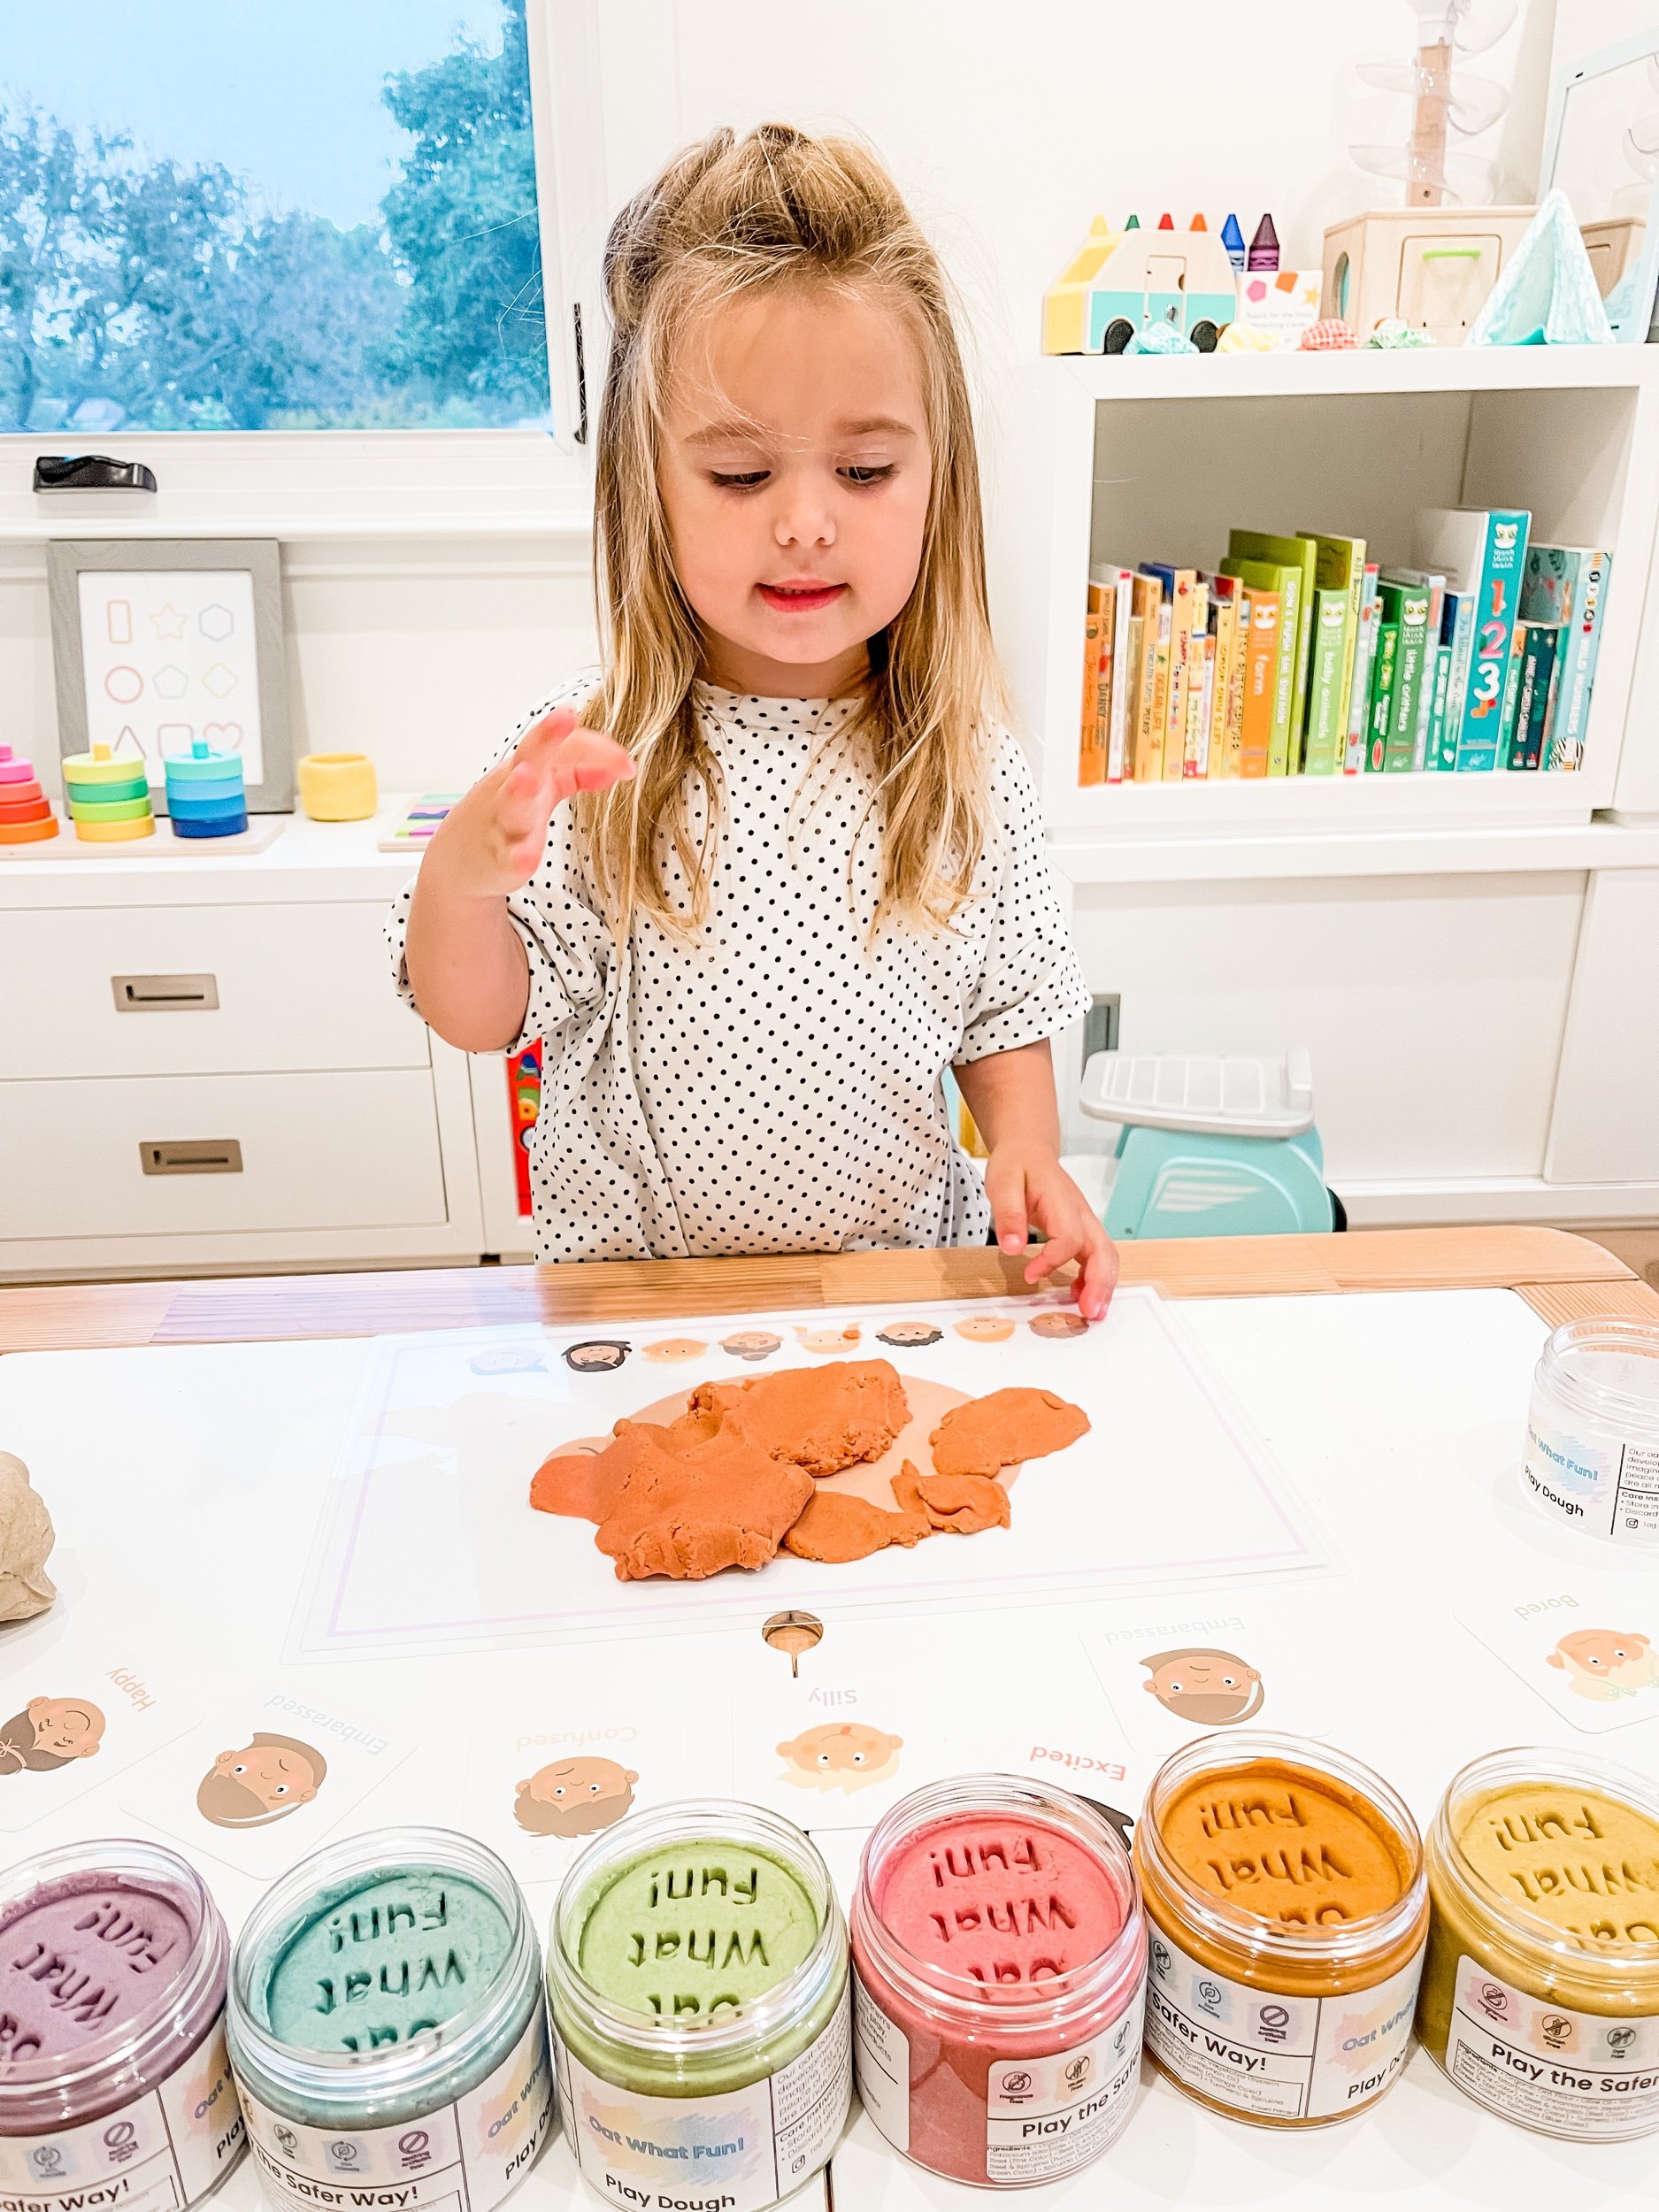
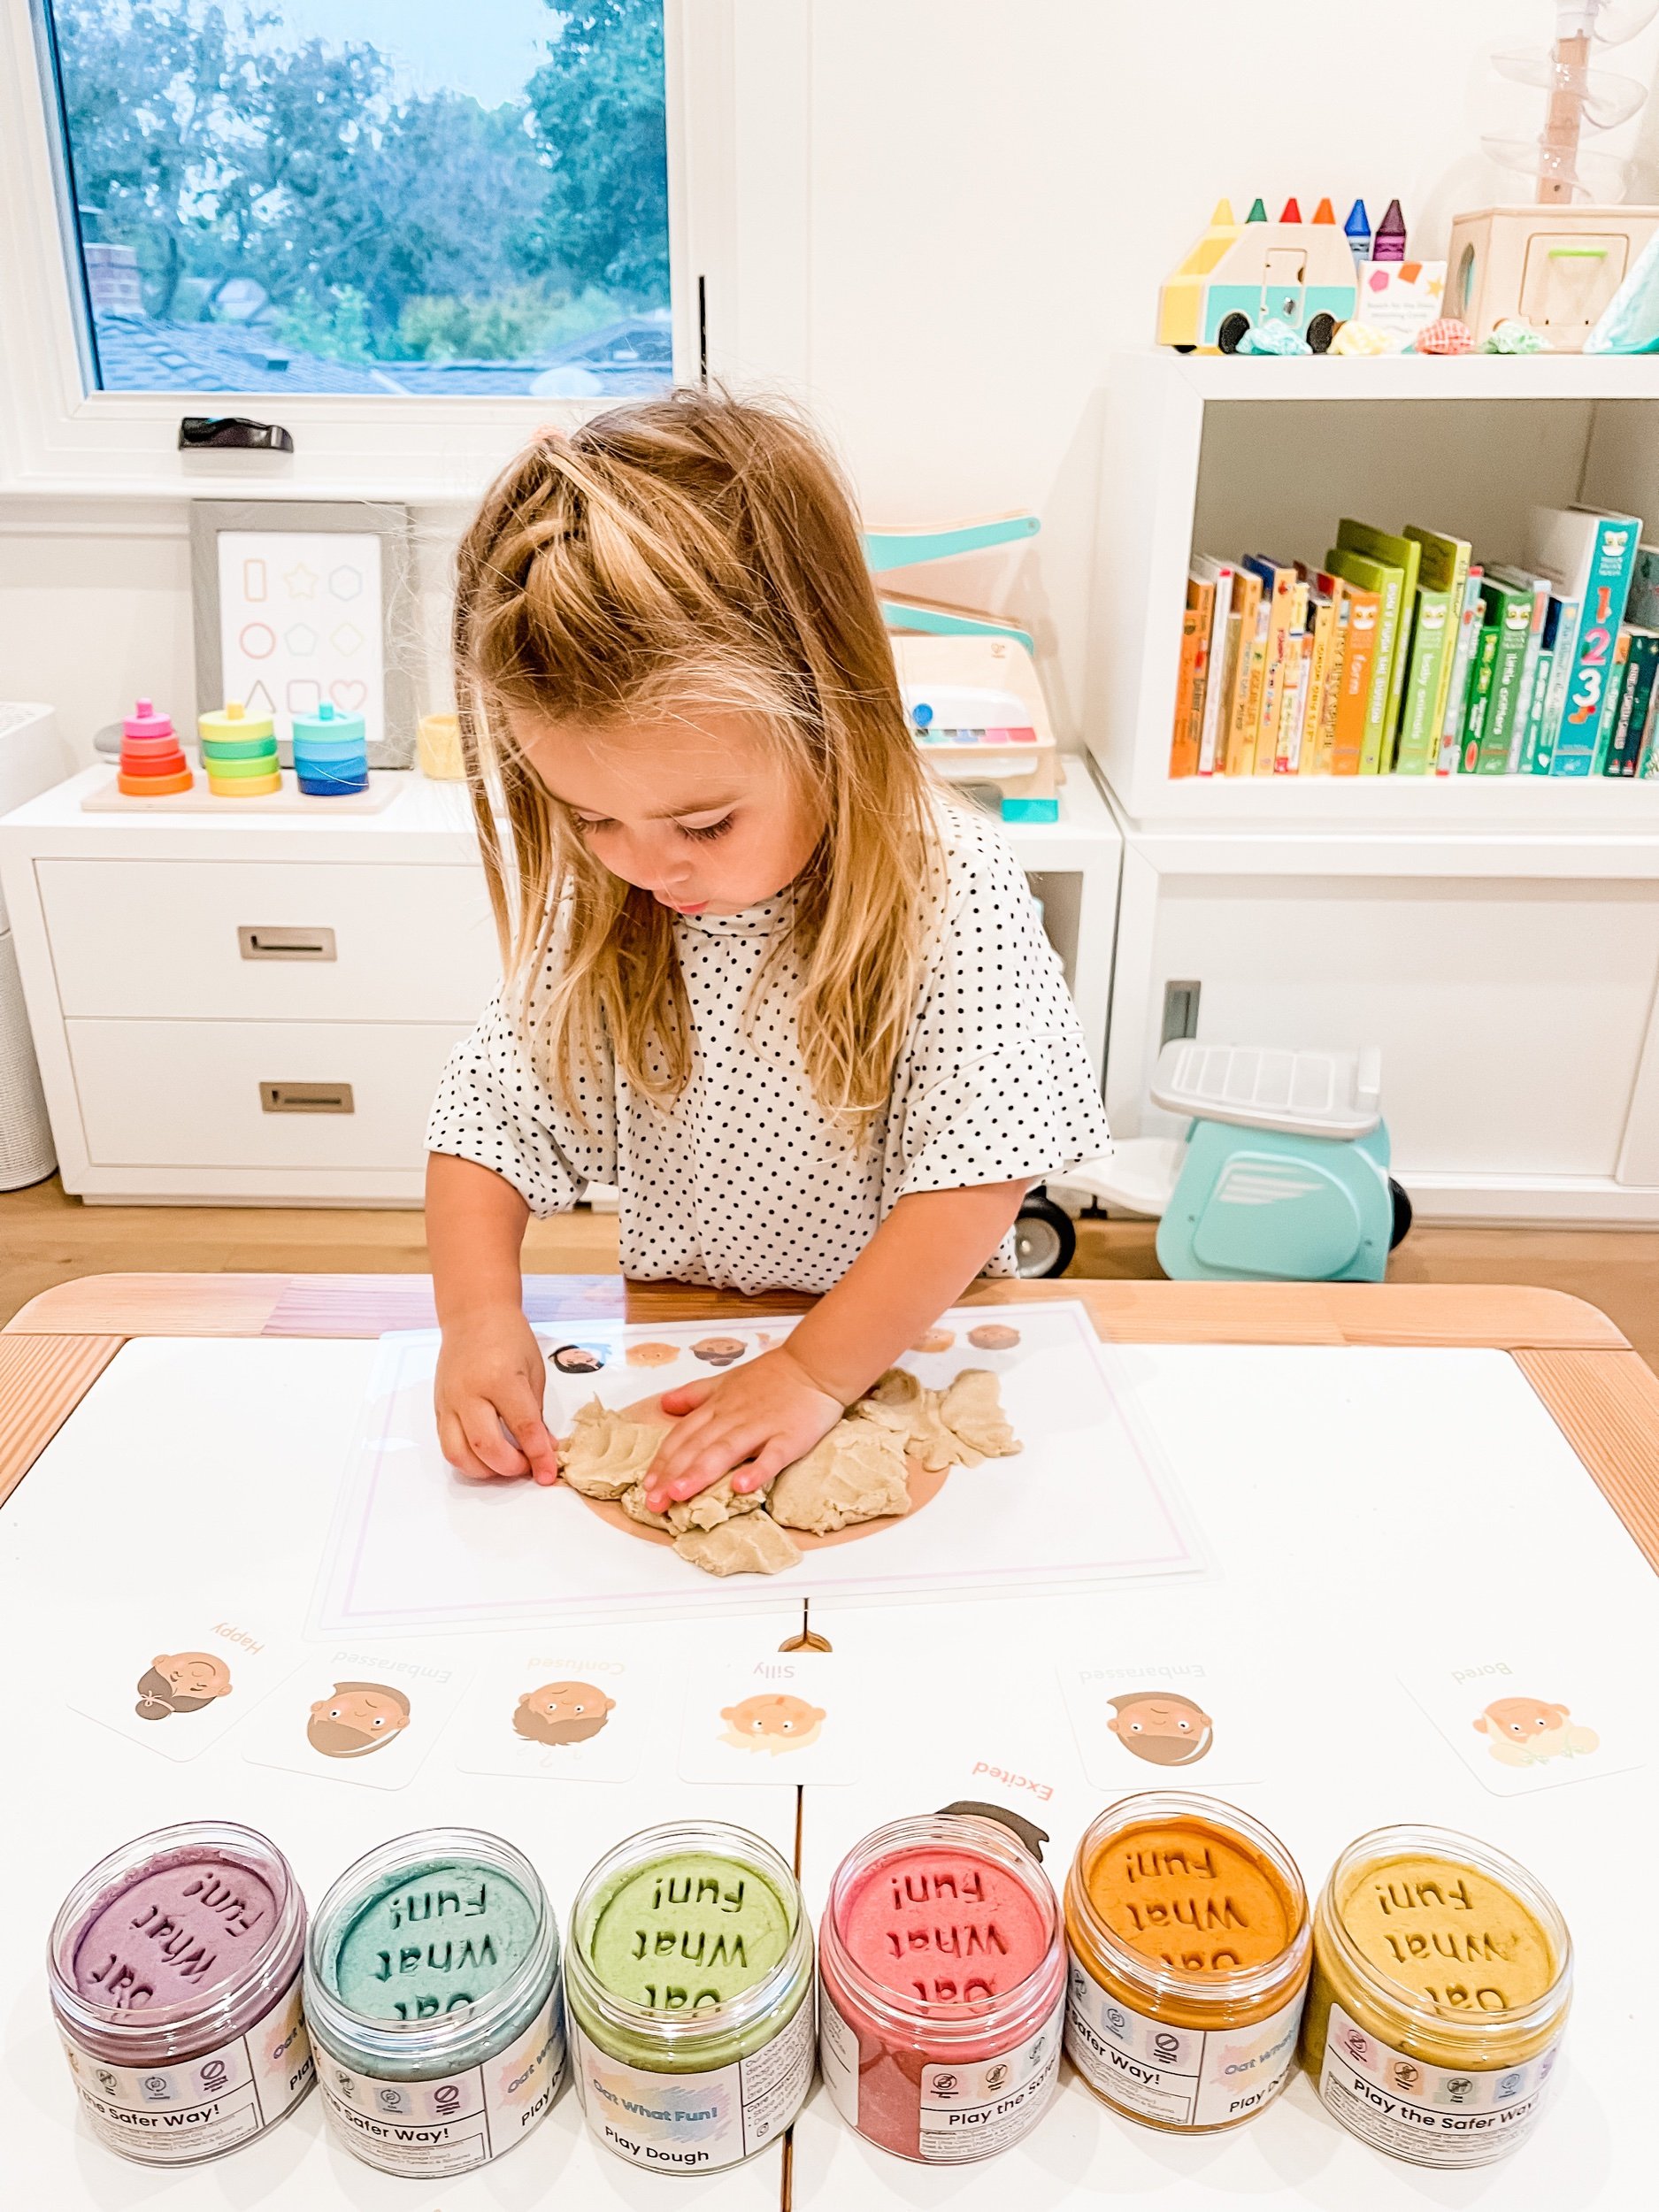
Today we made the cutest little colorful faces with this awesome oat meal based playdoh from @oatwhatfun.
As parents and caregivers, we all want our children to grow up to be well-adjusted, empathetic individuals who are able to navigate the complexities of the world around them. One of the most important foundations for this development is a strong understanding of emotions.
From a very young age, toddlers and preschoolers begin to experience and express a wide range of emotions, from joy and excitement to frustration and sadness. However, at this age, children often lack the language and understanding to fully communicate and process their feelings.
That's where our emotions flashcards and memory game cards come in! These tools are specifically designed to help young children learn about and practice identifying and expressing different emotions.
Through using our flashcards, toddlers and preschoolers can learn to identify and name different emotions, such as happiness, sadness, anger, and fear. This helps to build a foundation for more complex emotional understanding and regulation later on. The memory game cards are also a fun and interactive way to reinforce this learning and make it more engaging.
Beyond just learning the vocabulary of emotions, our cards also help children to understand the causes and triggers of different emotions, and how to express them in appropriate ways. This is an essential skill for developing healthy relationships and effective communication.
Our emotions flashcards and memory game cards are also convenient and easy to use. Parents and caregivers can use them at home during playtime, during car rides, or whenever they have a spare moment. They are also durable and can withstand being handled by little hands.
In conclusion, understanding emotions is crucial for children's social and emotional development, and our emotions flashcards and memory game cards are an excellent tool for helping young children learn about and practice identifying and expressing different emotions. They are convenient, durable, and fun for both children and adults. Don't hesitate to buy our emotions flashcards and memory game cards today!


Week 1: Introduction to Emotions
Monday:
Introduction to the concept of emotions and why it's important for children to learn about them.
Discussion of different emotions and their associated feelings, such as happy, sad, angry, and scared.
Introduce flashcards with pictures of children expressing different emotions and have the children identify the emotions they see.
Encourage the children to share times when they have felt the different emotions discussed.
Tuesday:
Review of emotions discussed yesterday and introduction of new emotions, such as excited and surprised.
Group activity: Have the children act out different emotions and have the class guess which emotion they are expressing.
Small group discussion: Have the children talk about a time when they felt a specific emotion and how they dealt with it.
Wednesday:
Introduction of the concept of triggers for emotions, such as a toy being taken away causing sadness.
Discussion of appropriate ways to express emotions and the importance of communication.
Role-playing activity: Have the children act out different scenarios and discuss appropriate ways to express emotions in those situations.
Thursday:
Review of emotions and triggers discussed throughout the week.
Introduction of the memory game cards, where children match emotion cards with the corresponding triggers.
Play the memory game as a class and discuss the different triggers for emotions.
Friday:
Review of the week's lesson on emotions.
Encourage the children to share what they have learned about emotions and ask if they have any further questions.
End the week with a class discussion on how understanding emotions can help us have better relationships and communication with others.
Note: Each day's activities should be adjusted based on the children's age and development level. Also, activities should be adapted to include different modalities such as visual, kinesthetic, auditory, and tactile to make it more engaging for kids.
Have a shop that specializes in baby gifts? I'd love to feature your shop and products in one of my weekly roundups. Email me at goodnightfoxstudio@gmail.com.
Check out GoodnightFox wholesale we’d love to have you carry the GoodnightFox brand.