In this blog post, we'll guide you through the exciting world of sensory play using the Flisat table from IKEA. This versatile piece of furniture can be transformed into a captivating sensory play station for kids, and we'll show you how to set it up step by step. Whether you're new to sensory play or a seasoned pro, this guide will help you create an engaging and educational play space for your little ones.
Purchasing the table setup
To get started with your Flisat table sensory play setup, you'll need a few essential items:
Flisat Table | $89.00: You can find this versatile table at your local IKEA store or on their website. If you don’t have an IKEA nearby, there are several great Flisat Alternative Sensory Tables options available on Amazon. Most of them hold the same Trofast Bins.
Medium Trofast Bins | $4.00: The Standard Sized Trofast bin is perfect for large sensory play. If you just want the basics and don’t have room to store extra supplies, then I recommend getting just one of these and two of the smaller bins. If you want to use the bins for extra playroom storage then I recommend getting two or more.
Small Trofast Bins | $2.00: If you’re going for the basics, I recommend getting two of these for one side of the table and one large bin for the other side of the table. This enables you to do setups with 3 different parts. The smaller bins are nice because they don’t require as much sensory filler, which can be expensive and messy.
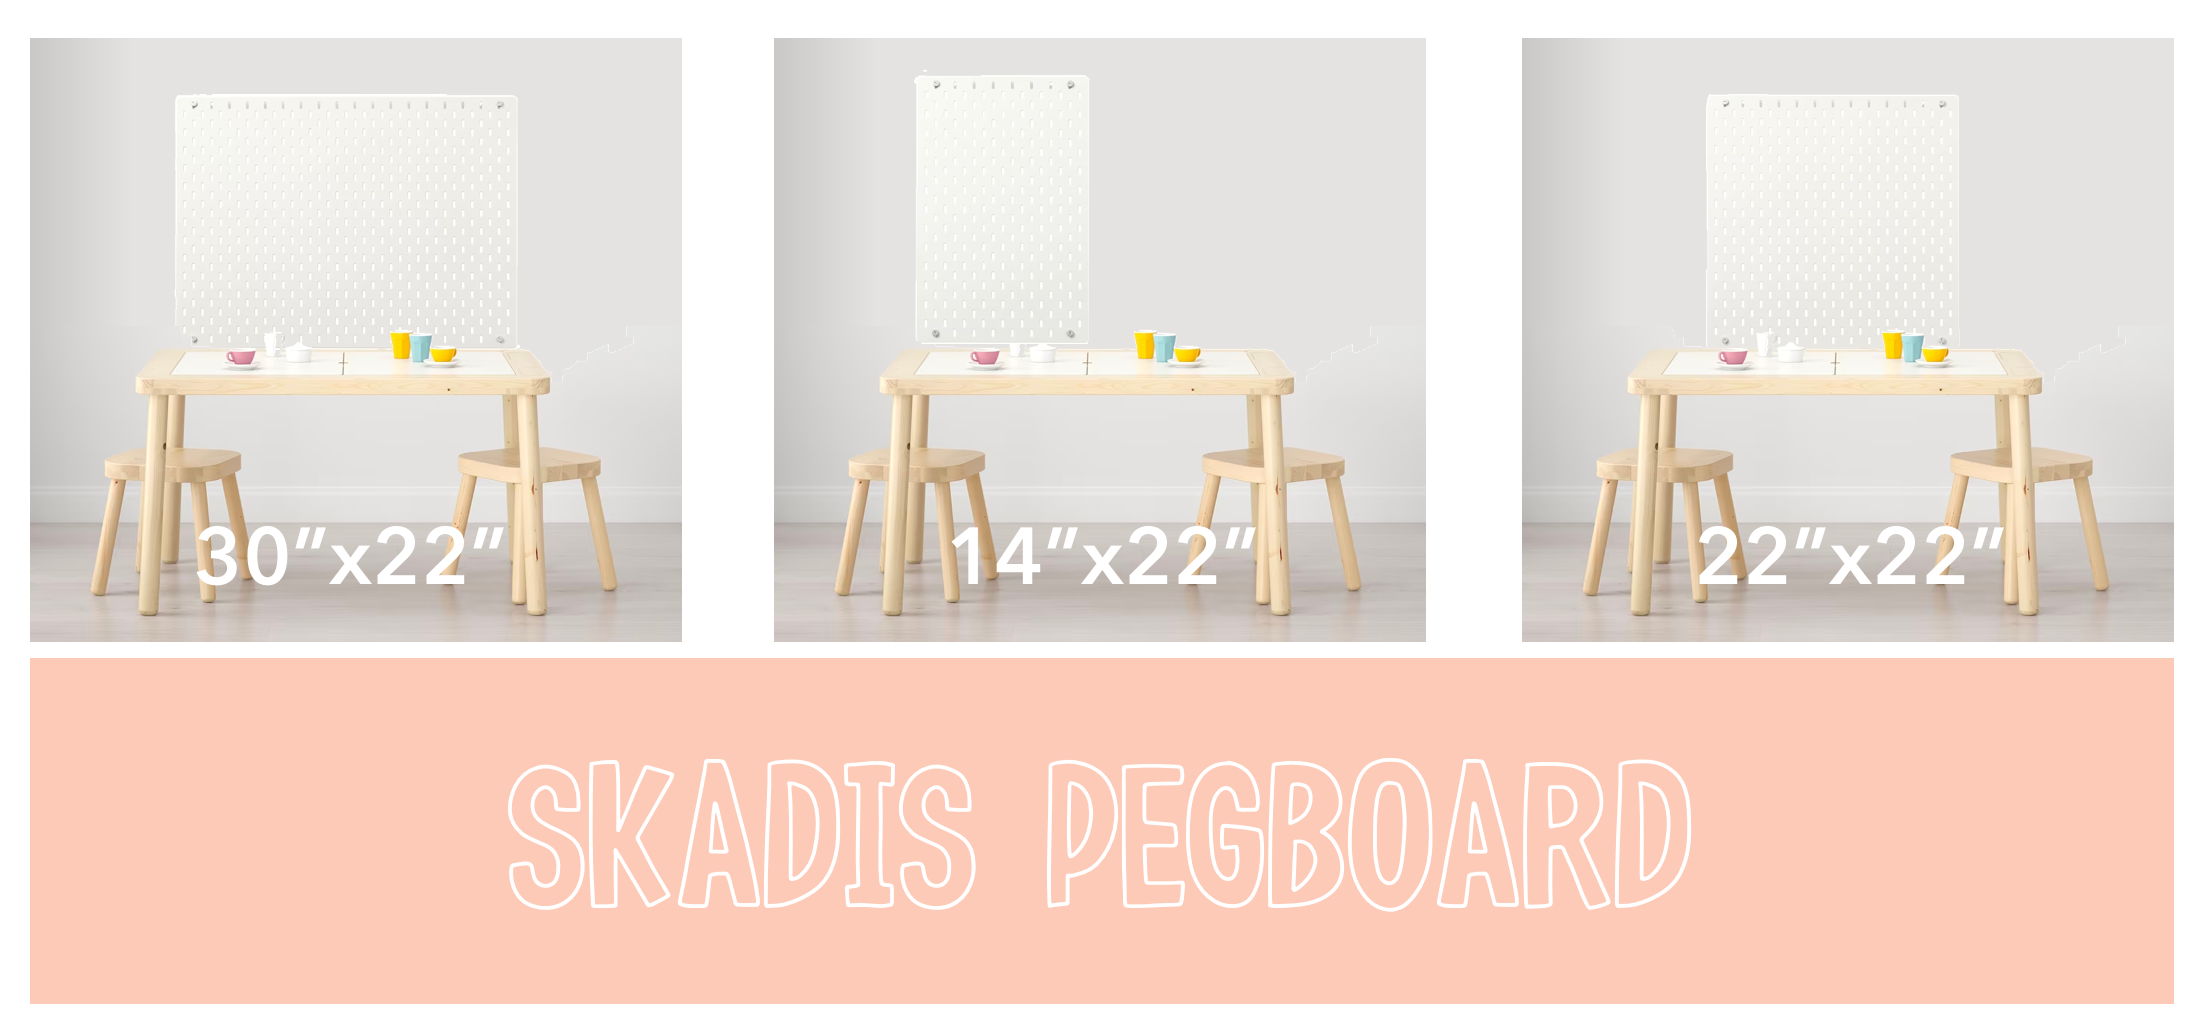
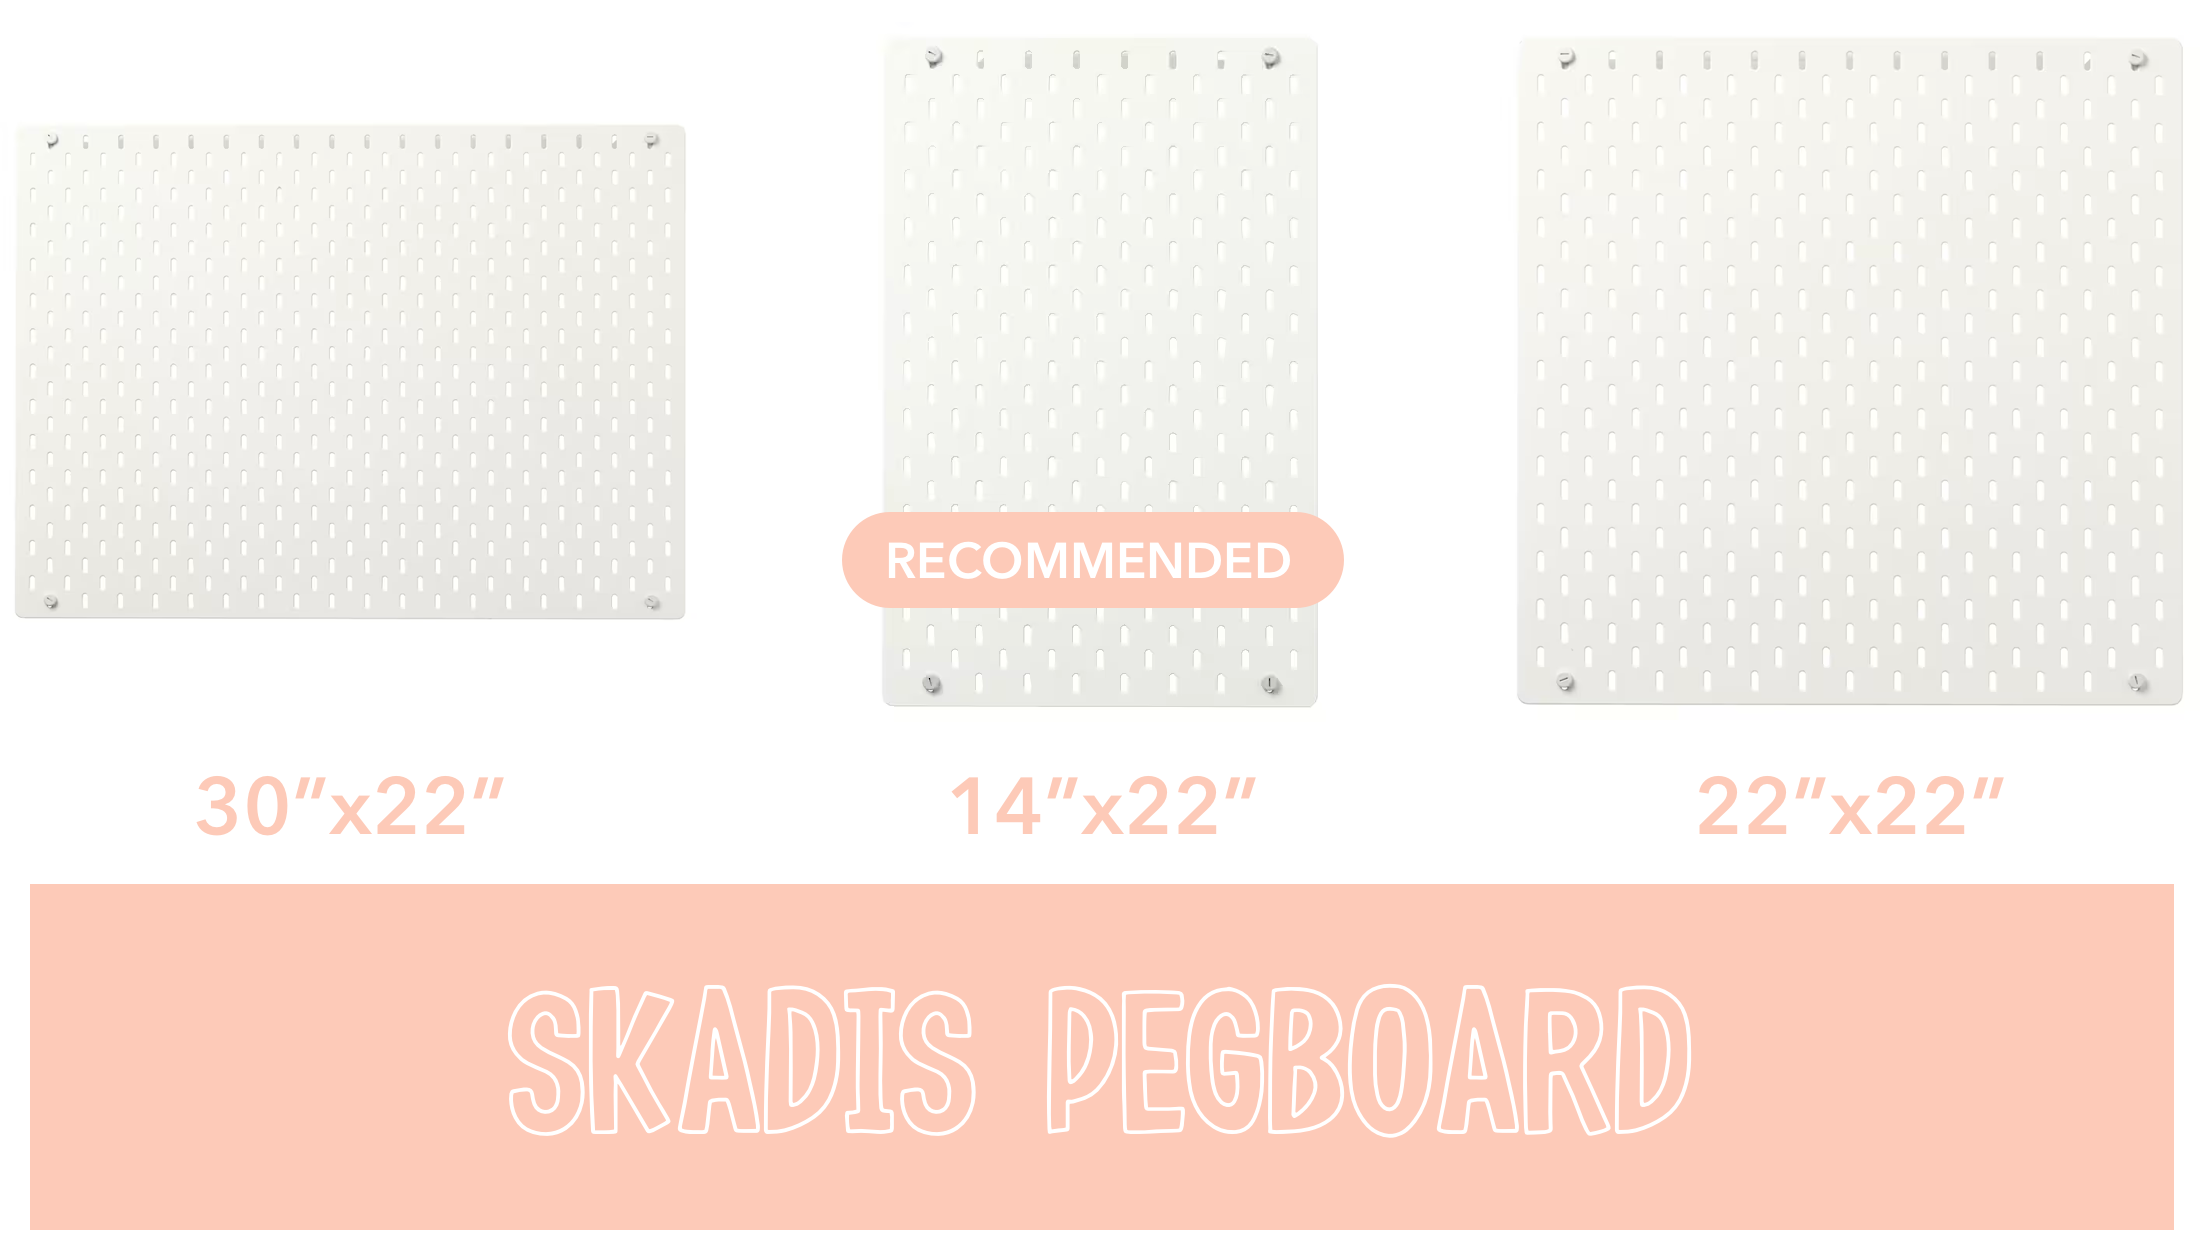
Skadis Peg Board | $16.00: To add even more possibilities to your setup, consider getting a pegboard attachment for the Flisat table. This will provide extra storage and display options. I love the smaller peg board 14.5”x22” because it can be used upright and allow the child to see around the other side for dramatic play setups. The full sized board 30”x22” is also very popular if you want to allow the child to sit at the table and play with a full sized backdrop. The square sized board 22”x"22” is a perfect square and in my opinion works best on walls for sensory storage materials. This size won’t match the length of the table nor will it give the child much room to see around. For most of my GoodnightFox Sensory Table Printable Play setups, I tape a paper awning to the pegboard to create the look of entering a shop!
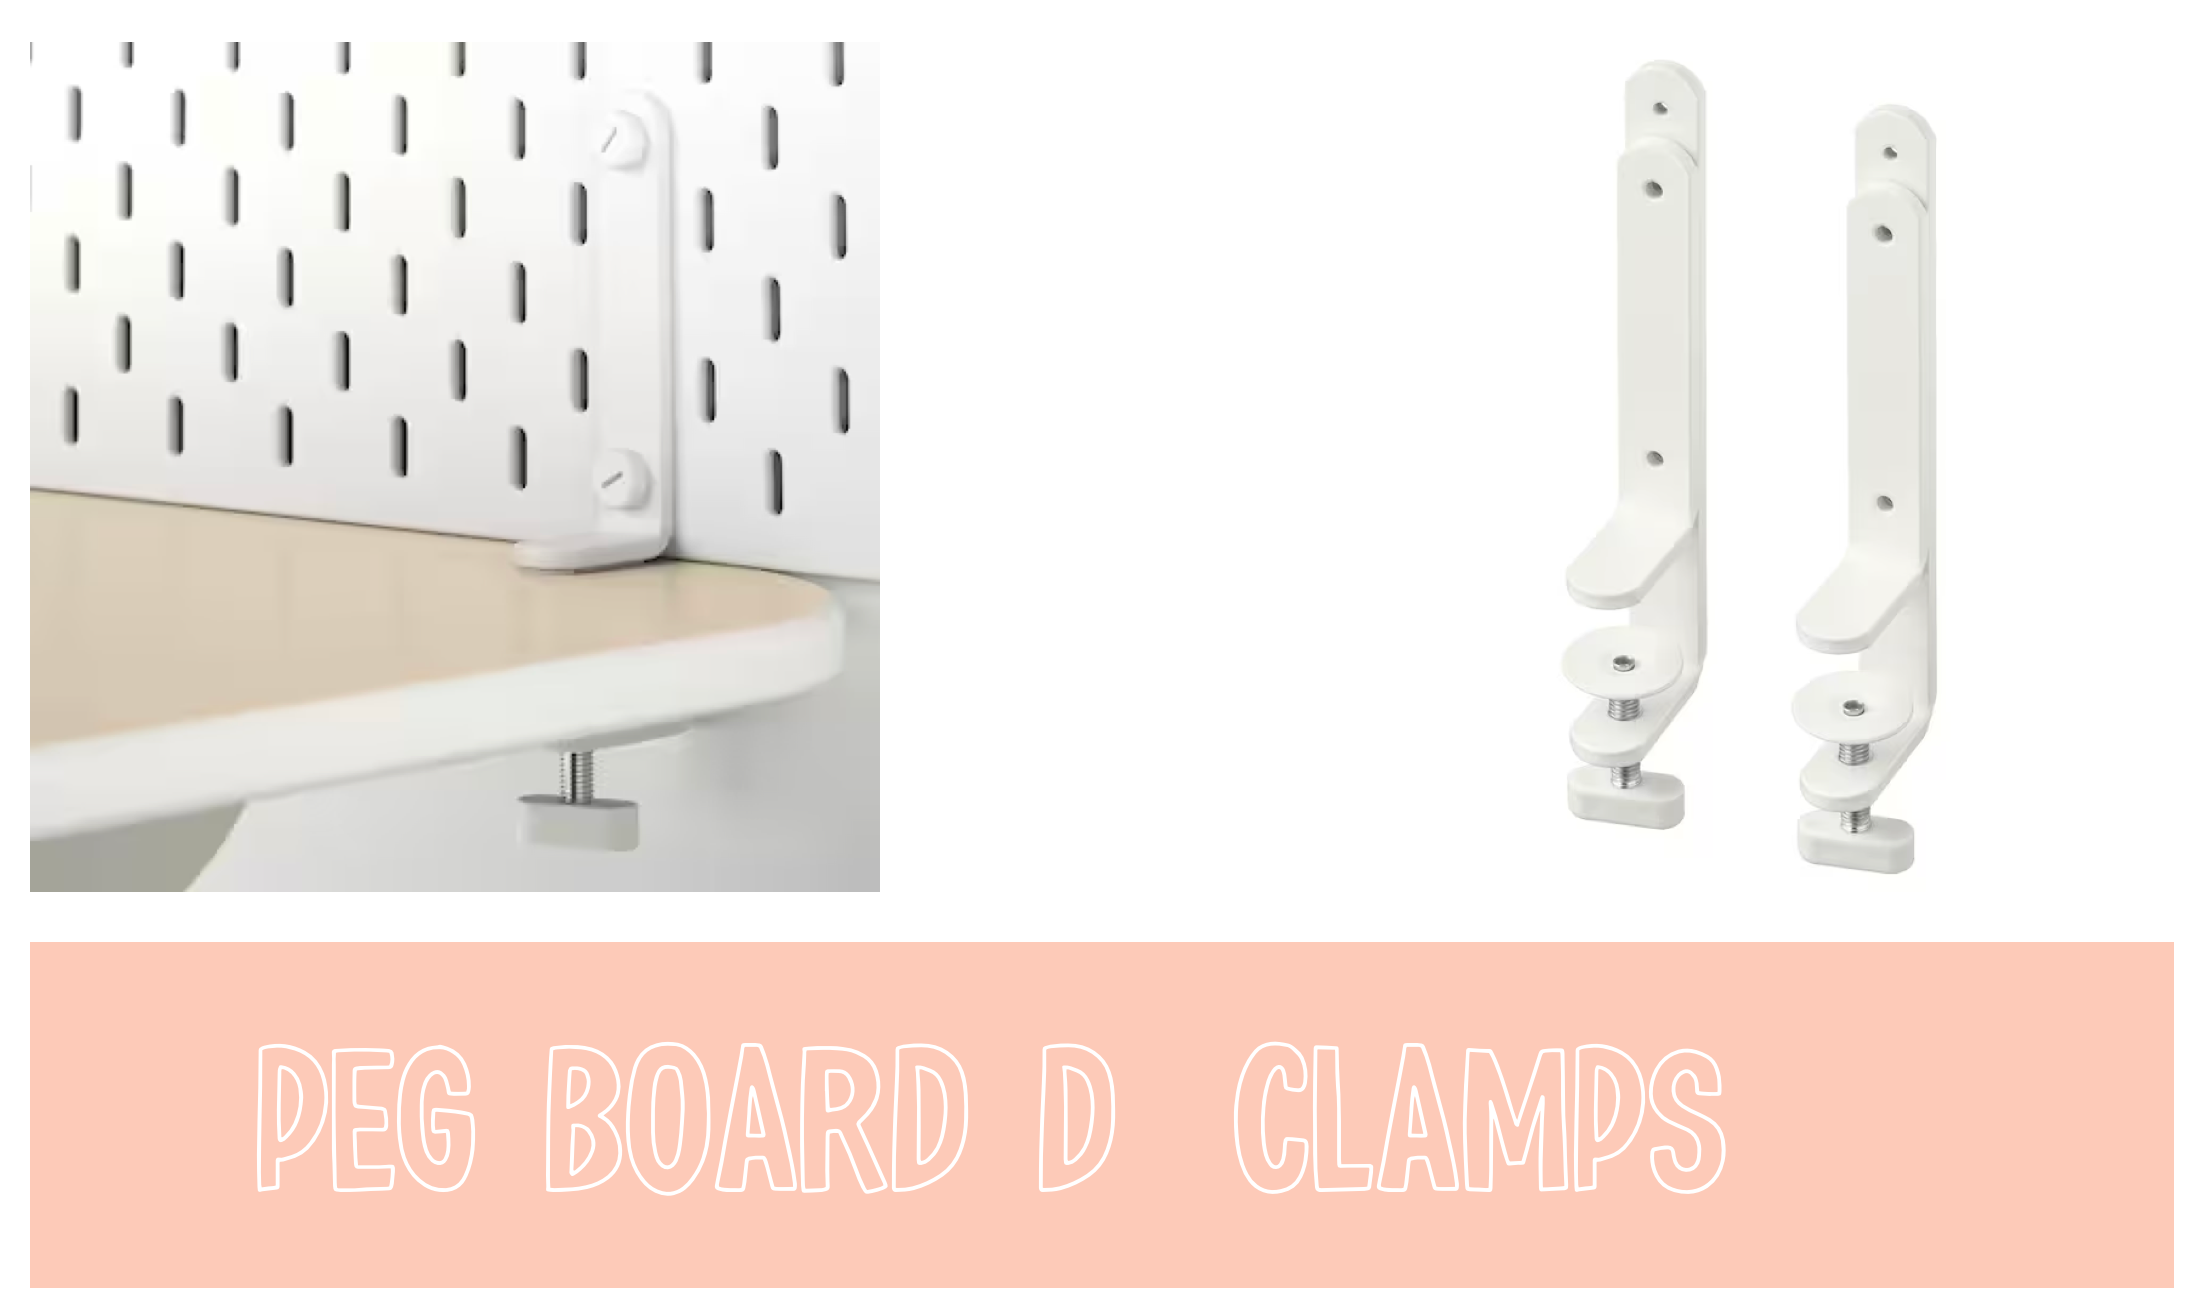
Skadis Connector (D Clamps) | $6.00: These simple screw on D Clamps will secure first to the pegboard and then clamp down by tightening a screw to the table. This keeps the peg board upright and secure to the table and offers a nice back drop to display sensory table materials.
For the table setup basics that I use literally every day, the total cost is $120. Considering it’s something you plan to use at least weekly if not daily, it’s not too expensive.
Buying Sensory Table Basic Supplies Must Haves
Some must have basic supplies include: sifter, funnel, scoops, tape, and scissors. You’ll want to have these basic supplies in a handy bin nearby that you can pull out for each week. My favorite place to buy scoops and sifters is from Inspire My Play because I love to have matching sets. That said, you can totally make do with a basic all in one kit from Amazon.
Cups | $16.00: These are my favorite little cups and sifter because they’re stackable to save space and they match the scoop set. That said, if you’re going for an all wooden look, then I’d recommend this complete set.
Funnel | $7.00: You’re going to want a pretty wide mouth funnel for typical sensory fillers like beans and chickpeas. Your kiddos will love getting extra use out of these in the bath tub as well so it doesn’t hurt to have a few extras.
Sifter | $10: If you plan to work with a mix of textures, like rice grains, beans, chickpeas, sand, and other sensory fillers, you’re definitely going to want to have this specific sifter on hand. This thing lets you sort small grains from large grains and allows you to easily mix two fillers (like rice and beans) and sort them out again at the end. It’s also super satisfying to use so I’d highly recommend it.
Scoops | $16.00: I love these silicone scoops because they’re soft and flexible and also just made out of a great material.
Tape | $14.00: I recommend stocking up on tape especially if you’re going to be doing a lot of add-on materials to the sensory play itself. I use regular scotch tape for hanging most of my printables and then scotch packing tape for securing the awning to the peg board.
Scissors | $8.00: You’ll definitely want to have a good pair of scissors on hand if you plan to do a lot of cut outs and printables. It’s also great to have a pair of kid scissors handy because the little ones love to help out and it’s a great opportunity to practice those fine motor skills.
Setting up the table
Once you have the Flisat table, peg board, and D clamps, it's time to set up your sensory play station. Here's how to do it:
Assemble the Flisat table according to the instructions provided by IKEA.
Attach the peg board to the back of the table for additional storage space.
Use the D clamps to secure sensory play containers and materials to the table, making it easily accessible for your child.
PLANNING FOR SENSORY TABLE STORAGE
Organizing and storing your sensory play supplies is essential. Consider using small containers, bins, and jars to keep materials like colored rice, playdough, beads, and more neatly organized. This will make it easy for your child to access the materials they need for their playtime. Here are some highly recommended storage options:
Plastic stackable bins from target. I like to use GoodnightFox flashcards at the front of each bin so that I can remember what the theme of that bin is even without going through the extra hassle of creating labels.
Photo storage bins. These storage bins are amazing for sorting flashcards and a simple sensory supply. I use them for weather acrylics, bees, wool balls, fruit erasers, etc. Even little wooden bits and bobs that you’ll end up acquiring can fit neatly into these containers. Plus each small box fits neatly into the large box so that you can see and easily access everything. I like to keep 16 activities stored in my car at all times and these are super handy to pull out when you need a quick restaurant solution or something to keep their attention while in line at the doctor’s office.
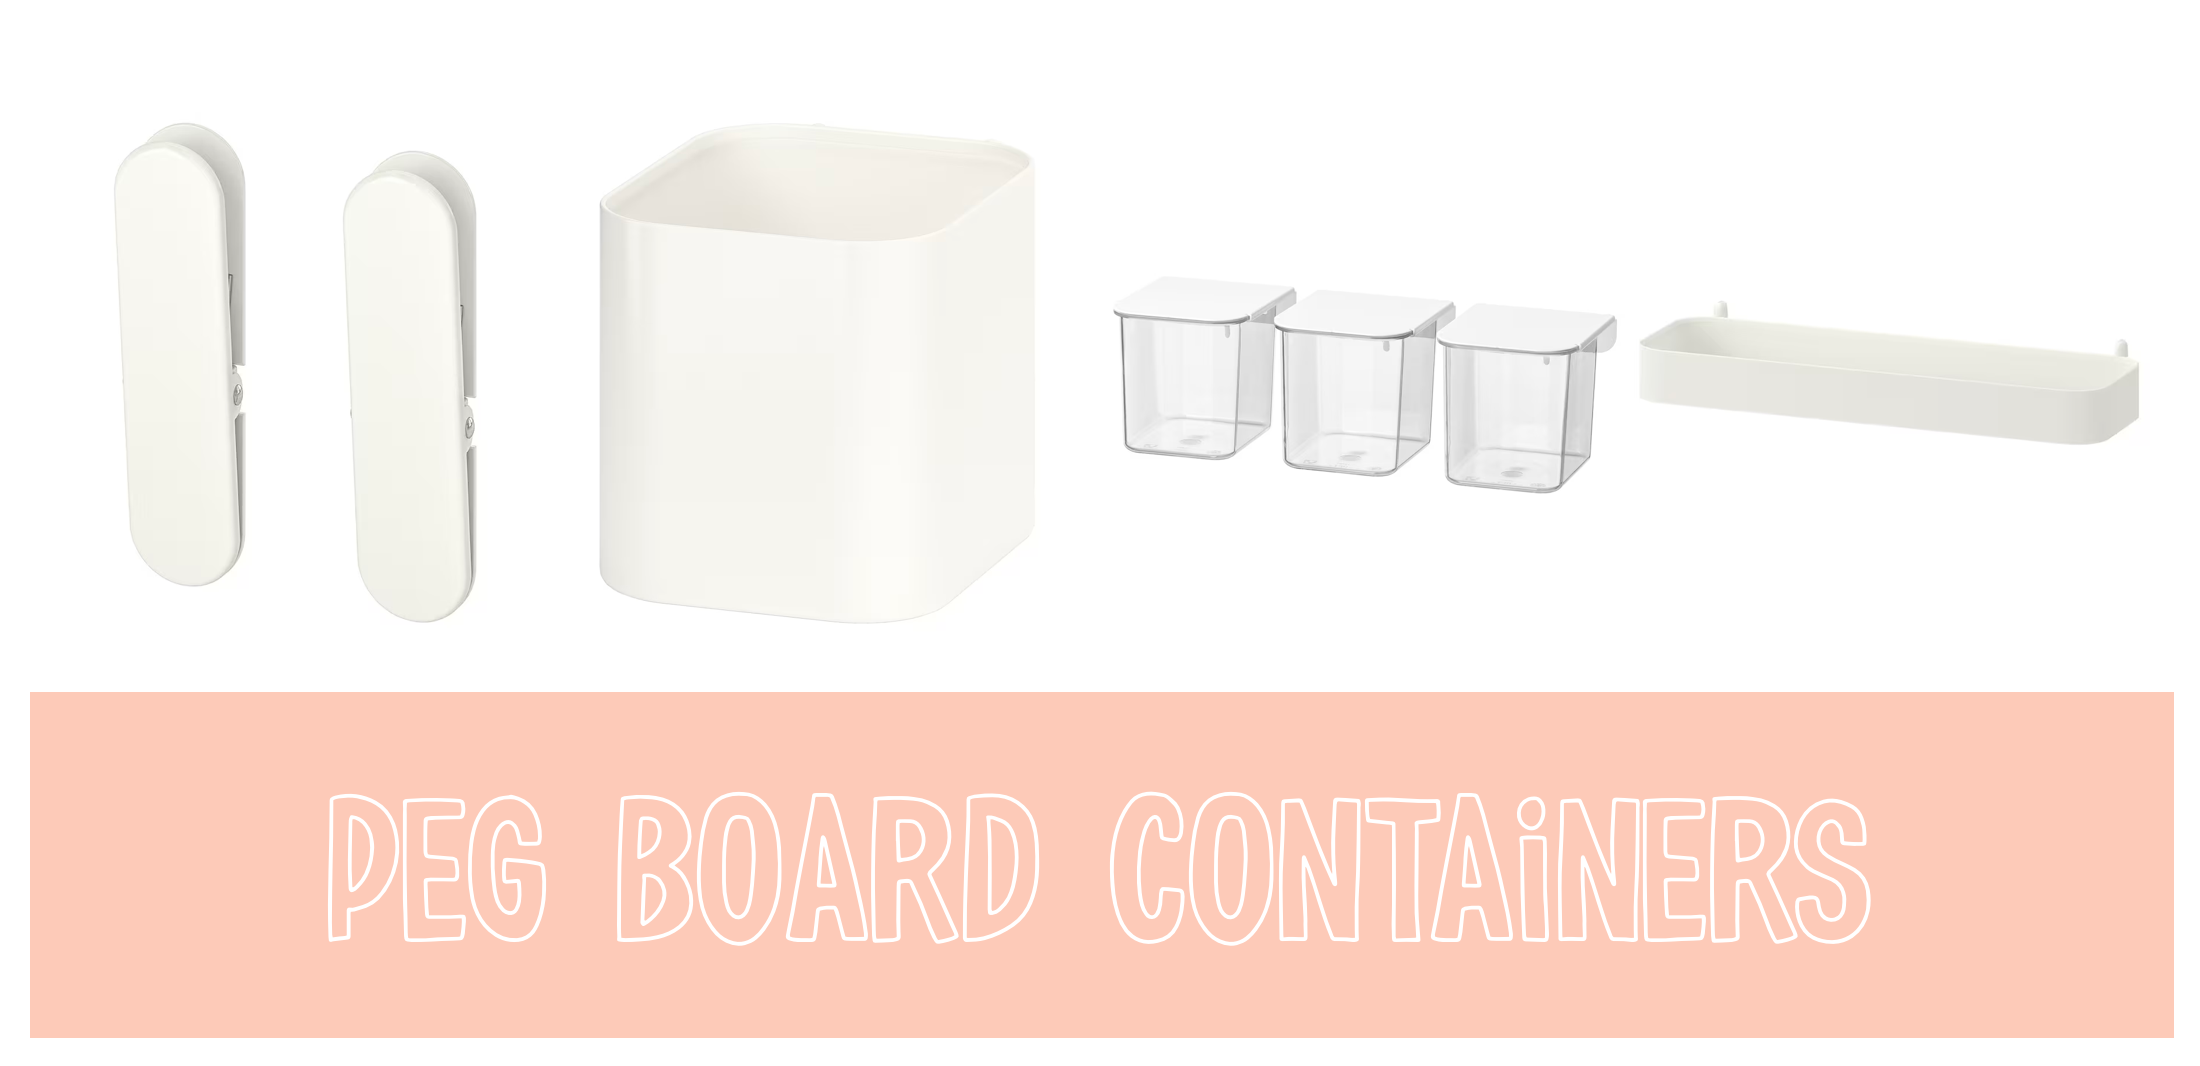
Peg Board Containers. You’ll definitely want some containers you can use to quickly access smaller supplies and sensory fillers. I love the Skadis Peg Board drawer containers because they’re so accessible. The little white containers are super handy as well especially if you plan to have the table do double duty for art supplies (like markers, pens, stamps). The white shelf can also come in handy, but it doesn’t hold much so you’d want to have a clear purpose for it in mind (for me it just serves as a catch all). The white clips are handy for hanging flashcards, pictures, and reference materials, but if I’m being honest, I just prefer to tape things directly to the board because it saves space.
FINDING INSPIRATION
Inspiration can come in many forms! Here’s where I get my inspiration for themes:
Holidays: I love doing holiday and seasonal themed setups. Check out my recent blog post on my Top 10 Favorite Winter Activity Setups for more inspiration.
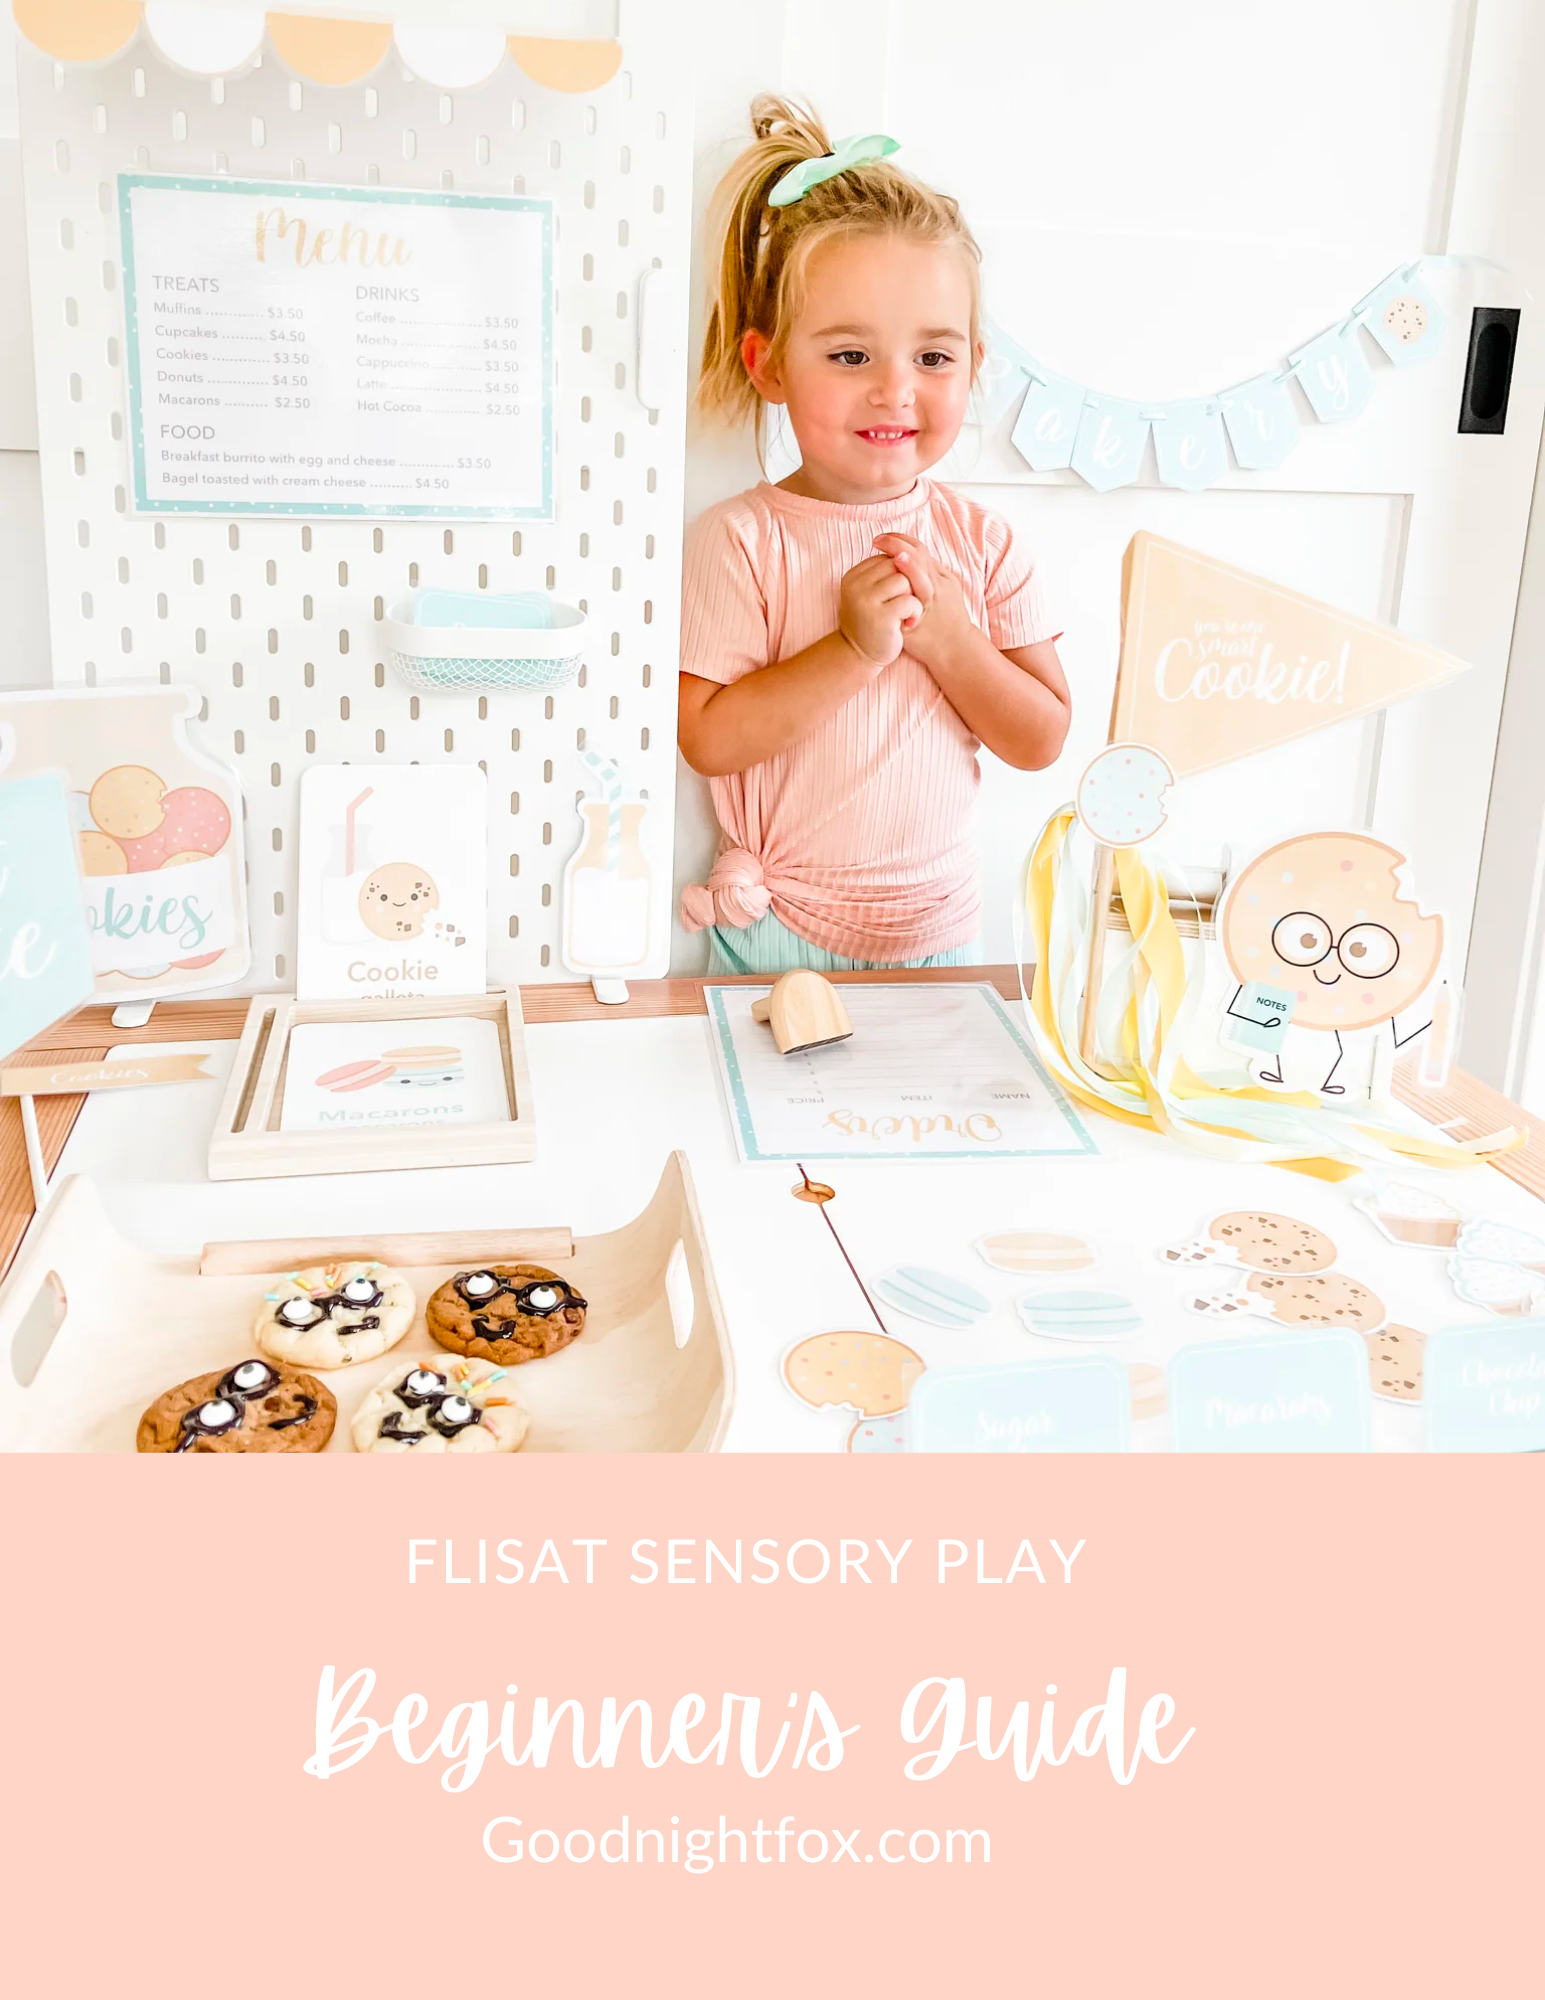
Books: I love children’s books and find so much inspiration in them. Lots of moms that I follow like to do themes best on kid’s favorite books and it’s such a fun way to get them using their imagination. I created a Bakery Setup based on the book “The Smart Cookie”.
Learning concepts: Learning the alphabet, counting, numbers, shapes, math, writing, reading, phonics, spelling. Classroom topics are a great way to get inspired and also make the fun educational.
Real world scenarios: I love creating dramatic play printables based on real world shops and scenarios. I find that Sofia learns the most when immersed in a world we’ve created where she gets to play the part of a shop owner or astronaut, a baker or a even a farm animal.
Interesting materials: Lastly, I’m always inspired by new materials to play with. When I found Pluffle, I started really getting into looking for new and interesting textures to play with. I’ve created sensory tables with ace bandages, glow in the dark rocks, hydrophobic water and much more. Whenever you come across a fun material (whether it’s aluminum foil or wax paper) it’s also fun to think of a way to incorporate that into sensory play.
If you don’t know where to start, I recommend my Sensory Play Calendar. It provides an easy way to get started with a weekly bin and associated learning goal or concept.
Creating fun sensory play activities
Now comes the fun part! Use the Flisat table to create a variety of sensory activities that engage your child's senses and encourage their creativity. Here are a few ideas to get you started:
Sensory Bins: Fill containers with various materials like water beads, sand, or sensory rice.
Art and Craft Station: Use the pegboard to hang art supplies, such as paper, markers, and scissors.
Playdough Fun: Set up a playdough station with different colors and shapes for endless creativity.
Define your goals
Are you looking for taste safe activities for a little one? Are you looking for multi-age play for siblings? Are you wanting to teach a specific concept? Engage in dramatic play? Explore sensory materials? Build fine motor skills?
What are your non-negotiables? Some moms refuse to have rice or sand in their homes. Some prefer only edible play. Some prefer no sticky, gooey, or doughy materials. And some prefer to do water play only outside. Knowing your limits will help you narrow your search for inspiration.
Some nice to have extras
Trofast Frame | $59.00: If you’re going all out, I highly recommend getting this storage unit. If you’re a busy mom, then taking down and putting up new setups takes time and you’ll end up wondering where you’re going to store it all. The fastest and most convenient sensory play storage option is hands down going to be throwing everything into these handy Trofast Bins and sliding them into the shelves. Take it from me, I’ve done this for years and stored them all in containers in the closet. I wish I had this super convenient shelf option.
Trofast Storage Tray | $5.00: These are not a must, but definitely a nice to have if you like to keep your setups neat and orderly. It also helps you to organize scoops and spoons. They also fit nicely on the tops of the bins while the fillers can sit underneath. Super convenient if you want just a little bit more organization to the madness.
Toy Cash Register | $XX: For most of the setups I do, I like to play pretend as though Sofie owned a shop in the real world. So having a cash register is super handy. I’ve had both this one from Crate & Barrel and this one from Pottery Barn and loved them both.
Felt Food | $XX: For farmer market, grocery store, and play kitchen setups, having felt food on hand is a great way to add some realistic magic to the fun. If you’re already making the trek to IKEA, I’d highly recommend snagging these four sets while you’re there: Felt Vegetables, Felt Shopping Basket, Felt Pizza, Felt Cinnomon Rolls. You really can’t beat their prices when it comes to felt play food.
Wooden Tray | $30.00: This is definitely extra but I use it all of the time in my setups so I had to put it on the list. This little wooden tray that comes with this Plan Toys food set is so handy for creating a little tray that can be toted around as you create a little restaurant scene for your kiddos.
Inspire My Play Tray | $69.00: I love having this tray on hand for when I want to do small world play and open up 360 degrees of space around Sofie at our circle play table. Using the dividers creates spaces for each individual part of the play setup, and allows her to create the world all on her own. It’s very deep which allows for liquids and other materials.
Cloud Silicone Placemat | $14.00: Having this cloud mat on hand is great for when we want to get into sticky or messy play. I love having it for slime days, play doh, or anything wet. Just note that if you’re going to use magnetic sand, it does stick to this surface and would have to be washed off.
The Flisat table from IKEA can be the perfect canvas for sensory play adventures with your child. By following these simple steps and utilizing the resources mentioned, you'll have everything you need to create a captivating and educational sensory play space. For more sensory play ideas and tips, be sure to explore the other articles on GoodnightFox.com.
Don't hesitate to reach out if you have any questions or want to share your own Flisat table sensory play experiences. Happy playing!
frequently asked questions:
How long do you leave a setup out for? I personally like to change it up about once a week. But that said, if an activity is inspiring a lot of play and fun, I’ll leave it up for a few weeks. Let’s face it, we all get busy too and sometimes there isn’t enough time or ideas to cycle through weekly. But some parents use their table to homeschool and setup a new activity every single day!
What activity ideas are taste safe for mouthing toddlers? Great question! When Sofie was in that phase of putting everything in her mouth, I opted for taste safe sensory fillers (which are mostly food based). I even used cooked rice and beans! I did a lot of pasta noodles, dry baking ingredients and lots of homemade taste-safe playdough recipes.
What size peg board do you buy? I personally love the 14x22” peg board setup because I love to use my table for dramatic play setups. You can check out the handy visual guide in this post so that you can see which board would best fit your needs.
